
1. Introduktion
Tak for købetasing the VILINICE 6500 Lumens 720P Native Portable Projector. This manual provides essential information for the safe and efficient operation of your device. Please read it thoroughly before use and retain it for future reference.
2. Sikkerhedsoplysninger
To ensure safe operation and prolong the lifespan of your projector, please observe the following safety precautions:
- Bloker ikke ventilationsåbningerne. Sørg for tilstrækkelig luftgennemstrømning omkring projektoren for at forhindre overophedning.
- Avoid direct exposure to the projector lens light. The bright light can cause eye strain or damage.
- Do not place the projector in unstable locations. Ensure it is on a flat, stable surface to prevent falls.
- Hold projektoren væk fra vand, fugt og brandfarlige materialer.
- Brug kun den strømadapter, der følger med projektoren.
- Forsøg ikke at reparere projektoren selv. Overlad al service til kvalificeret personale.
- Tag stikket ud af projektoren under tordenvejr eller når den ikke bruges i længere perioder.
3. Pakkens indhold
Kontroller venligst pakkens indhold ved åbning. Hvis der mangler eller er beskadigede dele, skal du kontakte kundesupport.
- VILINICE 6500 Lumens 720P Native Portable Projector
- Fjernbetjening
- Strømkabel
- HDMI kabel
- AV-kabel
- Brugermanual
- 100-inch Projector Screen (as indicated in product images)
4. Produktet er slutview
Gør dig bekendt med projektorens komponenter og grænseflader.

Image: The VILINICE projector shown with its remote controls, highlighting its compact design.
4.1 Forside og side View
- Projektionsobjektiv: Sender billedet ud på skærmen.
- Fokusring: Justerer billedets klarhed.
- Keystone Correction Ring: Korrigerer trapezformet billedforvrængning.
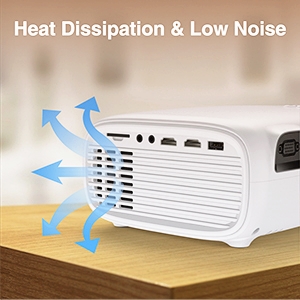
- Ventilationsåbninger: For heat dissipation. Do not block.

Image: The projector's rear and side panels displaying multiple connectivity options including AV, AUX, HDMI, USB, VGA, and SD card slot.
4.2 Bag- og sidegrænseflader
- AV-port: Til tilslutning af ældre enheder ved hjælp af et AV-kabel.
- AUX (Audio Out) Port: Til tilslutning af eksterne højttalere eller hovedtelefoner.
- HDMI-porte (x2): For connecting devices like laptops, gaming consoles, or TV sticks.
- USB-porte (x2): For connecting USB drives to play media or power devices.
- VGA port: Til tilslutning af computere med VGA-udgang.
- SD-kortplads: Til afspilning af medier direkte fra et SD-kort.
- Strømindgang: Tilsluttes strømadapteren.
5. Opsætning
5.1 Placering og projektion
Position the projector on a stable surface. The optimal projection distance and screen size can vary. Ensure the projector is perpendicular to the screen for the best image quality.

Image: The projector set up for an outdoor movie night, demonstrating its portability and the included 100-inch screen.
The projector also features a mounting hole for ceiling or tripod installation.
Billede: En detaljeret view of the projector's mounting hole, suitable for various installation methods.
5.2 Strømtilslutning
Tilslut strømkablet til projektorens strømindgang, og sæt det derefter i en stikkontakt.
5.3 Fokus- og Keystone-korrektion
After powering on, adjust the focus ring on the projector lens until the image is clear. If the image appears trapezoidal, use the keystone correction ring to adjust it to a rectangular shape.

Image: Visual guide demonstrating how to adjust the focus and keystone correction for a clear and properly shaped image.
5.4 Tilslutning af enheder
Projektoren understøtter forskellige inputkilder:
- HDMI: Connect laptops, TV sticks, gaming consoles (PS4, Xbox), or DVD players using an HDMI cable.
- USB: Insert a USB disk to play photos, videos, or music directly.
- VGA: Tilslut ældre computere eller bærbare computere med et VGA-kabel.
- AV: Connect legacy devices like VCRs or older DVD players.
- SD-kort: Insert an SD card into the slot to access media files.
- Smartphones: For smartphone connectivity, an external MHL HDMI adapter (not included) may be required.

Image: Illustration of connecting a smartphone or laptop to the projector, emphasizing ease of use.
6. Betjening
6.1 Tænd/sluk
Tryk på tænd/sluk-knappen på projektoren eller fjernbetjeningen for at tænde eller slukke enheden.
6.2 Valg af indgangskilde
Use the "Source" button on the remote control or the projector's control panel to select the desired input source (HDMI1, HDMI2, USB, VGA, AV, SD Card).
6.3 Justering af indstillinger
Navigate the on-screen menu using the remote control to adjust various settings:
- Billedindstillinger: Adjust brightness, contrast, color, and aspect ratio.
- Lydindstillinger: Control volume and audio modes. The projector features a built-in HiFi stereo speaker for an immersive audio experience.
- Zoom funktion: The projector supports a 100%-75% zoom function, allowing you to adjust the screen size without moving the projector.
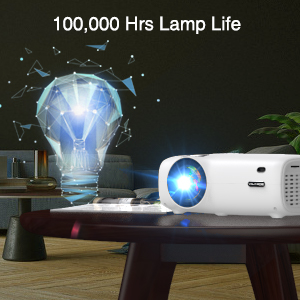
Image: Visual representation of the projector's zoom function, showing how the image size can be reduced from 100% to 75%.

Image: A family enjoying a movie projected by the VILINICE projector, highlighting the built-in HiFi stereo speaker for a great auditory experience.
7. Vedligeholdelse
Proper maintenance ensures optimal performance and longevity of your projector.
- Rengøring af linser: Use a soft, lint-free cloth and lens cleaning solution specifically designed for optical lenses. Do not use abrasive cleaners.
- Fjernelse af støv: Rengør regelmæssigt projektorens yderside med en blød, tør klud. Brug en dåse trykluft til forsigtigt at fjerne støv fra ventilationsåbningerne.
- Opbevaring: Når projektoren ikke er i brug, skal den opbevares køligt og tørt, væk fra direkte sollys og ekstreme temperaturer.
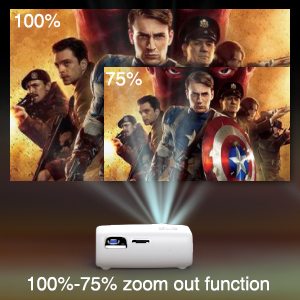
Image: Illustration of the projector's heat dissipation system, designed for efficient cooling and low noise operation.
The projector is designed with a long-lasting lamp levetid på op til 100,000 timer.

Image: A visual representation emphasizing the projector's extended lamp lifespan of 100,000 hours.
8. Fejlfinding
Hvis du støder på problemer, kan du se følgende almindelige problemer og løsninger:
- Ingen strøm:
- Sørg for, at strømkablet er korrekt tilsluttet til både projektoren og stikkontakten.
- Kontroller, om stikkontakten fungerer.
- Intet billede:
- Kontroller, at inputkilden er korrekt valgt (f.eks. HDMI1, USB).
- Check the connection cable (HDMI, VGA, AV) between the projector and the source device.
- Sørg for, at kildeenheden er tændt og udsender et signal.
- Sløret billede:
- Juster fokusringen på projektorlinsen.
- Sørg for, at projektionsafstanden er inden for det anbefalede område.
- Clean the projector lens if it is dirty.
- Trapezoidal Image:
- Adjust the keystone correction ring until the image is rectangular.
- Ensure the projector is placed on a flat surface and is perpendicular to the screen.
- Ingen lyd:
- Øg lydstyrken på både projektoren og kildeenheden.
- Kontroller, om eksterne højttalere er tilsluttet og fungerer korrekt.
- Ensure the audio output settings on the source device are correct.
9. Specifikationer
Below are the technical specifications for the VILINICE 6500 Lumens 720P Native Portable Projector:
| Feature | Specifikation |
|---|---|
| Mærke | VILINICE |
| Skærmopløsning | Native 1280 x 720 (720P) |
| Understøttet opløsning | 1080P Full HD |
| Lysstyrke | 6500 lumen |
| Display Type | LCD |
| Forbindelsesteknologi | HDMI, MHL, USB, VGA |
| Speciel funktion | Portable, 100%-75% Zoom Function |
| Højttaler type | Built-In, Surround (HiFi Stereo) |
| Lamp Liv | Op til 100,000 timer |
| Varens vægt | 4.92 pund |
| Produktdimensioner | 12.6 x 5.51 x 8.27 tommer |
10. Garanti og support
VILINICE products come with a standard manufacturer's warranty. For detailed warranty information, product support, or technical assistance, please refer to the warranty card included in your package or visit the official VILINICE website. Do not attempt to open or modify the projector, as this may void your warranty.