
1. Introduktion
The LiebeWH VC837 is a 6000-count auto-ranging digital multimeter designed for accurate and reliable electrical measurements. It features a non-contact AC voltage (NCV) sensor, True RMS measurement, and functions for measuring voltage, current, resistance, capacitance, frequency, duty cycle, diode, continuity, and temperature. Its compact and portable design makes it a convenient tool for various electrical tasks.

Figur 1.1: Forside view of the LiebeWH VC837 Digital Multimeter, displaying its clear LCD and rotary switch.
2. Sikkerhedsoplysninger
Always read and understand all safety instructions before using this multimeter.
- Do not touch the metal parts of the test leads with your hands during measurement to ensure personal safety.
- Ensure the multimeter is set to the correct function and range before connecting to the circuit.
- Anvend aldrig voltage or current that exceeds the maximum rated limits of the multimeter.
- Udvis ekstrem forsigtighed ved arbejde med spændingsførende kredsløb. Høj lydstyrketagkan være farlige.
- Udskift batterierne, når indikatoren for lavt batteri vises, for at sikre nøjagtige aflæsninger.
- Brug ikke multimeteret, hvis det ser beskadiget ud, eller hvis huset er åbent.
3. Produktkomponenter
Pakken indeholder typisk følgende varer:
- 1 x LiebeWH VC837 Digital Multimeter
- 2 x testledninger (rød og sort)
- 1 x Thermal Contact (Thermocouple for temperature measurement)
- 1 x brugermanual

Figure 3.1: The VC837 Multimeter shown with its standard accessories: test leads and a thermocouple.
4. Opsætning
4.1. Batteriinstallation
Multimeteret kræver 2 x AAA 3V batterier (medfølger ikke). Sådan installeres eller udskiftes batterier:
- Sørg for, at multimeteret er slukket.
- Find batterirummet på bagsiden af enheden.
- Brug en skruetrækker til at åbne batteridækslet.
- Isæt to AAA-batterier, og overhold den korrekte polaritet (+/-).
- Sæt batterirummets dæksel på igen og fastgør det med skruen.

Figur 4.1: Bagside view of the VC837 Multimeter, indicating the battery compartment location.
4.2. Tilslutning af testledninger
Connect the test leads to the appropriate input jacks for your desired measurement:
- Tilslut sort testledning til KOM (Fælles) stik.
- For bdtage, resistance, capacitance, frequency, diode, and continuity measurements, connect the rød testledning til VΩmA stik.
- For current measurements up to 600mA, connect the rød testledning til VΩmA stik.
- For current measurements up to 10A, connect the rød testledning til 10A stik.
5. Betjeningsvejledning
The VC837 features a rotary switch for function selection and several buttons for additional features.
5.1. Rotary Switch Functions
Turn the rotary switch to select the desired measurement function:
- OFF: Powers off the multimeter.
- V~: AC Voltage måling.
- V=: DC bindtage måling.
- Ω / ->| / Buzzer: Resistance, Diode Test, and Continuity Test. Use the SELECT/ID knappen for at gennemgå disse funktioner.
- Hz °C °F / NCV: Frequency, Temperature (Celsius/Fahrenheit), and Non-Contact Voltage detection. Use the SELECT/ID knappen for at gennemgå disse funktioner.
- uA / mA / A: Mikroampher, Milliampere, and Ampere current measurements (AC/DC). Use the SELECT/ID button to cycle through AC/DC modes.
5.2. Knapfunktioner
- SELECT/ID: Cycles through sub-functions within a rotary switch position (e.g., Resistance, Diode, Continuity; or AC/DC for current).
- RANGE/REL: Manually selects measurement range (disables auto-ranging) or activates Relative mode.
- HOLDE/*: Freezes the current display reading (Data Hold). Long press to activate backlight.
5.3. Udførelse af målinger
Generelle måletrin:
- Connect the test leads correctly to the multimeter and the circuit.
- Drej drejeknappen til den ønskede funktion.
- Aflæs måleværdien på LCD-displayet.
Example: Measuring DC Voltage
- Tilslut den sorte ledning til KOM and the red lead to VΩmA.
- Drej drejekontakten til V=.
- Connect the test leads across the component or circuit where you want to measure DC voltage.
- Læs bindtage -værdi på displayet.
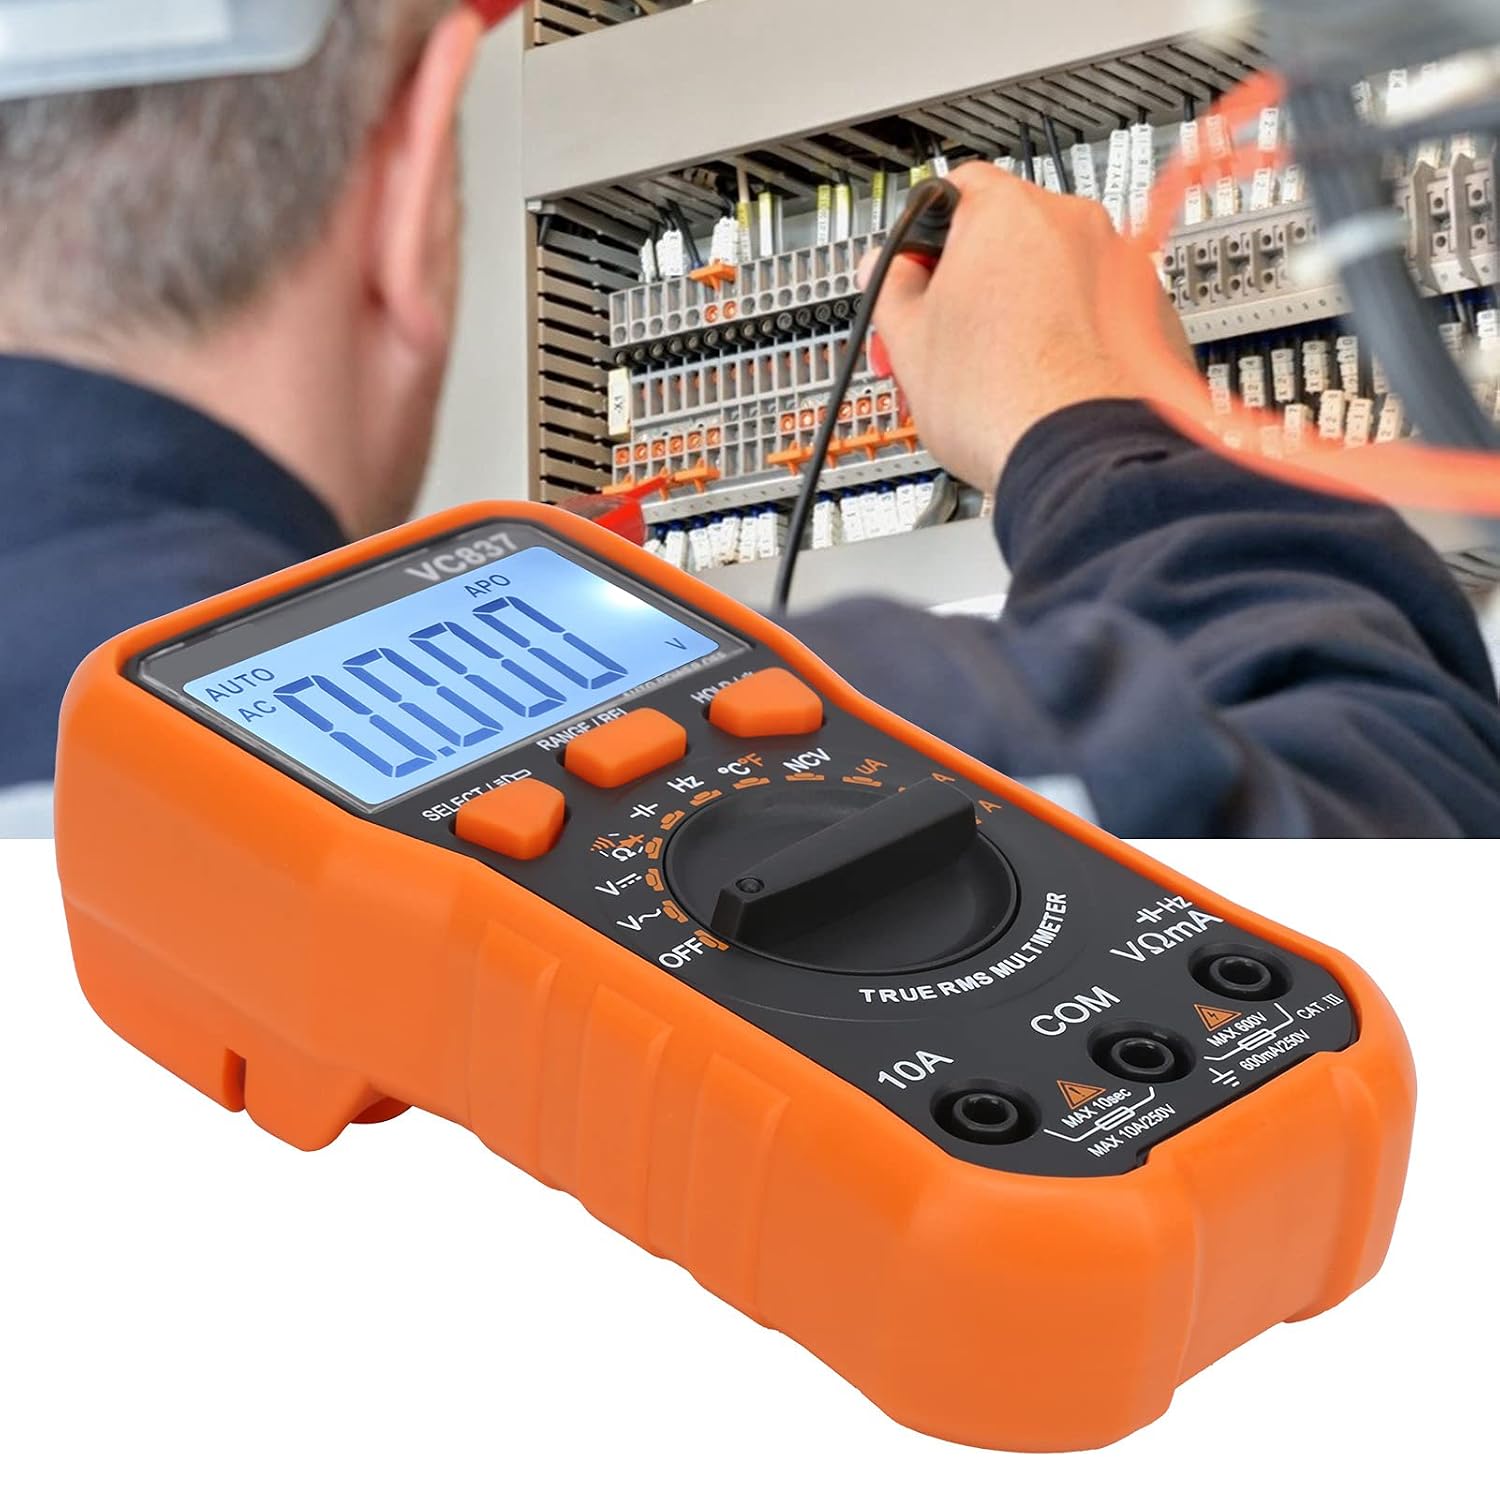
Figure 5.1: The VC837 Multimeter being used to measure electrical parameters in a circuit.
5.4. Non-Contact Voltage (NCV) Detektion
For at detektere AC-volumentage uden direkte kontakt:
- Drej drejekontakten til Hz °C °F / NCV position.
- Tryk på SELECT/ID button until NCV is active (indicated on the display).
- Move the top edge of the multimeter near the conductor. The NCV sensor will detect AC voltage, indicated by an audible beep and LED light.
6. Vedligeholdelse
6.1. Rensning
Tør sagen af med annonceamp klud og mildt rengøringsmiddel. Brug ikke slibemidler eller opløsningsmidler.
6.2. Udskiftning af batteri
Refer to Section 4.1 for battery replacement instructions. Replace batteries promptly when the low battery indicator appears to maintain measurement accuracy.
6.3. Udskiftning af sikring
This multimeter may contain internal fuses for protection. Fuse replacement should only be performed by qualified personnel. Refer to the full manual for specific fuse ratings and replacement procedures.
7. Fejlfinding
- Ingen visning / Svag visning:
Check battery installation and polarity. Replace batteries if they are low or depleted. - Forkerte aflæsninger:
Ensure the correct function and range are selected. Check test lead connections. Verify the circuit is properly connected. - "OL" (Overbelastning) indikation:
The measured value exceeds the selected range. Switch to a higher range or ensure the input is within the multimeter's maximum specifications. - Multimeter Does Not Turn On:
Check batteries. Ensure the rotary switch is not stuck between positions.
8. Specifikationer
| Feature | Specifikation |
|---|---|
| Model | VC837 |
| Vise | 6000 Counts LCD (approx. 61 x 28 mm) |
| Strømforsyning | 2 x AAA 3V batterier (medfølger ikke) |
| Sampling Rate | 3 gange / sekund |
| AC-frekvensrespons | 40Hz-2kHz |
| Indgangsimpedans | 10MΩ |
| Automatisk sluk | Cirka 15 minutter |
| Lav voltage Alarm | Under 2.4V |
| Driftstilstand | Auto or Manual Ranging |
| Materiale | ABS |
9. Garanti og support
For detailed warranty information and customer support, please refer to the specific warranty card included with your product or visit the official LiebeWH webwebstedet. Behold din købskvittering som købsbevis.