
1. Introduktion
Thank you for choosing the CREATE WINDCALM M Ceiling Fan. This manual provides essential information for the safe installation, operation, and maintenance of your new ceiling fan. Please read this manual thoroughly before installation and keep it for future reference.

Image 1.1: The CREATE WINDCALM M Ceiling Fan, showcasing its sleek design, accompanying remote control, and the smartphone app interface for smart control.
2. Sikkerhedsinstruktioner
Følg altid grundlæggende sikkerhedsforanstaltninger ved installation og betjening af elektriske apparater for at reducere risikoen for brand, elektrisk stød og personskade.
- Sørg for, at strømforsyningen er afbrudt før installation eller vedligeholdelse.
- Installationen skal udføres af en kvalificeret elektriker eller en kompetent person.
- Monteringsstrukturen skal kunne bære ventilatorens vægt.
- Stik ikke genstande ind i ventilatorbladene, mens ventilatoren er i drift.
- Hold børn og kæledyr væk fra ventilatoren under drift.
- This fan is suitable for indoor and outdoor covered areas.
3. Pakkens indhold
Carefully unpack all components and check against the list below. If any items are missing or damaged, contact customer support immediately.
- Loftventilatormotorenhed
- Ventilatorblade (3x)
- Monteringsbeslag
- Fjernbetjening
- Monteringsudstyr (skruer, ankre, skiver)
- Instruktionsmanual
4. Opsætning og installation
Følg disse trin for korrekt installation. Professionel installation anbefales.
- Forbered monteringsstedet: Ensure the ceiling joist or support structure can hold the fan's weight (approximately 6.22 kg).
- Monter monteringsbeslaget: Secure the mounting bracket to the ceiling using the provided screws and anchors. Ensure it is firmly attached.
- Ledningsføring: Connect the fan's electrical wires to your household wiring according to local electrical codes. The fan operates on 240 Volts. Ensure correct connection of Live (L), Neutral (N), and Ground (Earth) wires.
- Attach the Fan Unit: Carefully lift the fan motor unit and attach it to the mounting bracket. Many models include a hook to temporarily hang the fan while wiring.
- Installer ventilatorblade: Attach the three fan blades to the motor unit using the provided screws. Ensure all screws are tightened securely.

Billede 4.1: Detaljeret view of the fan's central unit, showing the robust construction and points for blade attachment.

Image 4.2: The ceiling fan seamlessly integrated into a room, demonstrating its aesthetic appeal and compact design.
5. Betjening
Your CREATE WINDCALM M Ceiling Fan can be controlled via the included remote control or the CREATE mobile application (for Wi-Fi enabled models).
5.1. Fjernbetjeningsfunktioner
- Tænd/sluk: Tænder eller slukker for blæseren.
- Hastighedskontrol: Adjusts fan speed through 6 settings.
- Timer: Indstil ventilatoren til at slukke automatisk efter 1, 2 eller 4 timer.
- Sommer/vinter tilstand: Ændrer bladets rotationsretning.
5.2. Summer/Winter Operation
Ventilatoren har en vendbar motor for komfort året rundt.
- Sommertilstand (rotation mod uret): Pushes cool air downwards, creating a refreshing breeze. This mode helps to cool the room by circulating air.
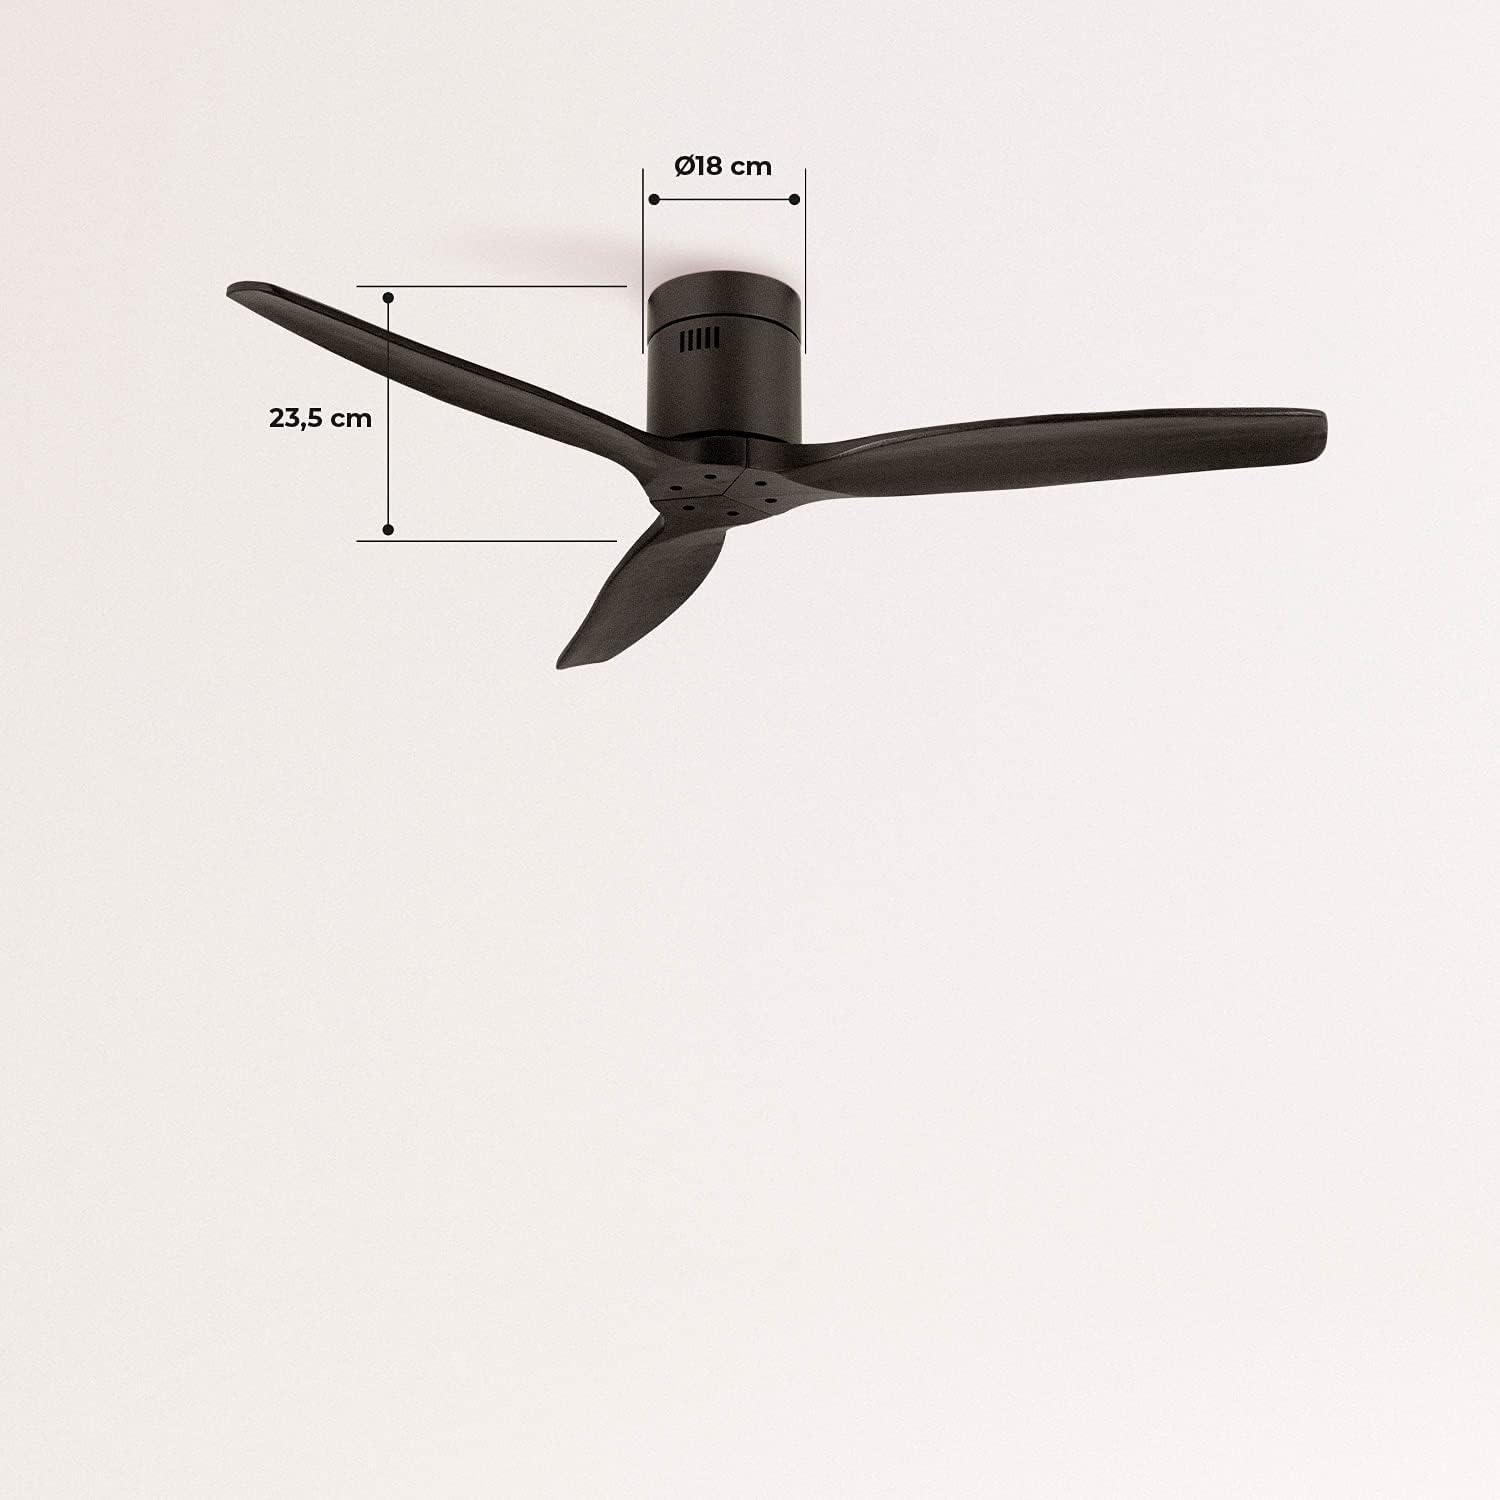
Image 5.1: Visual representation of the fan's airflow in Summer Mode, where cool air is directed downwards.
- Vintertilstand (rotation med uret): Draws cool air upwards, circulating warm air trapped near the ceiling downwards. This helps to distribute heat more evenly, reducing heating costs.

Image 5.2: Visual representation of the fan's airflow in Winter Mode, where warm air is recirculated from the ceiling.
5.3. Wi-Fi and App Control (Smart Option)
If your model includes the Wi-Fi option, download the CREATE app to control and program your fan from your smartphone. Follow the in-app instructions for pairing your device.
6. Vedligeholdelse
Regelmæssig vedligeholdelse sikrer optimal ydeevne og levetid for din ventilator.
- Rensning: Støv ventilatorblade og motorhus regelmæssigt med en blød, tør klud.amp klæde. Brug ikke slibende rengøringsmidler eller opløsningsmidler.
- Bladinspektion: Kontrollér regelmæssigt, at alle knivskruer er spændte. Løse knive kan forårsage slingren og støj.
- Motor smøring: Ventilatorens jævnstrømsmotor er permanent smurt og kræver ikke yderligere smøring.
7. Fejlfinding
Hvis du støder på problemer med din ventilator, kan du se følgende almindelige problemer og løsninger:
| Problem | Mulig årsag | Løsning |
|---|---|---|
| Ventilatoren tænder ikke | Ingen strømforsyning; Lavt batteriniveau i fjernbetjeningen; Forkert ledningsføring. | Kontroller afbryderen; Udskift fjernbetjeningens batteri; Verificer ledningsforbindelser. |
| Blæseren slingrer | Løse knivskruer; Ubalancerede knive; Løst monteringsbeslag. | Spænd alle knivskruer; Sørg for, at knivene er korrekt monteret; Kontroller, at monteringsbeslaget er sikkert fastgjort. |
| Overdreven støj | Løse komponenter; Motorproblem. | Check all screws and connections; If noise persists, contact customer support. |
| Fjernbetjening virker ikke | Lavt/dødt batteri; Fjernbetjening ikke parret. | Replace battery; Refer to remote pairing instructions in the full manual (if applicable). |
| Problemer med Wi-Fi-forbindelse | Incorrect network password; Router too far; App issues. | Verify Wi-Fi password; Move router closer or use a Wi-Fi extender; Reinstall app or check for updates. |
8. Specifikationer
| Feature | Specifikation |
|---|---|
| Mærke | SKABE |
| Modelnummer | 93531_182750 |
| Farve | Sort |
| Stil | Uden Lys |
| Strømkilde | Elektrisk med ledning |
| Voltage | 240 volt |
| Wattage | 40 watt |
| Luftstrøm | 210 kubikmeter i minuttet |
| Støjniveau | 50 dB |
| Bladlængde | 66 centimeter |
| Diameter | 132 centimeter |
| Produktdimensioner | 132D x 132B x 23.5H cm |
| Varens vægt | 6.22 kilo |
| Speciel funktion | Letvægts |

Image 8.1: Key dimensions of the fan, including its 132 cm diameter and 66 cm blade length.

Image 8.2: Additional dimensions, highlighting the fan's height of 23.5 cm and the 18 cm diameter of the motor housing.
9. Garanti og support
Your CREATE WINDCALM M Ceiling Fan comes with a standard warranty. For specific warranty terms and conditions, please refer to the documentation included with your purchase or visit the official CREATE website. In case of any issues or for technical support, please contact CREATE customer service. The seller, CREATE, offers support and assistance for product-related inquiries.