
1. Introduktion
This manual provides detailed instructions for the safe installation, operation, and maintenance of your Millennium Lighting 4601-CH 2-Light Flushmount Ceiling Light. Please read all instructions carefully before beginning installation and retain this manual for future reference.
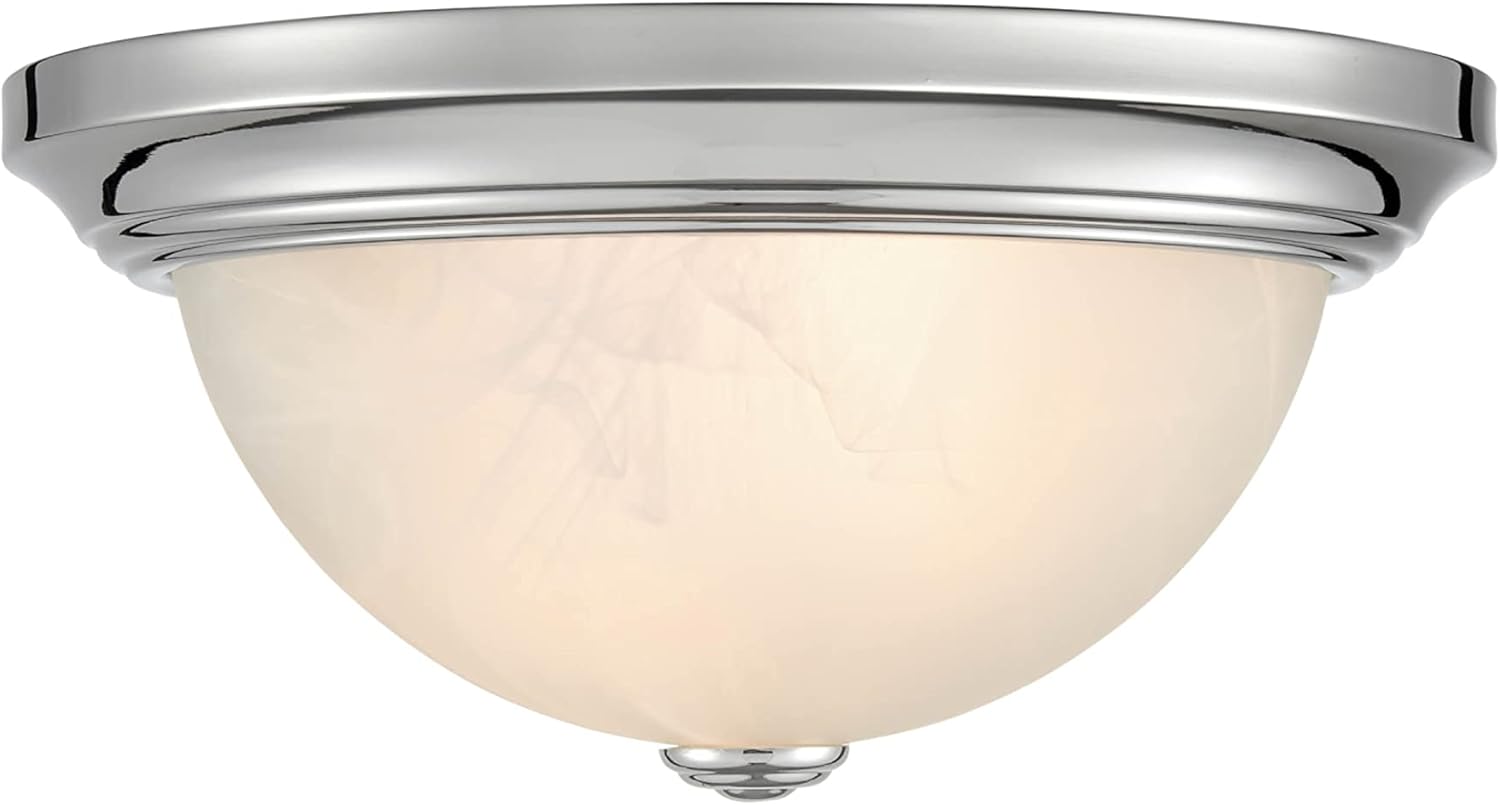
Image 1.1: Millennium Lighting 4601-CH 2-Light Flushmount Ceiling Light, Chrome finish.
2. Vigtige sikkerhedsoplysninger
ADVARSEL: RISIKO FOR ELEKTRISK STØD. Afbryd strømmen ved afbryderen eller sikringsboksen før installation eller service.
- Læs alle instruktioner omhyggeligt før installation.
- Dette produkt skal installeres i overensstemmelse med den gældende installationskode af en person, der er bekendt med produktets konstruktion og drift og de involverede farer.
- Kontakt en kvalificeret elektriker, hvis du er usikker på installationsprocessen.
- Sørg for, at alle elektriske tilslutninger er udført i overensstemmelse med lokale forskrifter, forordninger og National Electric Code (NEC).
- Denne lampe er klassificeret til damp Må ikke installeres i områder, hvor den vil være direkte udsat for vand.
- Brug kun det angivne watttage og type pærer.
- Overskrid ikke det maksimale wattage angivet på armaturet.
- This item is UL listed and meets CSA standards, ensuring compliance with safety regulations.
3. Pakkens indhold
Kontroller, at alle komponenter er til stede, før installationen påbegyndes. Hvis der mangler eller er beskadigede dele, må du ikke forsøge at samle eller installere armaturet.
- Flushmount Ceiling Light Fixture (1)
- Monteringshardwaresæt (1)
- Glasskærm (1)
- Finale (1)
- Instruktionsmanual (1)
Bemærk: Pærer er ikke inkluderet og skal købes separat.
4. Produktspecifikationer
| Feature | Specifikation |
|---|---|
| Mærke | Millennium belysning |
| Modelnummer | 4601-CH |
| Farve | Chrome |
| Materiale | Metal |
| Produktdimensioner | 11 cm L x 11 cm B x 5.5 cm H |
| Voltage | 120 volt |
| Max Wattage | 60 watts (per bulb, 2 bulbs total) |
| Monteringstype | Loftmontering |
| Indendørs/Udendørs brug | Indendørs (Damp Placering bedømt) |
| Certificeringer | UL Listed, CSA Standards |
5. Installationsvejledning
5.1 Nødvendigt værktøj (medfølger ikke)
- Phillips hovedskruetrækker
- Fladhovedskruetrækker
- Trådstrippere
- Elektrisk tape
- Sikkerhedsbriller
- Stige
5.2 Installationstrin
- Sluk for strømmen: Før du starter, skal du sørge for, at strømmen til samledåsen er slukket ved afbryderen eller sikringsskabet.
- Forbered monteringsplade: Attach the mounting plate to the junction box using the screws provided in the hardware kit. Ensure it is securely fastened.
- Foretag elektriske forbindelser:
- Tilslut armaturets sorte ledning til husets sorte (varme) ledning.
- Tilslut armaturets hvide ledning til husets hvide (neutrale) ledning.
- Connect the fixture's ground wire to the house's ground wire (or to the mounting plate if no house ground is available).
- Fastgør alle forbindelser med trådmøtrikker og pak dem ind med elektrikertape for ekstra sikkerhed.
- Monteringsarmaturhus: Carefully push the wired fixture body up to the mounting plate, aligning the screw holes. Secure the fixture body to the mounting plate using the provided screws.
- Installer pærer: Insert the appropriate light bulbs (not included) into the sockets. Do not exceed 60 watts per bulb.
- Fastgør glasskærm: Carefully place the glass shade onto the fixture. Secure it in place using the finial by screwing it onto the threaded rod at the bottom of the fixture. Do not overtighten.
- Gendan strøm: Once installation is complete and all components are secure, restore power at the circuit breaker or fuse box.
6. Betjening
Once installed and power is restored, the Millennium Lighting 4601-CH flushmount ceiling light can be operated using a standard wall switch. This fixture is compatible with standard wall dimmers, allowing you to adjust the light output to your desired level (dimmer switch sold separately).
7. Pleje og vedligeholdelse
To maintain the appearance and functionality of your light fixture, follow these guidelines:
- Rensning: Afbryd altid strømmen før rengøring. Tør armaturet af med en blød, tør klud. Brug ikke slibende rengøringsmidler, opløsningsmidler eller polermidler, da de kan beskadige overfladen.
- Udskiftning af pære: Ensure power is off before replacing bulbs. Allow bulbs to cool completely before handling. Replace with bulbs of the same type and wattage, not exceeding the maximum specified.
- Inspektion: Kontrollér regelmæssigt alle forbindelser og monteringsudstyr for at sikre, at de forbliver fastgjorte.
8. Fejlfinding
Hvis du oplever problemer med din lampe, kan du se følgende almindelige problemer og løsninger:
| Problem | Mulig årsag | Løsning |
|---|---|---|
| Lyset tænder ikke | Ingen strøm til armaturet Løse ledningsforbindelser Defekt pære | Tjek afbryder/sikring. Kontroller, at alle ledningsforbindelser er sikre (sørg først for, at strømmen er slukket). Udskift pære(r). |
| Lyse flimrer | Løse ledningsforbindelser Inkompatibel lysdæmperkontakt Defekt pære | Kontrollér ledningsforbindelserne (sørg først for, at strømmen er slukket). Sørg for, at lysdæmperen er kompatibel med pæretypen. Udskift pære(r). |
| Humming sound from fixture | Inkompatibel lysdæmperkontakt Løse komponenter | Sørg for, at lysdæmperen er kompatibel med pæretypen. Check that all mounting hardware and the glass shade are securely fastened. |
Hvis problemet fortsætter efter at have forsøgt disse løsninger, skal du kontakte en kvalificeret elektriker.
9. Garanti og support
9.1 Garantioplysninger
This Millennium Lighting fixture is covered by a 1-year limited manufacturer's warranty from the date of purchase. This warranty covers defects in materials and workmanship under normal use. It does not cover damage resulting from improper installation, accident, misuse, abuse, or normal wear and tear.
9.2 Kundesupport
For technical assistance, warranty claims, or to inquire about replacement parts, please contact Millennium Lighting customer service. Refer to your purchase documentation or the Millennium Lighting webhjemmeside for aktuelle kontaktoplysninger.