DUCLUS DU5032
DUCLUS Photography Light Box User Manual
Model: DU5032 | Mærke: DUCLUS
Your comprehensive guide to setting up, operating, and maintaining your DUCLUS Photography Light Box.
1. Produktet er slutview
The DUCLUS Photography Light Box is a portable and foldable photo studio designed to help you capture high-quality, professional-looking product photos with ease. It features integrated LED lighting, multiple background options, and various shooting angles to minimize shadows and provide uniform illumination for your subjects.

Figure 1.1: The DUCLUS Photography Light Box in use, demonstrating its ability to capture clear product images.
2. Pakkens indhold
Kontroller venligst, at alle nedenstående varer er inkluderet i din pakke:
- 1 x DUCLUS Photography Light Box
- 1 x Diffuser cloth with hole (for top shooting)
- 1 x Diffuser cloth without hole (for front shooting)
- 2 x Paper backgrounds (White, Black)
- 6 x PVC backgrounds (Black, White, Gray, Orange, Blue, Green)
- 1 x USB Cable (2m length)
- 1 x Opbevaringspose
- 1 x Brugermanual (dette dokument)

Figure 2.1: All components included in the DUCLUS Photography Light Box kit.
3. Opsætningsvejledning
Setting up your DUCLUS Photography Light Box is quick and easy. Follow these steps:
- Unfold the Box: Take the light box out of its storage bag. Unfold it completely until it forms a cube shape. The internal reflective surfaces should face inwards.

Figure 3.1: Unfolding the light box.
- Secure the Supports: Ensure the internal support structures are fully extended and locked into place to maintain the box's shape.

Figure 3.2: Opening the internal supports.
- Close the Front Window: If applicable, close the front opening of the light box using the Velcro fasteners to create a seamless enclosure.

Figure 3.3: Closing the front window.
- Indsæt baggrund: Choose one of the provided backgrounds (PVC or paper) and slide it into the designated slots at the back of the light box. Ensure it lies flat and smooth.

Figure 3.4: Selection of 8 backgrounds included with the light box.
- Tilslut strøm: Plug the USB cable into the light box's power port and connect the other end to a USB power source (e.g., wall adapter, power bank, computer USB port).
4. Betjeningsvejledning
4.1. Adjusting LED Lighting
The DUCLUS Photography Light Box features 120 SMD LED beads with a 5500K natural white light source, ideal for professional photography. The brightness is 10-level adjustable.
- Tænd/sluk: Use the power button on the inline controller to turn the LED lights on or off.
- Justering af lysstyrke: Use the '+' and '-' buttons on the controller to increase or decrease the brightness. There are 10 adjustable levels.

Figure 4.1: Dimmable LED lighting with 10 brightness levels and high CRI for accurate color reproduction.
4.2. Utilizing Diffuser Cloths
Two diffuser cloths are included to help soften reflections and reduce shadows, especially for reflective subjects:
- Diffuser with Hole: Attach this cloth over the LED ring light when shooting from the top opening to soften the light and minimize reflections from above.
- Diffuser without Hole: Attach this cloth over the LED strip when shooting from the front opening to soften the light and minimize reflections from the front.
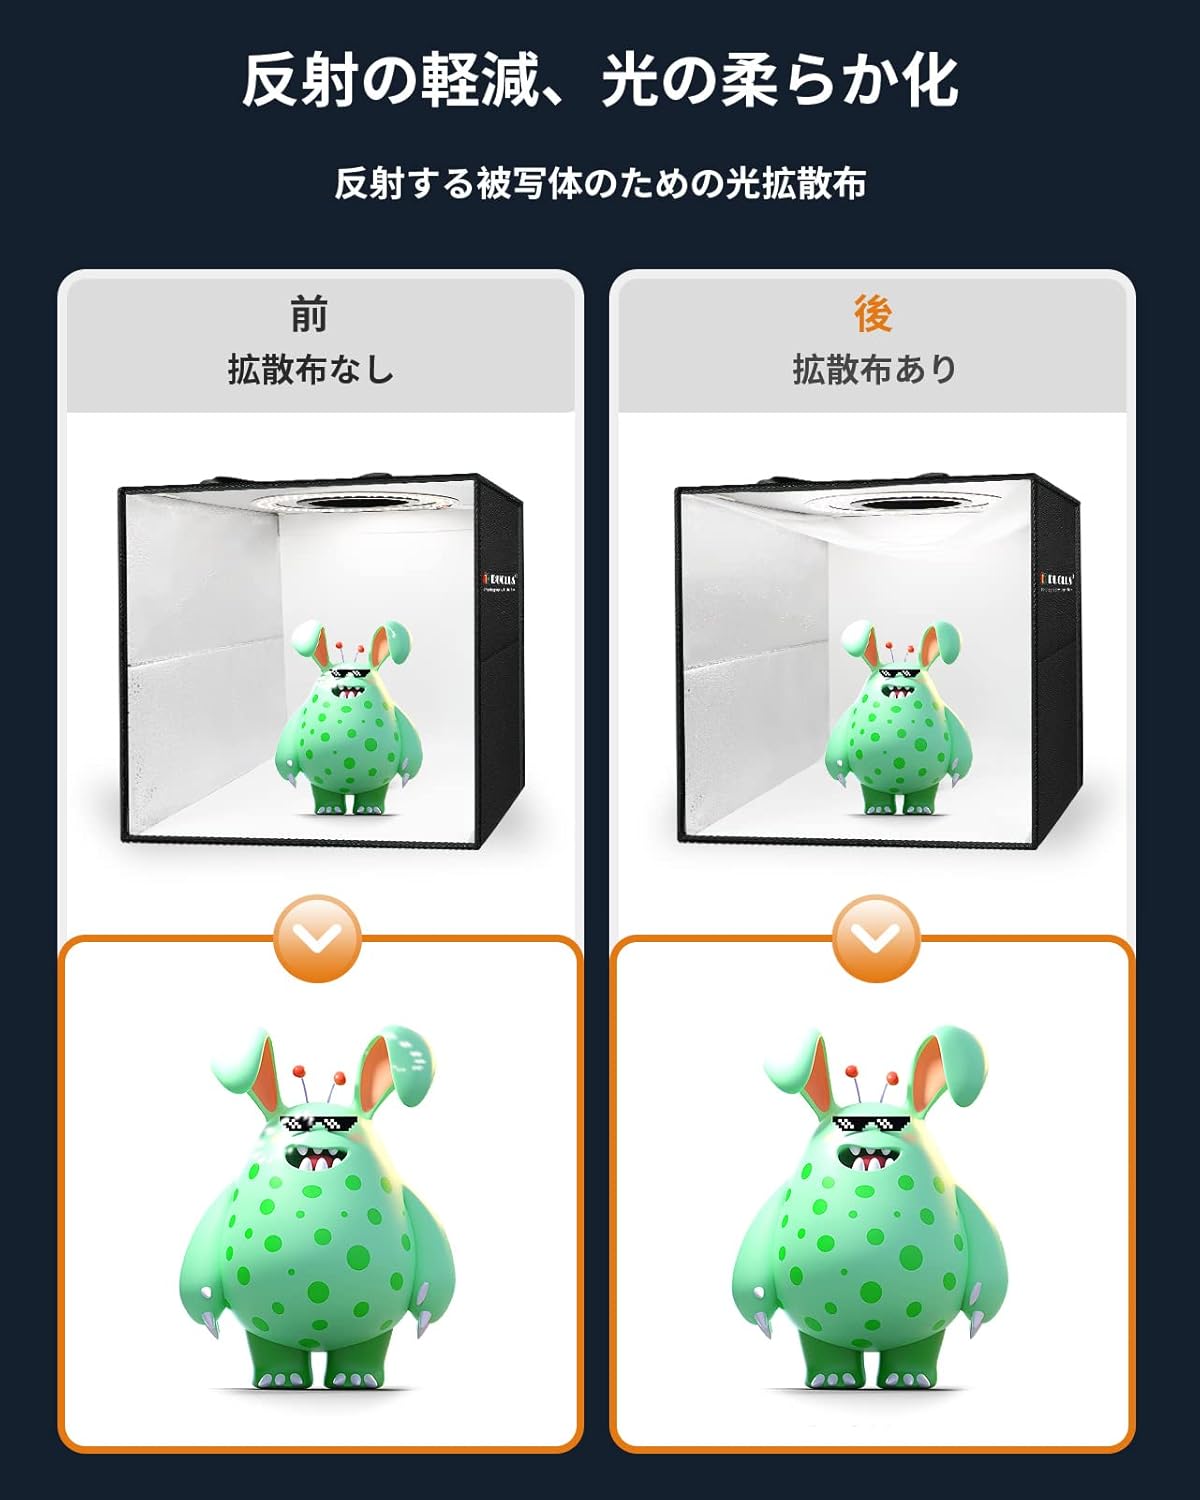
Figure 4.2: Effect of using the diffuser cloth to soften light and reduce reflections.
4.3. Multiple Shooting Angles
The light box offers various shooting angles to achieve desired visual effects:
- Front Shooting Window: Use the main front opening for standard product shots.

Figure 4.3a: Front shooting.
- Top Shooting Hole: Utilize the circular opening on the top for overhead shots, ideal for flat lay photography or capturing the top view of objects.

Figure 4.3b: Overhead shooting.
- Side Light Window: The side window allows for unique lighting effects and angles.

Figure 4.3c: Side light shooting.
- Front Light Window: The front light window provides additional flexibility for lighting.

Figure 4.3d: Front light shooting.
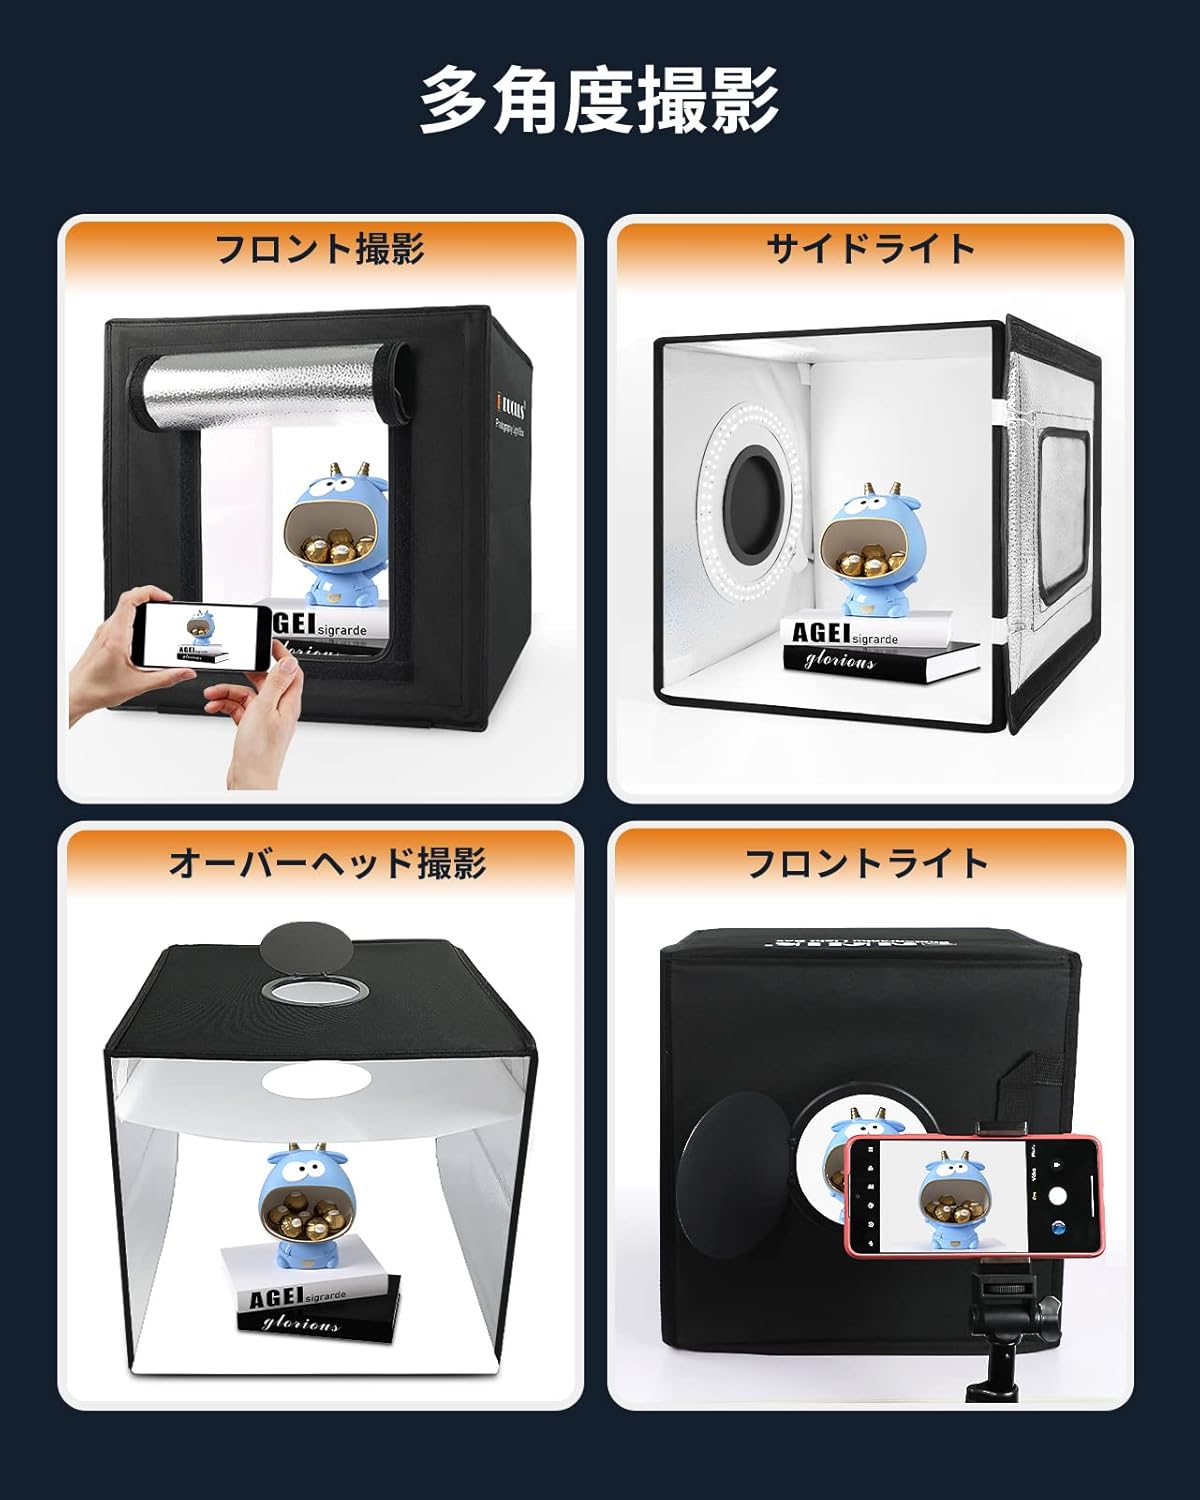
Figur 4.4: Overview of multi-angle shooting capabilities.
5. Vedligeholdelse
To ensure the longevity and optimal performance of your DUCLUS Photography Light Box, follow these maintenance guidelines:
- Cleaning the Box: Wipe the exterior of the light box with a soft, damp klæde. Undgå at bruge slibende rengøringsmidler eller opløsningsmidler.
- Rengøringsbaggrunde:
- PVC Backgrounds: These are waterproof and can be wiped clean with a damp klæde.
- Paper Backgrounds: Handle with care to avoid creases or tears. If they become dirty, they may need to be replaced.
- LED lys: The LED lights are designed for long-term use and generally do not require maintenance. Do not attempt to disassemble the LED strip.
- Opbevaring: When not in use, fold the light box compactly and store it in the provided storage bag to protect it from dust and damage. Store in a cool, dry place.
6. Fejlfinding
If you encounter any issues with your DUCLUS Photography Light Box, please refer to the following common problems and solutions:
| Problem | Mulig årsag | Løsning |
|---|---|---|
| LED-lys tænder ikke. |
|
|
| Photos have harsh shadows or reflections. |
|
|
| Lyskassen holder ikke sin form. |
|
|
If you encounter a problem not listed here or if the suggested solutions do not resolve the issue, please contact DUCLUS customer support for assistance.
7. Specifikationer
| Feature | Detalje |
|---|---|
| Modelnummer | DU5032 |
| Dimensioner (produkt) | 30 x 30 x 30 cm (11.8 x 11.8 x 11.8 tommer) |
| Vægt | 1.8 kg (3.97 lbs) |
| Materiale | Oxford stof |
| LED mængde | 120 SMD LED beads |
| Farvetemperatur | 5500K (naturhvid) |
| Justering af lysstyrke | 10 niveauer |
| CRI (Color Rendering Index) | >95 |
| Inkluderede baggrunde | 6 x PVC (Black, White, Gray, Orange, Blue, Green), 2 x Paper (White, Black) |
| Strømindgang | USB (2 m kabellængde) |
8. Garanti og support
DUCLUS is committed to providing high-quality products and excellent customer service. Your DUCLUS Photography Light Box comes with the following:
- 2 års kvalitetsgaranti: This warranty covers manufacturing defects and ensures the product meets its specified quality standards for two years from the date of purchase.
- 30-Day Return/Exchange Policy: Hvis du ikke er tilfreds med dit køb, kan du returnere eller ombytte produktet inden for 30 dage.
- 24-timers kundeservice: For any inquiries, technical support, or warranty claims, please contact our customer service team.
For further assistance, please visit the official DUCLUS store on Amazon or contact us directly through the Amazon platform.
Ask a question about this manual
Ask about setup, troubleshooting, compatibility, parts, safety, or missing instructions. Manuals+ will review the question and use this page’s manual context to help answer it.