
1. Introduktion
Thank you for choosing a Kraus Loften Kitchen Workstation Sink. This manual provides detailed instructions for the safe and proper installation, operation, and maintenance of your new sink. Please read all instructions carefully before beginning installation and keep this manual for future reference. For additional information or assistance, please visit kraususa.com.
2. Sikkerhedsoplysninger
ADVARSEL: Manglende overholdelse af disse instruktioner kan resultere i ejendomsskade, personskade eller død.
- Brug altid sikkerhedsbriller og handsker under installationen.
- Sørg for at alle lokale VVS- og bygningsreglementer overholdes.
- Sluk for vandforsyningen, før du påbegynder noget VVS-arbejde.
- If you are unsure about any part of the installation, consult a professional plumber.
3. Pakkens indhold
Kontroller, at alle komponenter er til stede, før emballagen bortskaffes.
- Kitchen Sink (KWT321-25/18)
- Monteringshardware
- Udskæringsskabelon
- Bundgitter
- Silmontering
- Afløbshætte
- Viskestykke
- Instruktionsmanual
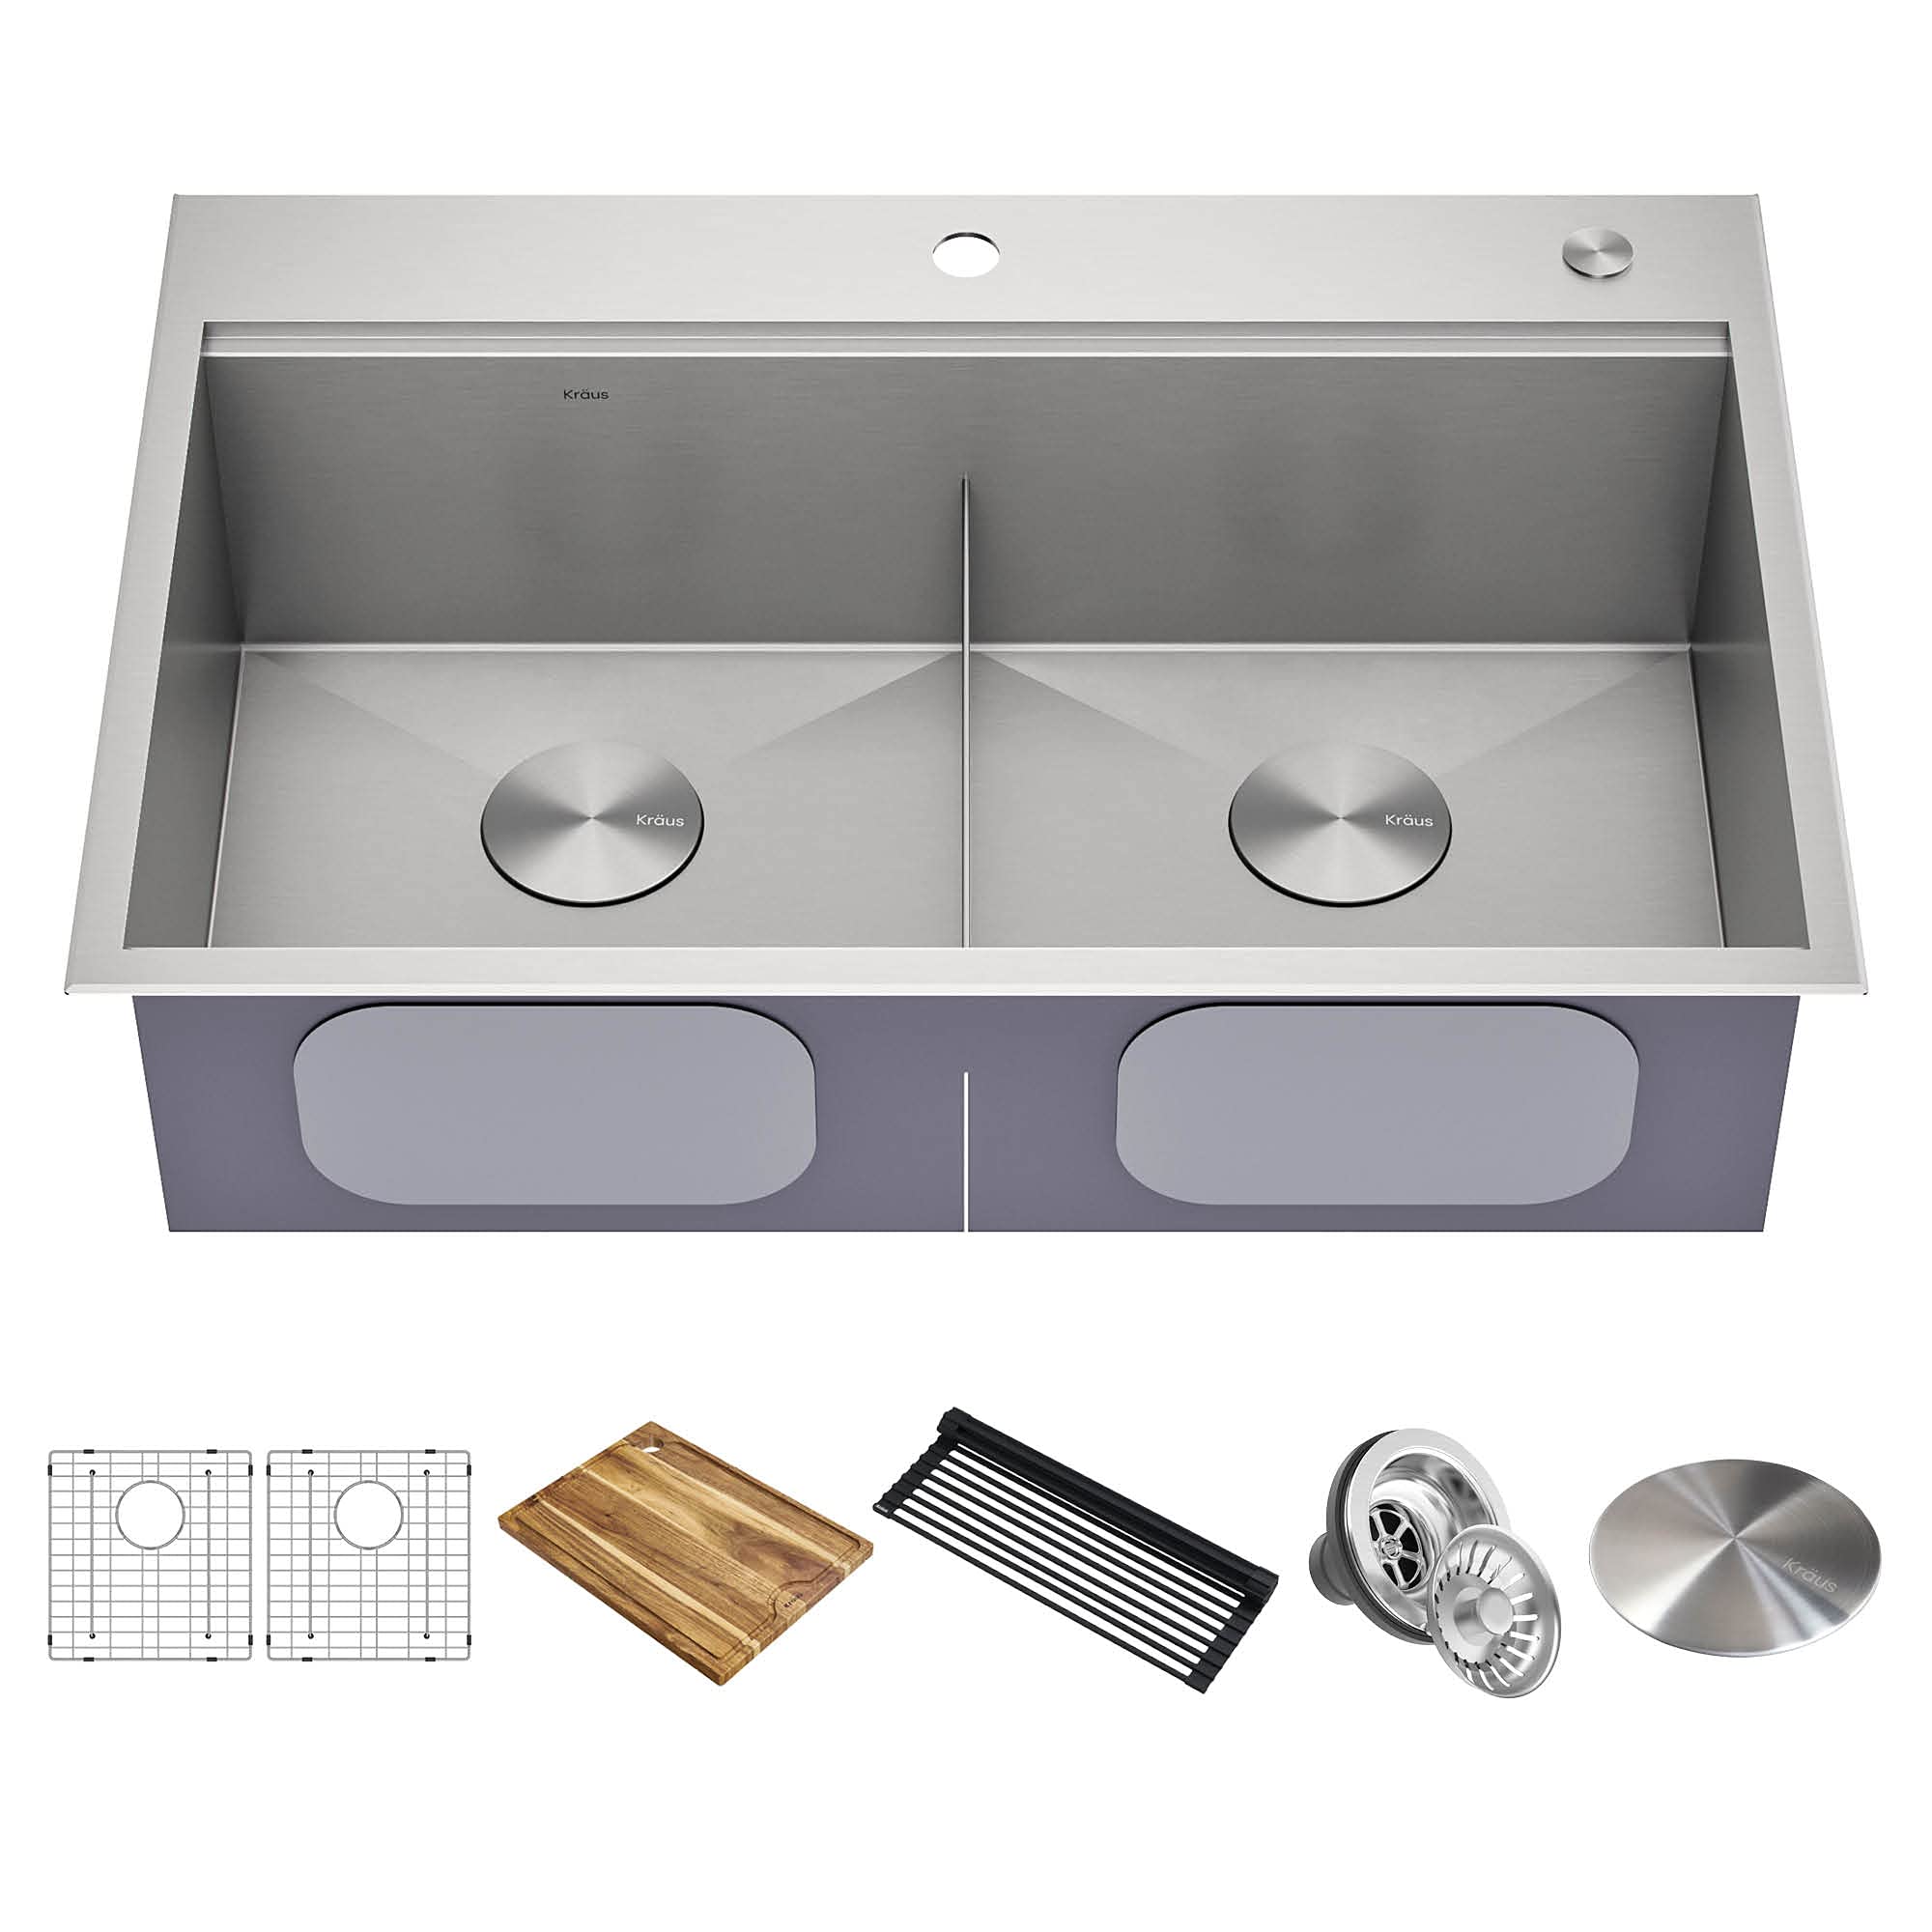
Image 1: Kraus Loften KWT321-25/18 Kitchen Workstation Sink with its various components and accessories. The image displays the stainless steel sink, a bottom grid, a strainer, and other items typically included in the package.
4. Værktøj, der kræves til installation
Følgende værktøjer anbefales til en vellykket installation:
- Sikkerhedsbriller
- Handsker
- Målebånd
- Blyant
- Jigsaw or Router (for countertop cutout)
- Bore
- Silikoneforsegling
- Justerbar skruenøgle
- Skruetrækker
- Niveau
5. Opsætning og installation
5.1 Preparing the Countertop
- Place the provided cutout template on the countertop in the desired location.
- Trace the outline of the template onto the countertop with a pencil.
- For undermount installation, ensure the cutout is slightly smaller than the sink rim for proper support. For drop-in, follow the template precisely.
- Carefully cut along the traced line using a jigsaw or router.
- Clean the edges of the cutout.
5.2 Installing the Sink
- Apply a bead of silicone sealant around the perimeter of the countertop cutout.
- Carefully lower the sink into the cutout (for drop-in) or lift it into place from underneath (for undermount).
- Secure the sink using the provided mounting hardware. Tighten the clips evenly to ensure a tight seal.
- Wipe away any excess silicone sealant immediately.
- Allow the sealant to cure for at least 24 hours before connecting plumbing.
5.3 Connecting Plumbing
- Install the strainer assembly into the sink drain opening according to the manufacturer's instructions.
- Connect the drain pipe to the strainer assembly.
- Connect the faucet and water supply lines (faucet sold separately).
- Tænd for vandforsyningen og kontroller for utætheder.
6. Operating Your Workstation Sink
Your Kraus Loften workstation sink is designed for versatility and efficiency. The integrated ledge allows for various accessories (e.g., cutting board, roll-up dish rack) to slide across the sink, creating a functional workspace.
- Brug af tilbehør: Place workstation accessories directly on the integrated ledge. Ensure they are properly seated to prevent slipping.
- Bottom Grid: The included bottom grid protects the sink surface from scratches and allows water to drain freely.
- Si: The strainer assembly prevents food particles from entering your plumbing. Empty it regularly.
7. Pleje og vedligeholdelse
Proper care will ensure the longevity and appearance of your stainless steel sink.
- Daglig rengøring: Clean daily with a soft cloth or sponge and mild dish soap. Rinse thoroughly and wipe dry to prevent water spots.
- Undgå slibemidler: Brug ikke slibende rengøringsmidler, ståluld eller skuresvampe, da disse kan ridse den rustfri ståloverflade.
- Kemikalier: Avoid harsh chemicals, bleach, or cleaners containing chlorides, which can corrode stainless steel.
- Rustforebyggelse: Remove any iron-based items (e.g., cast iron pots, steel wool) from the sink immediately to prevent rust stains. If rust spots appear, use a non-abrasive stainless steel cleaner.
- Workstation Accessories: Clean workstation accessories regularly with mild soap and water.
8. Fejlfinding
| Problem | Mulig årsag | Løsning |
|---|---|---|
| Water spots / Streaks | Hard water deposits; not drying after use. | Wipe sink dry after each use. Use a 50/50 solution of water and white vinegar for stubborn spots, then rinse and dry. |
| Ridser på overfladen | Abrasive cleaning; heavy objects dropped in sink. | Use non-abrasive cleaners and soft cloths. Use the bottom grid to protect the sink base. Minor scratches can be buffed out with a stainless steel scratch removal kit. |
| Rustpletter | Iron particles left on surface; exposure to harsh chemicals. | Remove iron-based items promptly. Clean with a non-abrasive stainless steel cleaner. Avoid cleaners with chlorides. |
| Leaking around drain or faucet | Forkert forseglede forbindelser. | Check all plumbing connections. Ensure silicone sealant is properly applied and cured. Tighten connections if necessary. Consult a plumber if leaks persist. |
9. Specifikationer
| Feature | Detalje |
|---|---|
| Modelnummer | KWT321-25/18 |
| Type | Drop-in / Undermount Workstation Sink |
| Materiale | 18 Gauge T304 Stainless Steel |
| Skålkonfiguration | Enkelt skål |
| Overordnede dimensioner | 25" L x 22" W x 10" D (Approximate, refer to template for exact cutout) |
| Minimum skabsstørrelse | 27 tommer |
| Afløbsåbning | 3.5 tommer |
10. Garanti og kundesupport
Kraus products are manufactured under the highest standards of quality and workmanship. Kraus offers a limited lifetime warranty on its kitchen sinks. For complete warranty information, please visit our webwebsted eller kontakt kundeservice.
Kundeservice:
- Webwebsted: www.kraususa.com
- E-mail: kundeservice@kraususa.com
- Telefon: 1-800-775-0703 (USA/Canada)
Please have your model number (KWT321-25/18) and proof of purchase available when contacting customer service.


