
Møn 82137SRN
Moen Magnetix 82137SRN Badekar- og Brusehane Brugermanual
Model: 82137SRN | Mærke: Moen
Indledning
This manual provides comprehensive instructions for the installation, operation, and maintenance of your Moen Magnetix 82137SRN Graeden Spot Resist Brushed Nickel 1-Handle Bathtub and Shower Faucet with Valve. Please read this manual thoroughly before installation and use to ensure proper function and longevity of your product.

Image: The Moen Magnetix 82137SRN Graeden Spot Resist Brushed Nickel 1-Handle Bathtub and Shower Faucet with Valve, showing the showerhead, handheld shower, hose, handle, and tub spout components.
Sikkerhedsoplysninger
- Sluk altid for hovedvandforsyningen, inden du påbegynder installations- eller reparationsarbejde.
- Brug passende personlige værnemidler (PPE) såsom sikkerhedsbriller og handsker under installationen.
- Sørg for, at alle forbindelser er sikre og fri for lækager, før vandforsyningen genoprettes.
- Hvis du er usikker på et trin, skal du kontakte en kvalificeret VVS-installatør.
Installationsvejledning
Professional installation is recommended for optimal performance and to ensure compliance with local plumbing codes. The following steps provide a general overview.
- Forbered installationsområdet: Turn off water supply. Clear the work area.
- Install the Valve Body: Secure the valve body within the wall according to the rough-in dimensions. Ensure it is level and properly aligned with the finished wall surface.
- Tilslut vandledninger: Connect hot and cold water supply lines to the appropriate inlets on the valve body. Connect the shower outlet and tub spout outlet lines.
- Installer badekarstuds: Attach the tub spout to its connection point, ensuring a tight seal.
- Install Trim Plate and Handle: Mount the trim plate over the valve body. Install the handle assembly onto the valve stem.
- Install Showerhead and Handheld Shower: Attach the main showerhead to the shower arm. Connect the hose to the handheld shower and the wall outlet.
- Test for lækager: Tænd langsomt for vandforsyningen, og kontroller alle forbindelser for lækager.

Image: An illustration showing the internal valve body and the external trim plate and handle, emphasizing that professional installation is recommended for the shower valve.
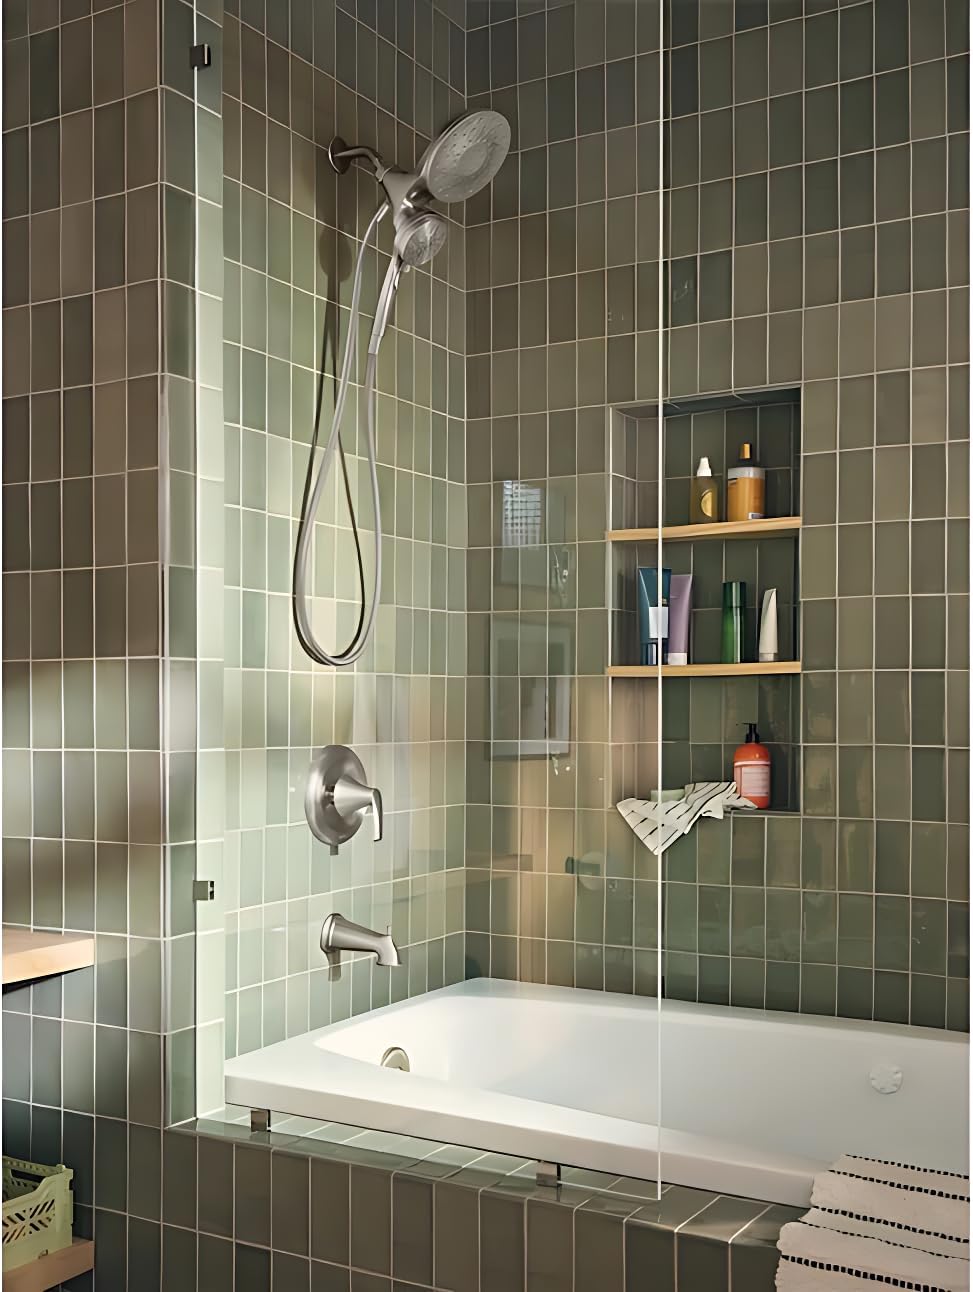
Image: The Moen Magnetix shower system installed in a modern bathroom with green tiled walls and a glass shower partition, demonstrating its appearance in a finished setting.
Betjeningsvejledning
Vandgennemstrømning og temperaturkontrol:
The single handle controls both water flow and temperature. Lift the handle to increase water flow. Rotate the handle left for hot water and right for cold water.
Showerhead and Handheld Shower Operation:
This system features a combination rainshower and handheld shower. You can use them together or separately.

Image: A diagram illustrating six unique spray functions available on the showerhead: Rinse, Downpour, Wide Coverage, Massage, Relaxing Massage, and Soothing Massage.

Image: A visual demonstrating the flexibility of the Moen Magnetix system, showing the main showerhead and handheld shower being used simultaneously and individually.
Udvidet rækkevidde:
The included 60-inch hose for the handheld shower provides extended reach and flexibility for various uses, such as bathing children or pets.

Image: A person using the Moen Magnetix handheld shower with its extended hose to wash a dog, highlighting the flexibility and convenience of the design.
Vedligeholdelse og rengøring
To maintain the finish and performance of your Moen faucet, follow these cleaning guidelines:
- Regelmæssig rengøring: Clean with mild soap and water. Rinse thoroughly and dry with a soft cloth.
- Undgå skrappe rengøringsmidler: Do not use abrasive cleaners, harsh chemicals, or polishes containing alcohol, acids, or abrasives, as these can damage the Spot Resist Brushed Nickel finish.
- Punktbestandig finish: The Spot Resist finish is designed to resist fingerprints and water spots, making cleaning easier.
- Brusehoveddyser: Periodically clean the rubber nozzles on the showerhead and handheld shower to remove mineral buildup. You can gently rub them with your finger or a soft brush.
Fejlfinding
| Problem | Mulig årsag | Løsning |
|---|---|---|
| Lavt vandtryk | Clogged showerhead nozzles; partially closed shut-off valve; mineral buildup in lines. | Clean showerhead nozzles; ensure shut-off valves are fully open; consult a plumber for line cleaning. |
| Utæt vandhane | Slidte O-ringe eller pakninger; løse forbindelser. | Tighten connections; replace worn parts (consult Moen support or a plumber). |
| Temperatursvingninger | Issue with water heater; pressure balance valve malfunction. | Check water heater settings; contact a qualified plumber for valve inspection. |
Produktspecifikationer
| Feature | Detalje |
|---|---|
| Mærke | Møn |
| Materiale | Nikkel |
| Finish Type | Børstet |
| Antal håndtag | 1 |
| Håndtag Materiale | Rustfrit stål |
| Varens vægt | 6.4 pund |
| Monteringstype | Vægmontering |
| Inkluderede komponenter | Håndtag |
| UPC | 026508304532 |
| Fabrikant | Møn |
| Varenummer | 82137SRN |
| Produktdimensioner | 23 x 9.5 x 5.96 tommer |
| Varemodelnummer | 82137SRN |
| Slutte | Børstet |
| Batterier inkluderet? | Ingen |
| Batterier påkrævet? | Ingen |
| ASIN | B08YRYGZ7M |
| Dato først tilgængelig | 12. marts 2021 |
Garanti og support
Moen products are manufactured with the highest standards of quality and workmanship. For detailed warranty information and customer support, please visit the official Moen webwebstedet eller kontakt deres kundeservice direkte. Gem din købsbevis til garantikrav.
Moen Officiel Webwebsted: www.moen.com
Kundeservice: Henvis til Møen website for current contact information (phone, email, chat).
Ask a question about this manual
Ask about setup, troubleshooting, compatibility, parts, safety, or missing instructions. Manuals+ will review the question and use this page’s manual context to help answer it.