
1. Vigtige sikkerhedsinstruktioner
Read and understand all safety instructions before operating the generator. Failure to follow these instructions can result in serious injury or death.
- Kuliltefare: Generators produce carbon monoxide, an odorless, colorless, poisonous gas. Operate the generator outdoors in a well-ventilated area, far from windows, doors, and vents. Never operate indoors or in partially enclosed spaces.
- Fare for elektrisk stød: Do not operate the generator in wet conditions. Ensure all electrical connections are dry and properly grounded. Use only approved extension cords that are rated for outdoor use and the generator's power output.
- Brandfare: Gasoline is highly flammable. Refuel in a well-ventilated area with the engine off and cool. Do not smoke or allow open flames near the generator or fuel. Store gasoline in an approved container in a safe location.
- Varme overflader: The generator engine and muffler become very hot during operation and remain hot for a period after shutdown. Avoid contact with hot surfaces to prevent burns.
- Børn og kæledyr: Hold børn og kæledyr væk fra generatoren, især under drift.
2. Komponenter overview
Familiarize yourself with the main components of your Husky HKG3000 portable gasoline generator.
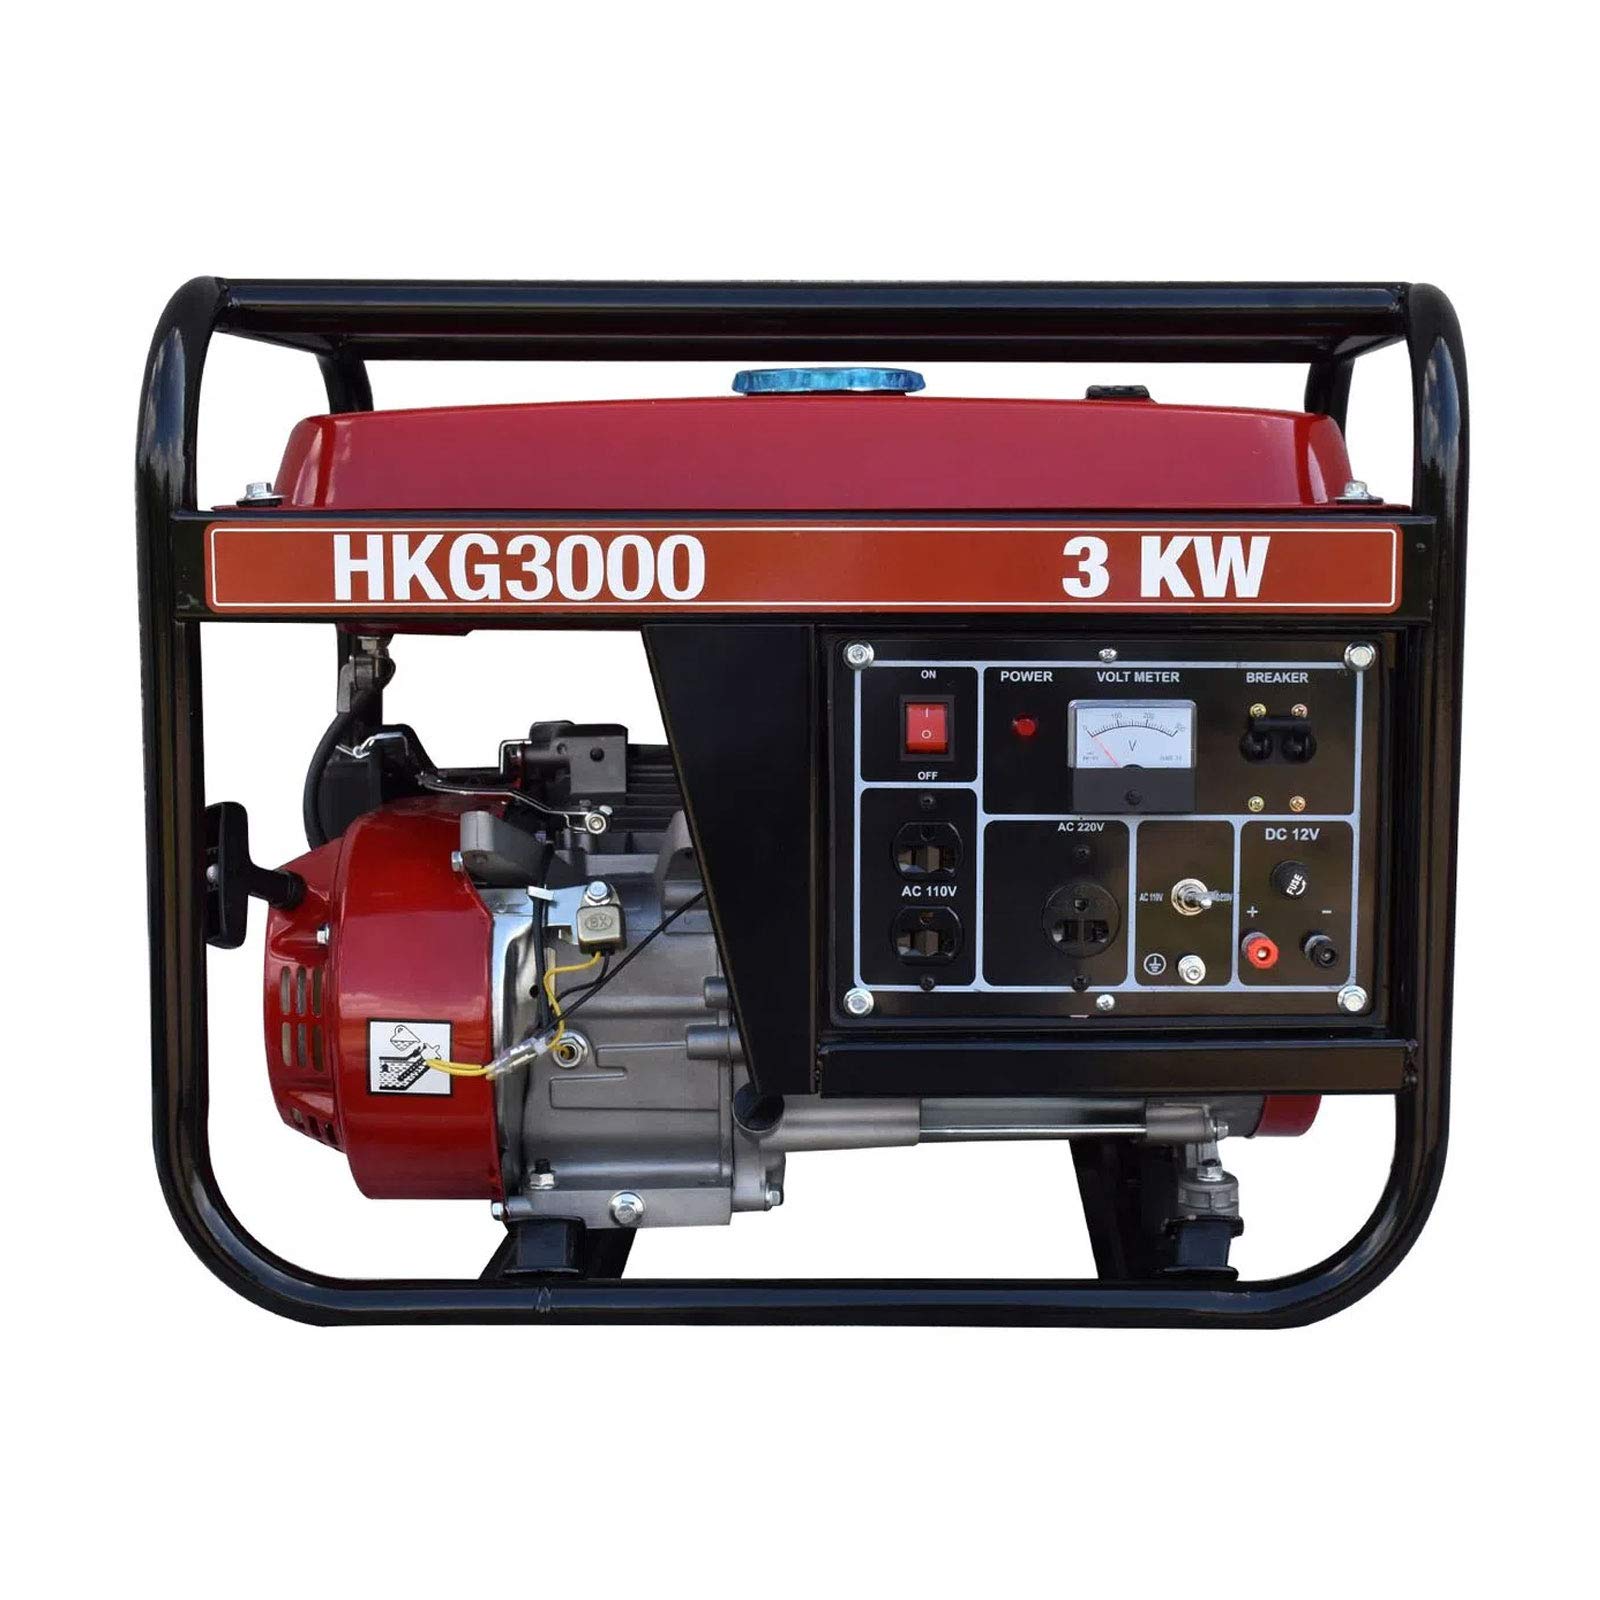
Figur 2.1: Samlet set view of the Husky HKG3000 Portable Gasoline Generator, showcasing dens robuste ramme og kontrolpanel.

Figur 2.2: Forside view of the Husky HKG3000 Portable Gasoline Generator, highlighting the control panel with power outlets, voltmeter, and circuit breakers.

Figur 2.3: Side view of the Husky HKG3000 Portable Gasoline Generator, showing the 4-stroke engine, air filter housing, and fuel valve.

Figure 2.4: Included accessories for the Husky HKG3000 Portable Gasoline Generator, featuring the user manual, power plugs, and a spark plug wrench.
Nøglekomponenter:
- Brændstoftank: Stores gasoline.
- Brændstofdæksel: Seals the fuel tank.
- Brændstofventil: Controls fuel flow to the engine.
- Chokerhåndtag: Bruges til at starte en kold motor.
- Rekylstarter: Manual pull-cord for starting the engine.
- Motorafbryder: Turns the engine ignition ON/OFF.
- Luftfilter: Beskytter motoren mod støv og snavs.
- Oliepåfyldningsdæksel/målepind: Til påfyldning og kontrol af motorolie.
- AC Outlets (110V/220V): For connecting electrical devices.
- DC 12V-udtag: Til opladning af 12V-batterier.
- Voltmeter: Viser output voltage.
- Afbrydere: Protect the generator and connected devices from overload.
- Lyddæmper: Reducerer motorstøj og dirigerer udstødningsgasserne.
3. Opsætning
Udfør følgende opsætningstrin før første brug:
3.1 Udpakning
- Tag forsigtigt generatoren ud af emballagen.
- Inspect for any shipping damage. Contact your dealer if damage is found.
- Ensure all included accessories (power plugs, spark plug wrench, manual) are present.
3.2 Påfyldning af motorolie
The generator is shipped without engine oil. Operating without oil will cause severe engine damage.
- Placer generatoren på en plan overflade.
- Skru oliepåfyldningsdækslet/målepinden af.
- Slowly add the recommended engine oil (e.g., SAE 10W-30) to the crankcase until it reaches the upper mark on the dipstick. Do not overfill.
- Sæt oliepåfyldningsdækslet/målepinden forsvarligt på igen.
3.3 Påfyldning af brændstof
Brug kun frisk, blyfri benzin med et oktantal på 87 eller højere.
- Ensure the generator engine is off and cool.
- Åbn brændstofdækslet.
- Carefully pour gasoline into the fuel tank, avoiding spills. Do not fill above the red indicator or the bottom of the filler neck.
- Luk tankdækslet forsvarligt. Tør straks spildt brændstof op.
3.4 Jordforbindelse af generatoren
Korrekt jordforbindelse er afgørende for at forhindre elektrisk stød.
- Connect a heavy-gauge copper wire from the generator's grounding terminal to an approved ground source, such as a ground rod driven into the earth.
- Consult a qualified electrician for local grounding requirements.
4. Betjeningsvejledning
4.1 Tjek før start
- Kontroller motoroliestanden.
- Tjek brændstofniveauet.
- Sørg for, at alle elektriske belastninger er frakoblet fra generatoren.
- Verify the generator is on a level surface and in a well-ventilated outdoor area.
4.2 Starting the Engine (Manual Start)
- Drej brændstofventilen til ON position.
- Flyt chokerhåndtaget til LUKKET (start) position if the engine is cold. If the engine is warm, set the choke to the ÅBEN position.
- Drej motorkontakten til ON position.
- Firmly grasp the recoil starter handle and pull it slowly until resistance is felt, then pull quickly and smoothly.
- Once the engine starts, slowly move the choke lever to the ÅBEN (run) position.
- Lad motoren varme op i et par minutter, før du tilslutter elektriske belastninger.
4.3 Tilslutning af elektriske belastninger
- Sørg for, at generatoren kører problemfrit.
- Plug in your electrical devices one at a time, starting with the highest wattage enhed.
- Do not exceed the generator's rated wattage (2.8 kW nominal, 3 kW maximum). Overloading will trip the circuit breakers.
4.4 Standsning af motoren
- Afbryd alle elektriske belastninger fra generatoren.
- Drej motorkontakten til SLUKKET position.
- Drej brændstofventilen til SLUKKET position.
5. Vedligeholdelse
Regelmæssig vedligeholdelse sikrer optimal ydeevne og forlænger din generators levetid. Udfør altid vedligeholdelse med motoren slukket og afkølet.
5.1 Motorolieskift
- Change the engine oil after the first 20 hours of operation, then every 50-100 hours or annually.
- Drain old oil while the engine is warm. Refill with recommended oil type and quantity.
5.2 Rengøring af luftfilter
- Efterse luftfilteret hver 50. time eller oftere i støvede forhold.
- Clean the foam element with warm, soapy water, rinse, and allow to dry completely. Lightly oil the foam element before reinstallation.
5.3 Tændrørsinspektion
- Efterse tændrøret hver 100. time eller årligt.
- Clean carbon deposits and adjust the gap if necessary. Replace if electrodes are worn or insulation is cracked.
5.4 Vedligeholdelse af brændstofsystemet
- If storing the generator for more than 30 days, drain the fuel tank and carburetor, or use a fuel stabilizer.
- Regularly check fuel lines for cracks or leaks.
5.5 Opbevaring
- Rengør generatorens yderside.
- Opbevares rent, tørt og godt ventileret, væk fra direkte sollys og ekstreme temperaturer.
- Dæk generatoren til for at beskytte den mod støv.
6. Fejlfinding
Dette afsnit indeholder løsninger på almindelige driftsproblemer.
6.1 Motoren starter ikke
- Intet brændstof: Kontroller brændstofniveauet, og påfyld frisk benzin om nødvendigt.
- Fuel Valve OFF: Drej brændstofventilen til ON.
- Engine Switch OFF: Turn engine switch to ON.
- Improper Choke Position: Adjust choke lever as per starting instructions (Section 4.2).
- Low Oil Level: Check oil level and add oil if necessary. The generator may have a low-oil shutdown feature.
- Fouled Spark Plug: Undersøg og rengør eller udskift tændrøret.
6.2 Ingen effekt
- Strømafbryder udløst: Reset the AC or DC circuit breaker on the control panel. Reduce load if it trips again.
- Overbelaste: Disconnect some electrical devices. Do not exceed the generator's rated capacity.
- Faulty Connection: Check all power cords and connections.
6.3 Engine Runs Poorly
- Gammelt brændstof: Tøm det gamle brændstof af og fyld op med frisk benzin.
- Tilstoppet luftfilter: Rengør eller udskift luftfilteret.
- Fouled Spark Plug: Undersøg og rengør eller udskift tændrøret.
7. Specifikationer
| Specifikation | Værdi |
|---|---|
| Mærke | Husky |
| Model | HKG3000 |
| Motortype | 4-takts |
| Motor Hestekræfter | 7.5 hk |
| Brændstoftype | Benzin |
| Startsystem | Manual (Recoil) |
| Maksimal effekt | 3 kW (3000 watt) |
| Nominel strømudgang | 2.8 kW (2800 watt) |
| Frekvens | 60 Hz |
| Voltage | 110V / 220V |
| Anbefalet brug | Kommerciel |
| Varens vægt | 70 kilo |
| Bærbarhed | Transportabel |
8. Garanti og support
This Husky generator is covered by a manufacturer's warranty. Please refer to the warranty card included with your product for specific terms and conditions.
For technical assistance, parts, or warranty claims, please contact Husky customer support through their official webwebstedet eller kontaktoplysningerne i din produktdokumentation.
Always provide your model number (HKG3000) and serial number when contacting support to ensure efficient service.


