
1. Produktet er slutview
The EarMen TR-Amp is a high-performance portable USB Digital-to-Analog Converter (DAC), preamplifier og hovedtelefoner amplifier. It is designed to deliver superior audio quality from various digital sources, supporting high-resolution audio formats including PCM, DoP, DXD, DSD64/128, and MQA. Its compact design makes it suitable for both desktop and portable use.

Figur 1: Øverst view of the EarMen TR-Amp, visasing the brand logo and sleek red finish.
2. Opsætning og forbindelser
2.1 Pakkens indhold
- EarMen TR-Amp Enhed
- USB-C to USB-C Cable (for data and charging)
- Brugervejledning (dette dokument)
Note: A USB power adapter for charging is not included. Use a standard 5V USB charger.
2.2 Charging the TR-Amp
The TR-Amp features a built-in rechargeable Lithium Polymer battery. Before first use, fully charge the device.
- Connect the supplied USB-C cable to the "CHRG" USB-C port on the rear of the TR-Amp.
- Connect the other end of the USB-C cable to a 5V USB power adapter or a powered USB port on a computer.
- The LED indicator on the front panel will illuminate during charging. It will change color or turn off when charging is complete (refer to LED indicator section for details).
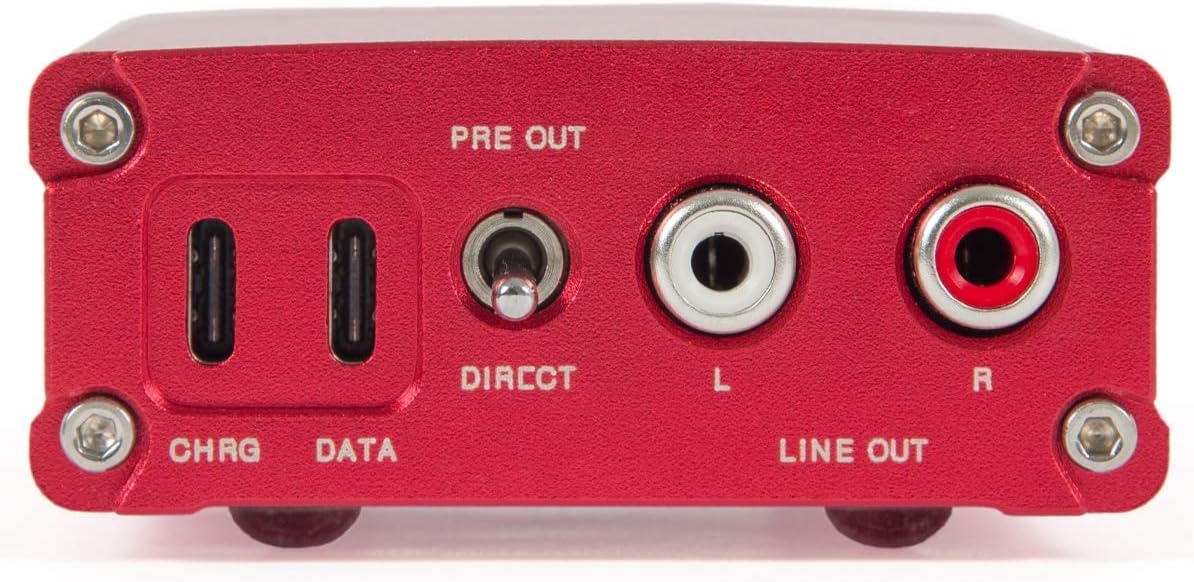
Figure 2: Rear panel of the TR-Amp, showing the "CHRG" (charging) and "DATA" (data transfer) USB-C ports, along with Line Out connections.
A full charge typically provides several hours of playback, depending on usage and volume levels. The device does not have a dedicated charge status indicator beyond the low charge warning, so monitor charging time.
2.3 Tilslutning til en kildeenhed
The TR-Amp is compatible with iPhones, Android devices, MacOS, and Windows computers.
- Connect the supplied USB-C cable to the "DATA" USB-C port on the rear of the TR-Amp.
- Connect the other end of the USB-C cable to your source device (e.g., smartphone, tablet, computer).
- Ensure your source device's audio output is set to the TR-Amp. For Windows, you may need to install specific drivers (available on the EarMen website). MacOS and Linux typically do not require additional drivers.

Figure 3: The TR-Amp connected via USB-C to a smartphone, illustrating its portable use with digital audio sources.
For optimal performance, use high-quality USB-C to USB-C cables. If your device uses a different port (e.g., USB-A, Lightning), use a compatible adapter or cable.
3. Betjening
3.1 Tænd/sluk og lydstyrkekontrol
The TR-Amp is powered on and off using the volume knob located on the front panel.
- To power on: Rotate the volume knob clockwise until you hear a click. The LED indicator will light up.
- To power off: Rotate the volume knob counter-clockwise until you hear a click and the LED indicator turns off.
- Volume adjustment: Once powered on, rotate the knob clockwise to increase volume and counter-clockwise to decrease volume. Start with a low volume setting before playing audio.

Figure 4: Front panel of the TR-Amp, showing the 3.5mm and 6.3mm headphone outputs, and the combined power/volume knob.
3.2 Hovedtelefonudgang
The TR-Amp provides two headphone outputs:
- 3.5mm (1/8 inch) Headphone Jack: For standard headphones and in-ear monitors.
- 6.3mm (1/4 inch) Headphone Jack: For larger, audiophile-grade headphones.
Connect your headphones to the appropriate jack. The TR-Amp's powerful amplifier can drive a wide range of headphones.
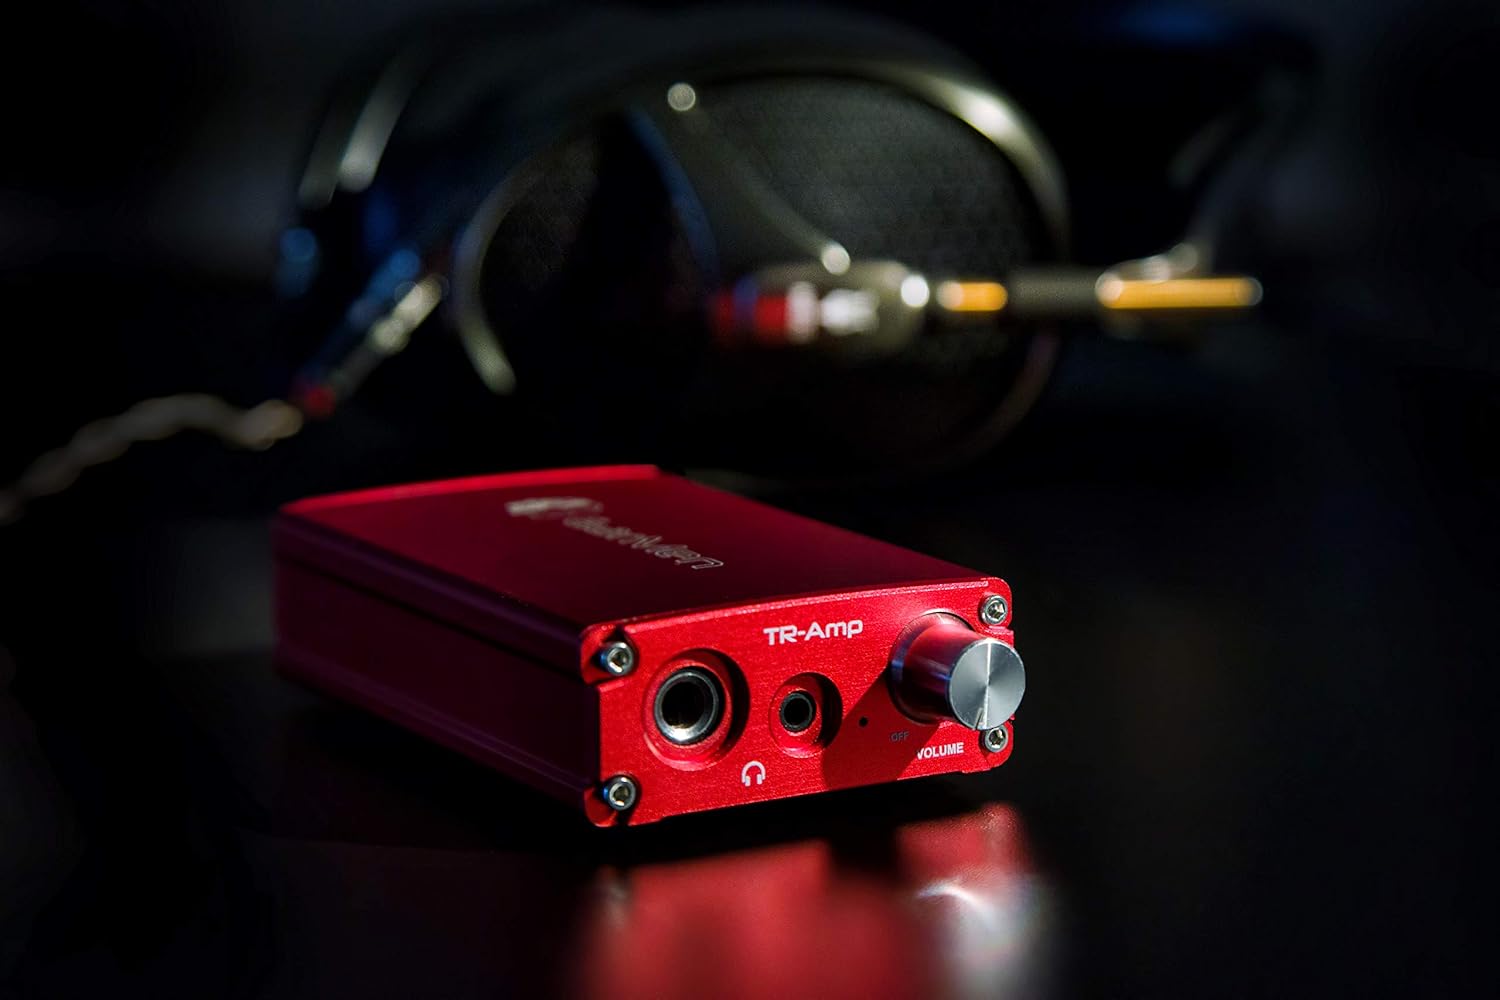
Figure 5: The TR-Amp positioned with headphones in the background, illustrating its primary function as a headphone amplivligere.
3.3 Line Out Functionality
The rear panel features RCA Line Out connections for connecting the TR-Amp til en ekstern amplifier or powered speakers. There are two modes:
- Direkte tilstand: Provides a fixed, unattenuated line-level output (2.1V). This mode bypasses the volume control of the TR-Amp and is ideal when connecting to a preamplifier eller integreret amplifier with its own volume control.
- Preout Mode: Provides a variable line-level output (up to 3.4V) controlled by the TR-Amp's volume knob. This mode is suitable for connecting directly to a power amplifier eller drevne højttalere.
Use the toggle switch labeled "DIRECT" on the rear panel to select between Direct and Preout modes. Ensure the TR-Amp's volume is set appropriately when using Preout mode to avoid sudden loud sounds.
3.4 MQA-afspilning
The TR-Amp features an integrated hardware Master Quality Authenticated (MQA) renderer. When playing MQA audio files, the TR-Amp will automatically unfold the extra information from the signal, providing a high-resolution audio experience. The LED indicator will change color to signify MQA playback (refer to LED indicator section for details).
4. Vedligeholdelse og pleje
- Rensning: Use a soft, dry cloth to clean the exterior of the TR-Amp. Avoid using harsh chemicals, solvents, or abrasive materials.
- Opbevaring: Opbevar enheden et køligt, tørt sted væk fra direkte sollys og ekstreme temperaturer.
- Batteripleje: For at forlænge batteriets levetid bør du undgå at aflade batteriet helt ofte. Hvis det opbevares i længere tid, skal du oplade batteriet til cirka 50 % og genoplade det et par gange om måneden.
- Håndtering: Handle the TR-Amp forsigtigt. Undgå at tabe den eller udsætte den for hårde stød.
5. Fejlfinding
5.1 Ingen lydudgang
- Ensure the TR-Amp is powered on and the volume is turned up.
- Verify that your headphones or external amplivligere er korrekt forbundet.
- Check the USB data connection to your source device.
- Confirm that the TR-Amp is selected as the audio output device on your computer or smartphone.
- If using Line Out, ensure the correct mode (Direct/Preout) is selected and the connected amplifier is powered on and set to the correct input.
5.2 Enhed genkendes ikke af computer/smartphone
- Ensure the USB cable is connected to the "DATA" port on the TR-Amp.
- Try a different USB-C cable or USB port on your source device.
- Genstart din computer eller smartphone.
- For Windows users, download and install the latest drivers from the EarMen official webwebsted.
5.3 Opladningsproblemer
- Ensure the USB cable is connected to the "CHRG" port on the TR-Amp.
- Verify that the USB power adapter or computer USB port is providing power.
- Prøv et andet USB-C-kabel eller strømadapter.
- If the device has been completely discharged for a long time, it may take a few minutes for the charging indicator to appear.
5.4 Poor Audio Quality / Distortion
- Check the source audio file kvalitet.
- Sørg for, at alle kabler er korrekt tilsluttet.
- Reduce the volume level on both the TR-Amp and your source device to prevent clipping.
- Test with different headphones or speakers to rule out external equipment issues.
6. Tekniske specifikationer
| Input | USB-C |
| Hovedtelefonudgang | 3.5 mm og 6.3 mm |
| Hovedtelefoner Amp THD+N | <0.005 % |
| Hovedtelefoner Amp SNR | >114dB |
| Hovedtelefoner Amp Strømudgang | 400mW@2.5V into 16Ω, 350mW@3.4V into 32Ω |
| Line Out Direct Mode THD+N | <0.005 % |
| Line Out Direct Mode SNR | >114dB |
| Line Out Direct Mode Output | 2.1V |
| Line Out Preout Mode THD+N | <0.007 % |
| Line Out Preout Mode SNR | >114dB |
| Line Out Preout Mode Output | 3.4V |
| Understøttede lydformater | PCM 32bit/384kHz, DoP, DXD 384/352.8kHz, DSD64/128, MQA 384kHz |
| Batteri | 3700mAh Lithium Polymer |
| Dimensioner (L x B x H) | 5.08" x 2.6" x 1.18" (ca. 129 mm x 66 mm x 30 mm) |
| Vægt | 8.5 ounces (ca. 241 g) |
| DAC-chip | ES9038Q2M SABRE 32 Reference DAC |
| Hovedtelefoner Amp Chip | TPA6120 |
7. Garanti og support
7.1 Garantioplysninger
For detailed warranty terms and conditions, please refer to the official EarMen webwebstedet eller kontakt din autoriserede forhandler. Gem din købsbevis til garantikrav.
7.2 Kundesupport
If you encounter any issues not covered in this manual or require further assistance, please contact EarMen customer support through their official webwebsted. Angiv din produktmodel og en detaljeret beskrivelse af problemet for effektiv support.
Official EarMen Webwebsted: www.earmen.com