
InFocus IN119BB
InFocus IN119BB Multimedia Projector User Manual
Model: IN119BB
Indledning
This manual provides comprehensive instructions for the safe and efficient operation of your InFocus IN119BB Multimedia Projector. Please read this manual thoroughly before using the projector and retain it for future reference.
The InFocus IN119BB projector is designed for versatile use, offering a very long lamp life, high brightness, and extensive connectivity options. Its compact and lightweight design ensures ease of portability and installation.
Sikkerhedsoplysninger
Overhold altid følgende sikkerhedsforanstaltninger for at forhindre brand, elektrisk stød eller personskade:
- Bloker ikke ventilationsåbninger.
- Udsæt ikke projektoren for regn eller fugt.
- Overlad al service til kvalificeret servicepersonale.
- Undgå at se direkte ind i projektorlinsen, når lamp er tændt.
- Sørg for korrekt jordforbindelse til netledningen.
Produkt overview
Komponenter og kontroller
Familiarize yourself with the main components and controls of your InFocus IN119BB projector.

Figur 1: Vinklet view of the InFocus IN119BB projector, showing the lens, ventilation grilles, and top panel controls.

Figur 2: Front view of the InFocus IN119BB projector, highlighting the main projection lens.

Figur 3: Top-down vinklet view of the InFocus IN119BB projector, showing the control panel layout.

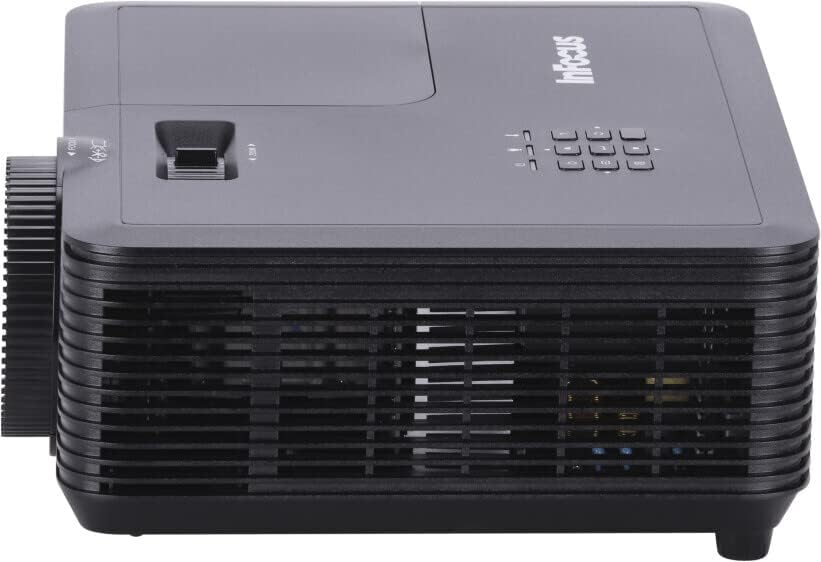
Figur 4: Side view of the InFocus IN119BB projector, illustrating its compact profile.
Figur 5: Bag view of the InFocus IN119BB projector, displaying all available input and output ports including HDMI, VGA, S-Video, and audio connections.
Opsætning
Placering
Choose a stable, flat surface for the projector. Ensure adequate ventilation around the unit. For optimal image quality, position the projector perpendicular to the projection surface.
Tilslutning af strøm
- Tilslut netledningen til projektorens strømindgang.
- Plug the other end of the power cord into a grounded electrical outlet (240V recommended).
Tilslutning af inputkilder
The IN119BB projector supports multiple input sources:
- HDMI: Use an HDMI cable to connect your computer, Blu-ray player, or other HDMI-enabled device to either HDMI 1 or HDMI 2 port.
- VGA: Connect your computer's VGA output to the VGA IN port using a VGA cable.
- S-video: For older video sources, connect an S-Video cable to the S-VIDEO port.
- Lyd: Connect external audio devices to the AUDIO IN port. Audio output is available via the AUDIO OUT port.
Betjeningsvejledning
Tænd/sluk
- To power on, press the Power button on the projector or remote control. The power indicator light will turn blue.
- To power off, press the Power button twice. The projector will enter a cooling down cycle before shutting down completely.
Justering af billedet
- Fokus: Drej fokusringen på objektivet, indtil billedet er skarpt og klart.
- Zoom: Adjust the zoom lever next to the lens to change the image size.
- Keystone-korrektion: Hvis billedet ser trapezformet ud, skal du bruge keystone-korrektionen i OSD-menuen til at firkante billedet.
Valg af inputkilde
Press the "Source" button on the projector's control panel or remote control to cycle through available input sources (HDMI 1, HDMI 2, VGA, S-Video).
On-Screen Display (OSD) menu
Press the "Menu" button to access the OSD menu. Use the arrow keys to navigate and the "Enter" button to select options. Adjust settings such as brightness, contrast, color, and aspect ratio.
Opretholdelse
Lamp Udskiftning
Lamp life of the IN119BB is very long, but eventually, it will need replacement. When the lamp indicator lights up or the image becomes dim, it's time to replace the lampSe de detaljerede oplysninger.amp replacement guide in the full user manual for specific steps.
Rengøring af projektoren
- Linse: Brug en blød, fnugfri klud, der er specielt designet til optiske linser. Brug ikke slibende rengøringsmidler.
- Casing: Tør projektoren c afasing med en blød, damp klæde. Undgå at bruge skrappe kemikalier.
- Luftfiltre: Regularly check and clean the air filters to ensure proper ventilation and prevent overheating.
Fejlfinding
| Problem | Mulig årsag | Løsning |
|---|---|---|
| Intet billede vises | Power cord disconnected; Incorrect input source selected; Lamp spørgsmål. | Check power connection; Select correct input source; Replace lamp om nødvendigt. |
| Billedet er sløret | Objektivet er ude af fokus; Projektoren er for tæt på/langt fra skærmen. | Adjust focus ring; Reposition projector. |
| Projektoren overophedes | Blocked ventilation; Dirty air filter. | Ensure clear ventilation; Clean air filter. |
Specifikationer
| Feature | Detalje |
|---|---|
| Modelnummer | IN119BB |
| Displayteknologi | DLP |
| Indfødt opløsning | 1280 x 800 (WUXGA) |
| Lysstyrke | 3500 lumen |
| Forbindelse | HDMI (x2), VGA In, VGA Out, S-Video, Audio In, Audio Out, RS232 |
| Strømforsyning | 240V, 267W |
| Produktmål (L x B x H) | 23.62 x 31.24 x 10.67 cm |
| Produktets vægt | 2.6 kg (5.5 pund) |
| Formfaktor | Transportabel |
| Anbefalet brug | Hjemmebiograf |
Garanti og support
For warranty information and technical support, please visit the official InFocus webwebstedet eller kontakt deres kundeservice. Behold din købskvittering som købsbevis.
Online support: www.infocus.com/support
Ask a question about this manual
Ask about setup, troubleshooting, compatibility, parts, safety, or missing instructions. Manuals+ will review the question and use this page’s manual context to help answer it.