
1. Produktet er slutview
The NANPU 1/4" NPT Compressed Air Filter Regulator is designed to clean and dry compressed air while providing precise pressure regulation. It features a 5-micron brass filter element for efficient filtration and a manual drain for easy maintenance. This unit is suitable for various pneumatic applications requiring clean, regulated air.
Nøglefunktioner:
- 1/4" NPT port size for standard connections.
- 5-micron brass filter element for superior filtration and extended life.
- Piston-type pressure regulating screw for durability and leak prevention.
- Two-way installation: air input from left or right, with interchangeable pressure gauge and bracket positions.
- Includes a 0-150 psi gauge for accurate pressure monitoring.
- Manual drain for convenient moisture removal.
- Polycarbonate bowl with plastic guard for protection.
- Comes with a metal bracket for mounting.

Billede 1.1: Generelt view of the NANPU 1/4" NPT Compressed Air Filter Regulator.
2. Produktkomponenter
Familiarize yourself with the main components of the air filter regulator:

Image 2.1: Diagram showing the Pressure Regulating Knob, Bracket, Regulator Body, Metal Gauge, Filter Element, Filter Bowl, and Manual Drain.
- Pressure Regulating Knob: Used to adjust the output air pressure.
- Beslag: For mounting the unit securely.
- Regulatororgan: The main housing of the unit.
- Metal Gauge: Displays the regulated output pressure in psi and bar.
- Filterelement: The 5-micron brass element that removes particulates from the air.
- Filter Bowl: Collects condensed moisture and debris.
- Manuel dræning: Valve at the bottom of the filter bowl to release collected moisture.
3. Specifikationer
| Feature | Værdi |
|---|---|
| Modelnavn | NANPU 1/4" NPT Compressed Air Filter Regulator |
| Port størrelse | 1/4" NPT-gevind |
| Filterelement | 5 Micron Brass |
| Maks indløbstryk | 10 bar (145 psi) |
| Driftstryk | 0-10 bar (0-145 psi) |
| Flowhastighed | 73 SCFM @ 90 psi (2080 L/Minute @ 6 Bar) |
| Temperaturområde | 41-140°F (5-60°C) |
| Materiale | Zinklegering |
| Afløbstype | Manuel |
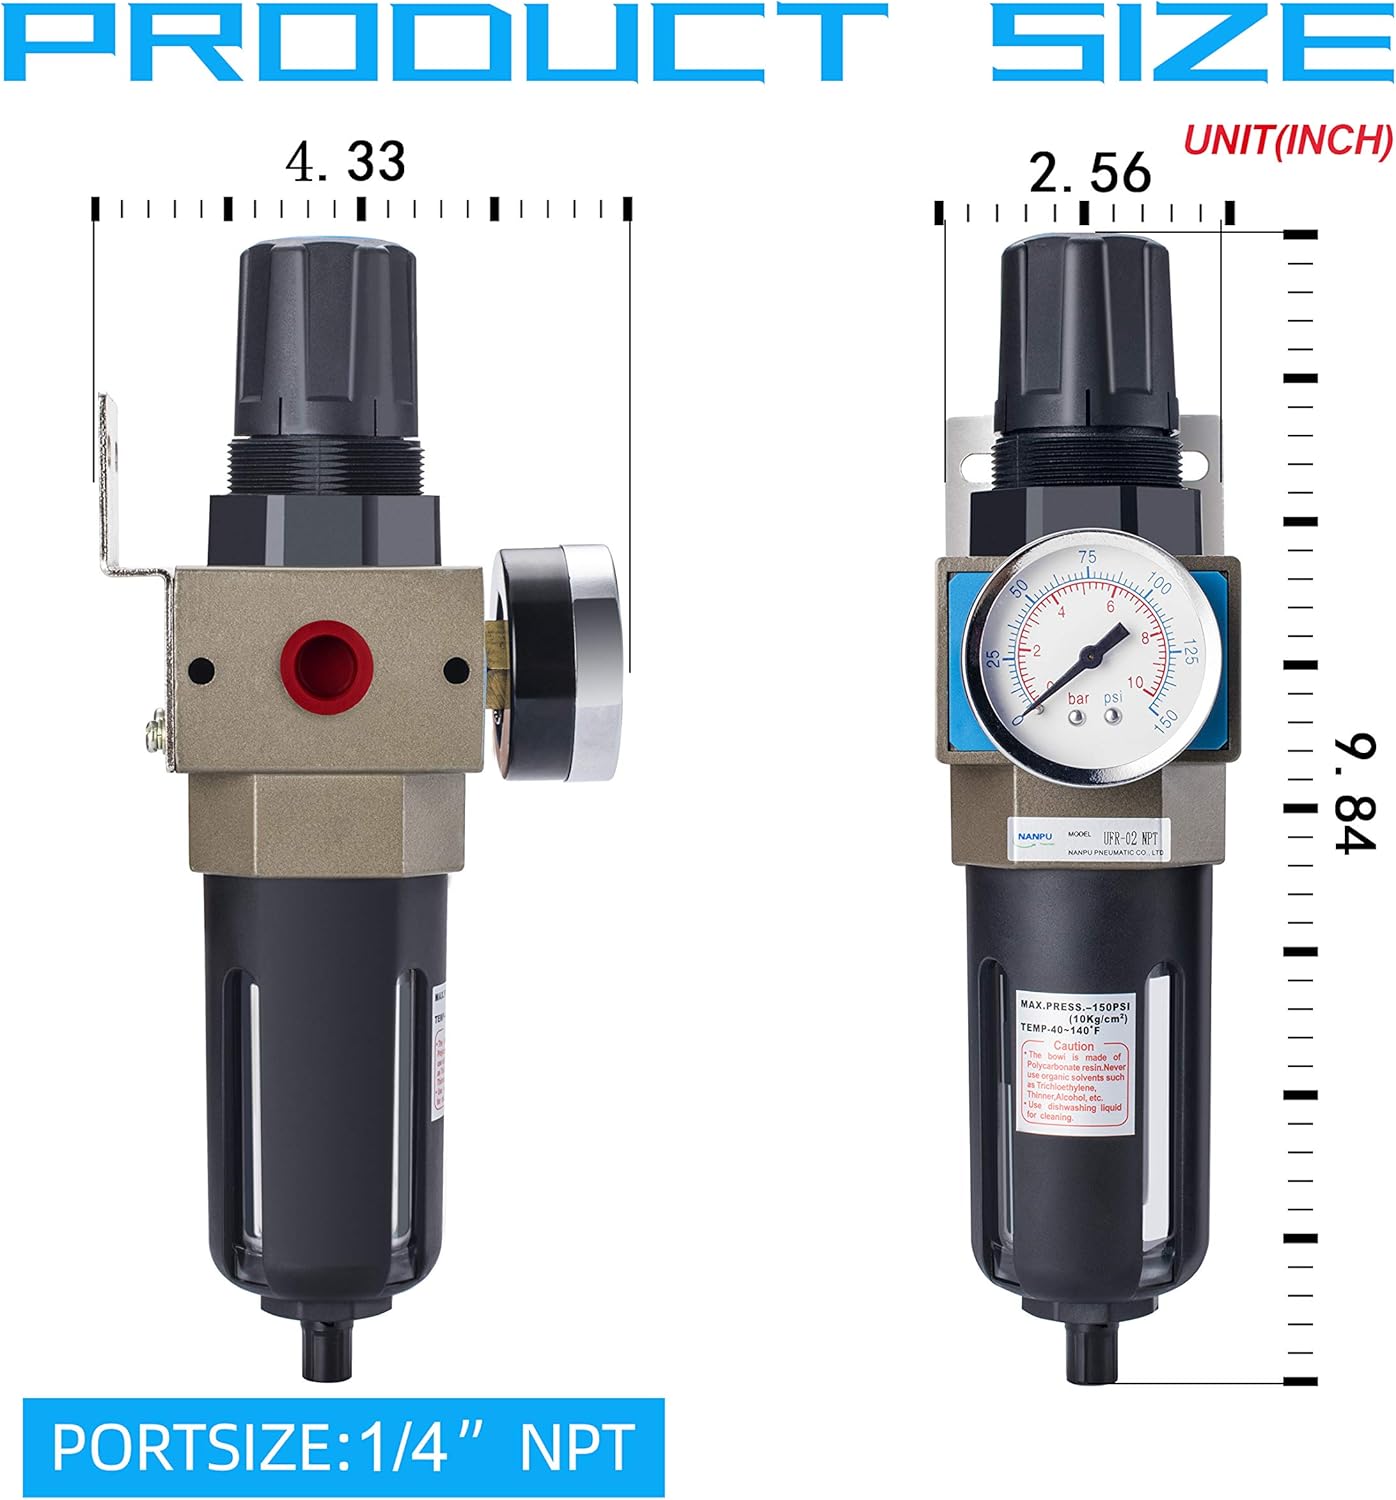
Image 3.1: Product dimensions, showing approximate height of 9.84 inches and width of 4.33 inches.
4. Opsætning og installation
Proper installation is crucial for optimal performance and safety. Follow these steps:
- Forbered forbindelser: Ensure all air lines and fittings are clean and free of debris. Use thread sealant tape on all NPT connections to prevent leaks.
- Mount the Regulator: Use the provided metal bracket to securely mount the regulator to a stable surface. Ensure it is mounted vertically with the filter bowl facing downwards.
- Tilslut luftledninger:
- Connect the compressed air supply line to the "IN" port.
- Connect the air tool or system line to the "OUT" port.
Note: The unit supports two-way installation, meaning air can enter from either the left or right port. The pressure gauge and bracket positions can be exchanged to suit your setup.
- Installer trykmåler: Screw the 0-150 psi pressure gauge into the designated port. Ensure it is finger-tight, then use a wrench for a final snug turn, being careful not to overtighten.
- Indledende trykindstilling: Before applying full pressure, ensure the pressure regulating knob is turned counter-clockwise to its lowest setting.

Image 4.1: Diagram illustrating air input ("IN") and output ("OUT") directions, and the pressure regulating knob.
5. Betjeningsvejledning
- Apply Air Pressure: Slowly open the main air supply valve to introduce compressed air to the regulator.
- Juster udgangstryk:
- Pull up the pressure regulating knob.
- Rotate the knob clockwise to increase the output pressure, or counter-clockwise to decrease it.
- Monitor the pressure gauge until the desired pressure is reached.
- Push the knob down to lock the setting.
- Overvåg ydeevne: Regularly check the pressure gauge to ensure the desired pressure is maintained during operation.
6. Vedligeholdelse
Regular maintenance ensures the longevity and efficient operation of your air filter regulator.
6.1. Draining Moisture
- The filter bowl will collect condensed moisture and oil.
- To drain, pull down the manual drain valve located at the bottom of the filter bowl.
- Allow all collected liquid to drain completely, then release the drain valve.
- Perform this task regularly, especially in humid environments or with heavy use, to prevent water from entering your air tools.
6.2. Filter Element Cleaning/Replacement
- The 5-micron brass filter element is designed for long life and reusability.
- If you notice a significant drop in airflow or pressure, or if the air quality deteriorates, the filter element may need cleaning.
- To access the filter element:
- Depressurize the air system completely.
- Unscrew the filter bowl from the regulator body.
- Carefully remove the brass filter element.
- Clean the element by blowing compressed air through it in the reverse direction of normal flow, or by soaking it in a suitable cleaning solution (e.g., warm soapy water) and rinsing thoroughly.
- Ensure the element is completely dry before reinstallation.
- Reassemble the unit, ensuring the filter bowl is securely tightened.
- Replace the filter element if it is damaged or cannot be cleaned effectively.
7. Fejlfinding
| Problem | Mulig årsag | Løsning |
|---|---|---|
| Luftlækage |
|
|
| No Airflow or Low Pressure Output |
|
|
| Water in Air Tools |
|
|
8. Garanti og support
For warranty information or technical support, please contact NANPU customer service. Refer to the product packaging or the official NANPU webwebsted for kontaktoplysninger.
Du kan også besøge NANPU Store on Amazon for yderligere produktinformation og supportressourcer.