
1. Introduktion
This instruction manual provides detailed guidance for the installation, operation, and maintenance of your Sonew Smart Electronic Door Lock. This lock offers multiple unlocking methods, including fingerprint, password, mobile application, IC card, and traditional key, enhancing security and convenience for your home or office.
2. Sikkerhedsoplysninger
- Læs alle instruktioner omhyggeligt før installation og brug.
- Forsøg ikke selv at skille låsen ad eller reparere den. Kontakt kvalificeret personale for service.
- Sørg for korrekt batteripolaritet, når du installerer batterier.
- Keep mechanical keys in a safe location outside the property.
- Protect the keypad from excessive force or sharp objects.
3. Pakkens indhold
Kontroller, at alle komponenter er til stede i pakken, før installationen påbegyndes:
- 1 x Door Lock (External Unit)
- 1 x Electric Lock Body (Internal Unit)
- 1 x Lock Ear
- 1 x Lock Cylinder
- 3 x Mekaniske nøgler
- 1 x monteringsplade
- 1 x Screw Bag (containing various screws for installation)
- 2 x monteringsbeslag
- 2 x IC-kort
- 1 x Brugsanvisning (dette dokument)
4. Specifikationer
| Feature | Specifikation |
|---|---|
| Materiale | Stainless Steel + Aluminium Alloy |
| Virkende strømforsyning | 4.5V-6.5V |
| Strømforsyning | 4 x AA batterier (medfølger ikke) |
| Arbejdsstrøm | ≤250mA |
| Stillegående strøm | ≤55uA |
| Oplåsningsmetoder | Mobile Phone App, Fingerprint, Password, IC Card, Key |
| Appkompatibilitet | For TUYA App |
| Korttype | 13.56MHZ IC Card |
| Fingeraftrykskapacitet | 100 |
| Kort kapacitet | 100 |
| Adgangskodekapacitet | 100 |
| Password Længde | 6-8 Digits (Virtual Password: 16 Digits) |
| Opløsning | 500 DPI |
| Afvisningsrate | ≤0.15 % |
| Falsk genkendelsesrate | ≤0.00004 % |
| Driftsfugtighed | 20%-93% |
| Arbejdstemperatur | 0℃-60℃ |
| Fingerprint Keypad Size | 166 x 58 x 35 mm (6.5 x 2.3 x 1.4 tommer) |
5. Opsætning og installation
The Sonew Smart Electronic Door Lock is designed for indoor single-head lock installation. Follow these steps for proper setup:
- Forbered døren: Ensure your door is compatible with the lock's dimensions.
- Installer låselegemet: Mount the electric lock body (internal unit) onto the door frame or door, ensuring proper alignment with the strike plate.
- Install the External Unit: Position the external keypad unit on the outside of the door.
- Tilslut ledninger: Carefully connect the wiring between the external keypad unit and the internal lock body as per the diagram.
- Installer batterier: Open the battery compartment on the internal unit and insert 4 AA batteries (not included), observing correct polarity.
- Sikre komponenter: Use the provided screws and mounting brackets to firmly secure both internal and external units.
- Test drift: After installation, test the mechanical key and basic lock/unlock functions before programming.

Figure 5.1: Internal and External Components Diagram. This image illustrates the various parts of the lock, including the door sensor, motor connector, battery box, resetting button, touch keypad, fingerprint reader, card reading area, keyhole cover, and mechanical keyhole.

Figure 5.2: Stainless Steel Rotary Switch. This image shows the internal stainless steel rotary mechanism, designed for quiet and low-noise operation.
6. Betjeningsvejledning
Your Sonew Smart Electronic Door Lock offers multiple convenient ways to unlock your door.
6.1. Oplåsning med fingeraftryk
The lock features a sensitive fingerprint reader. To unlock, place your registered finger on the fingerprint sensor. The lock will disengage if the fingerprint is recognized. The lock supports up to 100 unique fingerprints.

Figur 6.1: Overview of Unlocking Methods. This image displays the lock alongside icons representing fingerprint, password, card, key, and app unlock options.
6.2. Password Unlocking
Enter your registered 6-8 digit password on the capacitive touch screen keypad. The lock supports up to 100 passwords.
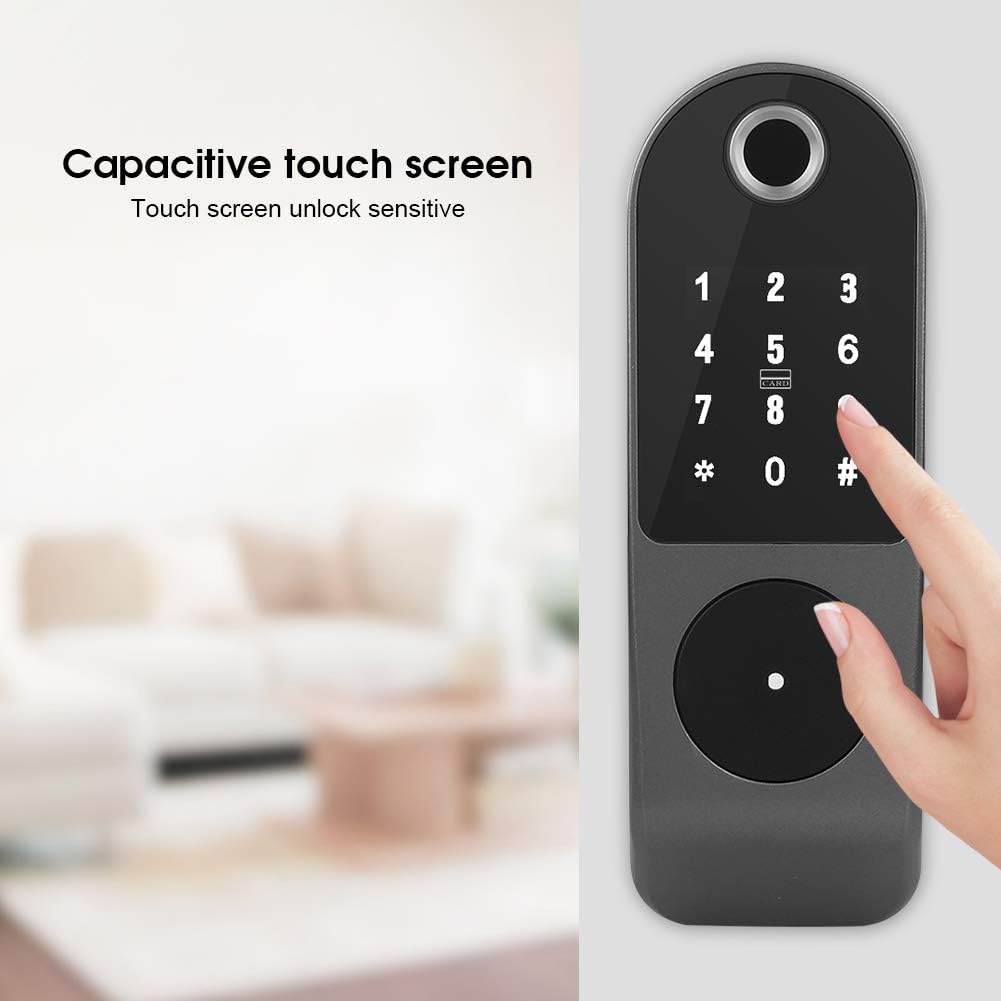
Figure 6.2: Capacitive Touch Screen. A hand is shown interacting with the sensitive touch screen keypad for unlocking.
6.2.1. Anti-Peep Password Function
To prevent others from observing your password, you can enter a sequence of random digits before and after your actual password. For example, hvis din adgangskode er 66666, kan du indtaste 123 + 66666 + 345. The lock will recognize the correct password within the longer sequence.

Figure 6.3: Password Anti-Peeping Function. The image highlights the keypad, indicating the ability to enter extra digits for security.
6.3. Mobile App Unlocking
Download and install the TUYA app on your smartphone. Follow the app's instructions to pair it with your lock. Once paired, you can remotely unlock the door using the app.

Figure 6.4: Mobile App Unlocking. A hand holding a smartphone is shown next to the lock, illustrating the app control feature.
6.4. Oplåsning af IC-kort
Present a registered 13.56MHZ IC card to the card reading area on the lock. The lock will disengage upon successful card recognition. The lock supports up to 100 IC cards.

Figure 6.5: IC Card Unlocking. An IC card is being held near the lock's card reading area to unlock the door.
6.5. Key Unlocking
In case of electronic malfunction or battery depletion, the lock can be opened using the provided mechanical keys. The keyhole is discreetly located at the bottom of the external unit, often covered by a small cap.

Figure 6.6: Hidden Keyhole and Emergency Charging Port. This image shows the location of the hidden mechanical keyhole and the emergency charging port at the bottom of the lock.
6.6. Automatic Lock Function
For enhanced security, the lock features an automatic lock function. If an incorrect password is entered more than 5 times within a 5-minute period, the keypad will automatically lock for 90 seconds. During this period, the system will not respond to any input. This feature helps prevent unauthorized access attempts.
6.7. Low Battery Reminder and Emergency Power
The lock is equipped with a low power consumption technology for extended battery life. When the battery voltage drops below 4.5V, the lock will issue a low battery alarm. After this alarm, the lock can still be unlocked approximately 200 times. In case of complete battery depletion, an emergency charging interface is available on the external unit (refer to Figure 6.6) to provide temporary power for unlocking.
7. Vedligeholdelse
- Rensning: Tør låsens overflade af med en blød, tør klud. Undgå at bruge slibende rengøringsmidler eller opløsningsmidler, der kan beskadige overfladen eller de elektroniske komponenter.
- Udskiftning af batteri: Replace all four AA batteries when the low battery alarm sounds. Use high-quality alkaline batteries for optimal performance.
- Tastaturpleje: Keep the touch keypad clean and dry to ensure sensitive operation.
- Fingeraftrykssensor: Ensure the fingerprint sensor is clean and free of debris for accurate recognition.
8. Fejlfinding
If you encounter issues with your Sonew Smart Electronic Door Lock, refer to the following common problems and solutions:
| Problem | Mulig årsag | Løsning |
|---|---|---|
| Lås reagerer ikke | Dead batteries; loose wiring; system error | Replace batteries; check wiring connections; use emergency charging port; try mechanical key. |
| Fingeraftryk ikke genkendt | Fingerprint sensor dirty; unregistered fingerprint; incorrect finger placement | Clean sensor; ensure finger is registered; place finger flat on sensor. |
| Adgangskoden virker ikke | Incorrect password; lock-out due to multiple failed attempts; unregistered password | Verify password; wait 90 seconds if locked out; ensure password is registered. |
| IC Card not working | Unregistered card; card damaged; incorrect card placement | Ensure card is registered; try another card; place card correctly on reading area. |
| Problemer med appforbindelse | Bluetooth/Wi-Fi off; app not paired; network issues | Ensure Bluetooth/Wi-Fi is on; re-pair device in app; check network connection. |
9. Garanti og support
Specific warranty information for the Sonew Smart Electronic Door Lock (Model B08JV27R2L) is not provided in this manual. Please refer to the product packaging or the retailer's webwebsted for garantioplysninger.
For technical support, troubleshooting assistance beyond this manual, or inquiries regarding warranty claims, please contact the retailer or manufacturer directly through their official support channels. Keep your purchase receipt and product model number (B08JV27R2L) readily available when seeking support.