Apevia Genesis Pro G-PRO-BK Mid Tower Gaming Case Instruction Manual
Model: G-PRO-BK | Brand: Apevia
Indledning
This manual provides detailed instructions for the installation, operation, and maintenance of your Apevia Genesis Pro G-PRO-BK Mid Tower Gaming Case. This case is designed to accommodate various PC components, offering excellent airflow and customizable RGB lighting. Please read these instructions carefully before beginning assembly to ensure proper setup and functionality.
1. Opsætning og installation
1.1 Udpakning og klargøring
Carefully remove the case from its packaging. Place it on a stable, flat surface. Identify all included accessories, such as screws, standoffs, and cable ties.
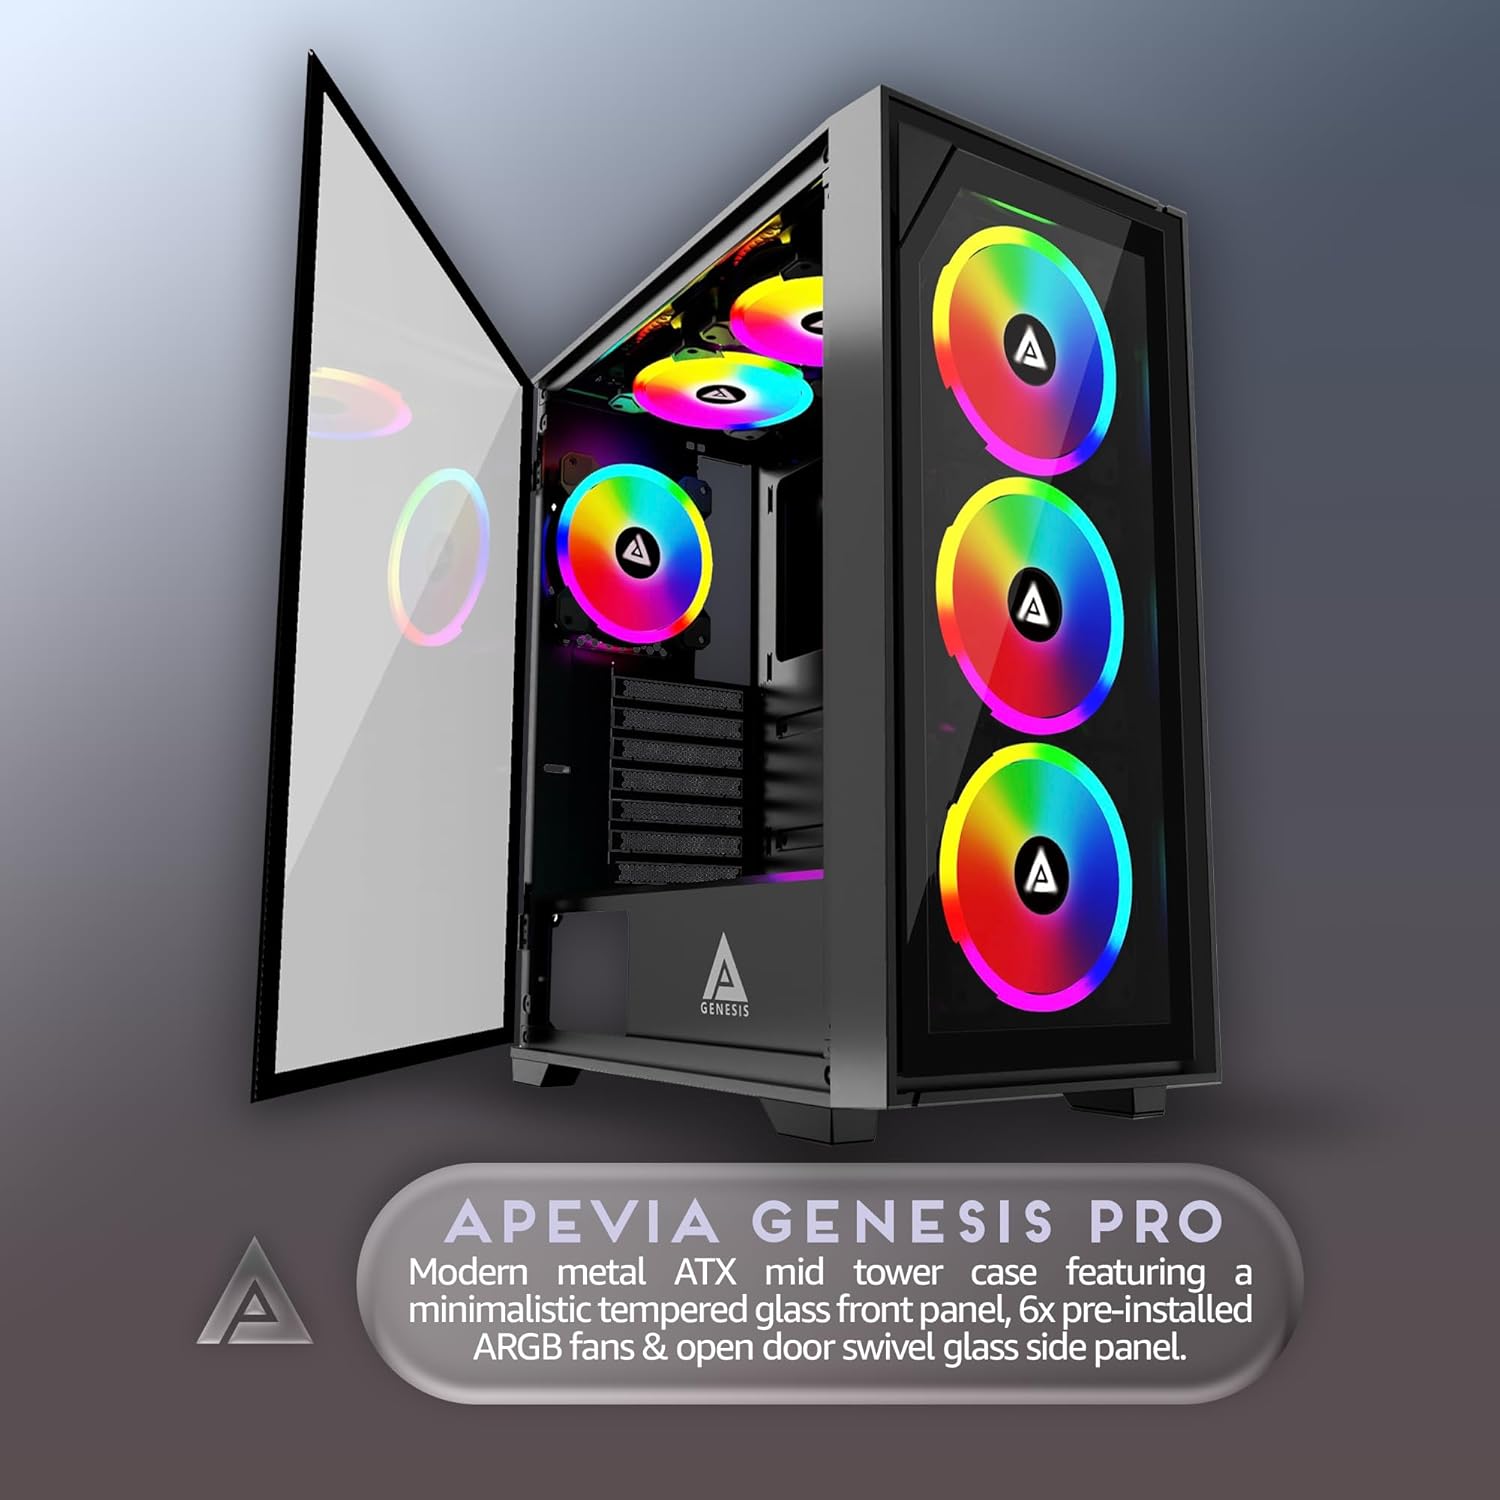
Figure 1: Apevia Genesis Pro G-PRO-BK with side panel open.
The case features two tempered glass panels: one on the left side and one on the front. The left side panel is typically secured with thumbscrews at the rear, while the front panel may be magnetically attached or secured with clips. Exercise caution when handling glass panels to prevent damage.
1.2 Installation af bundkort
Install the necessary standoffs for your motherboard form factor (ATX, Micro-ATX, or Mini-ITX). The case supports standard ATX, Micro-ATX, and Mini-ITX motherboards.
Placer I/O-skjoldet i den bageste åbning af kabinettet.
Juster forsigtigt dit bundkort med afstandsstykkerne og I/O-skjoldet, og fastgør det derefter med skruer.
1.3 Installation af strømforsyning
The power supply mounts at the top of the case. Secure your power supply unit (PSU) into the designated bay using the provided screws.
1.4 Installation af lagerdrev
The case supports up to two 3.5-inch hard drives and two 2.5-inch solid-state drives (SSDs). Locate the drive bays and secure your storage devices using the appropriate screws.
Figure 2: Internal layout with drive bay locations and cable management options.
1.5 Installation af grafikkort (GPU)
Install your graphics card into the appropriate PCIe slot on your motherboard. The case supports video cards up to 350mm in length. Secure the GPU with the expansion slot screws.
1.6 Installation af kølesystem (ventilatorer og radiatorer)
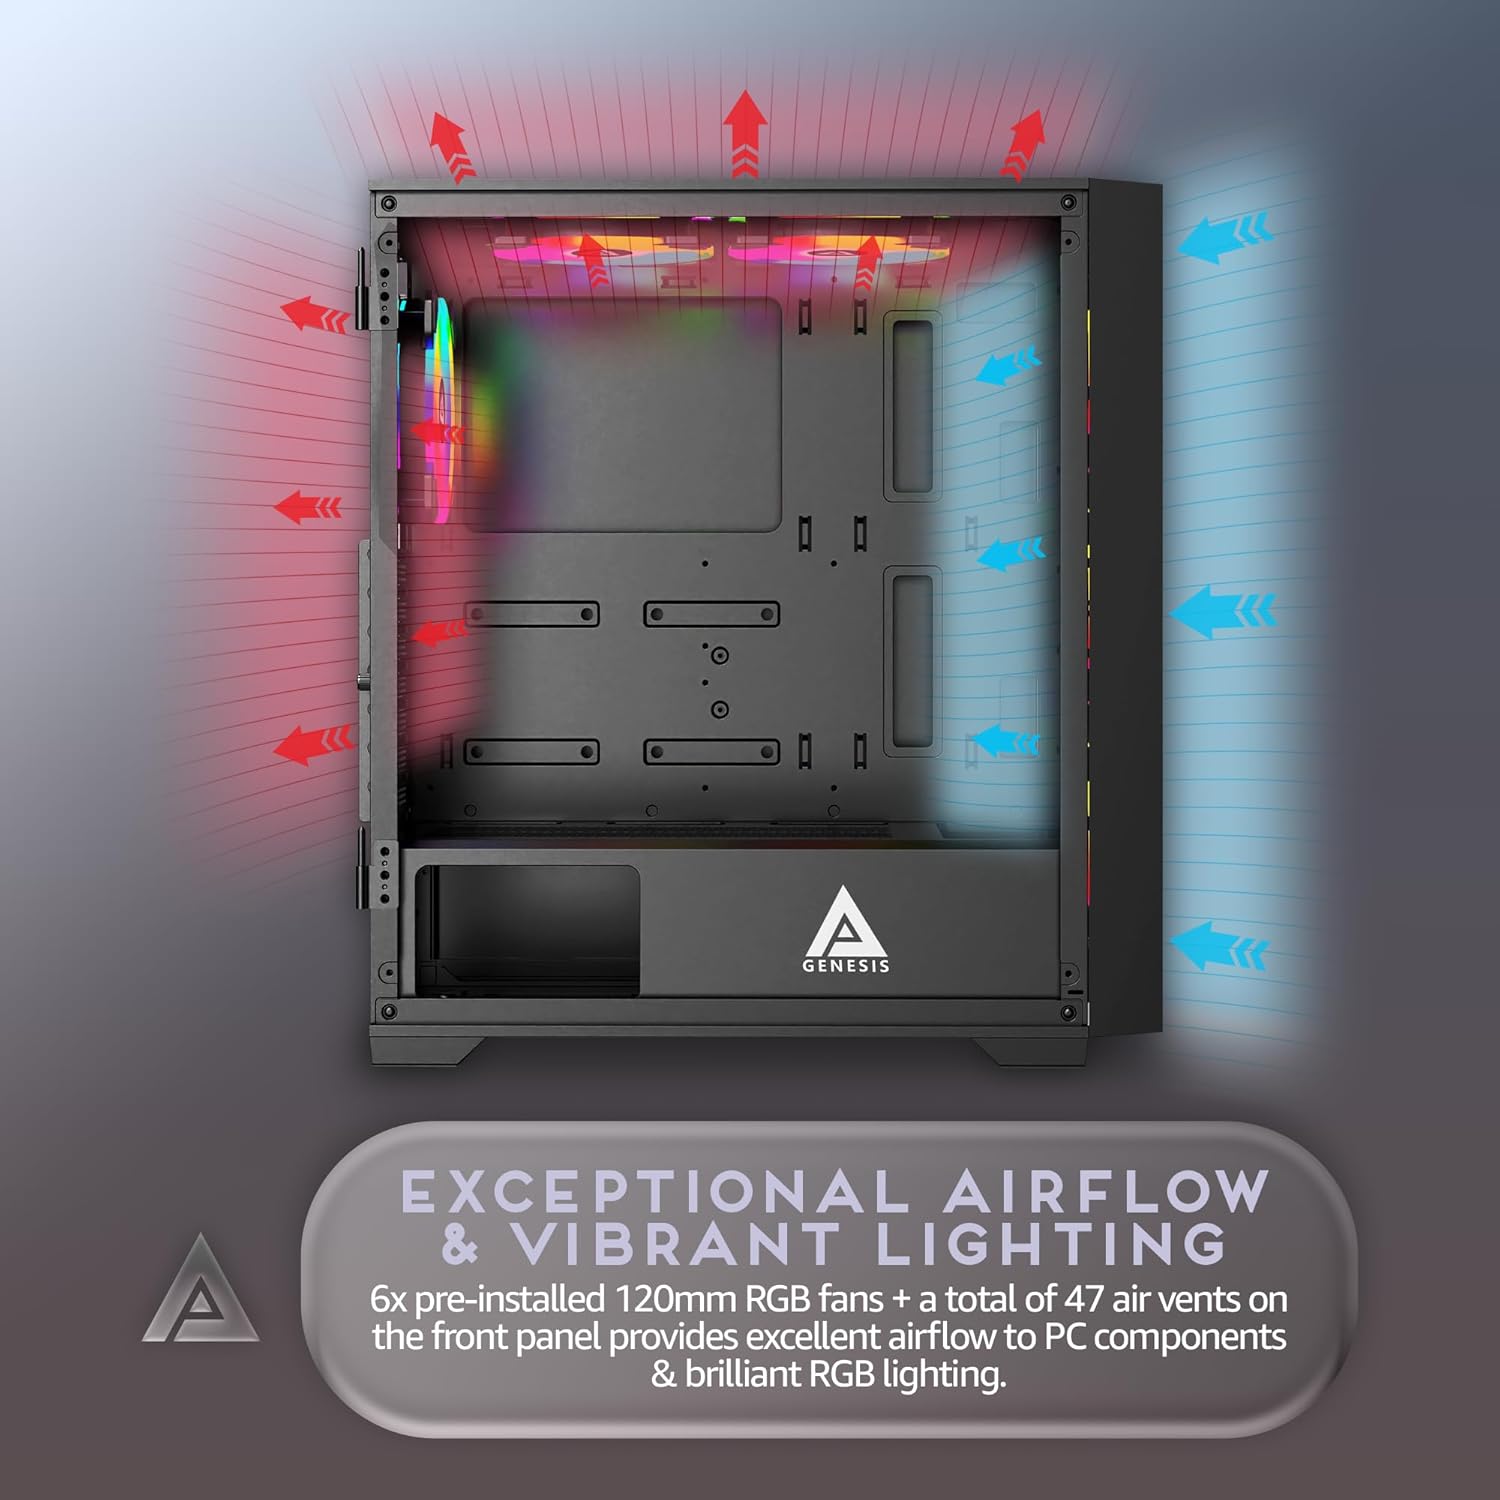
The Genesis Pro G-PRO-BK comes with six pre-installed 120mm RGB fans. It supports up to six 120mm fans in total and up to 240mm radiators in the top and front positions. CPU coolers up to 160mm in height are supported.
Figure 3: Airflow diagram for optimal cooling.
Ensure all fans are connected to the fan hub or motherboard headers for power and RGB control.
1.7 Kabelstyring
Udnyt kabelføringsudskæringerne og fastgørelsespunkterne bag bundkortbakken til at håndtere kablerne pænt. Dette forbedrer luftgennemstrømningen og æstetikken.
Video 1: En overview of a similar Apevia case, demonstrating internal layout and build considerations. This video provides visual guidance for component placement and cable routing.
2. Betjeningsvejledning
2.1 Tænd
After all components are installed and connected, ensure the power supply switch is in the 'ON' position. Press the power button located on the top I/O panel to start your system.
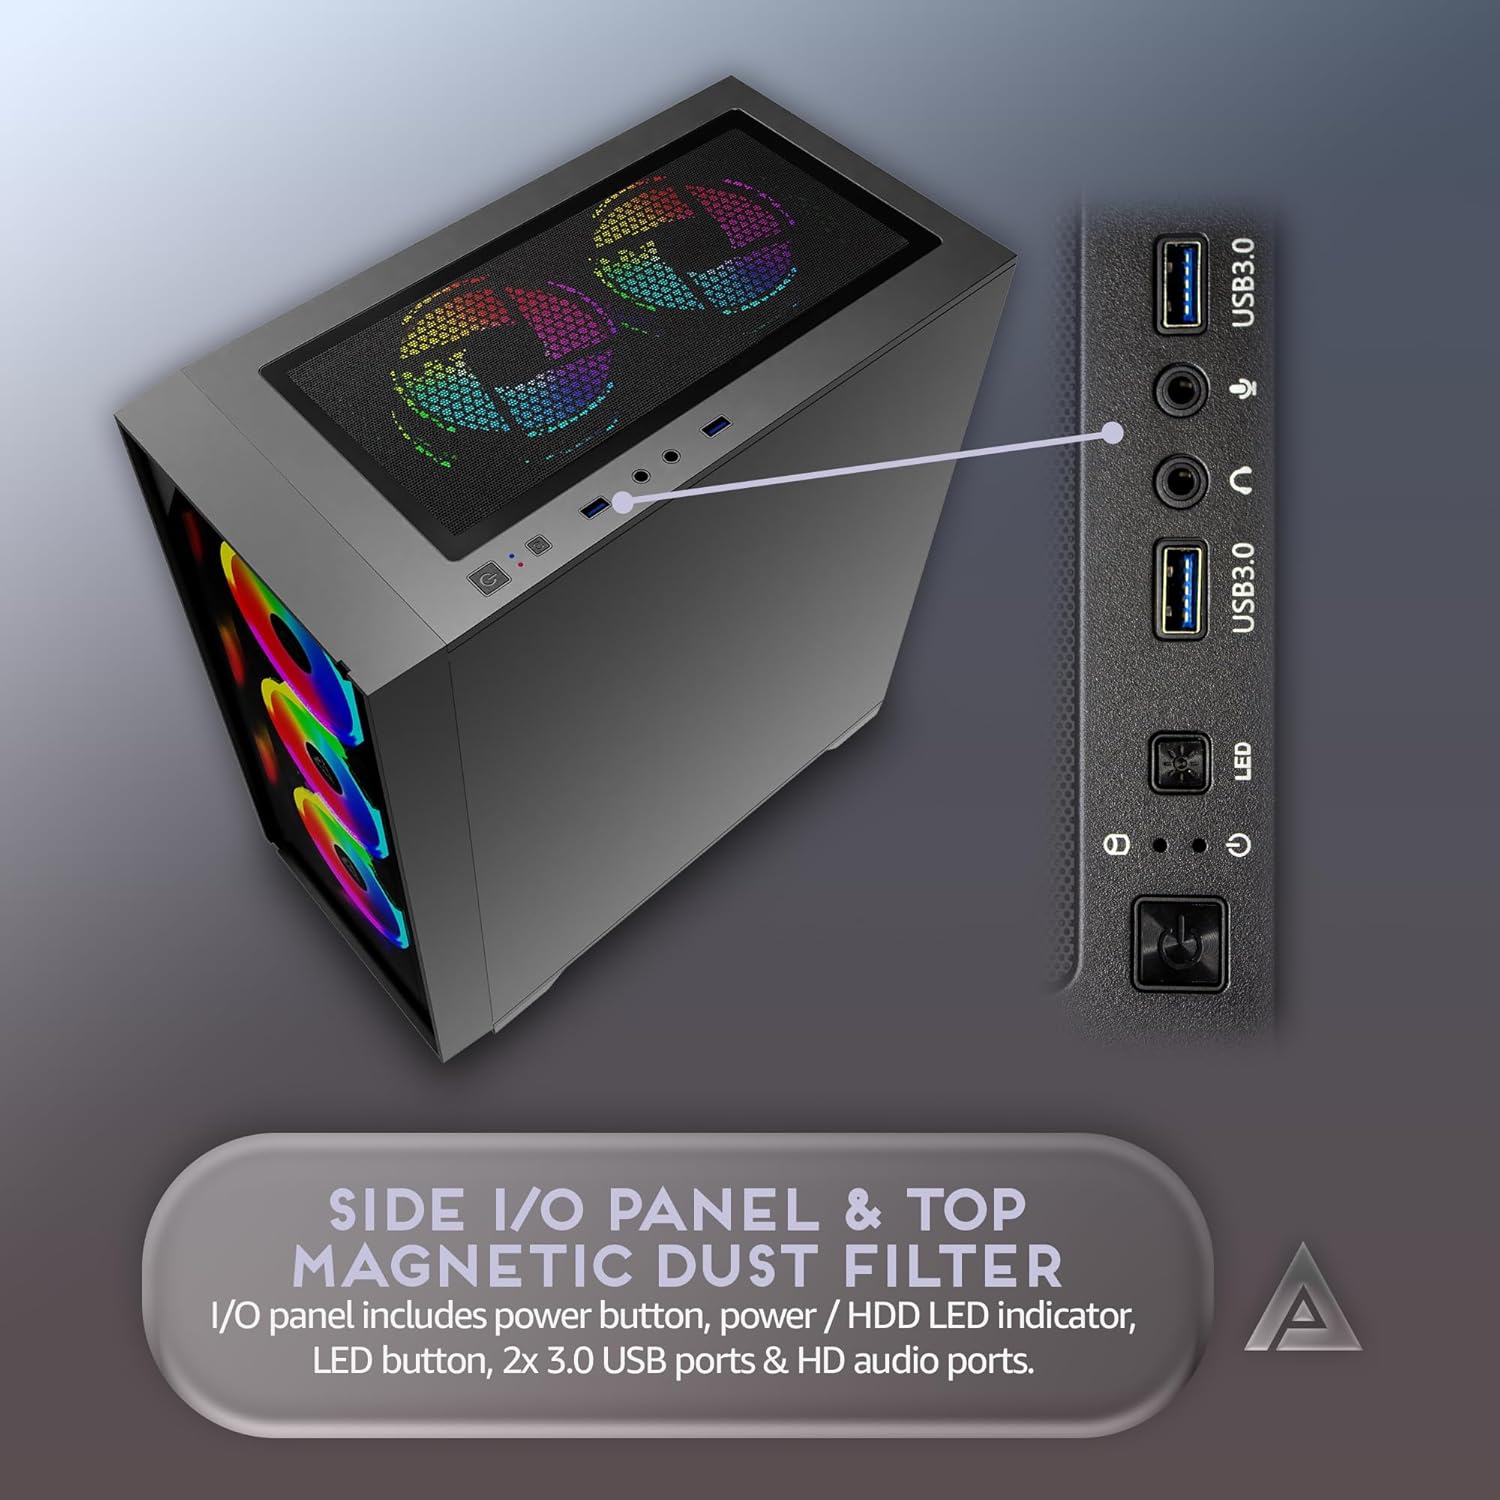
Figure 4: Top I/O panel with power and control buttons.
2.2 RGB-lysstyring
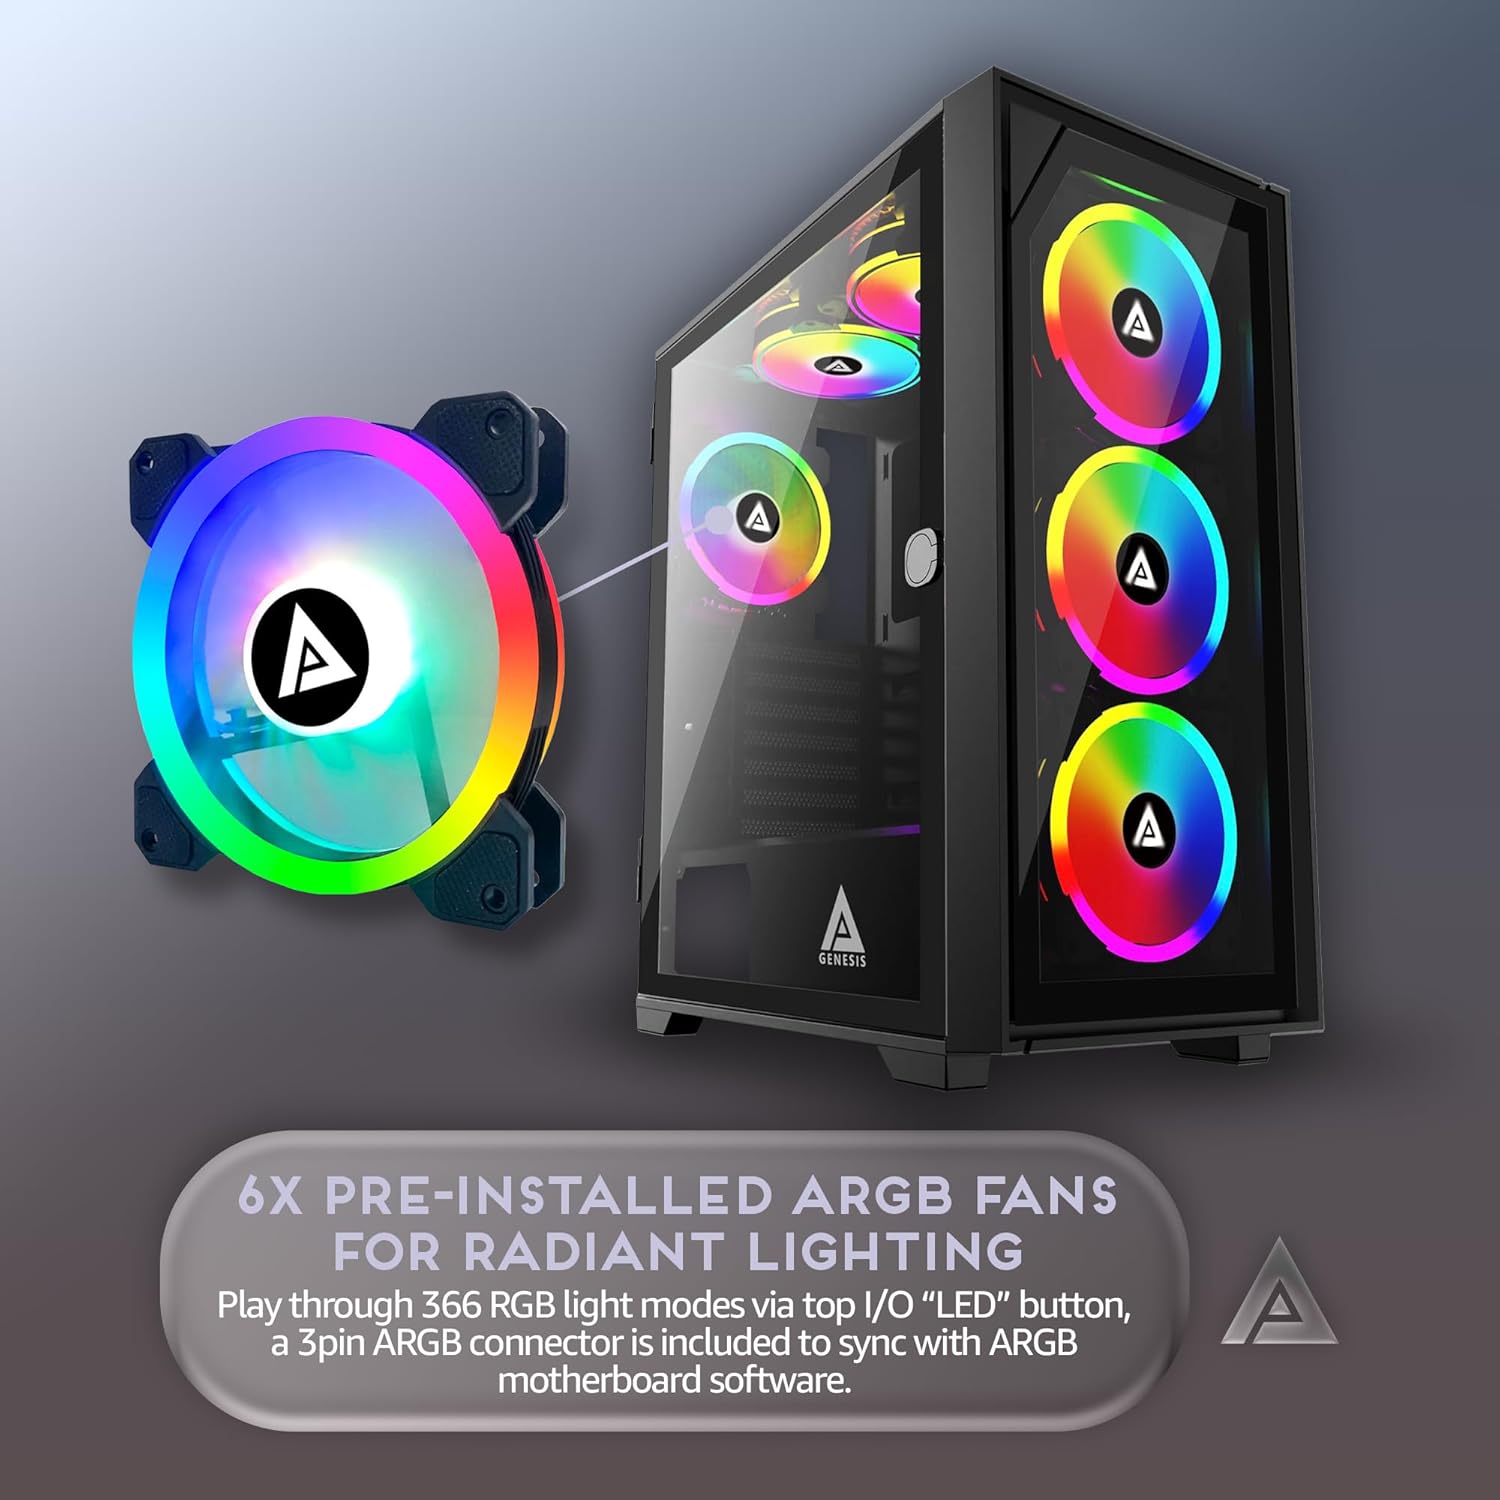
The pre-installed RGB fans can be controlled via the "LED" button on the top I/O panel. This button cycles through 16 lighting modes, offering 30 total play-through options including RGB, Breathing, Single Color, and Light Off. The fans are proprietary to this case.
Figure 5: Detail of an RGB fan, showcasing dens belysningsevner.
3. Vedligeholdelse
3.1 Rengøring af støvfiltre
The case includes a magnetic dust filter on the top panel. Regularly remove and clean this filter to maintain optimal airflow and prevent dust buildup inside the system. Gently wash with water and mild soap, then allow to air dry completely before reattaching.
Figure 6: Top panel with magnetic dust filter.
3.2 Generel rengøring
Use a soft, dry cloth to wipe down the exterior of the case. For tempered glass panels, use a glass cleaner and a microfiber cloth. Avoid abrasive cleaners or solvents that could damage the finish.
4. Fejlfinding
4.1 Systemet tænder ikke
Ensure the power supply is properly connected to the wall outlet and the PSU switch is 'ON'.
Verify all power cables (24-pin ATX, CPU, GPU, etc.) are securely connected to the motherboard and components.
Check the front panel header connections to the motherboard (Power SW, Reset SW).
4.2 RGB Fans Not Lighting Up or Functioning
Confirm that the fan hub (if used) is receiving power and is correctly connected to the motherboard or power supply.
Ensure all fan RGB cables are properly connected to the fan hub or motherboard RGB headers.
Press the "LED" button on the top I/O panel to cycle through lighting modes.
4.3 Overophedningsproblemer
Verify that all case fans are spinning correctly and are oriented for optimal airflow (intake/exhaust).
Clean all dust filters and internal components to remove any dust buildup.
Ensure CPU cooler and GPU fans are functioning properly.
5. Specifikationer
Feature
Detalje
Modelnavn
G-PRO-BK
Sagstype
Mid Tower
Farve
Sort ramme
Materiale
Metal, hærdet glas
Bundkort kompatibilitet
ATX, Micro ATX, Mini ITX
Udvidelsesslots
7
Max GPU-længde
350 mm
Max CPU kølerhøjde
160 mm
Forudinstallerede ventilatorer
6 x 120 mm RGB-blæsere
Radiatorstøtte
Up to 240mm (Top & Front)
Drive Bays
2 x 3.5" harddisk, 2 x 2.5" SSD
Front I / O-porte
1 x USB 3.0, 2 x USB 2.0, HD Audio, Power, Reset, LED Control
Varens vægt
16 pund
Figure 7: Internal dimensions and component compatibility.
6. Garanti og support
For warranty information and technical support, please refer to the official Apevia webwebstedet eller kontakt deres kundeservice direkte. Gem din købsbevis til garantikrav.
Apevia is a U.S. based computer hardware brand delivering reliable, performance-driven PC components. Specializing in PC cases, power supplies, and cooling solutions, Apevia brings modern design, efficiency, and affordability for gamers, creators, and builders.
Ask a question about this manual
Ask about setup, troubleshooting, compatibility, parts, safety, or missing instructions. Manuals+ will review the question and use this page’s manual context to help answer it.