
1. Introduktion
The PNI House IP516 is a 16-channel Network Video Recorder (NVR) designed for advanced surveillance systems, supporting up to 5MP IP cameras and H.265 video compression. This NVR allows for local and remote monitoring, recording, and management of your security cameras. It is compatible with ONVIF protocol cameras, offering flexibility in camera selection. This manual provides essential information for the proper installation, operation, and maintenance of your PNI House IP516 NVR.
2. Pakkens indhold
Kontroller venligst, at alle nedenstående varer er inkluderet i din pakke. Hvis der mangler eller er beskadigede varer, skal du kontakte din forhandler.
- PNI House IP516 NVR Unit
- USB-mus
- Strømadapter
- Brugervejledning (dette dokument)
- CD with Software
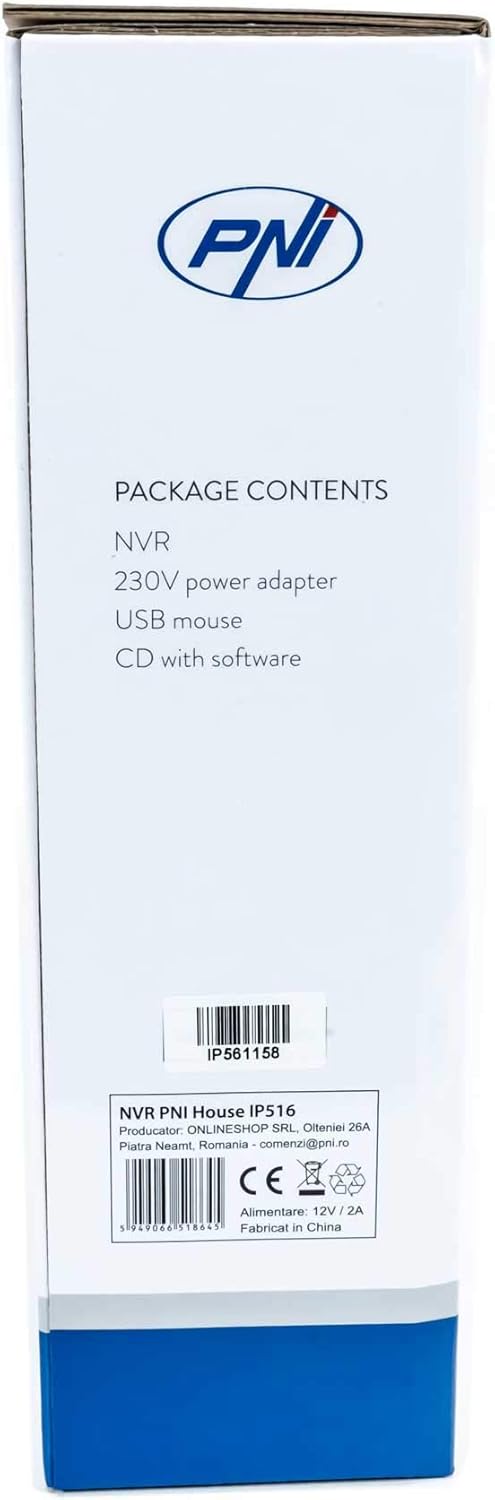
Image: Side of the NVR box detailing the package contents.

Image: The PNI House IP516 NVR unit, power adapter, and USB mouse included in the package.
3. Produktet er slutview
3.1 Frontpanel
The front panel of the NVR features indicator lights for system status.
- PWR (strøm): Angiver, at NVR'en er tændt.
- REC (optagelse): Flashes when recording is active.
- NET (Netværk): Angiver netværksaktivitet.

Billede: Forside view of the PNI House IP516 NVR, showing the power, record, and network indicator lights.
3.2 Bagpanel
The rear panel provides all necessary connection ports for the NVR.
- VGA port: Tilsluttes en VGA-skærm.
- HDMI-port: Connects to an HDMI monitor or TV for high-definition video output.
- LAN Port (RJ45 10/100 Mbps): Connects to your network router or switch.
- USB-porte (x2): For connecting the USB mouse, external storage, or for system upgrades.
- DC 12V strømindgang: Tilsluttes den medfølgende strømadapter.

Billede: Bagside view of the PNI House IP516 NVR, displaying VGA, HDMI, LAN, USB, and DC 12V power input ports.
4. Opsætning
4.1 Installation af harddisk (valgfrit)
The NVR supports a hard drive up to 8 TB for video storage. It is recommended to use dedicated CCTV hard drives for optimal reliability and endurance.
- Skru af og fjern topdækslet på NVR'en.
- Tilslut SATA-data- og strømkablerne fra NVR'en til harddisken.
- Fastgør harddisken til NVR-kabinettet med de medfølgende skruer.
- Sæt topdækslet på igen, og fastgør det med skruer.
4.2 Indledende forbindelser
- Connect a monitor to the NVR's VGA or HDMI port.
- Connect the USB mouse to one of the NVR's USB ports.
- Connect an Ethernet cable from the NVR's LAN port to your network router or switch.
- Connect the power adapter to the NVR's DC 12V input and then plug it into a power outlet. The NVR will power on automatically.
4.3 First Boot and Basic Configuration
Upon the first boot, the NVR will guide you through an initial setup wizard. Follow the on-screen prompts to:
- Opret en stærk adgangskode til administratorkontoen.
- Konfigurer indstillinger for dato og klokkeslæt.
- Format the installed hard drive (if applicable).
- Perform network settings (DHCP is usually enabled by default).
- Søg efter and add IP cameras to the NVR. The NVR supports up to 16 cameras at 2560x1920px (5MP) and is compatible with ONVIF protocol cameras.
5. Betjening af NVR'en
5.1 Lokal drift
Use the connected mouse to navigate the NVR's graphical user interface (GUI) on the monitor. Right-click to access the main menu, which includes options for live view, playback, recording settings, system configuration, and more.
5.2 Fjernadgang
The PNI House IP516 NVR can be accessed remotely for live viewing, playback, and configuration.
- Mobile Application (XMEye): Download the XMEye app from the Android Play Store or Apple App Store. Register an account, add your NVR by scanning its QR code or entering its serial number, and then you can view your cameras from anywhere with an internet connection.
- PC Software (General CMS): Install the General CMS software from the included CD or download it from the PNI support website. This software allows for comprehensive management of your NVR and cameras from a Windows PC.
5.3 Optagelsesstyring
NVR'en understøtter forskellige optagelsestilstande:
- Kontinuerlig optagelse: Optagelser 24/7.
- Planlagt optagelse: Optegnelser i bestemte tidsperioder.
- Optagelse af bevægelsesdetektering: Optager kun, når kameraerne registrerer bevægelse.
Configure these settings in the NVR's menu under 'Record' or 'Storage' settings.
5.4 Bevægelsesdetektion og advarsler
When motion is detected, the system can trigger various alerts:
- Mobilnotifikationer: Text notifications sent via the XMEye mobile application.
- E-mail-advarsler: An email sent to a predefined address.
- FTP-upload: The recording saved to an FTP server.
These alert settings can be configured in the NVR's 'Alarm' or 'Event' menu.
6. Vedligeholdelse
6.1 Harddiskstyring
Regularly check the status of your hard drive in the NVR's storage settings. If the hard drive becomes full, the NVR will typically overwrite the oldest recordings (loop recording). You may need to format the hard drive periodically if you encounter issues or wish to clear all data.
6.2 Systemopdateringer
Periodically check the PNI support website for firmware updates. Firmware updates can improve performance, add new features, or fix bugs. Follow the instructions provided with the firmware update carefully to avoid damaging the device.
6.3 Rengøring
Ensure the NVR unit is kept clean and free from dust. Use a soft, dry cloth to wipe the exterior. Do not use liquid cleaners or aerosols directly on the unit.
7. Fejlfinding
| Problem | Mulig årsag | Løsning |
|---|---|---|
| NVR does not power on | Ingen strømforsyning; defekt strømadapter | Check power connection; test power adapter; try a different outlet. |
| Ingen videoudgang på skærmen | Loose cable; incorrect input selected on monitor | Ensure VGA/HDMI cable is securely connected; select correct input on monitor. |
| Kan ikke få adgang til NVR via fjernadgang | Network issue; incorrect app settings; NVR not connected to internet | Verify NVR network connection; check router settings; ensure correct NVR ID/serial in app. |
| Kameraer viser ikke | Camera not powered; network issue; incorrect camera IP/protocol | Check camera power and network cables; ensure cameras are ONVIF compatible; verify camera IP addresses. |
| Ingen optagelse | Hard drive not installed/formatted; recording schedule not set; motion detection not configured | Install and format HDD; configure recording schedule; set up motion detection zones and sensitivity. |
8. Specifikationer
| Feature | Detalje |
|---|---|
| Modelnummer | IP516 |
| Kanaler | 16 |
| Max opløsning | 5MP (2560 x 1920px) |
| Videokomprimering | H.265 |
| Kompatible enheder | IP Cameras, Smartphone |
| Forbindelsesteknologi | HDMI, USB, VGA, RJ45 Ethernet |
| Kommunikationsgrænseflade | RJ45 10/100 Mbps |
| Maksimal lagerkapacitet | 8 TB (harddisk) |
| USB-porte | 2 |
| Strømforbrug | 10 watt |
| Producentens varenummer | PNI-1920P |
9. Garanti
The PNI House IP516 NVR comes with a standard manufacturer's warranty. Please refer to the warranty card included in your package or visit the official PNI webwebstedet for detaljerede vilkår og betingelser vedrørende garantidækning, varighed og serviceprocedurer. Gem dit købsbevis til garantikrav.
10. Support
For technical support, troubleshooting assistance, or further inquiries regarding your PNI House IP516 NVR, please visit the official PNI website or contact their customer service department. You can find contact information and additional resources on the PNI brand store page: PNI Brand Store.