1. Introduktion
This manual provides instructions for the ORICO 3559C3-SV 5-Bay USB 3.1 Gen2 Type-C HDD Enclosure. This device is designed to expand your storage capacity with support for up to five 2.5-inch or 3.5-inch hard disk drives (HDDs) or solid-state drives (SSDs). It features high-speed data transfer, efficient cooling, and broad operating system compatibility.
2. Pakkens indhold
Kontroller venligst, at alle komponenter er til stede i pakken:
- ORICO 3559C3-SV 5-Bay HDD Enclosure
- USB Type-C to Type-C Data Cable
- Strømadapter
- Brugermanual
- Skruer til installation af harddisk (hvis relevant)
3. Opsætning
3.1 HDD/SSD Installation
- Gently pull out the drive trays from the enclosure.
- Place your 2.5-inch or 3.5-inch HDD/SSD into a drive tray. Ensure the SATA connectors align correctly.
- Secure the drive to the tray using the provided screws. While the design aims for ease of use, securing drives with screws is recommended for stability.
- Skub den isatte drevbakke tilbage i kabinettet, indtil den klikker på plads.

Image: The ORICO 5-Bay HDD Enclosure with its drive trays extended, showing a hard drive and mounting screws. This illustrates the process of installing drives into the enclosure.
3.2 Tilslutning til din computer
- Connect one end of the USB Type-C data cable to the Type-C port on the enclosure.
- Connect the other end of the USB Type-C data cable to an available USB 3.1 Gen2 Type-C port on your computer. For optimal performance, use a USB 3.1 Gen2 port.
- Connect the power adapter to the enclosure's power input and then plug it into a power outlet.

Billede: En detaljeret view of the rear panel of the ORICO 5-Bay HDD Enclosure, highlighting the AC power input, USB 3.1 Gen2 Type-C ports (Main and Hub), and the power switch.
3.3 Tænd
Flip the power switch on the rear of the enclosure to the "ON" position. The power indicator light should illuminate, and the drives will begin to spin up.
4. Betjeningsvejledning
4.1 Accessing Drives
Once powered on and connected, your operating system should detect the installed drives. You may need to initialize and format new drives through your operating system's disk management utility before they can be used.
4.2 Højhastighedsdataoverførsel
The enclosure supports USB 3.1 Gen2, offering data transfer speeds up to 10Gbps. For maximum performance, ensure your computer's USB port and cable are also USB 3.1 Gen2 compatible. The device is backward compatible with USB 2.0 and USB 1.0, though speeds will be limited by the slower standard.

Image: The ORICO 5-Bay HDD Enclosure connected to a laptop, with a monitor in the background, illustrating its use for high-speed data transfer via USB 3.1 Gen2 Type-C.
4.3 Daisy Chain-funktionalitet
This enclosure supports a daisy chain function, allowing you to connect up to three identical ORICO 3559C3-SV units. This expands your total storage capacity significantly, potentially up to 240TB (16TB x 15 drives).

Image: A visual representation of the daisy chain function, showing multiple ORICO enclosures connected sequentially to a single computer, enabling expanded storage capacity.
4.4 Operativsystemkompatibilitet
The ORICO 3559C3-SV is compatible with Windows, Mac, and Linux operating systems, providing broad usability across different computing environments.

Image: A graphic depicting the ORICO enclosure's compatibility with various operating systems, including Windows, Mac, and Linux.
4.5 RAID Functionality (Mac OS)
For Mac OS users, RAID functionality (RAID0, RAID1, JBOD) can be configured through the operating system's software RAID features. This enclosure does not feature hardware RAID capabilities.
5. Vedligeholdelse
5.1 Rengøring
To maintain optimal performance, periodically clean the exterior of the enclosure with a soft, dry cloth. Ensure the device is powered off and disconnected from the computer and power source before cleaning. Avoid using liquid cleaners or solvents.
5.2 Kølesystem
The enclosure features an aluminum body and an 80mm x 80mm cooling fan to dissipate heat effectively. Ensure the fan vents are not obstructed to maintain proper airflow and prevent overheating, which can impact drive longevity and performance.
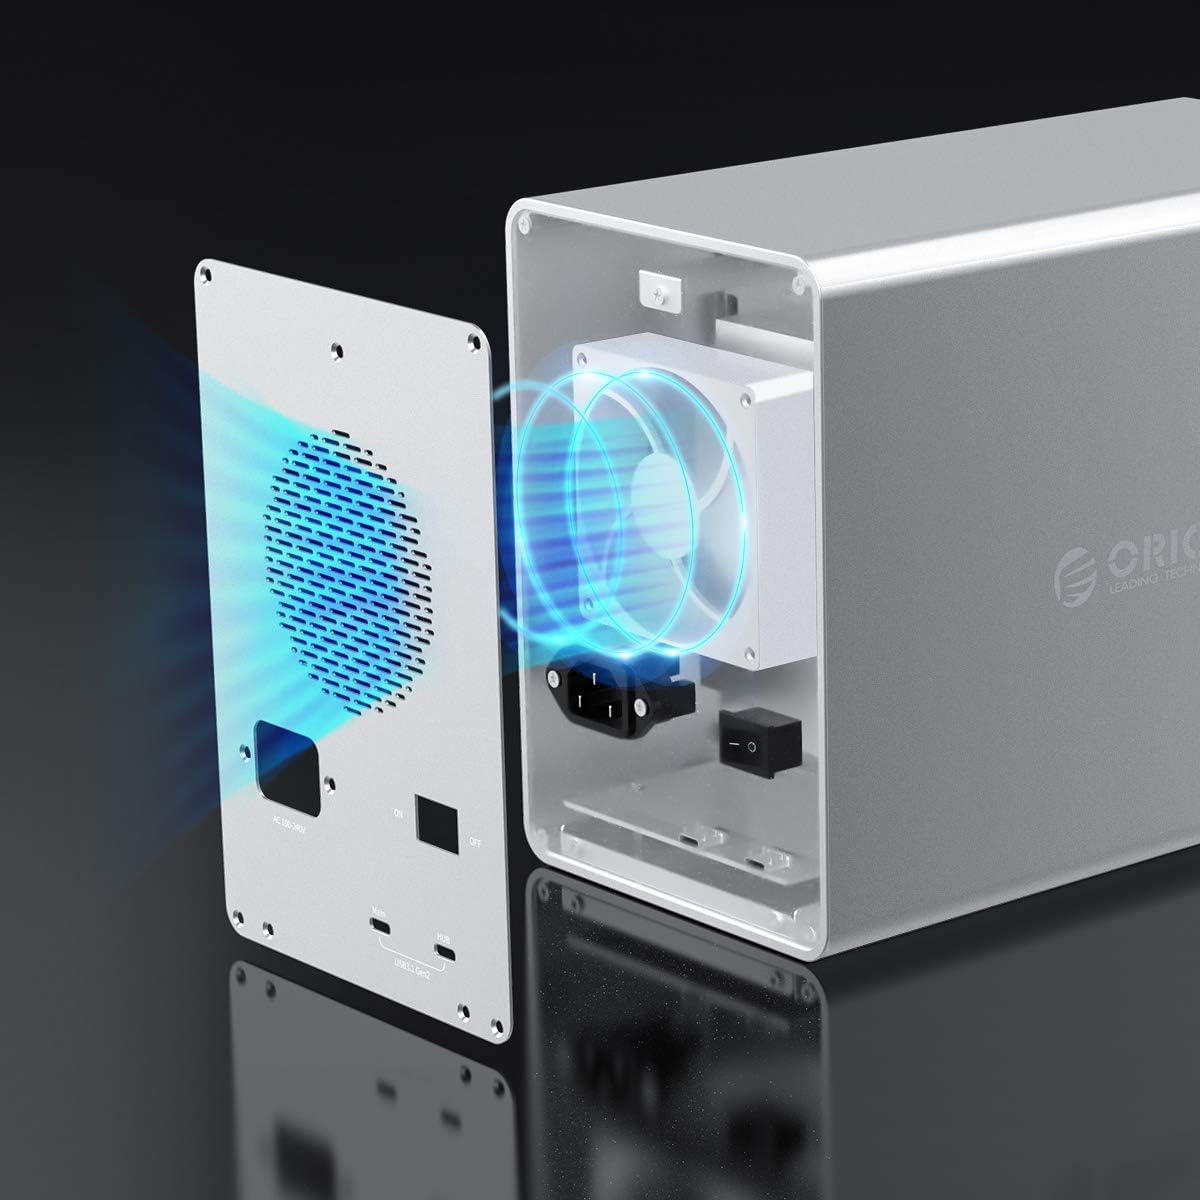
Billede: En intern view of the ORICO enclosure, highlighting the cooling fan and the airflow path designed for efficient heat dissipation.
5.3 Safe Drive Removal
Always safely eject or unmount drives from your operating system before powering off the enclosure or physically removing any drives to prevent data corruption.
6. Fejlfinding
6.1 Drives Not Recognized
- Ensure the enclosure is powered on and the USB cable is securely connected to both the enclosure and your computer.
- Verify that the drives are properly seated in their trays and secured.
- Check your computer's Disk Management (Windows) or Disk Utility (Mac) to see if the drives are detected but uninitialized or unformatted.
- Try connecting the enclosure to a different USB port or using a different USB cable.
- If only some drives are not recognized, try swapping them to different bays to isolate if the issue is with the drive or a specific bay.
6.2 Langsomme overførselshastigheder
- Ensure you are using a USB 3.1 Gen2 compatible port on your computer and a high-quality USB 3.1 Gen2 cable.
- Kontroller, at dit operativsystem og dine drivere er opdaterede.
- Performance can be affected by the speed of the installed drives themselves.
6.3 For meget ventilatorstøj
- Ensure the enclosure is placed on a stable surface and that the fan vents are clear of obstructions.
- High drive activity or high ambient temperatures can cause the fan to run at higher speeds.
7. Specifikationer
| Feature | Specifikation |
|---|---|
| Model | 3559C3-SV |
| Mærke | ORICO |
| Materiale | Aluminiumslegering |
| Farve | Sølv |
| Dimensioner (L x B x H) | 26.5 cm x 13.7 cm x 20.1 cm |
| Vægt | 3900 gram |
| Drive Bays | 5 |
| Kompatible drevtyper | 2.5-tommer / 3.5-tommer SATA HDD/SSD |
| Maks. enkeltdrevskapacitet | 16 TB |
| Max Total Capacity (Daisy Chain) | 240 TB (with 3 units) |
| Interface | USB 3.1 Gen2 Type-C (10Gbps) x 2 |
| Bagudkompatibilitet | USB 2.0/1.0 |
| Strømforsyning | Indbygget 150W |
| Kølesystem | 80mm x 80mm Cooling Fan, Aluminum Heat Dissipation |
| OS kompatibilitet | Windows, Mac, Linux |
8. Garanti og support
ORICO provides a 12-month warranty for this product from the date of purchase. Please retain your proof of purchase for warranty claims.
For technical support or further inquiries, please refer to the official ORICO webwebsted eller kontakt deres kundeserviceafdeling.