Indledning
This manual provides essential information for the safe and effective operation, assembly, and maintenance of your Murray IQ18PSH 18V Li-Ion Cordless 2-in-1 Pole Saw and Hedge Trimmer. This versatile tool is designed for pruning branches and trimming hedges in garden environments. Please read this manual thoroughly before initial use and keep it for future reference.
Sikkerhedsoplysninger
Overhold altid grundlæggende sikkerhedsforanstaltninger for at reducere risikoen for brand, elektrisk stød og personskade, når du bruger elværktøj.
- Læs alle instruktioner: Gør dig bekendt med betjeningselementerne og den korrekte brug af værktøjet.
- Brug personlige værnemidler (PPE): Always wear safety glasses, hearing protection, gloves, and sturdy footwear. A hard hat is recommended when using the pole saw.
- Hold arbejdsområdet ryddet: Ensure the area is free of obstacles, children, and pets.
- Bevar et fast greb: Always hold the tool with both hands for maximum control.
- Afbryd batteriet: Fjern altid batteripakken, før du foretager justeringer, skifter tilbehør eller opbevarer værktøjet.
- Undgå at overrække: Oprethold korrekt fodfæste og balance til enhver tid. Gå ikke for langt.
- Efterse før brug: Kontroller for beskadigede dele, løse fastgørelseselementer eller andre forhold, der kan påvirke sikker drift.
Pakkens indhold
Your Murray IQ18PSH package includes the following components:
- Pole Saw Attachment (20cm bar)
- Hedge Trimmer Attachment (41cm blade)
- Teleskopisk aksel
- Hjælpehåndtag
Note: The 18V Li-Ion battery and charger are sold separately and are not included with this tool-only version.

This image illustrates that the battery and charger are not included with the product.
Opsætning og montering
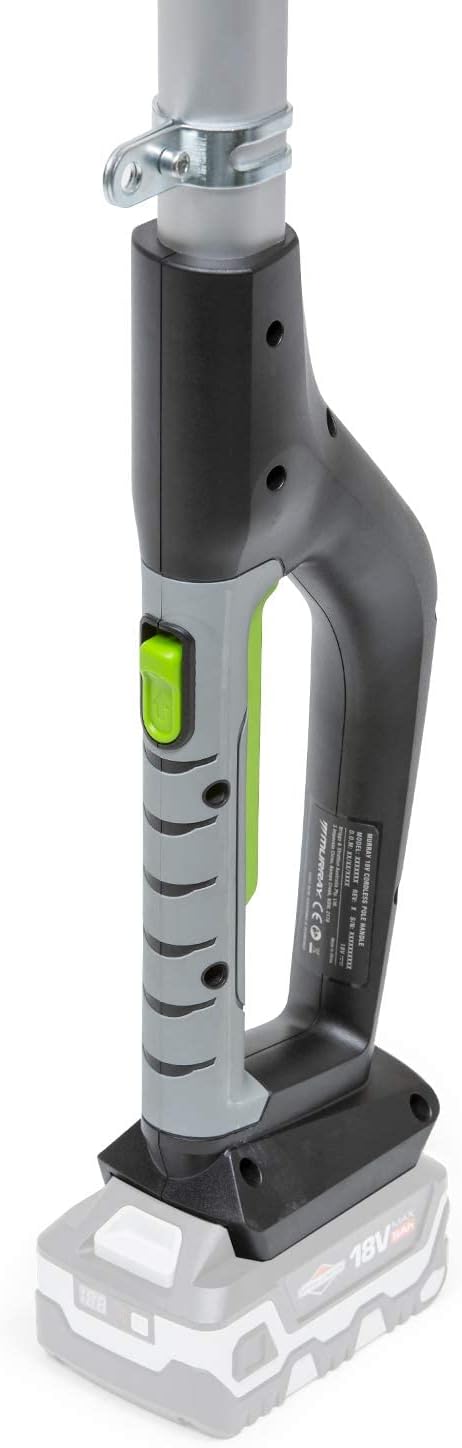
1. Batteriinstallation
The Murray IQ18PSH requires an 18V Li-Ion battery (not included). Ensure the battery is fully charged before use. Slide the battery pack into the base of the main handle until it clicks securely into place.

This image shows the connection point for the 18V battery at the base of the tool's handle.
2. Attaching the Attachments (Pole Saw / Hedge Trimmer)
Select either the pole saw or hedge trimmer attachment. Align the attachment head with the telescopic shaft and push it firmly until it locks into position. Ensure the connection is secure before operation.

This image illustrates the process of attaching the hedge trimmer head to the telescopic shaft.
3. Adjusting the Telescopic Shaft
The telescopic shaft allows for extended reach. To adjust, loosen the locking mechanism, extend the shaft to your desired length (up to 290cm for hedge trimmer, 260cm for pole saw), and then securely tighten the locking mechanism. Ensure the shaft is fully locked before use.

This image shows how to adjust the length of the telescopic shaft for extended reach.
4. Justering af hjælpehåndtaget
Position the auxiliary handle along the telescopic shaft for comfortable and secure grip. Loosen the knob, slide the handle to the desired position, and then tighten the knob firmly to fix it in place.

This image demonstrates the adjustment of the auxiliary handle on the telescopic pole.
5. Pole Saw Chain Tensioning
The pole saw attachment features a tool-less chain tensioning system. To adjust chain tension, rotate the green knob on the side of the saw head. Ensure the chain is snug but can still be pulled freely around the bar by hand. Refer to the diagram on the tool for correct tensioning.

This image highlights the chain tensioning mechanism on the pole saw attachment.
6. Pole Saw Chain Lubrication
The chainsaw attachment is equipped with an automatic lubrication system. Before each use, ensure the oil reservoir is filled with appropriate chain oil. Check the oil level indicator (MAX/MIN) to ensure sufficient lubrication for the chain and bar.
This image displays the oil reservoir and its level indicators for the pole saw attachment.
Betjeningsvejledning
1. Generel drift
Before starting, ensure the battery is fully charged and securely installed. Always maintain a firm grip with both hands on the tool and ensure stable footing. Keep bystanders, especially children and pets, at a safe distance from the work area. Avoid operating the tool in wet conditions or near power lines.
2. Brug af stangsaven
The 20cm Oregon bar and 3/8" low profile saw chain are designed for efficient cutting of branches up to 15cm thick. Position the saw carefully on the branch, allowing the chain to do the work. Avoid forcing the saw, as this can lead to kickback or damage. For larger branches, make an undercut first to prevent bark stripping.
3. Using the Hedge Trimmer
The 41cm blade with a 16mm cutting capacity is suitable for trimming most hedges and thicker twigs. The pivoting trimmer head can be adjusted to 7 different positions. To adjust, press the release button and rotate the head to the desired angle, then ensure it locks securely. Use a sweeping motion to trim hedges, working from bottom to top for best results.
Opretholdelse
Regelmæssig vedligeholdelse sikrer dit værktøjs levetid og sikker drift.
- Chain Lubrication (Pole Saw): Regularly check the chain oil reservoir and refill with appropriate chain oil as needed.
- Blade Cleaning (Hedge Trimmer): After each use, clean the hedge trimmer blades with a stiff brush to remove sap and debris. Apply a light coat of oil to prevent rust.
- Generel rengøring: Tør værktøjshuset af med enamp klæde. Brug ikke skrappe kemikalier eller slibende rengøringsmidler.
- Opbevaring: Store the tool in a dry, secure location out of reach of children. Always remove the battery pack before storing.
- Kædeslibning/udskiftning: A dull chain on the pole saw can reduce performance and increase kickback risk. Sharpen or replace the chain as necessary.
Fejlfinding
If you encounter issues with your Murray IQ18PSH, refer to the following common troubleshooting tips:
- Værktøjet starter ikke: Sørg for, at batteriet er fuldt opladet og korrekt isat. Kontroller, at sikkerhedsafbryderen og udløseren er korrekt aktiveret.
- Reduceret skæreydelse: For the pole saw, check chain tension and ensure the chain is sharp and well-lubricated. For the hedge trimmer, ensure blades are clean and sharp.
- Overdreven vibration: Check for loose components or damaged blades/chain. Discontinue use if vibration is severe.
- Chain Not Moving (Pole Saw): Verify chain tension is not too tight. Check for obstructions in the bar or chain.
If problems persist, contact Murray customer support for assistance.
Specifikationer
| Feature | Specifikation |
|---|---|
| Mærke | Murray |
| Modelnummer | 1697223 |
| Voltage | 18 volt |
| Strømkilde | Batteridrevet (Li-ion) |
| Hækkeklipperens klingelængde | 41 centimeter |
| Hækkeklipperens klippekapacitet | 16 mm |
| Pole Saw Bar Length | 20 centimeter |
| Pole Saw Cutting Capacity | Up to 15 cm (dry pine logs) |
| Telescopic Shaft Extension (Hedge Trimmer) | Op til 290 cm |
| Telescopic Shaft Extension (Pole Saw) | Op til 260 cm |
| Varens vægt | 5.83 kilo (12.83 pund) |
| Hastighed | 4500 RPM |
| Speciel funktion | Børsteløs motor |
| Håndtag Materiale | Aluminium |
Garanti og support
The Murray IQ18PSH is backed by a 5-year limited product consumer warranty. This warranty applies to residential use only. For complete warranty details, please refer to the official operator's manual that accompanies your product or visit the Murray webwebsted.
For technical support, spare parts, or warranty claims, please contact Murray customer service. Ensure you have your model number (1697223) and proof of purchase available when contacting support.