
1. Introduktion
Thank you for choosing the COMICA BoomX-D D2 2.4G Wireless Microphone System. This manual provides detailed instructions for the proper setup, operation, and maintenance of your new wireless microphone system. Please read this manual thoroughly before use to ensure optimal performance and to prevent damage to the device. Keep this manual for future reference.
2. Produktet er slutview
2.1 Nøglefunktioner
- 2.4G Digital Wireless Technology: Ensures stable and reliable audio transmission.
- Dual Transmitters, One Receiver: Allows simultaneous recording from two sources.
- Visual Power & Audio Dynamic Monitor: Real-time display of battery status and audio levels.
- Internal & External MIC Input Modes: Flexibility to use built-in microphone or external lavalier.
- Mono/Stereo Switchable Output: Adaptable for various recording needs.
- Broadcasting-Quality Audio: Delivers clear and crisp sound.
- Lav forsinkelse: Less than 20ms for synchronized audio and video.
- Arbejdsområde: Up to 50 meters (164 feet) in open areas.
- Multi-functional Belt Clip: For nem fastgørelse og bærbarhed.
- Kompakt og let design: Ideal for on-the-go recording.
- USB-C opladning: Praktisk og universel opladning.
2.2 Medfølgende komponenter
The COMICA BoomX-D D2 system typically includes the following components:
- 1 x modtager (RX)
- 2 x sendere (TX)
- 2 x 3.5mm TRS Lavalier Microphones
- 2 x Wind Muffs for Lavalier Microphones
- 1 x 3.5mm TRS-TRS Audio Cable (for cameras)
- 1 x 3.5mm TRS-TRRS Audio Cable (for smartphones)
- 1 x USB-C to USB-A Charging Cable (may include multiple for simultaneous charging)
- 1 x brugermanual
- 1 x Storage Case (or packaging)
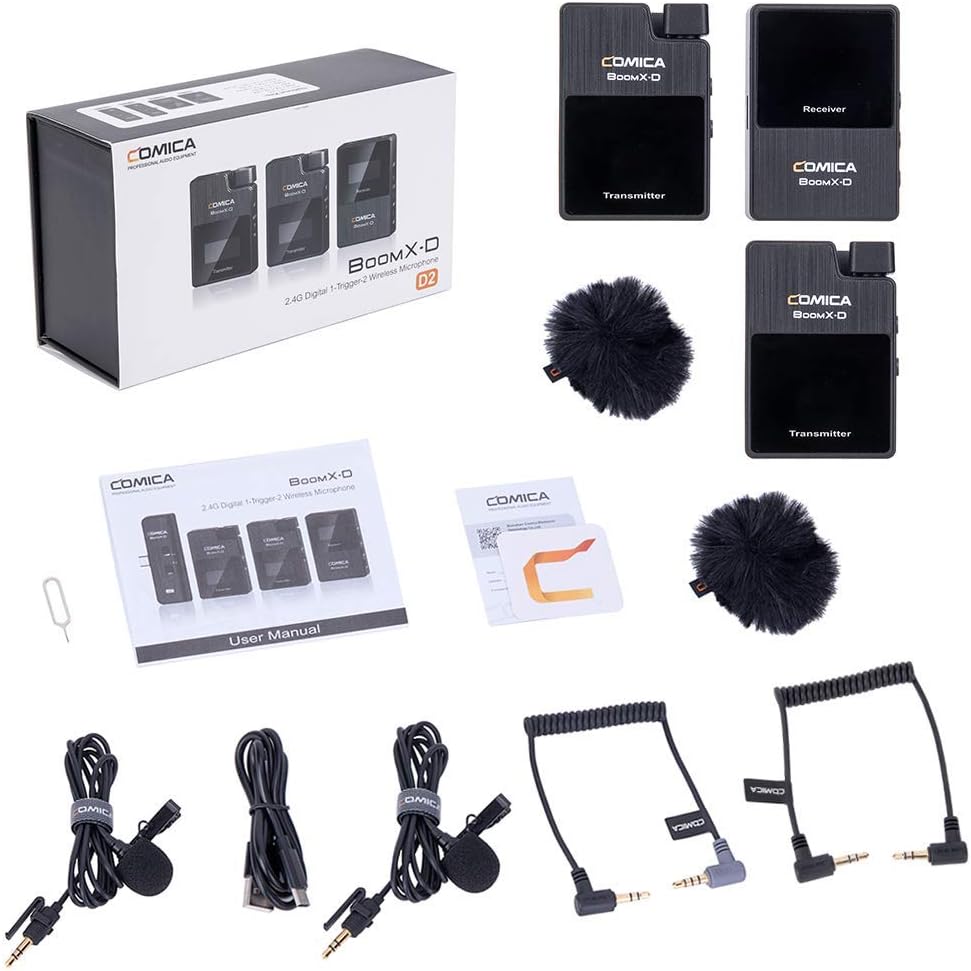
Figure 1: Complete contents of the COMICA BoomX-D D2 package, showing the receiver, two transmitters, lavalier microphones, wind muffs, various audio cables, and charging cable.
3. Opsætningsvejledning
3.1 Opladning af enhederne
Before initial use, fully charge the receiver and both transmitters using the provided USB-C charging cable. Connect the USB-C end to the device and the USB-A end to a compatible USB power adapter (not included) or a computer USB port.
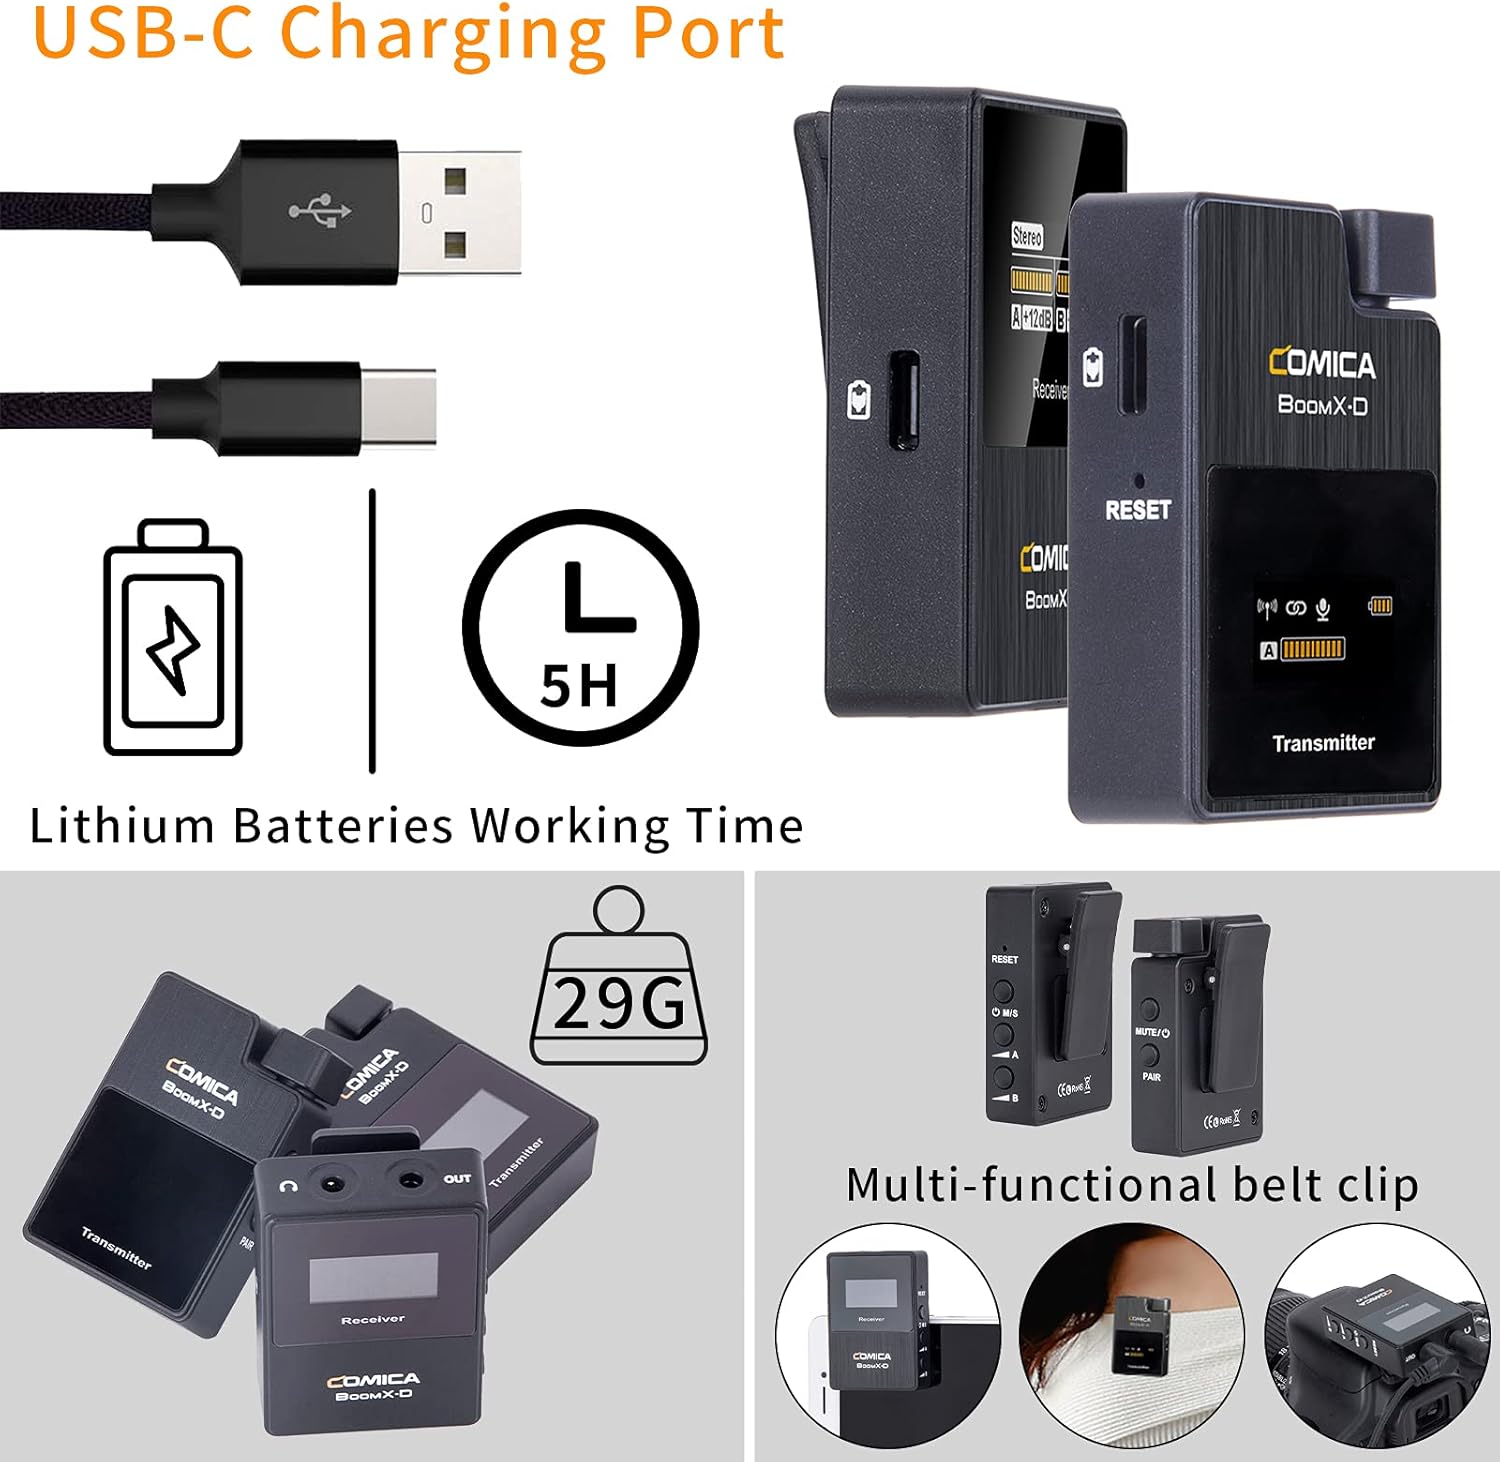
Figure 2: Illustration of the USB-C charging port on the COMICA BoomX-D D2 units, highlighting the charging process and battery life indication.
3.2 Tænd/sluk og parring
- Tænd: Press and hold the power button on both the receiver and transmitters until the screen illuminates.
- Automatisk parring: The units are designed to pair automatically upon power-on. Observe the screens for connection indicators. If pairing fails, refer to the troubleshooting section or the seller video for manual pairing instructions.
Video 1: A seller-provided video demonstrating the setup and pairing process of the COMICA BoomX-D D2 wireless microphone system, including how to connect to various devices.
3.3 Tilslutning til optageenheder
Use the appropriate audio cable to connect the receiver to your recording device (camera, smartphone, etc.).
- For kameraer (DSLR/spejlløse): Use the 3.5mm TRS-TRS audio cable. Connect one end to the receiver's output and the other to your camera's microphone input.
- Til smartphones/tablets: Use the 3.5mm TRS-TRRS audio cable. Connect one end to the receiver's output and the other to your smartphone's headphone/microphone jack. For devices without a 3.5mm jack, an appropriate adapter (e.g., USB-C to 3.5mm or Lightning to 3.5mm) may be required (not included).

Figure 3: The COMICA BoomX-D D2 receiver connected to a smartphone, illustrating its use for mobile video recording with low latency and a 50-meter range.

Figure 4: A visual guide to the compatibility of the COMICA BoomX-D D2 with various devices, including Canon, Nikon, Sony, Panasonic, Fujifilm cameras, and iPhone, Huawei, Samsung smartphones, using different audio cables.
4. Betjeningsvejledning
4.1 Using the Lavalier Microphone or Built-in Mic
Each transmitter has a built-in omnidirectional microphone. For discreet placement or improved audio quality, you can connect the included 3.5mm TRS lavalier microphone to the transmitter's MIC input port.
- With Lavalier Mic: Plug the lavalier microphone into the 3.5mm MIC input on the transmitter. Clip the lavalier mic to clothing, approximately 6-8 inches from the speaker's mouth.
- Without Lavalier Mic (Built-in): Ensure no external microphone is plugged in. Clip the transmitter directly onto clothing, ensuring the built-in microphone faces the sound source.

Figure 5: Demonstrates the flexibility of the COMICA BoomX-D D2, allowing users to choose between the external lavalier microphone or the built-in microphone on the transmitter, depending on their recording needs.
4.2 Mono/Stereo Output Switching
The receiver allows you to switch between mono and stereo output modes. This is useful for post-production flexibility or specific recording scenarios.
- Mono-tilstand: Combines audio from both transmitters into a single mono track.
- Stereo-tilstand: Records audio from each transmitter to separate left and right channels.
Refer to the receiver's display and control buttons to switch between these modes. The display will clearly indicate the selected mode.
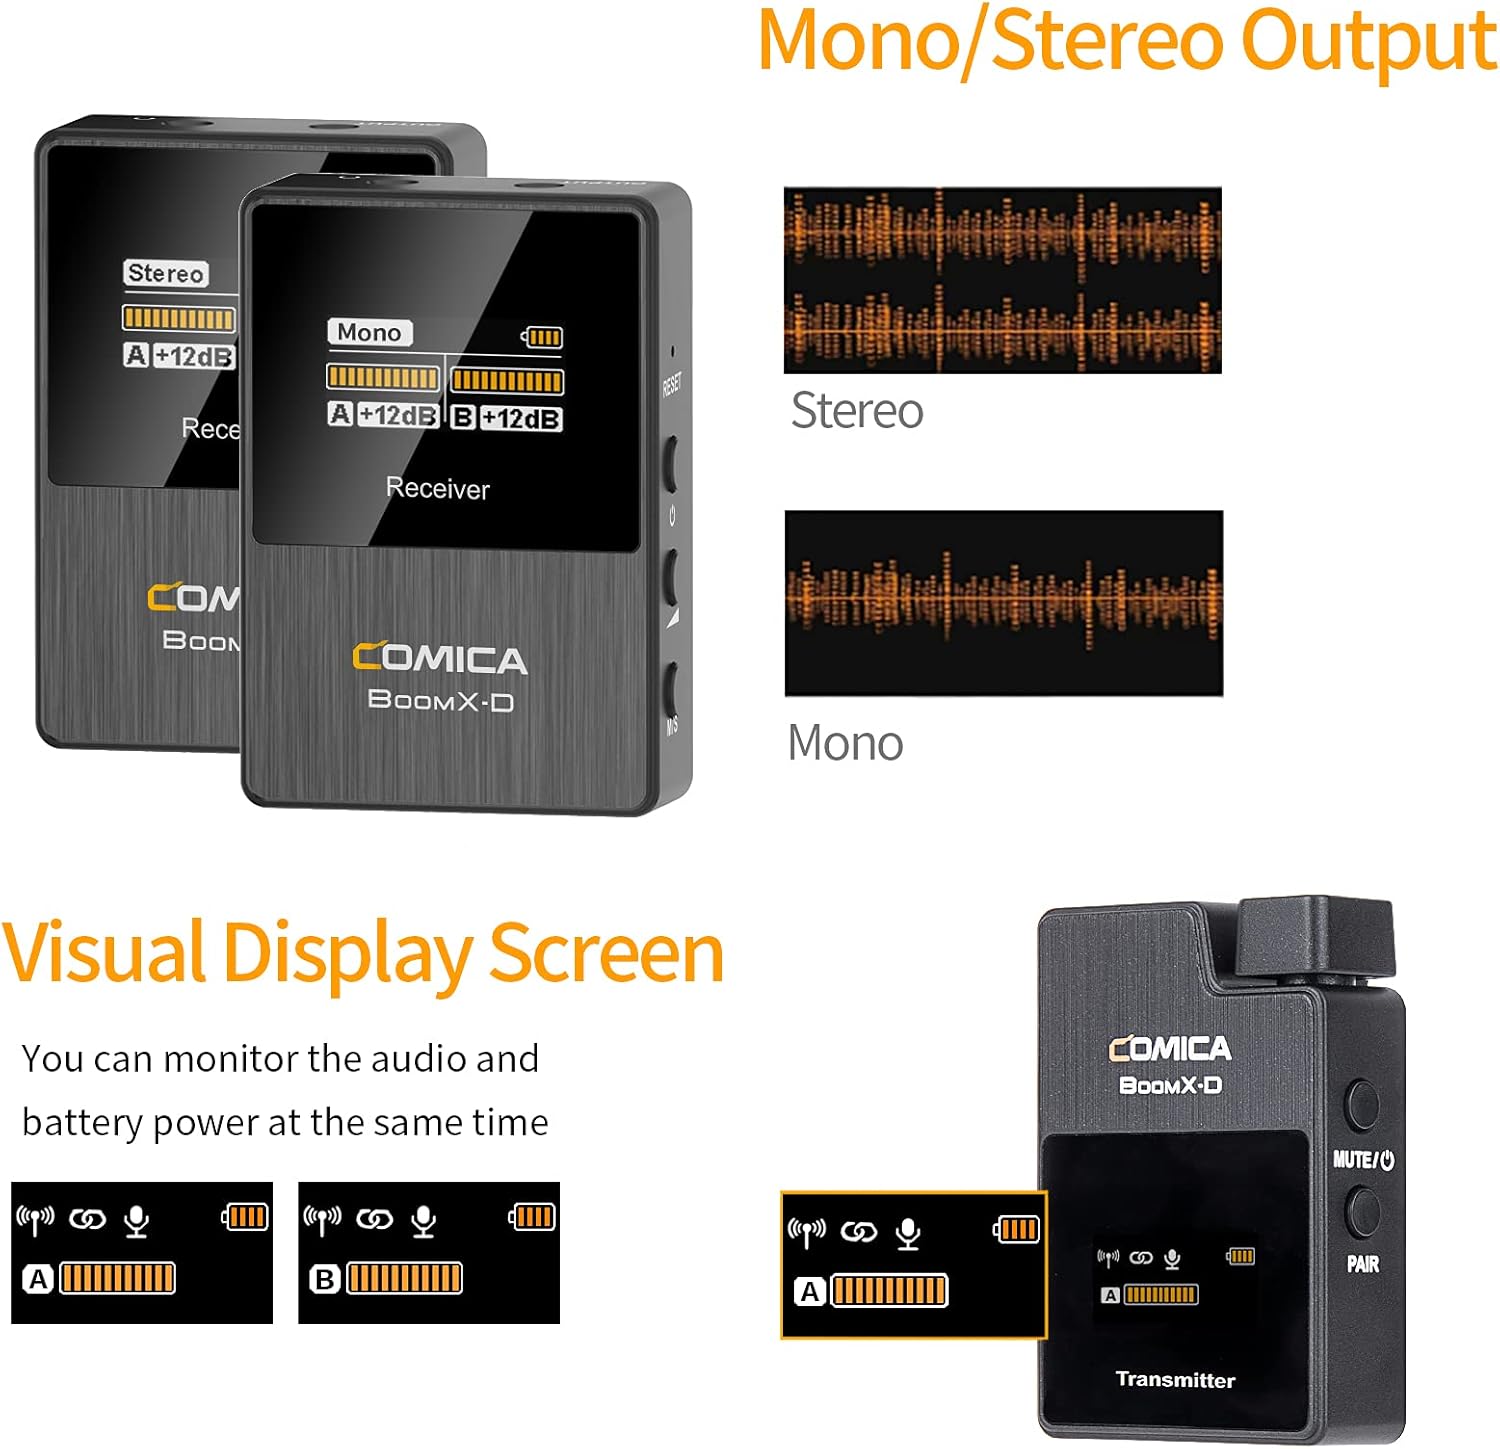
Figure 6: The visual display screen of the COMICA BoomX-D D2 receiver, showing options for Mono/Stereo output and real-time monitoring of audio levels and battery status for both transmitters.
4.3 Lydovervågning i realtid
Connect headphones to the receiver's 3.5mm headphone output jack to monitor your audio in real-time. This ensures that your audio is being recorded correctly and helps identify any potential issues during recording.

Figure 7: A user monitoring real-time audio through headphones connected to the COMICA BoomX-D D2 receiver, which is mounted on a camera, ensuring sound quality during recording.
5. Vedligeholdelse
- Rensning: Use a soft, dry cloth to clean the devices. Do not use harsh chemicals or abrasive materials.
- Opbevaring: Opbevar mikrofonsystemet et køligt og tørt sted, væk fra direkte sollys og ekstreme temperaturer.
- Batteripleje: For optimal batterilevetid bør du undgå at aflade enhederne helt ofte. Oplad dem regelmæssigt, selvom de ikke er i brug i længere perioder.
- Undgå fugt: Keep the devices away from water and high humidity to prevent damage.
6. Fejlfinding
| Problem | Mulig årsag | Løsning |
|---|---|---|
| Ingen lydudgang | Low battery; Incorrect cable connection; Unpaired devices; Muted microphone. | Charge devices; Ensure cables are securely connected; Re-pair transmitter and receiver; Check if transmitter is muted. |
| Interferens/dårlig lydkvalitet | Obstructions between TX/RX; Too far from receiver; Strong electromagnetic interference. | Reduce distance between TX/RX; Ensure clear line of sight; Move away from other wireless devices; Check external microphone connection. |
| Devices Not Pairing | Out of range; Pairing mode not activated. | Bring devices closer; Follow manual pairing instructions (if automatic fails); Ensure both are powered on. |
| Kort batterilevetid | Old battery; Frequent full discharge. | Ensure full charge before use; Avoid frequent full discharge; Consider battery replacement if significantly degraded. |
7. Specifikationer
- Mærke: KOMIKA
- Modelnummer: D2
- Forbindelse teknologi: USB, Wireless (2.4G Digital)
- Connector Type: USB-C, 3.5mm (TRS/TRRS)
- Speciel funktion: Clip-on-design
- Polar mønster: Omnidirektionel
- Lydfølsomhed: 86 decibel
- Mikrofonformfaktor: Mikrofonsystem
- Strømkilde: USB-C
- Signal-til-støjforhold: 86 dB
- Antal kanaler: 2
- Arbejdsområde: Op til 50 m (164 fod)
- Latency: <20 ms
8. Garanti og support
COMICA products are covered by a limited warranty against defects in materials and workmanship. For specific warranty terms, registration, and technical support, please visit the official COMICA webwebstedet eller kontakt deres kundeservice. Gem din købskvittering som købsbevis i tilfælde af garantikrav.
Officiel Webwebsted: www.comica-audio.com