1. Introduktion
Thank you for choosing the Alomejor Digital Drum Metronome Practice Pad. This device is designed to assist drummers and musicians in developing precise rhythm and tempo. It features a digital LCD screen, multiple practice modes, and an earphone jack for private practice sessions. Please read this manual thoroughly before using the product to ensure proper operation and longevity.
Pakkeindhold:
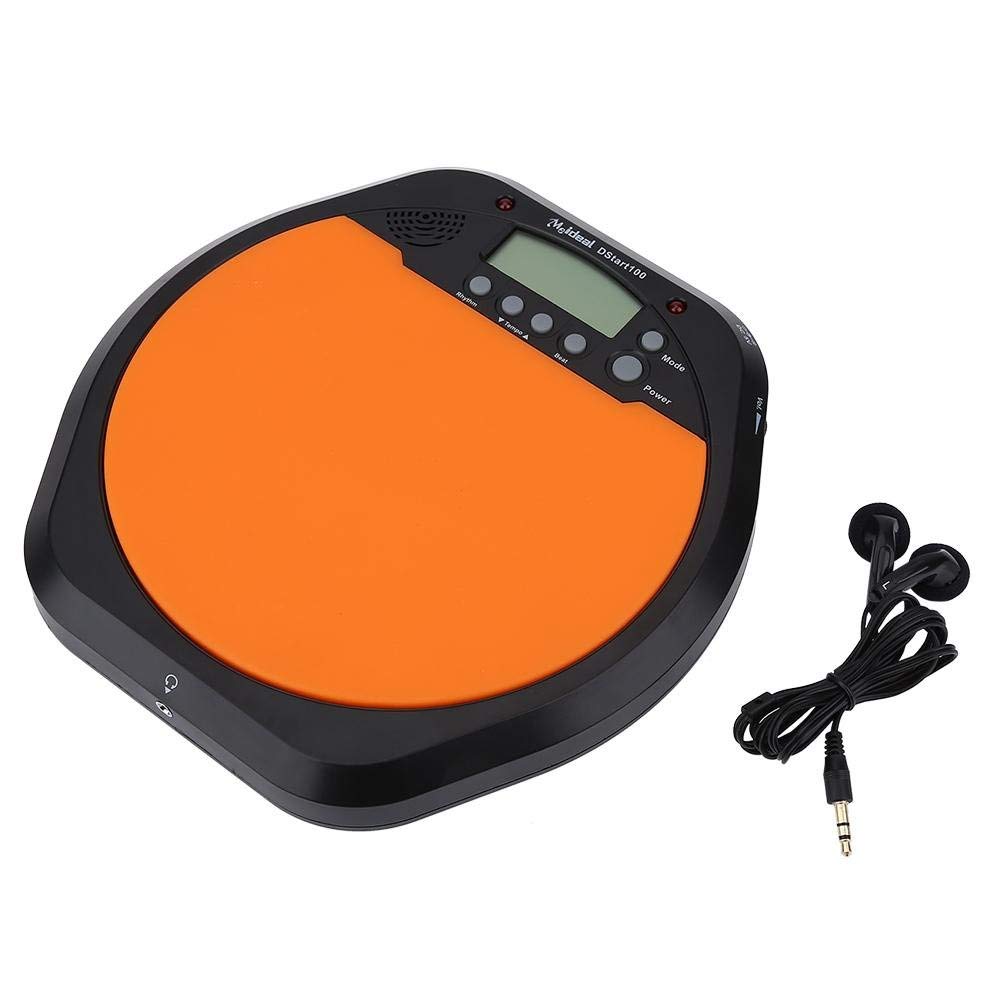
- 1 x Digital Drum Metronome Practice Pad
- 1 x høretelefon
- (2 x AAA batteries not included)
2. Produktfunktioner
- Multifunktionelt design: Offers various modes for comprehensive rhythm training.
- Digital LCD skærm: Provides clear visual feedback for tempo, rhythm, and count.
- Trykfunktion: Allows users to test and set their ideal tempo or match a song's tempo.
- Realistic Drum Feel: Engineered to provide a responsive surface similar to a real drum.
- Stik til øretelefoner: Enables silent practice, ideal for use in various environments without disturbing others.
- External DC Power Option: Supports external power supply for extended use (adapter not included).
- Holdbar konstruktion: Features anti-shock and anti-slip design for stability and longevity.


3. Opsætning
3.1 Batteriinstallation
- Locate the battery compartment on the underside of the practice pad.
- Åbn batterirummets dæksel.
- Isæt to (2) AAA-batterier, og sørg for at polerne vender korrekt (+/-).
- Luk batterirummets dæksel forsvarligt.

3.2 Strømtilslutning
- Batteristrøm: Når batterierne er installeret, er enheden klar til brug.
- External DC Power (Optional): For continuous use, connect a compatible DC power adapter (not included) to the external DC power port located on the side of the unit.

3.3 Hovedtelefontilslutning
To practice silently, plug the included earphone into the 3.5mm headphone jack located on the side of the practice pad.

4. Betjeningsvejledning
4.1 Tænd/sluk
- Tryk på Magt knappen for at tænde enheden.
- Tryk og hold på Magt knappen for at slukke for enheden.
4.2 Valg af tilstand
Tryk på Mode button to cycle through the available practice modes:
- Metronomtilstand: Provides a steady click for tempo practice.
- Tapping Mode: Allows you to tap a rhythm, and the device will display the calculated tempo.
- Tælletilstand: Helps in practicing specific counts or measures.

4.3 Adjusting Tempo and Rhythm
- Brug Tempo ▲ og Tempo ▼ buttons to increase or decrease the metronome's tempo (BPM).
- Brug Rytme button to change the rhythm pattern.
- Brug Slå button to adjust the beat subdivision.
The LCD screen will display the current tempo, rhythm, and beat settings.

5. Vedligeholdelse
- Rensning: Wipe the surface of the practice pad with a soft, dry cloth. Do not use abrasive cleaners or solvents.
- Opbevaring: Opbevar enheden et køligt, tørt sted væk fra direkte sollys og ekstreme temperaturer.
- Batteripleje: Fjern batterierne, hvis enheden ikke skal bruges i længere tid, for at forhindre lækage.
- Undgå påvirkning: While designed to be shockproof, avoid dropping the device or subjecting it to strong impacts.
6. Fejlfinding
| Problem | Mulig årsag | Løsning |
|---|---|---|
| Enheden tænder ikke. |
|
|
| Ingen lyd fra højttaler/øretelefoner. |
|
|
| Tap function is inaccurate. |
|
|
7. Specifikationer
| Mærke | Alomejor |
| Modelnummer | Alomejorrxzdnhs6e2 |
| Farve | Sort/orange |
| Materiale | Plast |
| Dimensioner (ca.) | 207 x 206 x 29 mm (8.15 x 8.11 x 1.14 tommer) |
| Vægt (ca.) | 496 g (1.1 lbs) |
| Tempo rækkevidde | 30-280 slag/min |
| Strømforsyning | 2 x AAA batteries (not included) or external DC power (adapter not included) |
8. Garanti og support
Alomejor products are designed for quality and performance. While specific warranty details are not provided in this manual, please refer to your purchase documentation or contact the retailer for information regarding warranty coverage and customer support.
For any issues or inquiries, please contact Alomejor customer service through the platform where you purchased the product.