
1. Introduktion
Thank you for choosing the Thermex H 30-U electric water heater. This appliance is a compact, wall-mounted storage water heater designed for domestic use, suitable for providing hot water for kitchen and shower applications. With a 30-liter capacity, it offers an efficient solution for your hot water needs. This manual provides essential information for the safe installation, operation, and maintenance of your new water heater.
The Thermex H 30-U is CE certified, ensuring compliance with European safety standards. It features an integrated inlet combination valve that acts as both a pressure limiting and non-return valve, enhancing safety and performance. The unit operates on 230V with a 1500W heating element, capable of heating water in approximately 65 minutes. Its design allows for flexible installation, including within kitchen cabinets, with upward-facing connections.
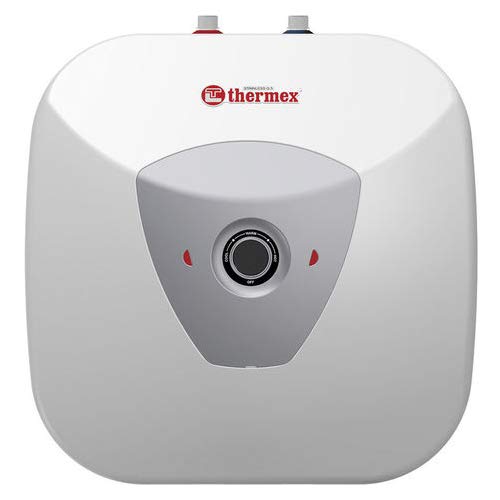
Figure 1: Thermex H 30-U Electric Water Heater, front view.
This image shows the compact design of the Thermex H 30-U electric water heater, highlighting its white casing and general appearance. The unit is designed for wall mounting and features connections at the top for convenient installation in various settings, such as under a sink or inside a cabinet.
2. Vigtige sikkerhedsinstruktioner
Please read all safety instructions carefully before installing or operating the appliance. Failure to follow these instructions may result in electric shock, fire, property damage, or personal injury.
- Elektrisk sikkerhed: Sørg for, at strømforsyningen matcher voltage specified on the appliance (230V). The appliance must be properly grounded. Do not use extension cords or adapters. Disconnect power before any maintenance or repair.
- Vandtryk: The maximum operating pressure is 8 Bar. Do not exceed this pressure. The included safety valve must be installed and regularly checked.
- Installation: Installation must be performed by a qualified professional in accordance with local regulations and this manual. Ensure the wall can support the weight of the water heater when full.
- Overophedningsbeskyttelse: The appliance is equipped with overheating protection. Do not tampmed denne sikkerhedsfunktion.
- Børn og udsatte personer: Dette apparat kan bruges af børn i alderen 8 år og derover og personer med nedsatte fysiske, sensoriske eller mentale evner eller mangel på erfaring og viden, hvis de har fået opsyn eller instruktion i brugen af apparatet på en sikker måde og forstår de involverede farer. . Børn må ikke lege med apparatet. Rengøring og brugervedligeholdelse må ikke udføres af børn uden opsyn.
- Vandtemperatur: Hot water can cause severe burns. Exercise caution when using hot water, especially with children or individuals with reduced sensitivity.
3. Pakkens indhold
Kontroller, at alle komponenter er til stede og ubeskadigede, før du fortsætter installationen:
- Thermex H 30-U Water Heater Unit
- Vægmonteringsbeslag
- Safety Valve (Inlet Combination Valve)
- Connection Materials
- Pre-assembled Power Cable with Plug
- Brugervejledning (dette dokument)
4. Tekniske specifikationer
| Feature | Specifikation |
|---|---|
| Model | H 30-U |
| Kapacitet | 30 liter |
| Dimensioner (B x H x D) | 455 mm x 476 mm x 408 mm |
| Strømudgang | 1500 W |
| Voltage | 230 V |
| Opvarmningstid (ca.) | 65 minutes (for 30L) |
| Tom vægt | 8.5 kg |
| Maksimalt tryk | 8 Bar |
| Energieffektivitetsklasse | C (on A+ to F scale) |
| Monteringstype | Vægmonteret |
| Vandtilslutninger | 1/2 tomme |
| Særlige funktioner | Overophedningsbeskyttelse |
5. Installationsvejledning
Installation of the Thermex H 30-U water heater should only be carried out by a qualified plumber or electrician in compliance with all local codes and regulations. Ensure the power supply is disconnected before beginning installation.
5.1. Valg af placering
- Select a wall that can safely support the full weight of the water heater (approx. 38.5 kg when full).
- Sørg for, at stedet er beskyttet mod frost.
- Allow sufficient space around the unit for maintenance and air circulation.
- The unit is designed for upward-facing connections, making it suitable for installation inside kitchen cabinets or above a sink.
5.2. Montering af enheden
- Mark the drilling points on the wall using the provided wall mounting bracket as a template.
- Drill holes and insert appropriate wall plugs (not always supplied, depending on wall type).
- Securely fasten the wall mounting bracket to the wall.
- Carefully lift the water heater and hang it onto the wall mounting bracket. Ensure it is stable and level.
5.3. Vandtilslutninger
- Connect the cold water inlet (marked blue) to the main cold water supply using 1/2 inch connectors.
- Install the supplied safety valve (inlet combination valve) on the cold water inlet line. This valve is crucial for safe operation and must not be omitted.
- Connect the hot water outlet (marked red) to your hot water distribution system using 1/2 inch connectors.
- Open the main water supply and check all connections for leaks.
- Open a hot water tap in your home to allow the tank to fill completely and air to escape. Close the tap once water flows steadily.
5.4. Elektrisk tilslutning
- The Thermex H 30-U comes with a pre-assembled power cable and plug.
- Plug the appliance into a properly grounded 230V electrical outlet.
- Ensure the electrical circuit is protected by an appropriate fuse or circuit breaker.
- Brug ikke adaptere eller forlængerledninger.
6. Betjeningsvejledning
6.1. Første opstart
- Ensure the water heater tank is completely filled with water (as described in Section 5.3).
- Plug the power cable into the electrical outlet or switch on the dedicated circuit breaker.
- The indicator light (if present) will illuminate, indicating that the heating process has begun.
6.2. Temperaturjustering
The Thermex H 30-U typically features a thermostat control knob, usually located on the front or bottom of the unit. Rotate the knob to adjust the desired water temperature. Higher settings will result in hotter water and consume more energy.
6.3. Normal drift
Once the desired temperature is set, the water heater will automatically heat the water and maintain the set temperature. The heating element will cycle on and off as needed. The heating time for a full 30-liter tank is approximately 65 minutes.
7. Vedligeholdelse
Regular maintenance ensures the longevity and efficient operation of your water heater. Always disconnect the power supply before performing any maintenance.
7.1. Rengøring af ydersiden
Rengør ydersiden casing med en blød, damp klud. Brug ikke slibende rengøringsmidler, opløsningsmidler eller stærke kemikalier, da disse kan beskadige overfladen.
7.2. Safety Valve Check
Periodically check the safety valve (inlet combination valve) for proper operation. Refer to the valve manufacturer's instructions for specific testing procedures, typically involving briefly opening the relief lever to ensure water discharges. This helps prevent mineral buildup and ensures the valve can release pressure if necessary.
7.3. Descaling (Professional Service Recommended)
In areas with hard water, mineral deposits (limescale) can accumulate inside the tank and on the heating element, reducing efficiency and lifespan. Descaling should be performed by a qualified technician every 1-2 years, depending on water hardness. This involves draining the tank and removing scale buildup.
7.4. Tømning af tanken
If the water heater will be out of use for an extended period or if there is a risk of freezing, the tank should be drained. Disconnect power, close the cold water inlet valve, open a hot water tap, and then open the drain valve (if present) or disconnect the cold water inlet to allow the tank to empty.
8. Fejlfinding
Før du kontakter kundesupport, bedes du læse følgende fejlfindingsvejledning for almindelige problemer:
| Problem | Mulig årsag | Løsning |
|---|---|---|
| Intet varmt vand |
|
|
| Vand ikke varmt nok |
|
|
| Vandlækage fra sikkerhedsventil |
|
|
| Unusual noises from unit |
|
|
If the problem persists after attempting these solutions, please contact Thermex customer support or a qualified service technician.
9. Garanti og support
9.1. Garantioplysninger
The Thermex H 30-U water heater comes with a comprehensive warranty:
- 2-års garanti on the entire device (excluding consumable parts).
- 5-års garanti på vandtanken.
This warranty covers manufacturing defects and material faults under normal use and service. It does not cover damage resulting from improper installation, misuse, neglect, freezing, unauthorized repairs, or failure to perform recommended maintenance. Please retain your proof of purchase for warranty claims.
9.2. Kundesupport
For technical assistance, spare parts, or warranty claims, please contact your local Thermex dealer or visit the official Thermex website for contact information. When contacting support, please have your model number (H 30-U) and proof of purchase readily available.