Indledning
This manual provides detailed instructions for the safe and efficient operation of your JVC KD-T812BT CD Receiver. Please read this manual thoroughly before using the product and keep it for future reference. This unit features integrated Alexa, Bluetooth hands-free calling and audio streaming, a high-performance tuner, sound processor, USB, AUX, and Spotify Control.
Opsætning
Udpakning og pakkeindhold
Carefully remove all items from the packaging. Ensure all components are present before proceeding with installation.
- KD-T812BT Main Unit
- Frontpanel
- Forramme
- Installation Sleeve
- ISO ledningsnet
- Release Hooks (2x)
- Mikrofon
Installation
Professional installation is recommended for optimal performance and safety. Refer to the included wiring harness diagram for correct connections. Ensure the vehicle's battery is disconnected before starting installation.
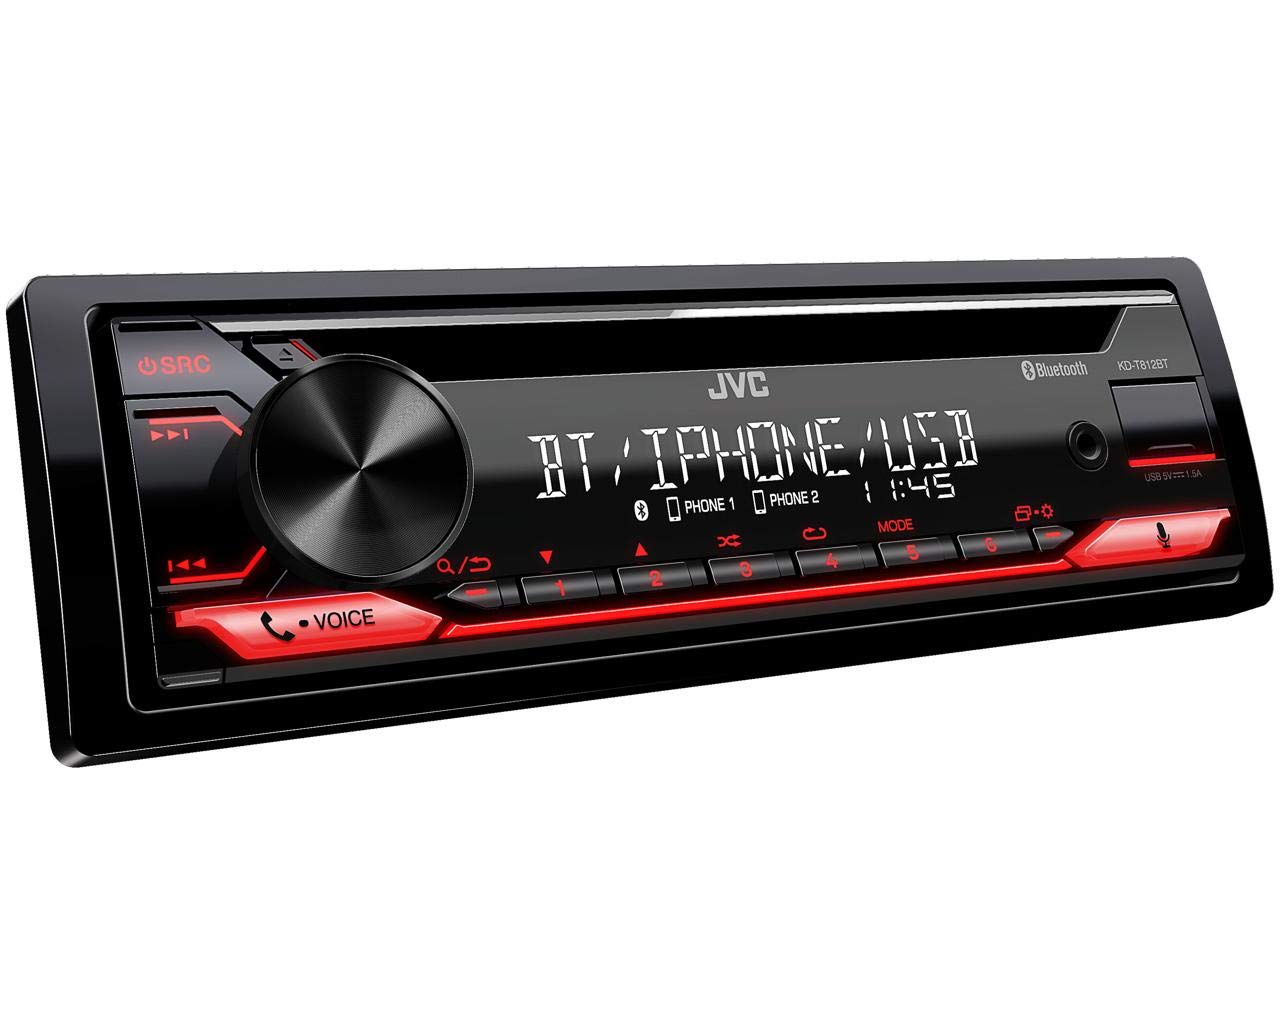
Figur 1: Forside view of the JVC KD-T812BT CD Receiver. This image shows the main display, control knob, source button, and various function buttons with red illumination.

Figur 2: Bagside view of the JVC KD-T812BT CD Receiver, illustrating the wiring harness connector, antenna input, and RCA pre-out connections.
Første gang tændt
- Efter montering skal køretøjets batteri tilsluttes igen.
- Tryk på SRC knappen for at tænde enheden.
- Følg instruktionerne på skærmen for den første opsætning, inklusive valg af sprog.
Bluetooth-parring
To use Bluetooth features, you must pair your smartphone with the receiver.
- Tænd for Bluetooth på din smartphone.
- On the KD-T812BT, navigate to the Bluetooth menu.
- Select "Pairing" or "Device Search".
- Select "KD-T812BT" from your smartphone's Bluetooth device list.
- Bekræft parringskoden på begge enheder, hvis du bliver bedt om det.
- Up to two phones can be connected simultaneously for hands-free calls, and up to five smartphones for audio playback.

Figure 3: Illustration representing the Bluetooth hands-free calling feature, highlighting wireless connectivity for communication.
JVC Remote-app
Download the JVC Remote App from your smartphone's app store to control the receiver directly from your device.

Figure 4: Icon representing the JVC Remote App, which allows smartphone control of the receiver.
Betjeningsvejledning
Grundlæggende kontrol
- Tænd/sluk: Tryk på SRC button. Hold to turn off.
- Lydstyrkekontrol: Rotate the large central knob.
- Kildevalg: Tryk på SRC button repeatedly to cycle through sources (CD, USB, Tuner, Bluetooth Audio, AUX).
- Menu navigation: Use the central knob and surrounding buttons to navigate menus.
CD-afspilning
- Insert a CD into the disc slot with the label side up. The unit will automatically begin playback.
- Brug Springe knapper (<< / >>) to change tracks.
- Tryk på Pause/Afspil knappen for at pause eller genoptage afspilning.
- For at skubbe en CD ud, tryk på Udstøde knap.
USB-afspilning
Connect a USB storage device to the USB port. The unit supports AAC, MP3, WMA, WAV, and FLAC audio formats. The USB port also provides 1.5A charging for smartphones.

Figure 5: Logo indicating compatibility with iPhone and iPod devices for direct connection via USB.

Figure 6: Icon illustrating the USB port's capability to provide up to 1.5A charging current for connected devices.
Radio Tuner
Select the Tuner source. Use the Søge buttons to find stations. Press and hold to auto-seek. Store your favorite stations using the preset buttons (1-6).
- RDS (Radio Data System): Displays station information, program type, and traffic announcements where available.
- Stationshukommelse: The unit supports 18 FM and 6 MW station presets.
Bluetooth-lydstreaming
Once paired, select Bluetooth Audio as the source. You can stream music from your smartphone. The advanced AVRCP 1.6 profile allows for convenient searching of individual music tracks directly from the car stereo.
Håndfri opkald
When a paired phone receives a call, the unit will display caller information. Use the Svar og Afslut opkald buttons on the unit to manage calls. The external microphone ensures clear communication.
Alexa integration
With the Alexa app installed on your smartphone and connected via Bluetooth, you can use voice commands for various functions, including playing music, checking traffic, creating shopping lists, and getting news updates.

Figure 7: Logo indicating the integration of Amazon Alexa voice services within the receiver.
Spotify Control
Connect your smartphone running the Spotify app via Bluetooth or USB. You can then control Spotify playback directly from the receiver, including track selection and playlist browsing.

Figure 8: Logo representing the Spotify Control feature, allowing direct control of Spotify from the head unit.
Lydindstillinger
Access the sound menu to adjust audio settings:
- 13-bånds parametrisk iEQ: Allows precise adjustment of frequency response.
- DSP (Digital Signal Processor) with Time Alignment: Optimizes sound staging by adjusting the delay for each speaker.
- Aktiv crossover: Configures frequency ranges for connected speakers and subwoofers.

Figure 9: Icon representing the Digital Sound Processor (DSP) capabilities for advanced audio tuning.
Skærmindstillinger
Adjust the brightness of the display and button illumination through the system settings menu. The unit features a 13-digit VA LCD display for good readability.
Opretholdelse
Rengøring af enheden
Wipe the unit's surface with a soft, dry cloth. For stubborn dirt, use a cloth lightly dampened with water. Avoid using abrasive cleaners or solvents, as they can damage the finish.
Rengøring af cd'er
Handle CDs by their edges. If a CD is dirty, wipe it gently from the center outwards with a soft, lint-free cloth. Do not use solvents or abrasive cleaners.
Fejlfinding
If you encounter issues with your KD-T812BT, refer to the following common problems and solutions:
| Problem | Mulig årsag | Løsning |
|---|---|---|
| Ingen strøm | Loose wiring connection; Blown fuse. | Check power and ground connections. Inspect and replace fuse if necessary. |
| Ingen lyd | Lydstyrken er for lav; Mute aktiveret; Problem med højttalerledningerne. | Skru op for lydstyrken. Deaktiver lydløs. Kontroller højttalertilslutningerne. |
| Bluetooth-forbindelse mislykkes | Enheden er ikke i parringstilstand; Interferens; Allerede forbundet til en anden enhed. | Ensure both devices are in pairing mode. Move closer to the unit. Disconnect from other devices. |
| CD/USB playback error | Dirty or scratched disc; Incompatible file format; Damaged USB device. | Clean or replace disc. Ensure files are supported formats. Try a different USB device. |
If the problem persists after attempting these solutions, please contact JVC customer support.
Specifikationer
| Feature | Specifikation |
|---|---|
| Modelnummer | KD-T812BT |
| Mærke | JVC |
| Forbindelsesteknologi | Bluetooth, USB |
| Controller type | Amazon Alexa |
| Særlige funktioner | RDS, Spotify |
| Kompatible enheder | Smartphone |
| Lydkodning | Stereoanlæg |
| Lydudgangstilstand | Stereoanlæg |
| Surround Sound Kanalkonfiguration | 4.0 |
| Udgangseffekt | 200 Watts (4 x 50 W) |
| Antal kanaler | 4 |
| Internet Application | Spotify |
| Kontrolmetode | Anvendelse |
| Digitalt medieformat | MP3 audio, WAV, WMA, AAC, FLAC |
| Farve | Sort |
| USB-opladningsstrøm | Op til 1.5 A |
| Vise | 13-digit VA LCD |
Garantioplysninger
Dette produkt er omfattet af en 2 års producentgarantiGem venligst din købsbevis i tilfælde af garantikrav. Garantien dækker defekter i materialer og udførelse ved normal brug. Den dækker ikke skader forårsaget af misbrug, ulykker, uautoriseret ændring eller forkert installation.
For detailed warranty terms and conditions, please refer to the warranty card included with your product or visit the official JVC webwebsted.
Kundesupport
For further assistance, technical support, or service inquiries, please contact JVC customer support. You can find contact information on the official JVC webwebstedet eller i den dokumentation, der følger med dit produkt.
Before contacting support, please have your product model number (KD-T812BT) and purchase details ready.
Officiel JVC Webwebsted: www.jvc.com