
Indledning
Welcome to the brim 15 Bar Espresso Machine user manual. This guide provides detailed instructions for the safe and efficient operation, maintenance, and troubleshooting of your new espresso machine. Please read this manual thoroughly before first use and retain it for future reference.
Vigtige sikkerhedsoplysninger
Ved brug af elektriske apparater skal grundlæggende sikkerhedsforanstaltninger altid følges for at reducere risikoen for brand, elektrisk stød og/eller personskade, herunder følgende:
- Læs alle instruktioner.
- Rør ikke ved varme overflader. Brug håndtag eller knopper.
- For at beskytte mod brand, elektrisk stød og personskade må ledning, stik eller apparat ikke nedsænkes i vand eller anden væske.
- Tæt opsyn er nødvendigt, når et apparat bruges af eller i nærheden af børn.
- Træk stikket ud af stikkontakten, når det ikke er i brug, og før rengøring. Lad det køle af, før du sætter dele på eller af, og før du rengør apparatet.
- Betjen ikke noget apparat med en beskadiget ledning eller stik, eller efter at apparatet ikke fungerer korrekt eller er blevet beskadiget på nogen måde.
- Brug af tilbehør, der ikke er anbefalet af apparatets producent, kan resultere i brand, elektrisk stød eller personskade.
- Må ikke bruges udendørs.
- Lad ikke ledningen hænge ud over kanten af bordet eller bordpladen eller røre ved varme overflader.
- Må ikke placeres på eller i nærheden af en varm gas- eller elektrisk brænder eller i en opvarmet ovn.
- Sæt altid stikket i apparatet først, og sæt derefter ledningen i stikkontakten. For at afbryde forbindelsen skal du slukke for en vilkårlig knap og derefter tage stikket ud af stikkontakten.
- Brug ikke apparatet til andet end tilsigtet brug.
- Der skal udvises ekstrem forsigtighed ved flytning af et apparat, der indeholder varme væsker.
Produkt overview
The brim 15 Bar Espresso Machine is designed to provide a high-quality coffee experience at home. It features a high-pressure Italian pump and a powerful thermocoil heating system for consistent results.
Komponenter
- Kontrolpanel: Features Power, Single Shot, Double Shot, and Steam buttons, along with a pressure gauge.
- Portafilter: Indeholder formalet kaffe til brygning.
- Dampstang: Til dampning og skumning af mælk.
- Vandtank: Aftagelig for nem påfyldning.
- Drypbakke: Opsamler overskydende væske og kan tages ud for rengøring.
- Filterkurve: Pressurized single and double cup filter baskets.
- Tamper/Scoop: 2-in-1 tool for measuring and tamping kaffegrums.
- Frothing Pitcher: Stainless steel pitcher for milk frothing.
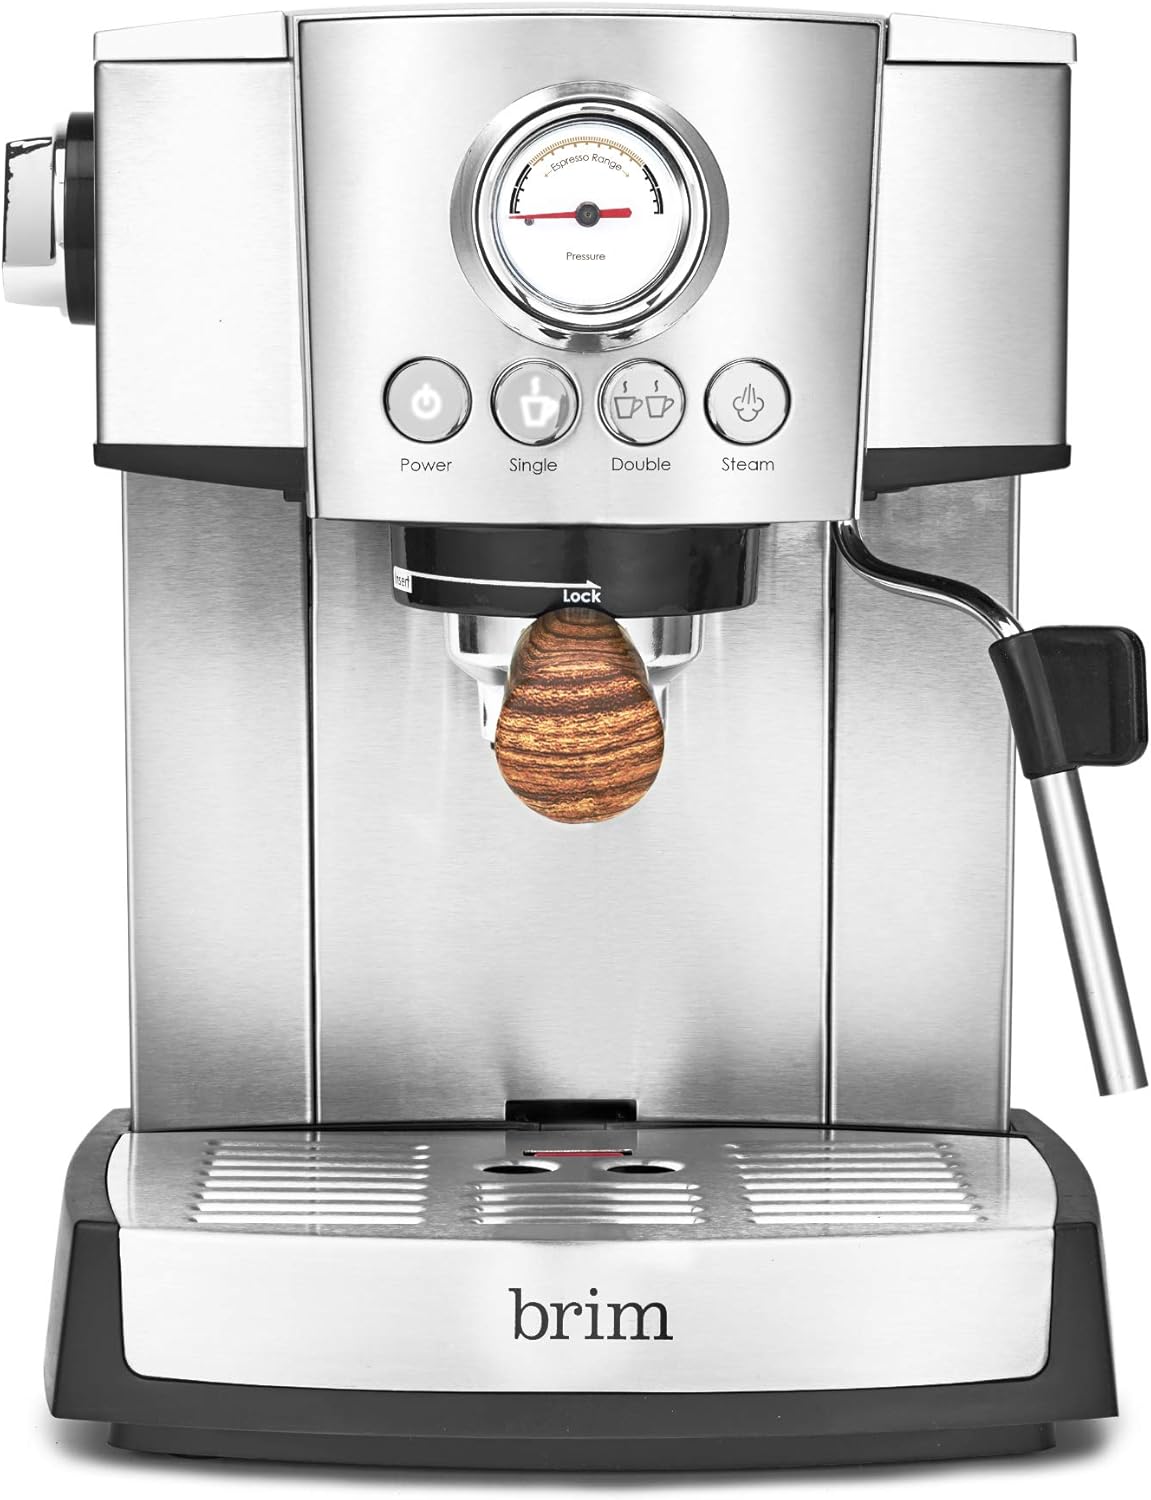
Figur 1: Front view of the brim 15 Bar Espresso Machine, showing the control panel with pressure gauge, power, single, double, and steam buttons, the portafilter, and the drip tray.

Figur 2: Vinklet view of the brim 15 Bar Espresso Machine, highlighting the removable water tank on the side, the portafilter with its wooden handle, and the steam wand.
Opsætning
1. Udpakning
- Carefully remove all packaging materials and the espresso machine from the box.
- Sørg for, at alle komponenter er anført i "Produkt overview"-afsnittet er til stede.
- Fjern eventuelle beskyttelsesfilm eller klistermærker fra apparatet.
2. Indledende rengøring
- Wash the water tank, portafilter, filter baskets, frothing pitcher, and drip tray in warm, soapy water. Rinse thoroughly and dry.
- Tør maskinens ydre af med adamp klæde. Nedsænk ikke hovedenheden i vand.
3. Fyldning af vandtanken
- Fjern vandtanken fra bagsiden af maskinen.
- Fyld tanken med frisk, koldt filtreret vand op til MAX-linjen.
- Sæt vandtanken sikkert på plads igen.
4. Klargøring af maskinen (første brug)
- Sæt maskinen i en jordet stikkontakt.
- Tryk på Magt button. The indicator light will flash as the machine heats up.
- Once the light stops flashing and remains solid, the machine is ready.
- Place a large cup under the portafilter (without coffee grounds).
- Tryk på Dobbelt skud button to run water through the system. This primes the pump and flushes any manufacturing residue.
- Repeat this process for the steam wand by turning the steam knob to release steam until water flows consistently.
- Turn off the steam and discard the water. Your machine is now ready for use.
Betjeningsvejledning
1. Fremstilling af espresso
- Klargør portafilteret: Sæt den ønskede filterkurv (enkelt eller dobbelt) i portafilteret.
- Malet kaffe: Mal friske kaffebønner til en fin konsistens, der er egnet til espresso.
- Dose og Tamp: Use the scoop to add ground coffee to the filter basket. For a single shot, use one scoop (approx. 7g). For a double shot, use two scoops (approx. 14g). Tamp kaffen fast og jævnt med tamper. Ensure the coffee bed is level.
- Fastgør portafilter: Sæt portafilteret i bryggehovedet, og drej det fast til højre, indtil det er sikkert låst.
- Placeringspokal: Placer en eller to espressokopper på drypbakken direkte under portafilterets tuder.
- Bryg espresso: Once the machine is heated (solid indicator light), press the Enkelt skud or Dobbelt skud button. The machine will automatically dispense the correct amount of espresso.
- Monitortryk: Observe the pressure gauge during extraction. The needle should ideally be in the "Espresso Range" for optimal flavor.
- Fjern portafilter: After brewing, carefully remove the portafilter by twisting it to the left. Be cautious as it will be hot. Discard the used coffee grounds.

Figur 3: Nærbillede view of espresso being extracted from the portafilter into a white cup, demonstrating the brewing process.
2. Steaming and Frothing Milk
- Forbered mælk: Fill the stainless steel frothing pitcher with cold milk (dairy or non-dairy) up to just below the spout.
- Aktiver Steam: Tryk på Damp button. The indicator light will flash as the machine heats up to steaming temperature. Once solid, it's ready.
- Rens damprør: Placer dampdysen over drypbakken, og åbn kort dampknappen for at tømme eventuelt kondensvand ud. Luk knappen.
- Dampmælk: Sæt spidsen af dampdysen lige under mælkens overflade i kanden. Åbn dampknappen helt.
- Skummælk: For frothing, keep the wand tip near the surface to incorporate air, creating foam. For steaming (heating), immerse the wand deeper. Move the pitcher in a circular motion to create a vortex.
- Monitor temperatur: Continue steaming until the milk reaches the desired temperature (around 140-150°F / 60-65°C) and texture. The pitcher will become hot to the touch.
- Stop med at dampe: Luk dampknappen, og fjern derefter kanden.
- Rengør damprør: Tør straks dampdysen af med en damppistol.amp cloth to prevent milk residue from drying. Briefly open the steam knob again to purge any milk from inside the wand.

Figur 4: A person's hands holding a stainless steel frothing pitcher under the steam wand, actively steaming milk to create foam for coffee beverages.
3. Making Cappuccinos and Lattes
Once you have brewed your espresso and frothed your milk, combine them to create your desired beverage.
- Cappuccino: Pour the frothed milk over the espresso, aiming for equal parts espresso, steamed milk, and a generous layer of foam.
- Latte: Pour the steamed milk over the espresso, holding back the foam initially, then topping with a thin layer of microfoam. Lattes typically have more steamed milk and less foam than cappuccinos.

Figur 5: Two ceramic cups containing coffee beverages with intricate latte art, showcasing the potential results of proper milk frothing.
Vedligeholdelse og rengøring
Regular cleaning and maintenance will ensure the longevity and optimal performance of your espresso machine. Always unplug the machine and allow it to cool before cleaning.
1. Daglig rengøring
- Portafilter og filterkurve: After each use, remove the portafilter, discard coffee grounds, and rinse the portafilter and filter basket under hot water. Use a brush to remove any stubborn coffee residue.
- Dampstang: Tør dampdysen af med en mundfuld umiddelbart efter mælkeskumning.amp klud. Udluft kort dampen for at fjerne eventuelle interne mælkerester.
- Drypbakke: Empty and rinse the drip tray daily or when the "Full" indicator appears. Wash with warm, soapy water.
- Bryggehoved: Wipe the brew head screen with a damp klud til at fjerne kaffegrums.
- Ydre: Tør maskinens ydre af med en blød, damp klæde. Brug ikke slibende rengøringsmidler eller skuresvampe.
2. Afkalkning
Mineral deposits (limescale) can build up in the machine over time, affecting performance and taste. Descale your machine every 2-3 months, or more frequently if you have hard water.
- Forbered afkalkningsopløsning: Mix a descaling solution according to the manufacturer's instructions (e.g., white vinegar and water, or a commercial descaler). Fill the water tank with this solution.
- Run Solution Through Brew Head: Place a large container under the brew head. Turn on the machine and press the Dobbelt skud button to run half of the solution through the brew head.
- Kør løsningen gennem dampstaven: Place another container under the steam wand. Open the steam knob and run the remaining solution through the steam wand until the tank is empty.
- Skylle: Fill the water tank with fresh, clean water. Repeat steps 2 and 3 to thoroughly rinse the machine and remove any descaling solution residue.
Fejlfinding
Se tabellen nedenfor for almindelige problemer og deres mulige løsninger. Hvis problemet fortsætter, skal du kontakte kundesupport.
| Problem | Mulig årsag | Løsning |
|---|---|---|
| No water flows from the brew head. | Water tank empty or not properly seated; machine not primed; pump airlocked. | Fill water tank and ensure it's seated correctly. Prime the machine as per "Setup" instructions. |
| Espressoen løber for langsomt eller slet ikke. | Coffee grounds too fine; too much coffee in filter; coffee tamped too hard; brew head clogged. | Brug grovere maling; reducer kaffemængden;amp lettere; rent bryggehoved. |
| Espresso flows too quickly or is watery. | Coffee grounds too coarse; too little coffee in filter; coffee tamped for let. | Brug finere maling; øg kaffemængden;amp fastere. |
| Damprøret producerer ingen damp eller svag damp. | Machine not at steaming temperature; steam wand clogged; water tank empty. | Wait for steam indicator light to be solid. Clean steam wand. Fill water tank. |
| Maskinen lækker vand. | Vandtanken er ikke sat korrekt i; drypbakken er fuld; pakningerne er slidte. | Ensure water tank is secure. Empty drip tray. Contact support if seals are suspected. |
Specifikationer
| Feature | Detalje |
|---|---|
| Mærke | skygge |
| Modelnavn | Espressomaskine |
| Varemodelnummer | 50030 |
| ASIN | B07YN8JRP6 |
| Kaffemaskine type | Espressomaskine |
| Speciel funktion | Programmerbar |
| Driftstilstand | Manuel |
| Human Interface Input | Knapper |
| Farve | Sølv |
| Produktdimensioner | 11.81 x 10.47 x 14.09 tommer |
| Varens vægt | 12.56 pund |
| Fabrikant | skygge |
| UPC | 829486500305 |
Garanti og support
For warranty information, please refer to the documentation included with your product at the time of purchase. For technical support, replacement parts, or general inquiries, please visit the official brim webwebsted eller kontakt deres kundeserviceafdeling.
Online support: Visit the brim Store on Amazon