Indledning
This manual provides essential instructions for the safe and efficient use of your MoKo Smart LED Light Bulb. This smart bulb offers customizable lighting with 16 million colors, adjustable brightness and color temperature, and convenient control via app or voice assistants like Alexa and Google Home. It operates on a 2.4GHz Wi-Fi network and does not require a separate hub.
Sikkerhedsoplysninger
- Sørg for, at strømmen er slukket, før du monterer eller fjerner pæren.
- Må ikke anvendes i helt lukkede armaturer, da dette kan forkorte pærens levetid.
- Not suitable for dimmers other than those controlled by the app or voice assistant.
- Undgå at udsætte pæren for vand eller høj luftfugtighed.
- Denne enhed er kun til indendørs brug.
Pakkens indhold
- MoKo Smart LED Light Bulb (BR30, E26 Base) x 1
- Brugervejledning x 1
Specifikationer
| Produktdimensioner | 14.48 x 10.16 x 10.16 cm |
| Varens vægt | 153.09 g (5.4 ounces) |
| Pære form størrelse | BR30 |
| Pære base | E26 |
| Wattage | 9 watt |
| Lys type | LED |
| Lys farve | Multicolor (RGB), Warm White, Cool White |
| Speciel funktion | Dæmpbar |
| Forbindelsesteknologi | Wi-Fi (kun 2.4 GHz) |
| Kontrolmetode | App, Voice (Alexa, Google Home, SmartThings) |
Opsætning
- Installer pæren: Screw the MoKo Smart LED Light Bulb into a standard E26 light socket. Ensure the power to the fixture is turned off before installation.
- Download appen: Download appen "Smart Life" fra App Store (iOS) eller Google Play Store (Android).
- Registrer/Log ind: Open the "Smart Life" app and register for a new account or log in if you already have one.
- Forberedelse til parring: Turn the light switch ON. The bulb should begin to blink rapidly. If it does not blink, manually turn the light switch OFF and ON repeatedly (typically 3-5 times) until the bulb starts blinking rapidly. This indicates it is in pairing mode.
- Tilføj enhed i appen: In the "Smart Life" app, tap the "+" icon in the top right corner to add a device. Select "Lighting" > "Light Source (Wi-Fi)".
- Opret forbindelse til Wi-Fi: Confirm the bulb is blinking rapidly. Enter your 2.4GHz Wi-Fi network password. Note: The bulb only supports 2.4GHz Wi-Fi networks; 5GHz networks are not compatible.
- Parring: The app will begin connecting to the bulb. Once connected, you can rename the bulb for easier control.
- Integrer med stemmeassistenter (valgfrit):
- Til Amazon Alexa: Open the Alexa app, go to "Skills & Games," search for "Smart Life," enable the skill, and link your Smart Life account. Then, discover devices.
- Til Google Home: Open the Google Home app, tap "+" > "Set up device" > "Works with Google," search for "Smart Life," link your account, and assign the bulb to a room.
- Til SmartThings: Open the SmartThings app, tap "+" > "Device," search for "Smart Life," and follow the on-screen instructions to connect.

Billede: Overview of MoKo Smart LED Light Bulb features, including color options, connectivity, and control methods.
Betjeningsvejledning
1. Appkontrol
- Tænd/sluk: Tap the bulb icon in the Smart Life app to toggle power.
- Dæmpning: Adjust the brightness slider within the app to set the desired light intensity.
- Farveændring: Select from 16 million colors using the color wheel or preset scenes.
- Farvetemperatur: Juster det hvide lys fra varmt (2000K) til koldt (6500K).
- Planlægning: Set schedules for the bulb to automatically turn on/off at specific times, or to change modes.
- Gruppekontrol: Create groups of multiple MoKo smart bulbs to control them simultaneously.
- Deling af enhed: Share control of the bulb with family members through the app.
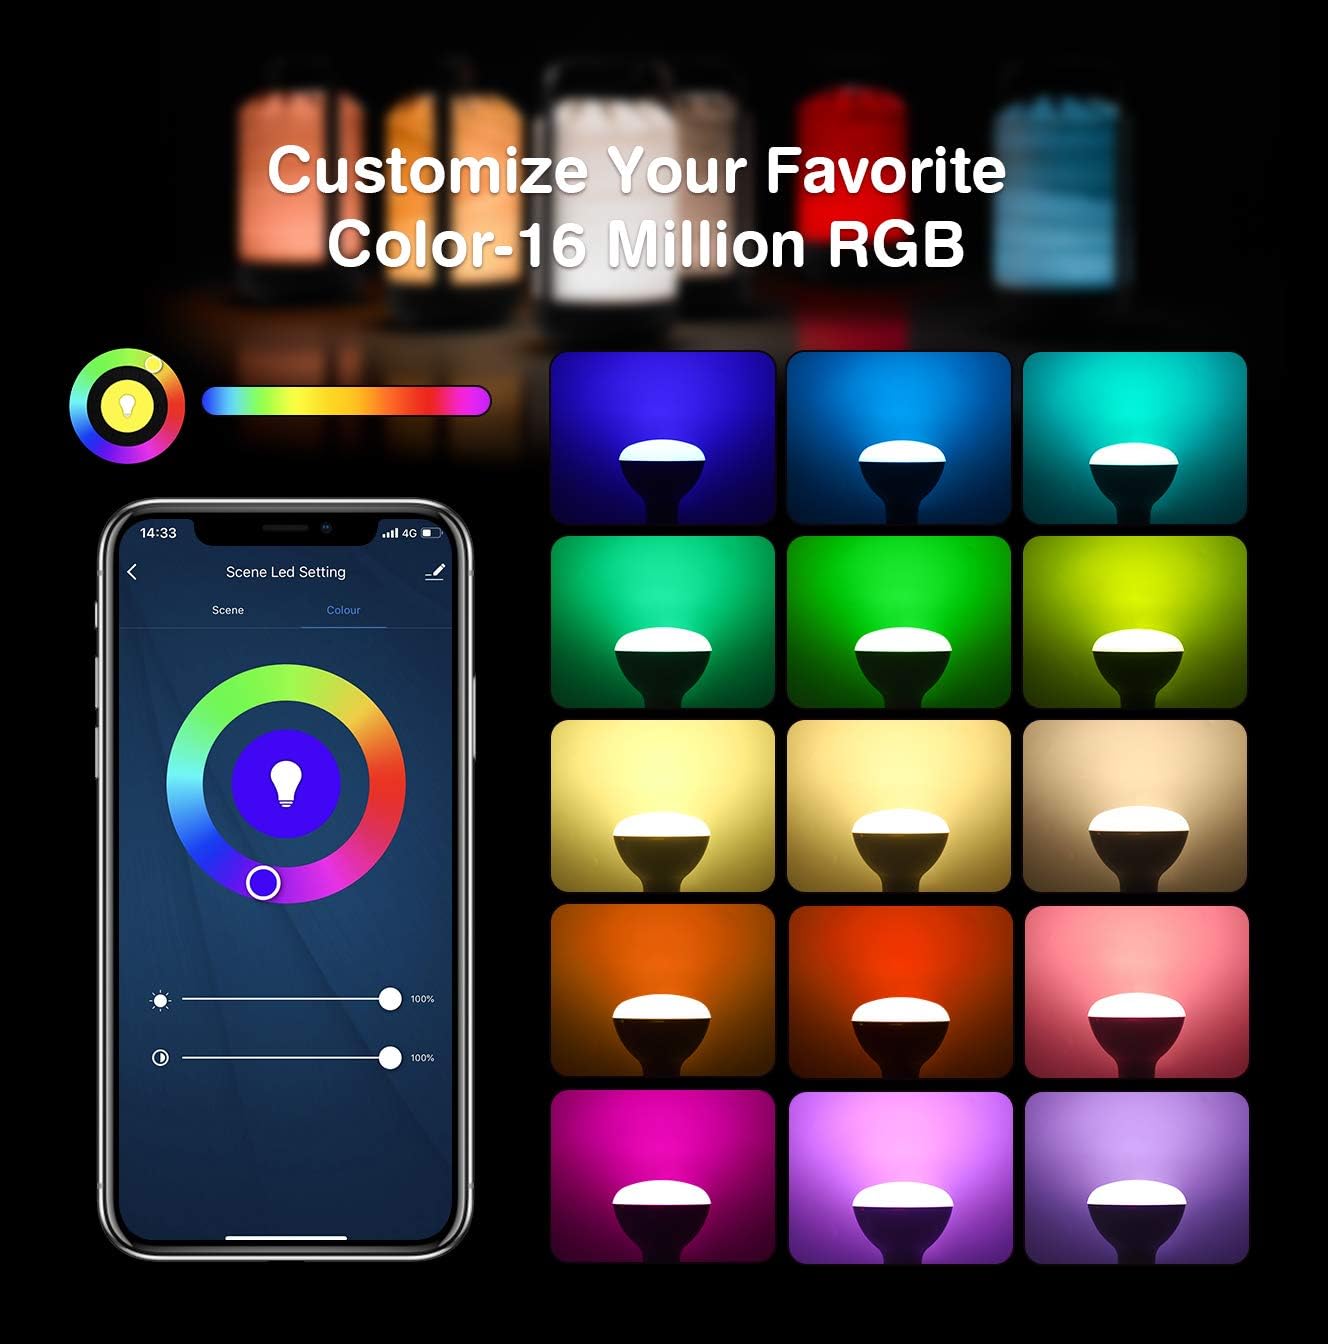
Image: App interface for customizing light color and brightness.

Image: App interface for adjusting color temperature and stepless dimming.
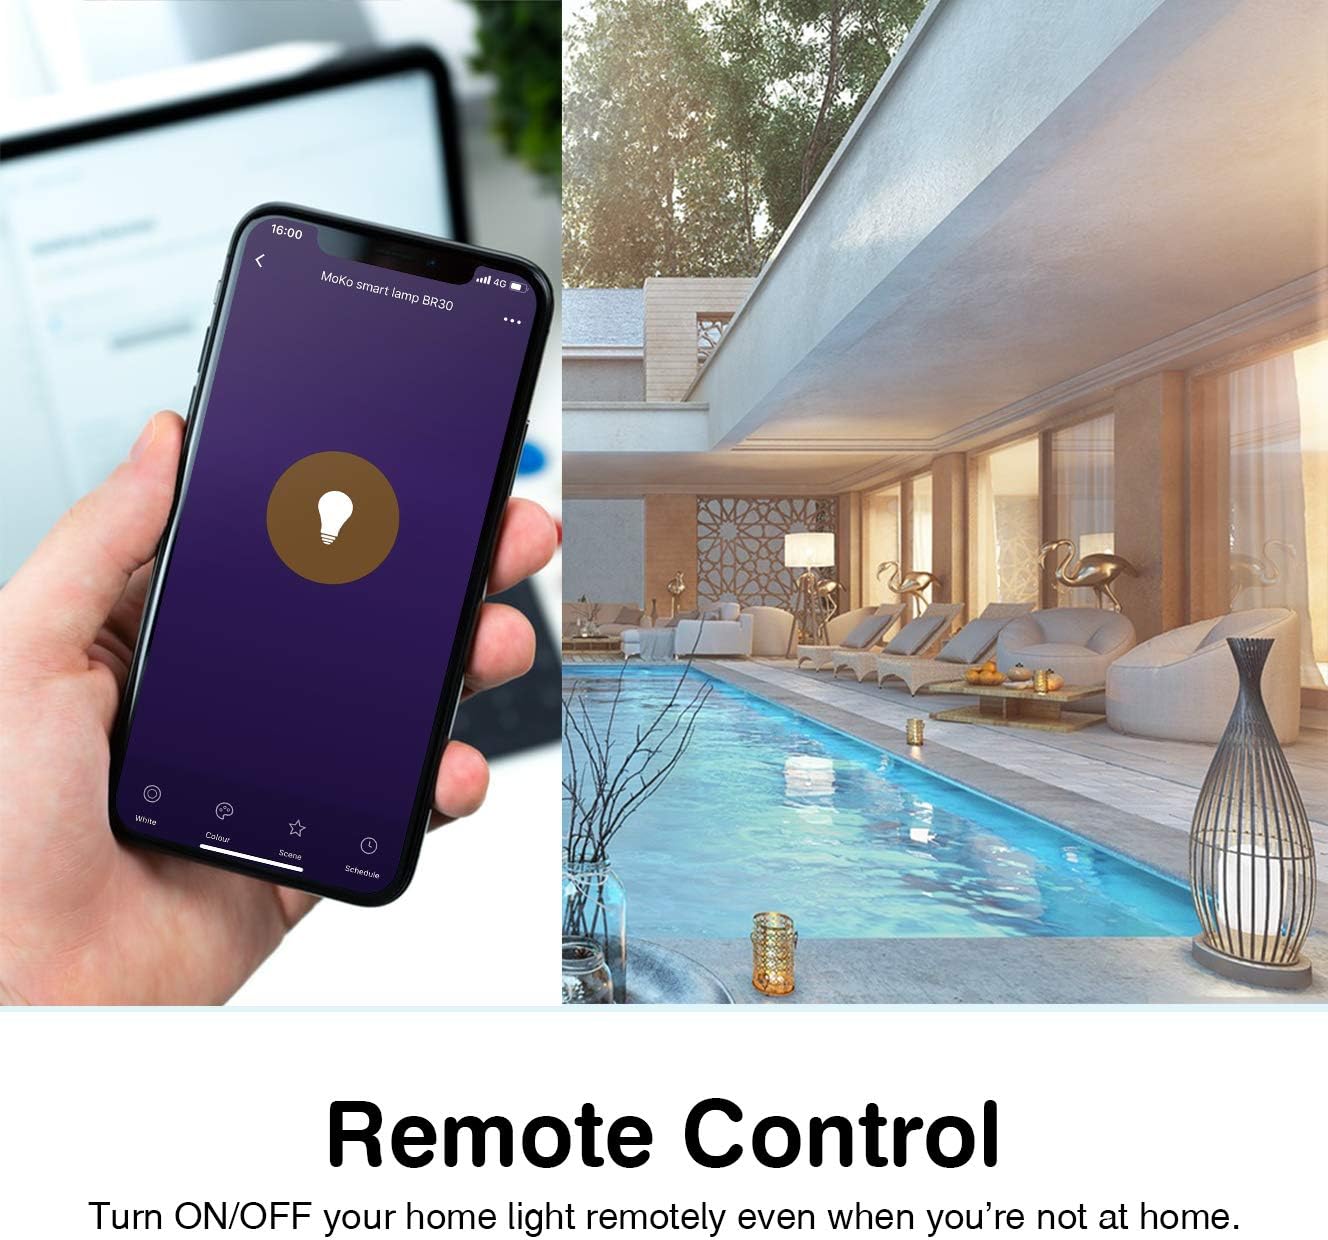
Image: Remote control functionality via the Smart Life app.

Image: Timing management and scheduling features.
2. Stemmekontrol
Once integrated with Amazon Alexa or Google Assistant, you can control your bulb using voice commands. Ensure your voice assistant device is connected to the same Wi-Fi network as your smart bulb.
- "Alexa, turn on the [Bulb Name]."
- "Hey Google, dæmp [Pærenavn] til 50%."
- "Alexa, indstil [Pærenavn] til blå."
- "Hey Google, skift [Pærenavn] til varm hvid."

Billede: Stemmestyringsintegration med Amazon Alexa og Google Assistant.
3. Gruppekontrol og enhedsdeling
The Smart Life app allows you to group multiple bulbs for simultaneous control and share access with other users.
- Gruppekontrol: In the app, select multiple bulbs and create a group. You can then control the entire group with a single command or tap.
- Deling af enhed: Navigate to the device settings in the app and select "Share Device" to invite family members to control the bulb.
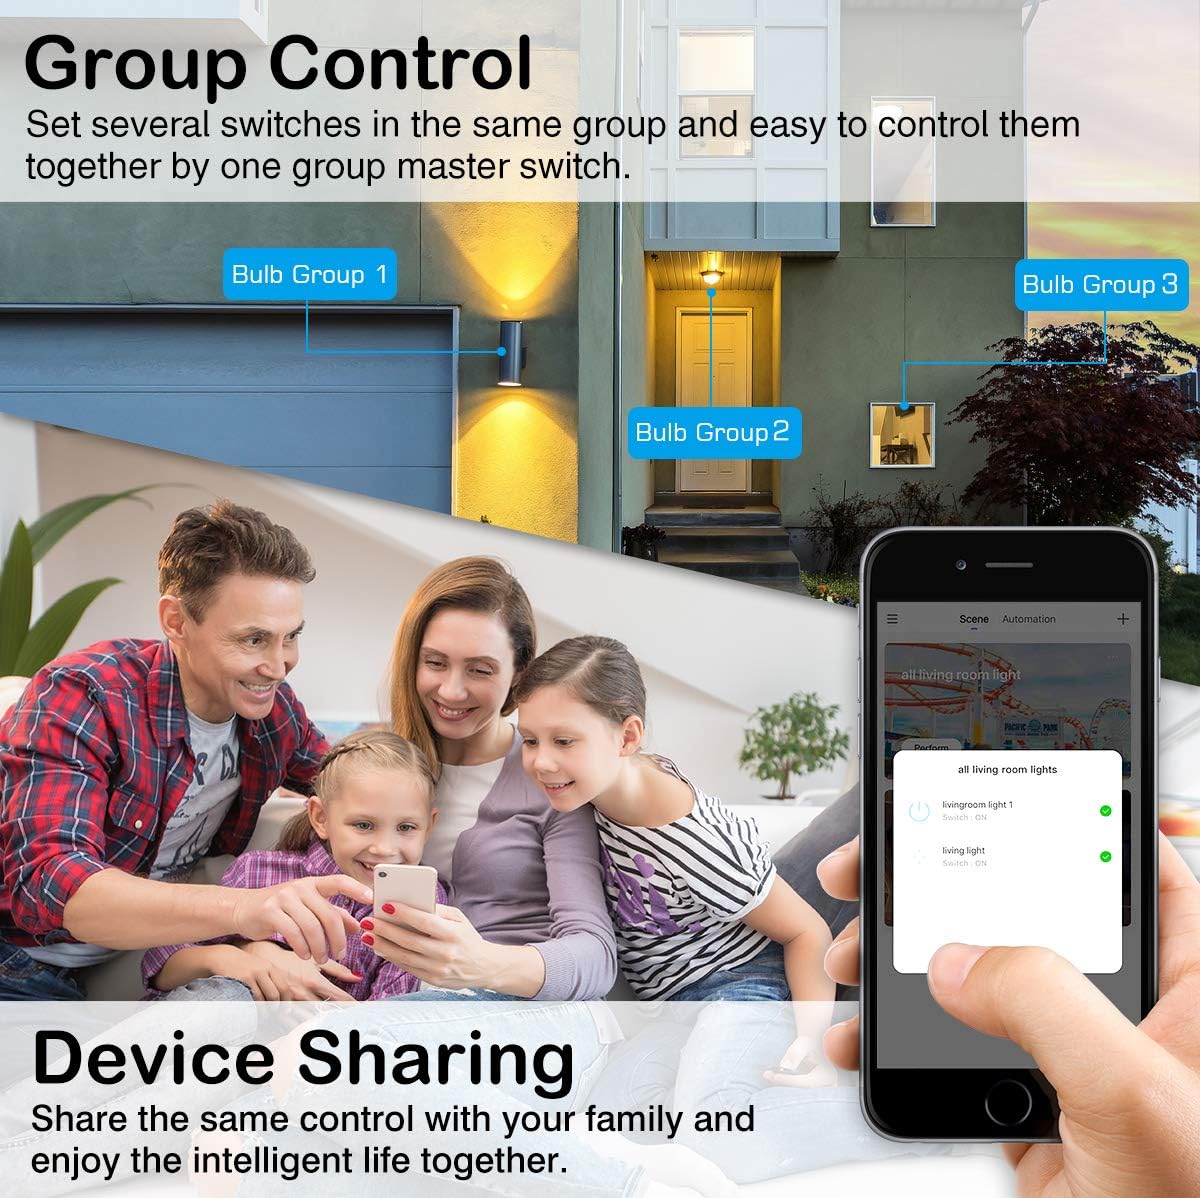
Image: Group control and device sharing features.
Opretholdelse
- Rensning: Sørg for, at pæren er slukket og kølet af, inden rengøring. Tør af med en blød, tør klud. Brug ikke flydende rengøringsmidler.
- Firmwareopdateringer: Tjek regelmæssigt Smart Life-appen for tilgængelige firmwareopdateringer for at sikre optimal ydeevne og sikkerhed.
- Opbevaring: Hvis pæren opbevares i længere tid, skal den opbevares køligt og tørt, væk fra direkte sollys.
Fejlfinding
- Bulb not blinking for setup: Manually turn the light switch OFF and ON 3-5 times until the bulb starts blinking rapidly. This puts it into pairing mode.
- Kan ikke oprette forbindelse til Wi-Fi:
- Ensure your Wi-Fi network is 2.4GHz. The bulb does not support 5GHz networks.
- Kontrollér, at din Wi-Fi-adgangskode er nøjagtig.
- Flyt pæren tættere på din Wi-Fi-router under opsætningen.
- Genstart din router, og prøv parringsprocessen igen.
- Pære mister forbindelse:
- Verify your 2.4GHz Wi-Fi network is stable and active.
- Ensure the bulb is within range of your Wi-Fi router.
- Check for any obstructions or interference that might affect the Wi-Fi signal.
- Try resetting the bulb (turn OFF/ON 3-5 times) and re-pairing it with the app.
- Stemmestyring virker ikke:
- Ensure the Smart Life skill/service is enabled and linked correctly in your Alexa or Google Home app.
- Verify the bulb's name in the Smart Life app matches the name you are using for voice commands.
- Ensure your voice assistant device is online and connected to the same network.
- Colors or brightness not responding:
- Tjek appen for fejlmeddelelser eller forbindelsesproblemer.
- Ensure the bulb is powered on and connected to Wi-Fi.
- Try closing and reopening the Smart Life app.
Garanti og support
For warranty information or technical support, please refer to the contact details provided on the product packaging or the official MoKo webwebstedet. Behold din købskvittering som købsbevis.