
Indledning
This manual provides detailed instructions for the setup, operation, maintenance, and troubleshooting of your Amcrest 5Series 4K NVR 16-Channel NV5216 Network Video Recorder. Please read this manual thoroughly before using the device to ensure proper functionality and safety.

Image: Amcrest 5Series 4K NVR NV5216, showcasing its 4K UHD resolution, 16 channels, H.265 compression, 20TB HDD capacity, two-way talk, 320Mbps bandwidth, HDMI output, and plug-and-play installation.
1. Opsætning
1.1 Pakkens indhold
Bekræft at alle komponenter er til stede i pakken:
- Amcrest 5Series 4K NVR (NV5216)
- Strømadapter
- USB-mus
- Netværkskabel
- Hurtig startvejledning
- Mounting Screws for Hard Drive (Hard Drive Not Included)
1.2 Hardware overview
Familiarize yourself with the ports and indicators on the NVR.
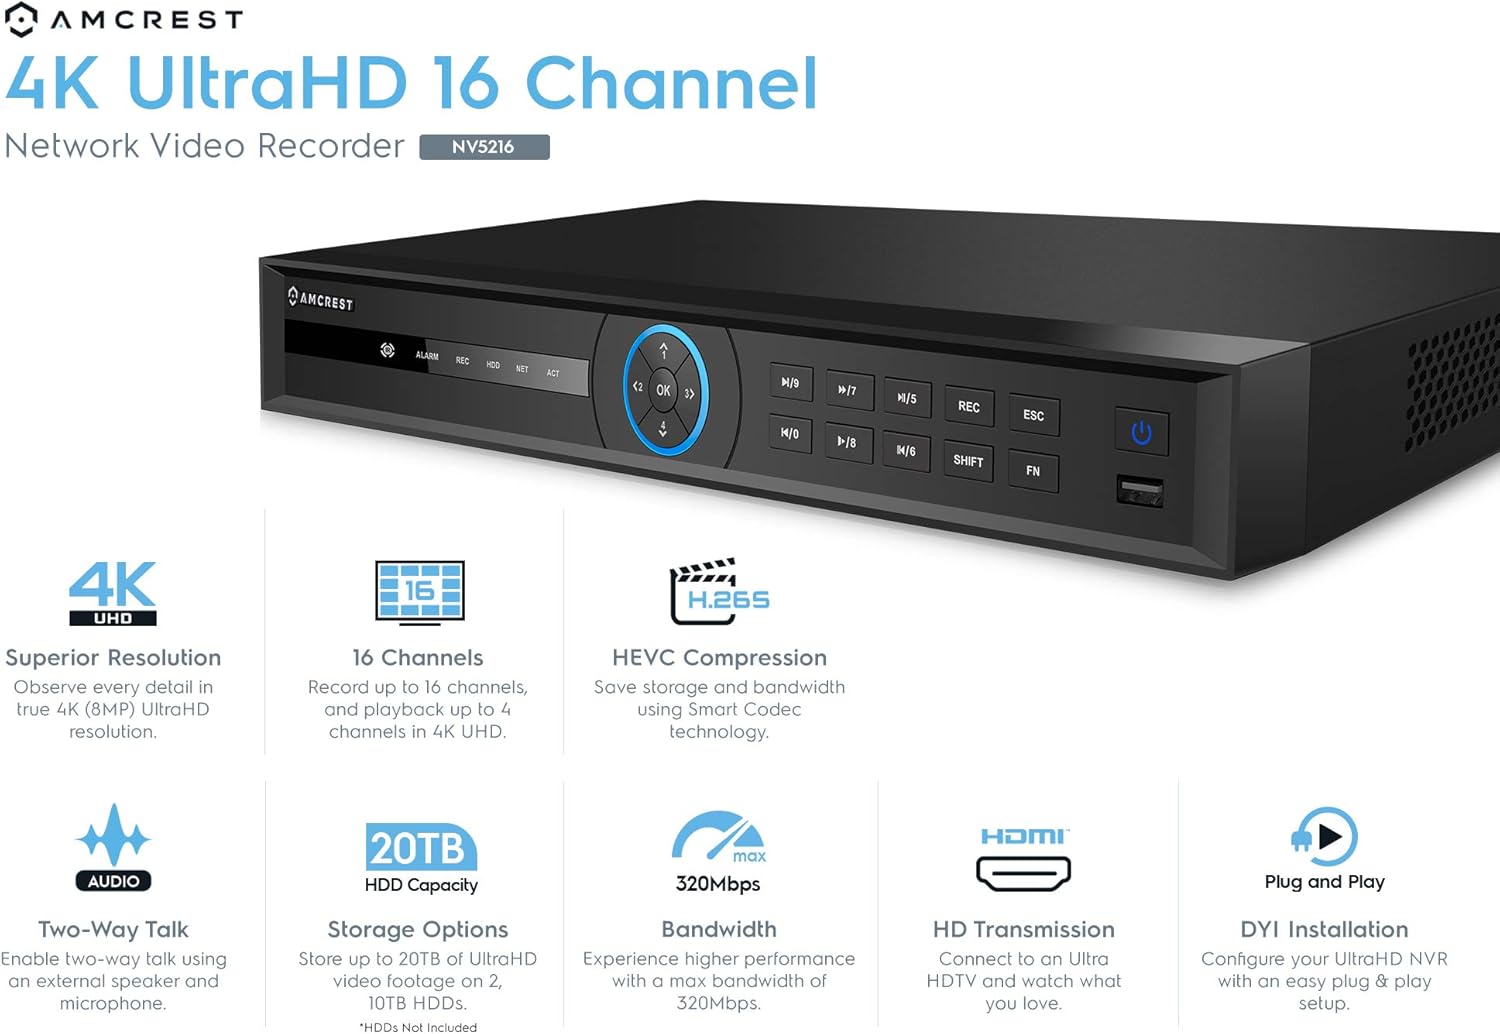
Image: Front panel of the Amcrest NV5216 NVR, showing the LED indicator, control panel buttons (OK, navigation, M/7, M/8, REC, ESC, SHIFT, FN), USB 3.0 port, and On/Off power button.
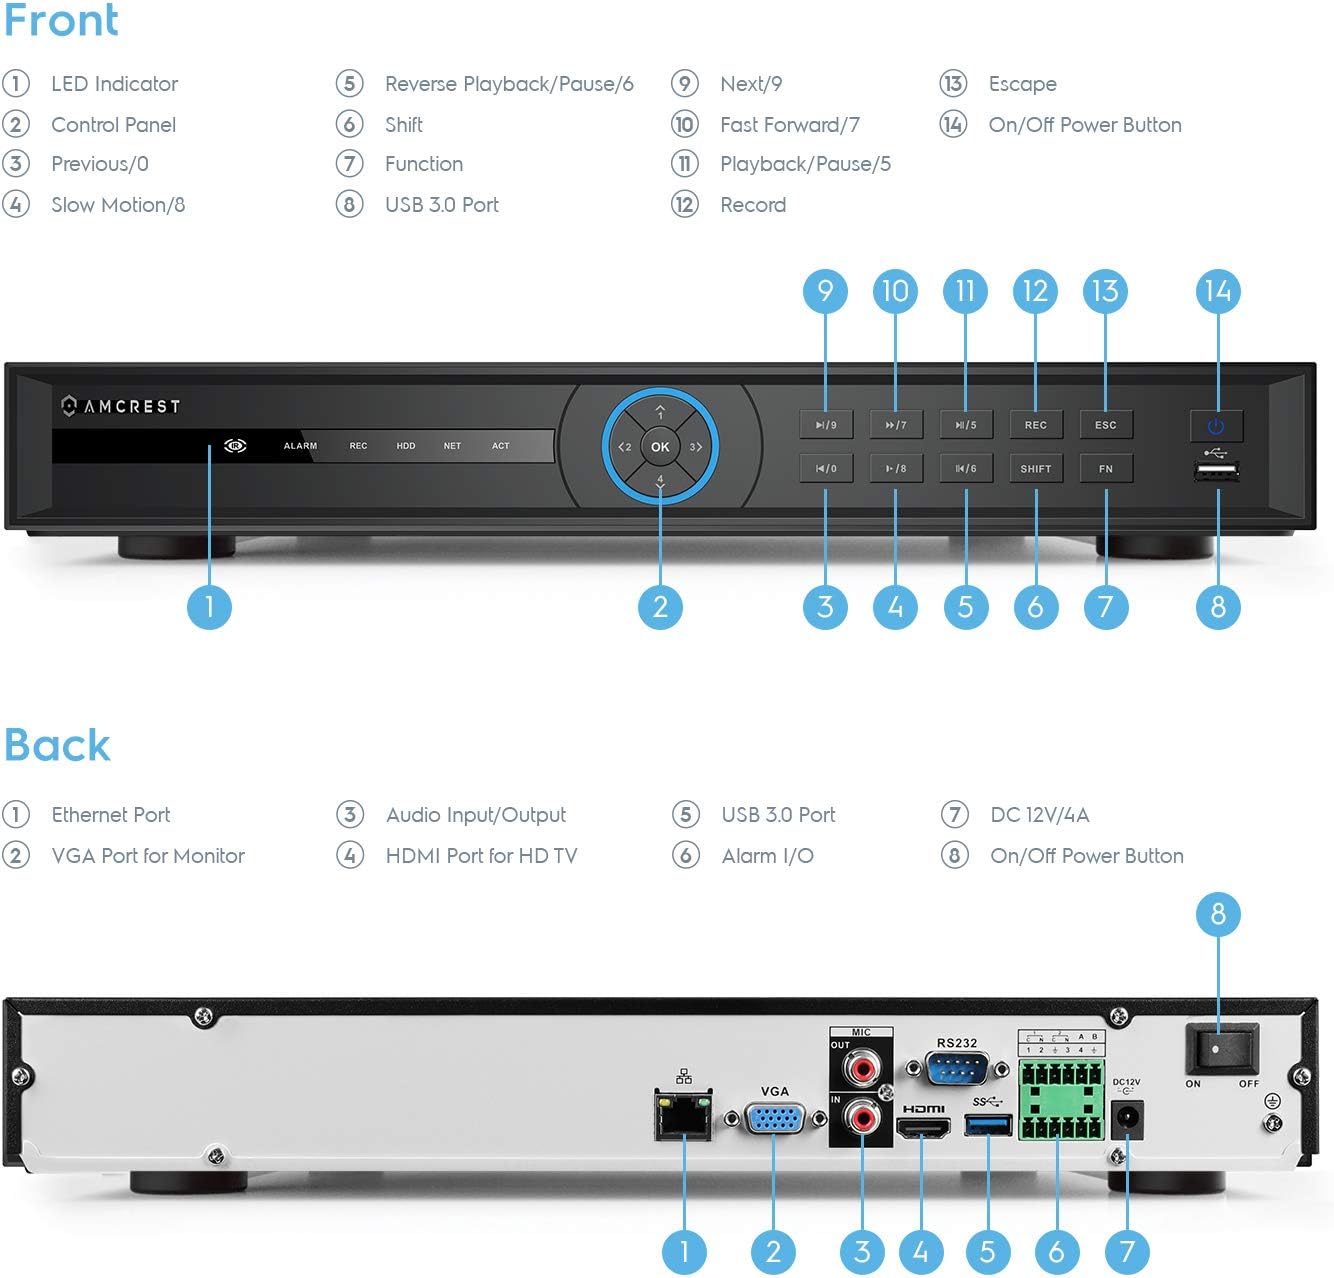
Image: Back panel of the Amcrest NV5216 NVR, illustrating the Ethernet port, VGA port for monitor, Audio Input/Output, HDMI port for HD TV, USB 3.0 port, Alarm I/O, DC 12V/4A power input, and On/Off power button.
1.3 Installation af harddisk
The NVR supports up to two 10TB hard drives (not included). Follow these steps to install a hard drive:
- Skru af og fjern topdækslet på NVR'en.
- Tilslut SATA-data- og strømkablerne fra NVR'en til harddisken.
- Fastgør harddisken til NVR-kabinettet med de medfølgende skruer.
- Sæt topdækslet på igen, og fastgør det med skruer.
1.4 Første tilslutning
Connect the NVR to your network and display:
- Connect the NVR to your router using the provided Ethernet cable. This NVR requires a hard-wired connection directly to your router to operate.
- Tilslut en skærm til NVR'ens HDMI- eller VGA-port.
- Tilslut USB-musen til en USB-port på NVR'en.
- Tilslut strømadapteren til NVR'en og en stikkontakt.
- Press the power button to turn on the NVR.
1.5 Guide til indledende opsætning
Upon first boot, the NVR will guide you through an initial setup wizard to configure basic settings such as language, date/time, network, and password. Follow the on-screen prompts.
1.6 Kamerastyring
The NV5216 supports Amcrest WiFi and Wired IP cameras, as well as limited compatibility with third-party IP cameras. To add cameras:
- Ensure your IP cameras are powered on and connected to the same network as the NVR.
- Access the NVR's camera management interface (usually found in the main menu under "Camera" or "Device Search").
- The NVR will scan for available cameras. Select the cameras you wish to add and follow the prompts to configure them.
2. Betjeningsvejledning
2.1 Live View
After setup, the NVR will display the live feed from connected cameras. You can view up to 4 channels at 4K resolution simultaneously. The NVR will adjust the resolution of remaining channels to 1080P at 30fps if more than 4 channels are viewred samtidig.
2.2 Optagelseskonfiguration
NVR'en understøtter forskellige optagelsestilstande:
- Manuel optagelse: Start og stop optagelse manuelt.
- Planlagt optagelse: Indstil specifikke tider for kontinuerlig optagelse.
- Optagelse af bevægelsesdetektering: Record only when motion is detected by the camera. Configure motion detection zones and sensitivity in the camera settings.
The NVR utilizes H.265 compression technology, which optimizes storage space without compromising video quality, allowing for longer recording times.
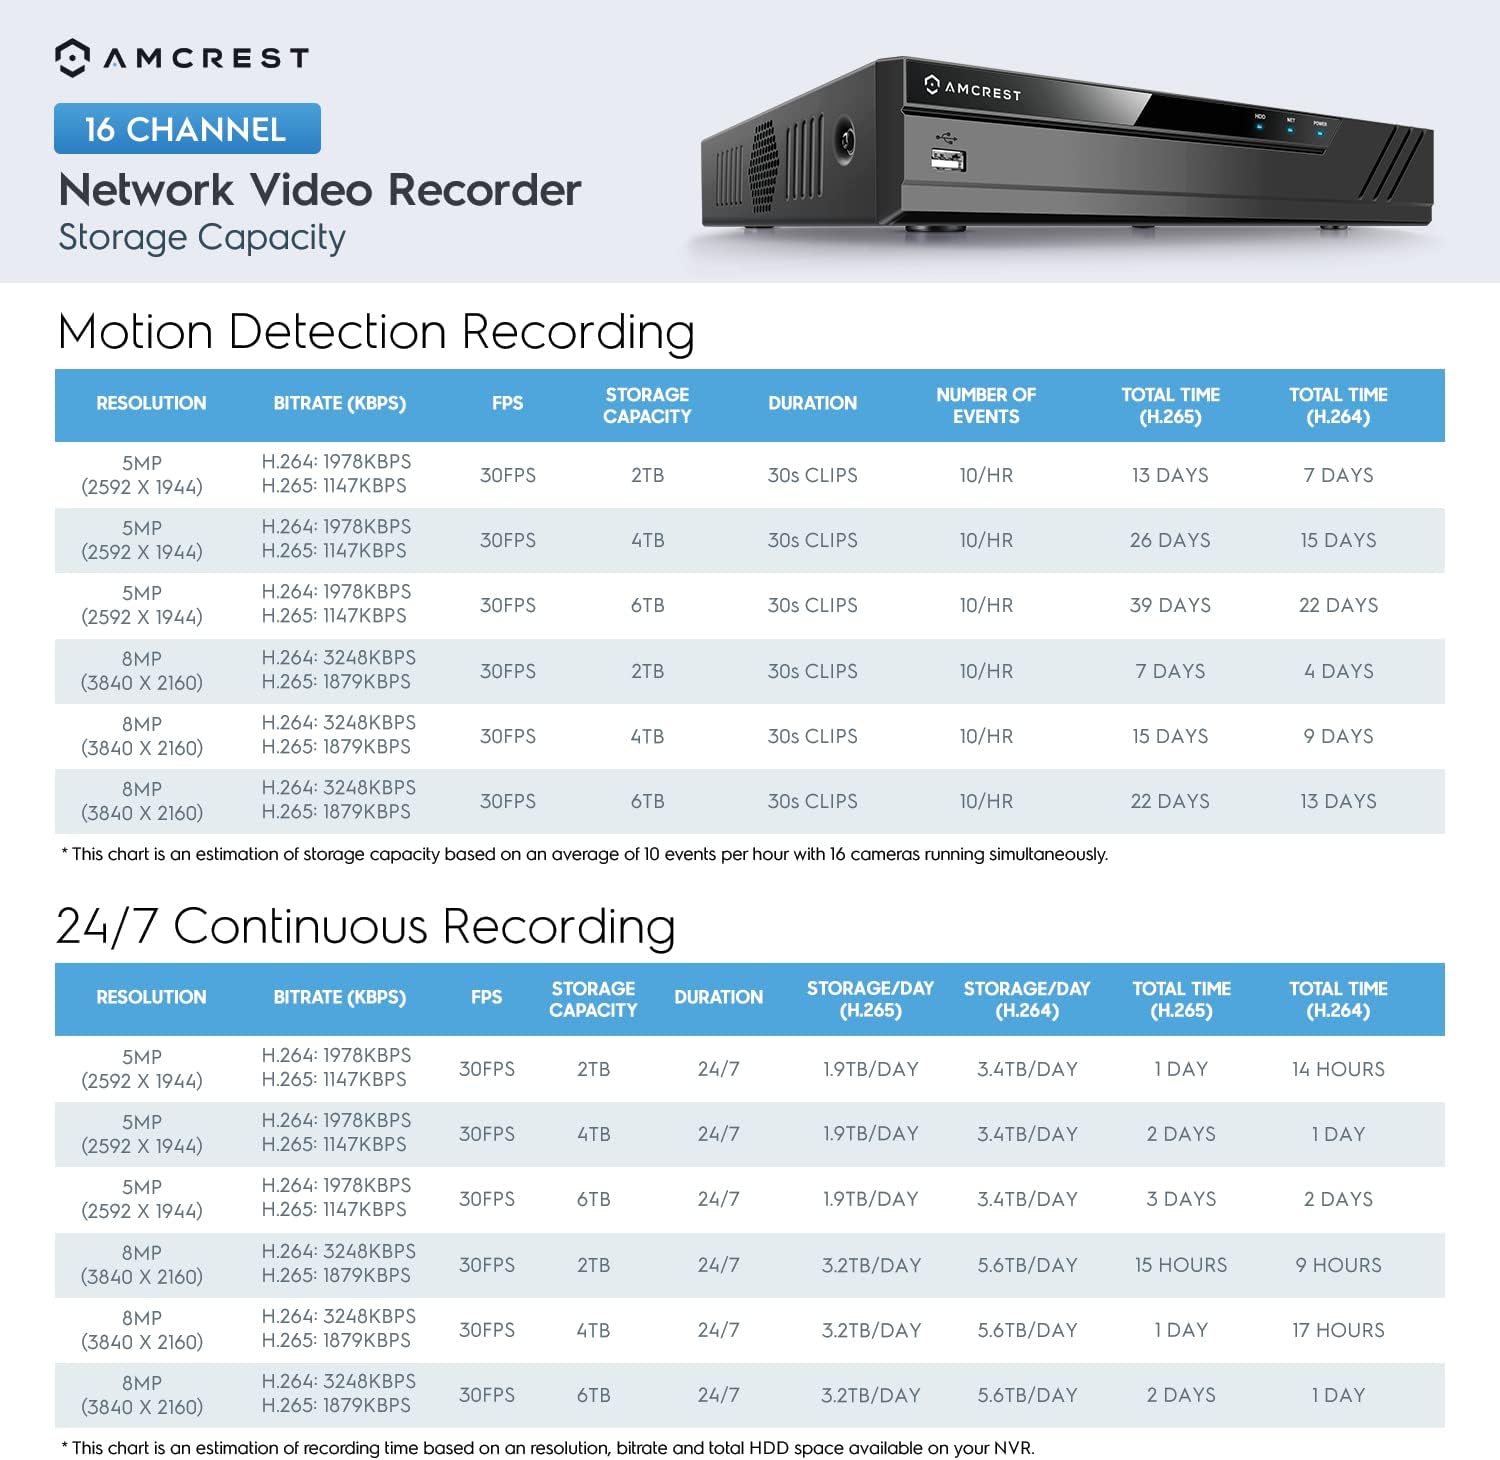
Image: A chart detailing estimated storage capacity for the Amcrest NV5216 NVR under various resolutions (5MP, 8MP) and recording types (Motion Detection, 24/7 Continuous) using H.264 and H.265 compression.
2.3 Afspilning
Til review optaget footage:
- Access the "Playback" function from the NVR's main menu.
- Select the desired date, time, and camera channel.
- Brug afspilningsknapperne (afspil, pause, spol frem, spol tilbage) til at navigere gennem fodsporenetage.
2.4 Remote Access (Amcrest View app)
Access your NVR remotely using the Amcrest View app on your smartphone or tablet:
- Download the "Amcrest View" app from your device's app store (available for iPhone, iPad, and Android).
- Åbn appen, og opret en konto, hvis du ikke har en.
- Scan the QR code displayed on the NVR's monitor (found in the network settings or device info) to add the NVR to your app.
- Når du har tilføjet det, kan du view live feeds, play back recordings, and manage settings from anywhere with an internet connection.
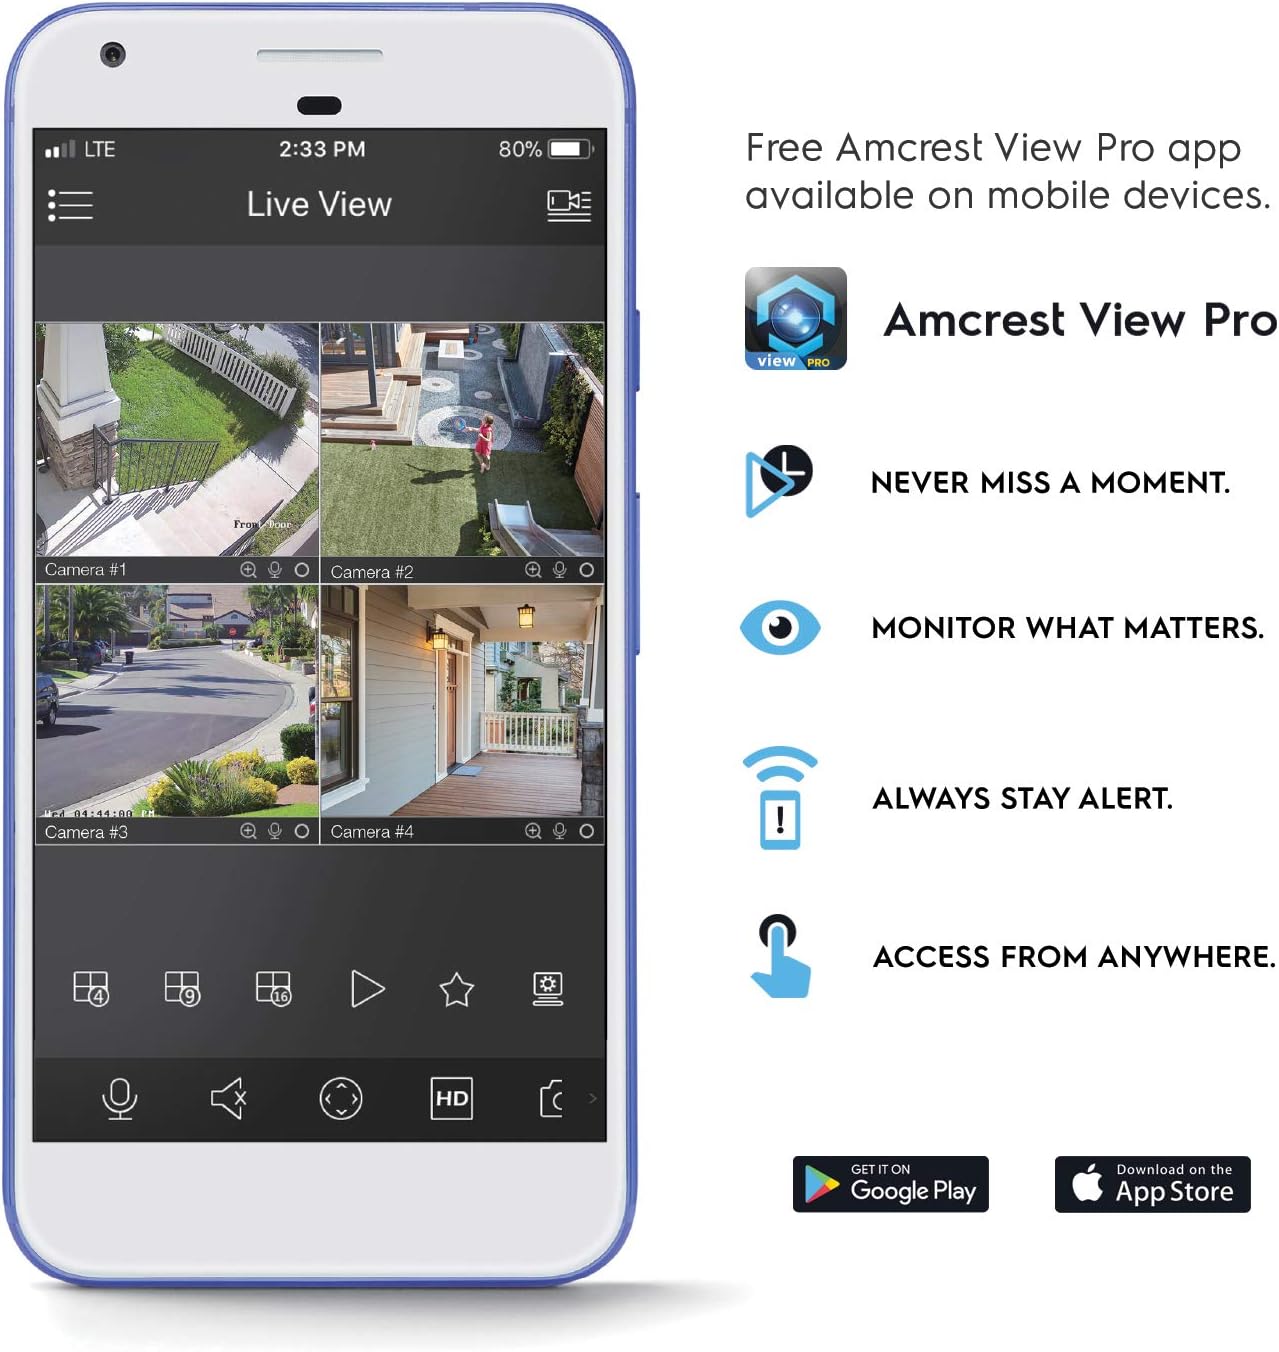
Image: A smartphone screen displaying the Amcrest View Pro app, showing a multi-camera live view interface. The app allows users to monitor, access, and stay alert from anywhere.
Video: An Amcrest overview video titled "Simple. Reliable. Secure." This video provides a general introduction to Amcrest security solutions and their benefits, including remote monitoring of loved ones and property.
3. Vedligeholdelse
3.1 Harddiskstyring
Regularly check the status of your hard drives through the NVR's storage settings. Ensure sufficient space is available for continuous recording. You can configure the NVR to overwrite older footage automatically when the hard drive is full.
3.2 firmwareopdateringer
Tjek Amcrest regelmæssigt webwebsted for firmwareopdateringer. Ved at holde din NVR's firmware opdateret sikrer du optimal ydeevne, sikkerhed og adgang til nye funktioner. Følg instruktionerne, der følger med firmwareopdateringspakken, omhyggeligt.
3.3 Rengøring
To maintain the NVR's longevity, keep it in a clean, dust-free environment. Use a soft, dry cloth to clean the exterior. Do not use liquid cleaners or aerosols.
4. Fejlfinding
4.1 Ingen videoudgang
- Check all video cable connections (HDMI/VGA) to the monitor and NVR.
- Sørg for, at skærmen er tændt og indstillet til den korrekte inputkilde.
- Verify the NVR is powered on and its power indicator light is active.
4.2 Kameraer viser ikke
- Confirm cameras are powered on and connected to the network.
- Ensure the NVR and cameras are on the same local network.
- Check camera IP addresses and network settings within the NVR's camera management interface.
- Verify camera compatibility with the NV5216.
4.3 Problemer med fjernadgang
- Sørg for, at NVR'en har en aktiv internetforbindelse.
- Verify that the Amcrest View app is updated to the latest version.
- Check network firewall settings on your router; port forwarding may be required for direct access, though the app often uses P2P for easier setup.
4.4 Optagelsesproblemer
- Check if a hard drive is installed and properly initialized in the NVR's storage settings.
- Verify that recording schedules or motion detection settings are correctly configured.
- Sørg for, at harddisken har tilstrækkelig ledig plads.
5. Specifikationer
| Modelnummer | NV5216 |
| Kanaler | 16-kanal |
| Optagelsesopløsning | 1080p/3MP/4MP/5MP/6MP/8MP (4K)/12MP |
| Levende View/ afspilning | Up to 4CH @ 4K @ 30fps simultaneously (remaining channels 1080P @ 30fps) |
| Harddisk-understøttelse | Up to 2 x 10TB (20TB total) (Hard Drives Not Included) |
| Videokomprimering | H.265 |
| Forbindelse | Ethernet (hard-wired connection required), USB 3.0 (rear), USB 2.0 (front) |
| Video output | HDMI, VGA |
| Driftsbetingelser | +14°F ~ +131°F (-10°C ~ +55°C) |
| Dimensioner | 17.09 x 14.53 x 5.55 tommer |
| Varens vægt | 6.41 pund |
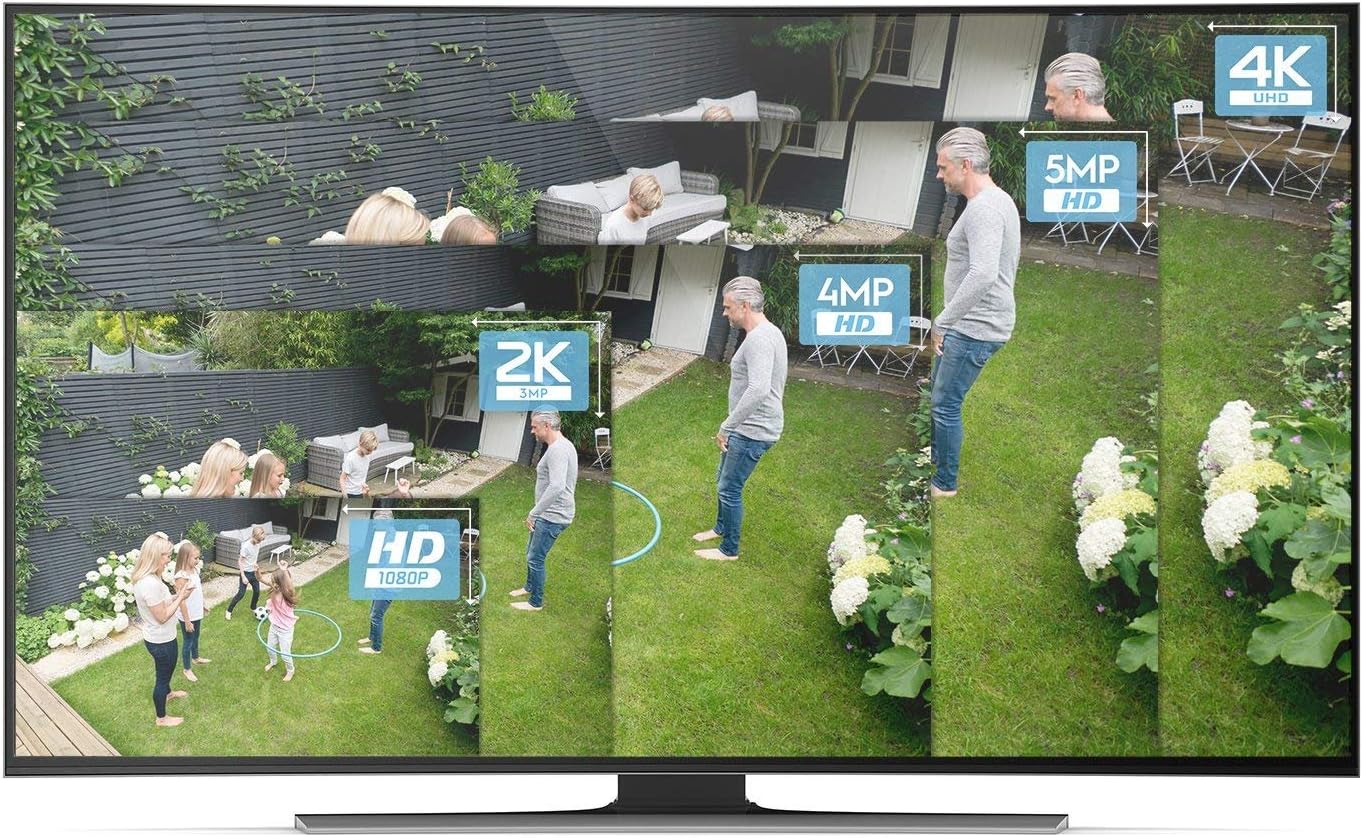
Image: A visual comparison demonstrating the clarity and detail difference between various video resolutions, including HD (1080p), 2K (3MP), 4MP, 5MP, and 4K (8MP).
6. Garanti og support
6.1 Produktgaranti
The Amcrest NV5216 NVR is guaranteed for a full year from the date of purchase. This warranty is offered with US Support and US Warranty exclusively by Amcrest.
6.2 Teknisk support
For technical assistance, troubleshooting, or warranty claims, please contact Amcrest Support. Refer to the official Amcrest webwebstedet for de seneste kontaktoplysninger og supportressourcer.