1. Introduktion
This manual provides instructions for the installation, operation, and maintenance of your Metallic Gear Neo Mini V2 Series Mini-ITX Case, model MG-NE210_SR02. This compact mini-tower chassis is designed for Mini-ITX systems, featuring sand-blasted aluminum panels, a tempered glass side panel, and support for liquid cooling solutions.

Figur 1: Foran-venstre view of the Metallic Gear Neo Mini V2 Series Mini-ITX Case in Silver, showcasing the tempered glass side panel and aluminum construction.
2. Pakkens indhold
Kontroller, at alle komponenter er til stede, før installationen påbegyndes.
- Metallic Gear Neo Mini V2 Series Mini-ITX Case (MG-NE210_SR02)
- Tilbehørsæske (skruer, kabelbindere, afstandsstykker osv.)
- Brugervejledning (dette dokument)
- One 120mm fan (pre-installed)
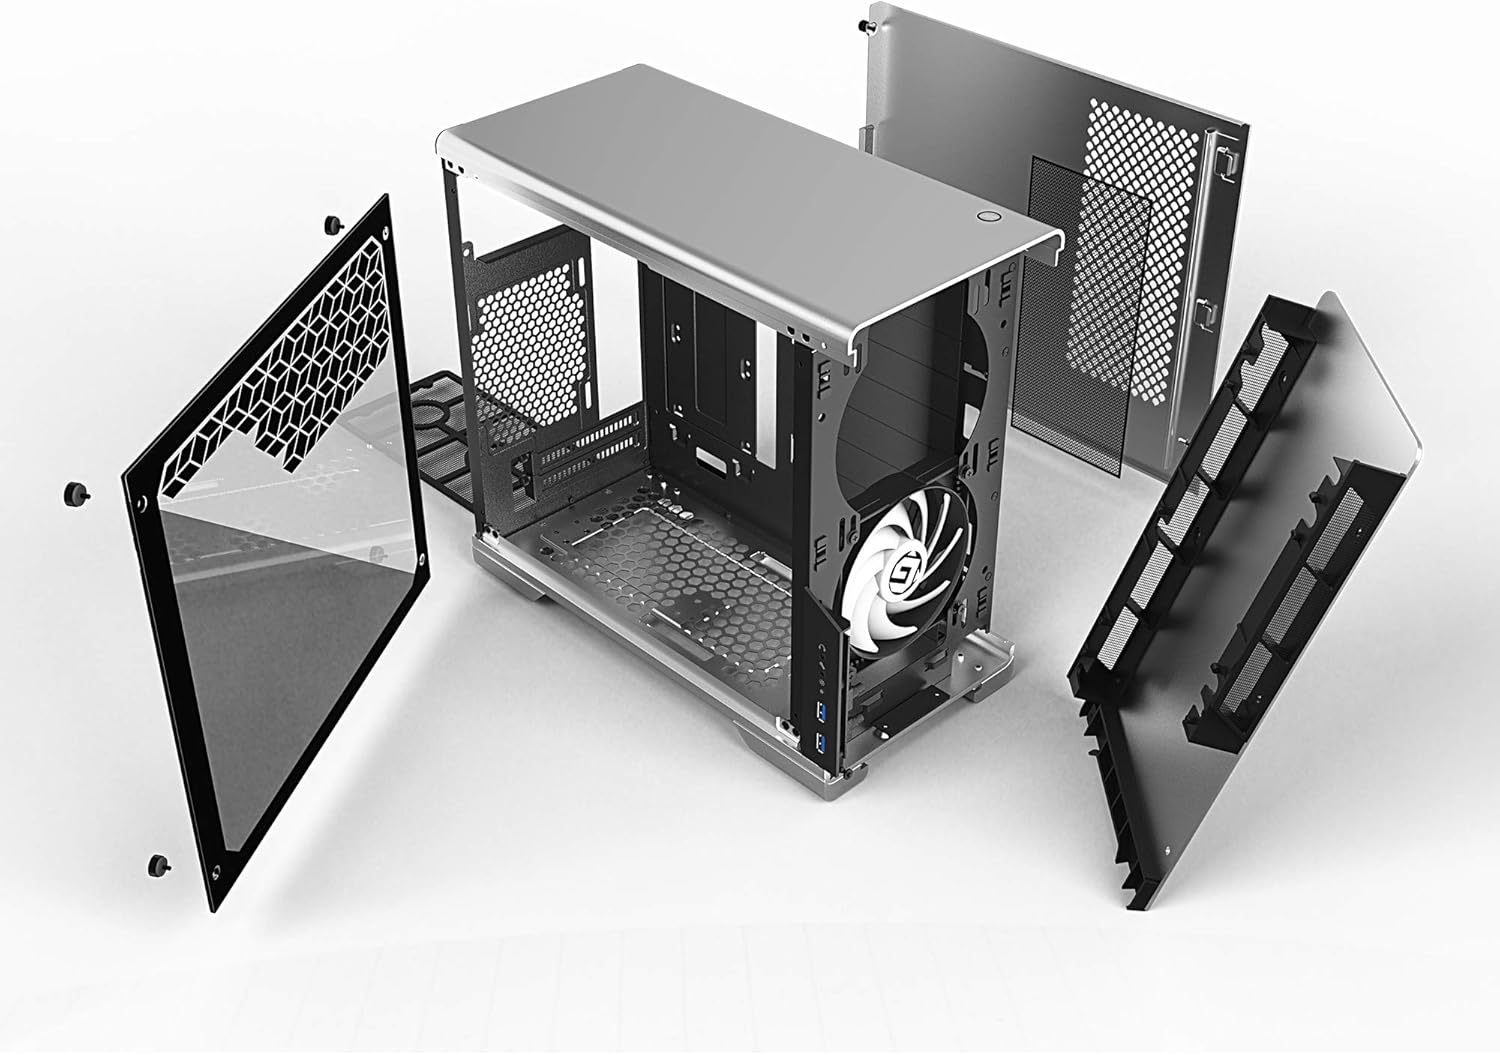
Figur 2: Eksploderet view illustrating the removable panels and internal structure of the Neo Mini V2, including the frame, side panels, and mounting hardware.
3. Opsætning og komponentinstallation
Follow these steps to install your computer components into the Neo Mini V2 chassis. Ensure the system is powered off and disconnected from any power source before installation.
3.1. Removing Panels
Carefully remove the tempered glass side panel and the solid aluminum side panel by unscrewing the thumb screws located at the rear of the case.
3.2. Motherboard Installation (Mini-ITX)
- Installer I/O-skjoldet i den bageste åbning af kabinettet.
- Align your Mini-ITX motherboard with the pre-installed standoffs.
- Fastgør bundkortet med de medfølgende skruer.
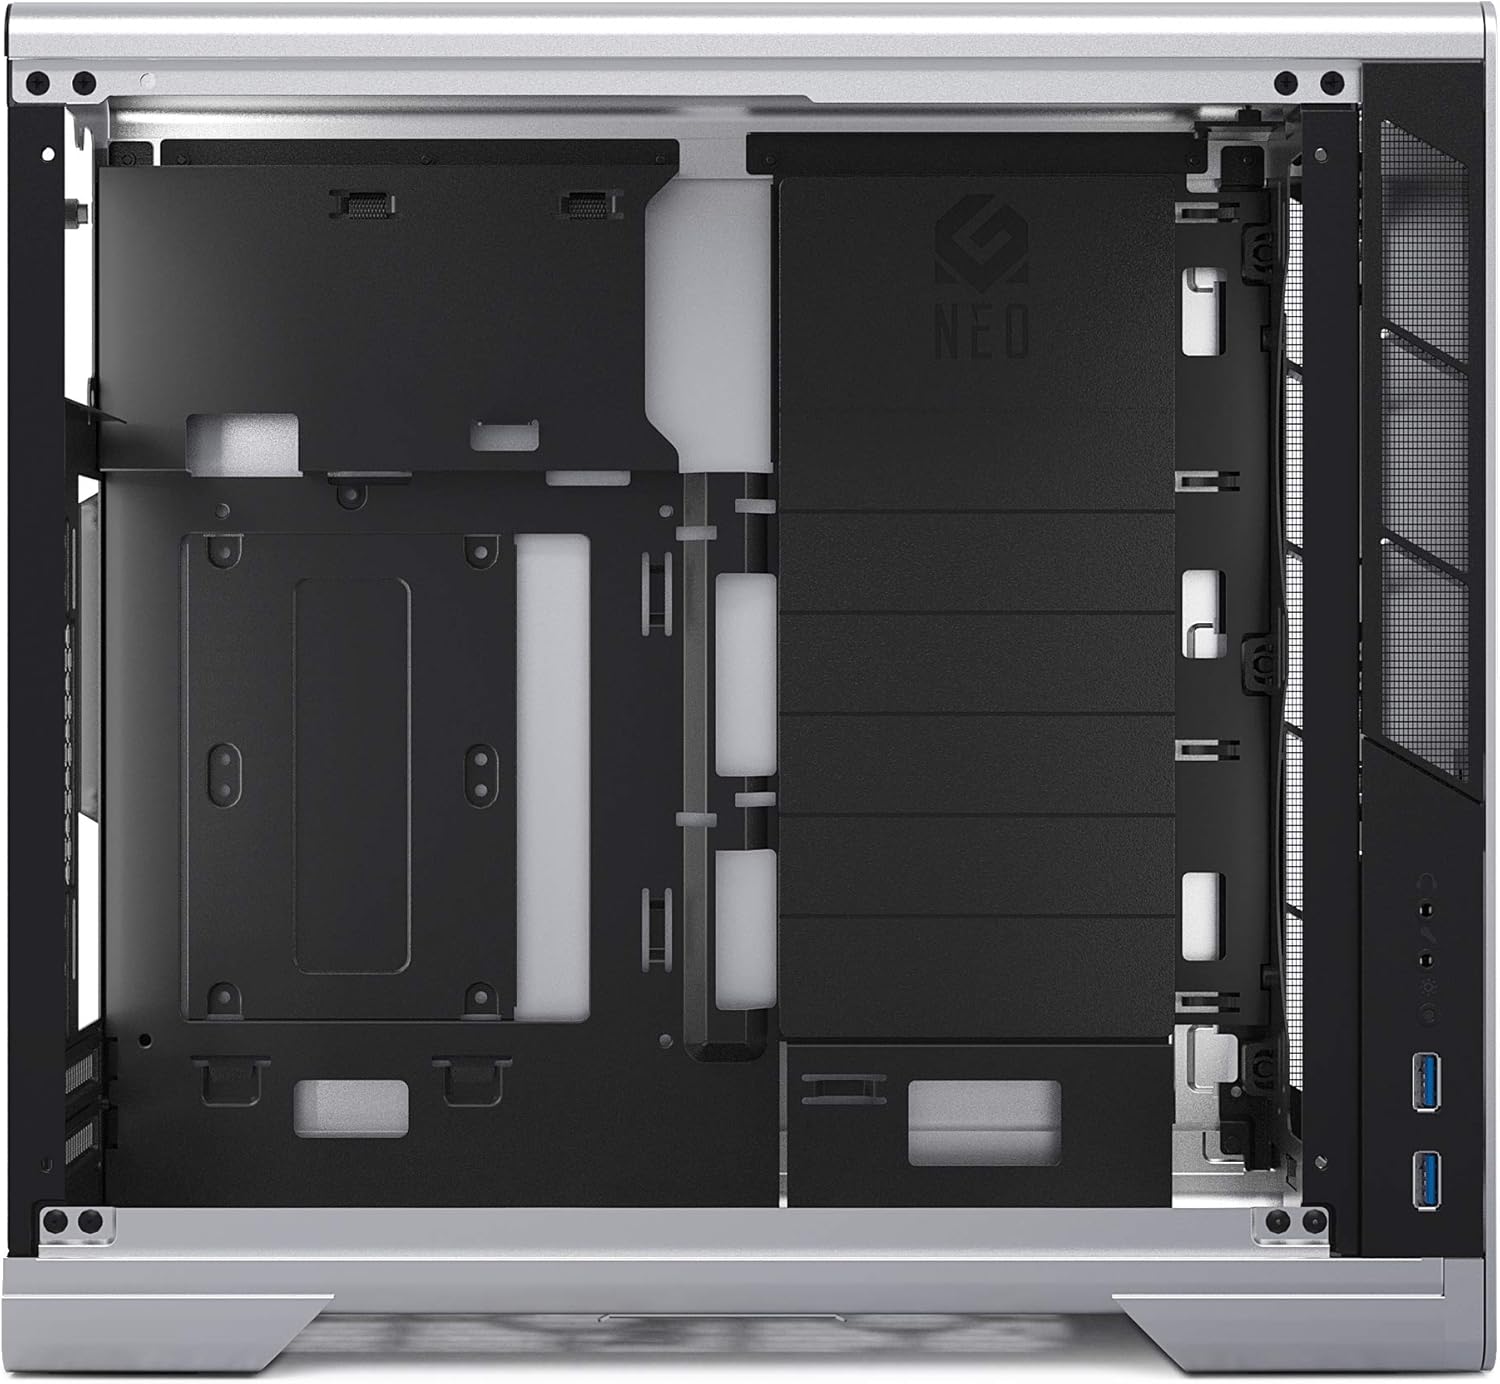
Figure 3: Internal layout of the Neo Mini V2, highlighting the motherboard mounting area and component placement.
3.3. Installation af strømforsyningsenhed (PSU)
The Neo Mini V2 supports full-size ATX power supplies.
- Remove the PSU mounting bracket from the top rear of the case.
- Attach the PSU to the bracket using the provided screws.
- Slide the PSU and bracket assembly back into the case and secure it.
- Tilslut de nødvendige strømkabler til dit bundkort og komponenter.
3.4. Installation af lagerdrev
The case provides multiple mounting locations for 2.5" SSDs and 3.5" HDDs. Refer to the internal layout for specific drive cage locations.
3.5. Installation af grafikkort
Install your graphics card into the PCIe slot on your motherboard. Ensure it is properly seated and secured with the retention clip and a screw to the case's expansion slot.
3.6. Cooling System Installation (Fans/AIO)
The Neo Mini V2 supports up to 280mm All-In-One (AIO) liquid cooling solutions. Install fans or radiators in designated mounting points (front, top, rear) as required.

Figur 4: Eksample of an internal build with RGB fans, demonstrating potential cooling configurations.
3.7. Kabelforvaltning
Utilize the cable routing cutouts and Velcro straps located behind the motherboard tray to organize and secure cables. Proper cable management improves airflow and aesthetics.

Figur 5: View of the rear interior, illustrating the space available for cable routing and management behind the motherboard tray.
4. Betjening
4.1. Tænd/sluk
Press the power button located on the top panel of the case to power on or shut down your system.

Figure 6: Detail of the power button on the top panel.
4.2. Forreste I/O-porte
The front panel provides convenient access to USB 3.0 ports, audio jacks, and an RGB control button.

Figure 7: Front I/O panel with USB ports, audio jacks, and RGB control button.
4.3. RGB-lysstyring
The integrated RGB lighting can be controlled via the dedicated button on the front I/O panel. This allows cycling through various colors and effects. The lighting can also be synchronized with compatible RGB-enabled motherboards.
5. Vedligeholdelse
5.1. Rengøring af støvfilter
The Neo Mini V2 includes dust filters to prevent dust accumulation inside the case. Regularly clean these filters to maintain optimal airflow and cooling performance.
- Locate the dust filters (e.g., front intake, PSU intake).
- Fjern forsigtigt filtrene.
- Clean them using compressed air or by rinsing with water (ensure they are completely dry before reinstallation).
- Reinstall the dust filters.
6. Fejlfinding
6.1. Systemet tænder ikke
- Ensure all power cables (24-pin ATX, 8-pin CPU, PCIe) are securely connected to the motherboard and components.
- Verify the power supply switch is in the "ON" position.
- Kontroller, at kablet til tænd/sluk-knappen på frontpanelet er korrekt tilsluttet til bundkortets frontpanelheader.
6.2. Dårlig luftgennemstrømning eller høje temperaturer
- Sørg for, at alle kabinetblæsere drejer og er orienteret korrekt for optimal luftstrøm (indsugning/udsugning).
- Rengør støvfiltrene regelmæssigt som beskrevet i afsnittet Vedligeholdelse.
- Review cable management to ensure cables are not obstructing airflow.
- Verify CPU cooler and GPU fans are functioning correctly.
6.3. Problemer med RGB-belysning
- Check that the RGB cables from the case are properly connected to the motherboard's RGB header or the integrated RGB controller.
- If using motherboard software, ensure it is up-to-date and configured correctly.
- Cycle through modes using the front panel RGB button to confirm controller functionality.
7. Specifikationer
| Feature | Detalje |
|---|---|
| Mærke | Metallic Gear |
| Modelnavn | MG-NE210_SR02 |
| Sagstype | Mini-tårn |
| Bundkort kompatibilitet | Mini ITX |
| Materiale | Aluminium, hærdet glas |
| Farve | Sølv |
| Dimensioner (LxBxH) | 15.1 x 7.5 x 14 tommer |
| Varens vægt | 13.33 pund |
| Strømforsyningsmonteringstype | Øverste måned |
| Afkølingsmetode | Water (AIO up to 280mm supported) |
| Antal udvidelsespladser | 1 |
| Front I / O-porte | 2x USB 3.0, Audio Jacks, RGB Control Button |
8. Garanti og support
For warranty information, technical support, or to download the latest drivers and software, please visit the official Metallic Gear webwebstedet eller kontakt deres kundeservice direkte. Gem din købsbevis til garantikrav.
Fabrikant: Phanteks