1. Introduktion
This manual provides detailed instructions for the installation, operation, and maintenance of the Titanium ED9764H5NV-2 64-Channel Network Video Recorder (NVR). Please read this manual thoroughly before using the device to ensure proper setup and functionality. Keep this manual for future reference.
2. Produktet er slutview
The Titanium ED9764H5NV-2 is a high-performance 64-channel 2U Network Video Recorder designed for advanced surveillance systems. It supports 4K resolution and H.265 compression, offering efficient video storage and playback. This NVR operates on an embedded Linux system and features a 320Mbps bandwidth for robust network performance.
Nøglefunktioner:
- Supports up to 64 channels of 8MP/5MP/4MP/3MP/1080P/960P/720P IP input.
- H.265 high-profile compression for efficient video storage.
- 320Mbps incoming bandwidth.
- 16-channel simultaneous playback.
- Dual HDMI and one VGA video output for 4K display.
- Audio In/Out ports.
- Supports up to 8 SATA HDDs (max 10TB each, HDDs not included).
- Intuitive Graphic User Interface (GUI) for easy operation.
- Multiple recording modes: manual, timer, motion, sensor.
- Remote access via IE, CMS, and mobile applications (iOS/Android).
Pakkeindhold:
- Titanium ED9764H5NV-2 NVR Unit
- Strømforsyning
- USB-mus
- Skruer til HDD-installation
- Hurtig startvejledning
3. Opsætning
3.1 Hardwareinstallation
- Udpakning: Carefully remove the NVR from its packaging. Inspect for any signs of damage.
- Hard Drive Installation (if applicable):
The NVR does not include pre-installed hard drives. To install, open the NVR casing by removing the screws on the rear and sides. Mount the SATA hard drives into the designated bays and connect the SATA data and power cables. Secure the hard drives with the provided screws. Close the casing.
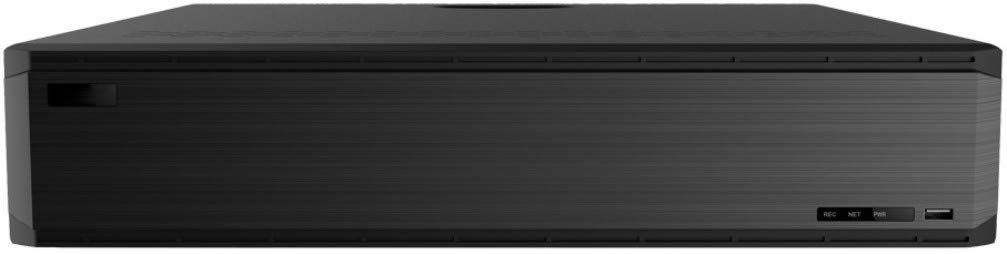
Figur 1: Forside view of the Titanium ED9764H5NV-2 NVR. This image shows the front panel of the NVR unit, featuring a sleek black design with ventilation grilles and a USB port.
- Tilslutning af eksterne enheder:
- Connect a monitor to one of the HDMI or VGA ports.
- Connect a USB mouse to a USB port for navigation.
- Connect the NVR to your network using an Ethernet cable plugged into one of the LAN ports.
- Connect any audio input/output devices to the RCA audio ports.

Figure 2: Rear panel connections of the Titanium ED9764H5NV-2 NVR. This image displays the rear panel with various ports including VGA, HDMI, USB, LAN, Audio In/Out, Alarm In/Out, e-SATA, and power input.
- Strømtilslutning: Connect the power supply to the NVR and then plug it into a power outlet. Turn on the NVR using the power switch on the rear panel.
3.2 Indledende konfiguration
- Upon first boot, the NVR will guide you through a setup wizard. Follow the on-screen prompts.
- Set a strong password for the administrator account.
- Configure network settings (DHCP is usually enabled by default, or set a static IP address).
- Initialize any newly installed hard drives. This process will format the drives and prepare them for recording.
- Indstil den korrekte dato, tid og tidszone.
- Scan and add IP cameras to the NVR. Ensure cameras are powered on and connected to the same network.
4. Betjeningsvejledning
4.1 Live View
After successful camera addition, the NVR will display the live feed from connected cameras. Use the mouse to navigate the interface. Double-click a camera view to enlarge it, or use the grid options to change the display layout.
4.2 Optagelsesstyring
- Optagetilstande: Access the "Record" menu to configure recording schedules. Options include continuous, motion detection, alarm trigger, or scheduled recording.
- Dual Stream Recording: The NVR supports dual stream technology, allowing for high-definition local storage and lower-bandwidth remote transmission.
4.3 Afspilning
Navigate to the "Playback" menu. Select the desired camera(s) and date/time range. Use the playback controls (play, pause, fast forward, rewind, digital zoom) to review optaget footage. The NVR supports 16-channel simultaneous playback.
4.4 Fjernadgang
- Web Browser: Access the NVR via a web browser (e.g., Internet Explorer) by entering its IP address.
- CMS Software: Install the provided Central Management Software (CMS) on your PC for advanced monitoring and management.
- Mobil app: Download the official mobile application (available for iOS and Android) and scan the NVR's QR code for easy remote access.
Sikkerhedskopier ALDRIG
For at sikkerhedskopiere optagede filertage, connect a USB storage device to the NVR's USB port. In the "Backup" menu, select the desired footage and initiate the backup process. Network backup options are also available.
5. Vedligeholdelse
- Regelmæssig rengøring: Keep the NVR unit clean and free from dust. Use a soft, dry cloth. Ensure ventilation openings are not blocked.
- Firmwareopdateringer: Kontroller jævnligt producentens website for firmware updates. Apply updates as recommended to ensure optimal performance and security.
- Harddiskens tilstand: Monitor the health of your hard drives through the NVR's system settings. Replace failing drives promptly to prevent data loss.
- Adgangskodesikkerhed: Regularly change administrator passwords and use strong, unique combinations.
- Miljøforhold: Ensure the NVR operates within the specified temperature and humidity ranges (-10~50°C, 10%~90% humidity).
6. Fejlfinding
| Problem | Mulig årsag | Løsning |
|---|---|---|
| NVR'en tænder ikke. | Power cable disconnected; Power switch off; Faulty power supply. | Check power cable connection; Ensure power switch is ON; Test with a different power supply if available. |
| Ingen videoudgang på skærmen. | Monitor cable loose; Incorrect input selected on monitor; NVR resolution mismatch. | Verify HDMI/VGA cable connections; Select correct input source on monitor; Try connecting to a different monitor or reset NVR display settings. |
| Kameraer viser ikke live view. | Camera not powered; Network issue; Incorrect camera IP address/credentials; Camera not added to NVR. | Check camera power and network connection; Verify camera IP and login details; Ensure cameras are properly added in NVR settings. |
| Ingen optagelse. | Hard drive not installed/initialized; Recording schedule not configured; Hard drive full. | Install and initialize hard drives; Configure recording schedules; Check hard drive status and free space. |
| Fjernadgang virker ikke. | Network configuration issues (port forwarding, DDNS); Incorrect IP address/port; Firewall blocking. | Verify network settings, port forwarding rules on router; Check NVR's network status; Temporarily disable firewall for testing. |
7. Specifikationer
| Feature | Detalje |
|---|---|
| Model | ED9764H5NV-2 |
| Operativsystem | Indlejret Linux |
| IP-kameraindgang | 64 kanaler |
| Video output | 2 HDMI, 1 VGA (4K output supported) |
| Lydindgang | RCA x 1 |
| Lydudgang | RCA x 1 |
| To-vejs lyd | Understøttet |
| Optagelsesopløsning | 8MP/5MP/4MP/3MP/1080P/960P/720P |
| Optagelsestilstande | Manuel, Timer, Bevægelse, Sensor |
| Afspilningskanaler | 16 kanaler |
| Alarmindgang | 8 Channels local, supports IPC alarm input |
| Alarmudgang | 4 kanaler |
| Network interface | RJ45 10/100/1000 Mbps x 2 |
| Båndbredde | 320 Mbps |
| Max. Users Online | 10 |
| USB-porte | USB 2.0 x 2, USB 3.0 x 1 |
| Intern HDD | SATA x 8, max 10TB per HDD (HDDs not included) |
| e-SATA | 2 |
| Strømforsyning | ATX |
| Strømforbrug | ≤ 15W (uden HDD) |
| Driftsbetingelser | -10~50°C, 10%~90% humidity |
| Dimensioner | 430 x 450 x 90mm (17.72 x 16.93 x 3.54 inches) |
| Vægt | 16.07 pund (ca.) |
8. Garanti og support
For warranty information, please refer to the warranty card included with your product or visit the official Titanium website. Technical support can be obtained through the manufacturer's customer service channels. Please have your model number (ED9764H5NV-2) and purchase details ready when contacting support.
Online ressourcer: For the latest drivers, firmware, and FAQs, please visit the Titanium support portal.