
1. Introduktion
This manual provides essential information for the installation, operation, and maintenance of your Itek Meshcore 36B Gaming Tower PC Case. Please read this manual thoroughly before beginning assembly to ensure proper setup and safe usage. Keep this manual for future reference.
Sikkerhedsoplysninger
- Afbryd altid strømmen til alle komponenter før installation eller vedligeholdelse.
- Håndter hærdede glaspaneler forsigtigt for at forhindre brud.
- Avoid exposing the case to extreme temperatures or humidity.
- Hold små dele væk fra børn.
2. Pakkens indhold
Bekræft at alle komponenter er til stede i pakken:
- Itek Meshcore 36B PC Case
- 4 x 14cm ARGB Fans (3 pre-installed in front, 1 pre-installed in rear)
- ARGB Fan Hub
- Tilbehørsæske (skruer, kabelbindere, afstandsstykker osv.)
- Brugervejledning (dette dokument)
3. Produktet er slutview
The Itek Meshcore 36B is an ATX gaming tower designed for optimal airflow, ease of assembly, and modern aesthetics. It features a perforated mesh front panel, four pre-installed ARGB fans, and a tempered glass side panel.
Nøglefunktioner
- Fremragende luftgennemstrømning: Full mesh front panel and four pre-installed ARGB fans (3 front, 1 rear) for efficient cooling.
- Hærdet glas sidepanel: Giver en klar view af interne komponenter og RGB-belysning.
- Moderne tilslutningsmuligheder: Includes 2x USB 3.0 ports and 1x USB-C port on the front/side I/O panel.
- Organiseret interiør: Separate compartment for the power supply unit (PSU) and storage drives (HDD/SSD) for clean cable management.
- Bred kompatibilitet: Supports ATX motherboards, graphics cards up to 420mm, CPU coolers up to 174mm, and liquid cooling radiators up to 360mm.
Komponentidentifikation

Figur 3.1: Forside view of the Itek Meshcore 36B PC case, showcasing the mesh front panel and three 14cm ARGB fans.

Figure 3.2: Angled front-side view, highlighting the tempered glass panel and front I/O ports (USB 3.0, Type-C).

Figur 3.3: Bagside view, illustrating the rear exhaust fan and expansion slots.

Figur 3.4: Interiør view from the tempered glass side, detailing the motherboard tray and component layout.
4. Opsætning og installation
Follow these steps for assembling your PC components within the Itek Meshcore 36B case.
4.1 Forberedelse af sagen
- Placer etuiet på en stabil, flad overflade.
- Carefully remove the tempered glass side panel by unscrewing the thumb screws at the rear and gently pulling the panel away. Set it aside on a soft, non-abrasive surface.
- Remove the solid metal side panel on the opposite side to access the cable management area.
4.2 Installation af bundkort
- Installer I/O-skjoldet (hvis det ikke er forudmonteret på dit bundkort) i den bageste åbning af kabinettet.
- Align the motherboard with the standoffs in the case. Ensure the standoffs match your ATX motherboard's screw holes.
- Fastgør bundkortet med de medfølgende skruer. Spænd ikke for hårdt.
4.3 Installation af strømforsyningsenhed (PSU).
- Find strømforsyningsrummet nederst på bagsiden af kabinettet.
- Slide the PSU into the compartment from the rear of the case, ensuring the fan faces downwards (if the case has a bottom vent) or upwards.
- Fastgør strømforsyningen med skruer fra bagsiden af kabinettet.
4.4 Installation af lagerdrev (HDD/SSD)
The case features dedicated bays for 3.5" HDDs and 2.5" SSDs, typically located in the PSU shroud area or behind the motherboard tray.
- For 3.5" HDDs: Slide the drive into the designated drive cage and secure with screws.
- For 2.5" SSDs: Mount the SSD onto the designated brackets, usually found behind the motherboard tray, and secure with screws.
4.5 Installation af grafikkort og udvidelseskort
- Fjern de nødvendige dæksler til udvidelsespladserne fra bagsiden af kabinettet.
- Indsæt grafikkortet eller et andet udvidelseskort i det relevante PCIe-stik på bundkortet.
- Secure the card with the provided screw or latch mechanism.
4.6 Kabelstyring
The Meshcore 36B offers 21mm of cable management space behind the motherboard tray.
- Route all necessary cables (PSU, data, front panel) through the cutouts in the motherboard tray.
- Use the included cable ties to bundle and secure cables, ensuring they do not obstruct airflow or interfere with side panel closure.
- Connect the front panel connectors (USB 3.0, USB-C, audio, power/reset switches, LED indicators) to the corresponding headers on your motherboard.
- Connect the ARGB fan hub to your motherboard's ARGB header (if available) for software control, or use the integrated controller for basic lighting effects. Ensure all fans are connected to the hub.
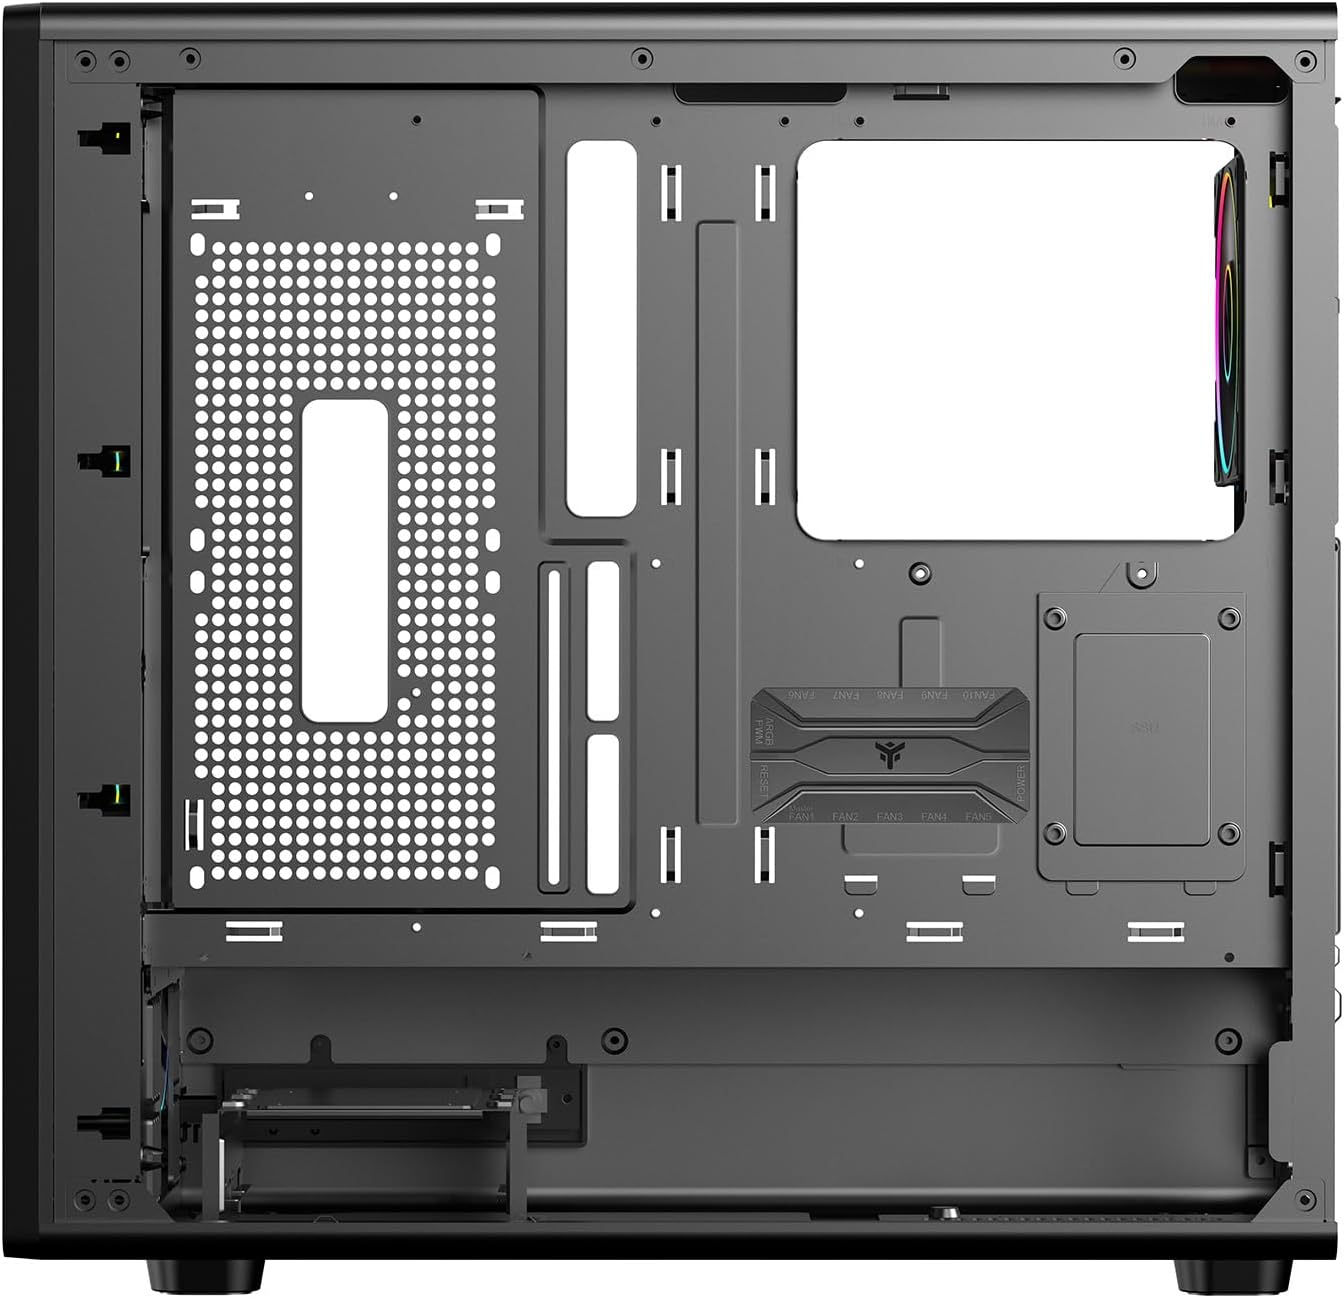
Figur 4.1: Interiør view from the backplate side, illustrating cable management options.
5. Betjeningsvejledning
5.1 Tænd
- Når alle komponenter er installeret og kabler er tilsluttet, skal begge sidepaneler sættes på igen.
- Tilslut din skærm, tastatur, mus og andet tilbehør.
- Tilslut strømkablet til strømforsyningen og en stikkontakt.
- Sæt tænd/sluk-knappen på strømforsyningen i positionen 'ON'.
- Press the power button on the front panel of the case to start your computer.
5.2 Front Panel Connectivity
The front/side I/O panel provides convenient access to:
- 2 x USB 3.0-porte: Til højhastigheds dataoverførsel med kompatible enheder.
- 1 x USB-C-port: For modern USB Type-C devices.
- Lydstik: For headphones and microphones.
- Power knap: For at tænde/slukke systemet.
- Nulstil knap: For at genstarte systemet.
- LED-indikatorer: For power and HDD activity.
5.3 ARGB-lysstyring
The pre-installed ARGB fans are connected to an ARGB hub. Lighting can be controlled in two ways:
- Motherboard Software Control: If the ARGB hub is connected to a compatible 3-pin 5V ARGB header on your motherboard, you can use your motherboard's RGB software (e.g., ASUS Aura Sync, MSI Mystic Light, Gigabyte RGB Fusion) to synchronize and customize lighting effects.
- Integreret controller: If not connected to a motherboard ARGB header, the hub typically has a button (often labeled 'LED' or 'RGB') on the case's front I/O panel or directly on the hub itself to cycle through pre-set lighting modes and colors.
6. Vedligeholdelse
Regelmæssig vedligeholdelse er med til at sikre optimal ydeevne og levetid for dit pc-kabinet.
6.1 Rengøring af støvfilter
The Meshcore 36B includes dust filters to prevent dust buildup inside the case. These filters should be cleaned periodically.
- Locate and remove the dust filters (typically on the top, front, and/or bottom of the case).
- Rengør filtrene med trykluft, en blød børste eller skyl dem med vand (sørg for, at de er helt tørre, inden de monteres igen).
- Reinstall the dust filters.
6.2 Generel rengøring
- Brug en blød, damp klud til at tørre de udvendige overflader af. Undgå slibende rengøringsmidler.
- Brug en glasrens og en mikrofiberklud til det hærdede glaspanel for at undgå striber.
- Periodically use compressed air to clear dust from internal components and fan blades.
7. Fejlfinding
If you encounter issues with your PC case, refer to the following common problems and solutions.
7.1 Ventilatorer drejer ikke / ARGB lyser ikke
- Tjek strømforbindelser: Ensure all fans are properly connected to the ARGB hub, and the hub itself is receiving power from the PSU (usually via a SATA power connector).
- Check ARGB Signal: If using motherboard software control, verify the ARGB hub is connected to a 3-pin 5V ARGB header on the motherboard and that the software is correctly configured.
- Try Integrated Controller: If motherboard control fails, try using the physical button on the case or hub to cycle through lighting modes.
7.2 Front Panel USB/Audio Ports Not Working
- Verify Motherboard Connections: Ensure the USB 3.0, USB-C, and audio headers from the front panel are securely connected to the correct pins on your motherboard. Refer to your motherboard manual for header locations.
- Tjek drivere: Ensure you have installed the latest chipset and audio drivers for your motherboard.
7.3 Overophedning af systemet
- Rengør støvfiltre: Ensure dust filters are clean and not obstructing airflow.
- Check Fan Orientation: Verify that fans are installed with correct airflow direction (front fans typically intake, rear/top fans exhaust).
- Improve Cable Management: Poor cable management can restrict airflow. Re-route cables for better air circulation.
8. Specifikationer
| Feature | Specifikation |
|---|---|
| Mærke | Itek |
| Modelnavn | Itek Case MESHCORE 36B |
| Modelnummer | ITGCAMC36B |
| Sagstype | Tårn |
| Bundkort kompatibilitet | ATX |
| Materiale | Metal, plastik, hærdet glas |
| Farve | Sort |
| Afkølingsmetode | Luft |
| Forudinstallerede ventilatorer | 4 x 14cm ARGB Fans (3 Front, 1 Rear) |
| Front I / O-porte | 2 x USB 3.0, 1 x USB-C |
| Max GPU-længde | 420 mm |
| Max CPU kølerhøjde | 174 mm |
| Væskekøling Support | Op til 360 mm |
| Kabelstyringsplads | 21 mm |
| Yderligere funktioner | Dust Filter, Perforated Front, ARGB Lighting, Integrated Fan |
9. Garanti og support
9.1 Produktgaranti
The Itek Meshcore 36B PC Case comes with a 24 måneders garanti from the date of purchase. This warranty covers manufacturing defects and faulty components under normal use. It does not cover damage caused by misuse, accidents, unauthorized modifications, or improper installation.
9.2 Teknisk support
For technical assistance, troubleshooting beyond this manual, or warranty claims, please contact Itek customer support through their official website or the retailer where the product was purchased. Please have your product model number (ITGCAMC36B) and proof of purchase ready when contacting support.