
Indledning
This manual provides essential instructions for the safe operation, setup, and maintenance of your Protocol Director HD Foldable Drone. Please read this manual thoroughly before operating the drone to ensure proper function and to prevent damage or injury.
The Protocol Director HD is a foldable drone equipped with a live streaming HD camera, designed for capturing aerial video and photos. It features an intuitive 2.4 GHz remote control, an altitude sensor for stable flight, and a free downloadable app for enhanced camera control and flight path drawing.
Sikkerhedsforanstaltninger
- Brug altid dronen i åbne, uhindrede områder, væk fra mennesker, dyr og forhindringer.
- Do not operate near airports, restricted airspace, or sensitive facilities.
- Hold en sikker afstand til elledninger, træer og vandmasser.
- Sørg for, at alle propeller er sikkert fastgjort og ubeskadigede før hver flyvning.
- Flyv ikke i stærk vind eller ugunstige vejrforhold.
- Hold fingre og hår væk fra roterende propeller.
- Adult supervision is recommended for users under 18 years of age. Recommended age for operation is 14 years and up.
- Only use original Protocol replacement parts and accessories.
- Forsøg ikke at modificere dronen eller dens komponenter.
- Sluk dronen og fjernbetjeningen, når de ikke er i brug.
Pakkens indhold
Bekræft at alle varer er til stede i pakken:
- Protocol Director HD Foldable Drone with Camera
- Remote Control with Phone Mount
- USB opladningskabel
- 2 x Drone Batteries
- Rejsetaske
- Instruktionsmanual (dette dokument)
- Spare Parts: Blades, Screwdriver

Image: The Protocol Director HD Foldable Drone, showcasing its compact design with propellers extended and camera visible at the front.
Opsætning
1. Opladning af dronens batteri
- Insert one of the drone batteries into the USB charging cable.
- Tilslut USB-opladerkablet til en USB-strømkilde (f.eks. computerens USB-port, USB-vægadapter).
- Opladningsindikatorlampen på USB-kablet lyser under opladning og slukker, når den er fuldt opladet.
- Opladning tager typisk cirka 60-90 minutter. Overoplades ikke.
2. Installation af fjernbetjeningsbatterier
- Åbn batterirummet på bagsiden af fjernbetjeningen.
- Isæt 4 AA-batterier (medfølger ikke), og sørg for korrekt polaritet (+/-).
- Luk batterirummet forsvarligt.

Image: The drone's remote control with a smartphone securely mounted, displaying a live feed from the drone's camera.
3. Udfoldning af dronen
- Gently unfold each of the four rotor arms until they click into place.
- Sørg for, at alle arme er helt strakte og låst inden flyvning.
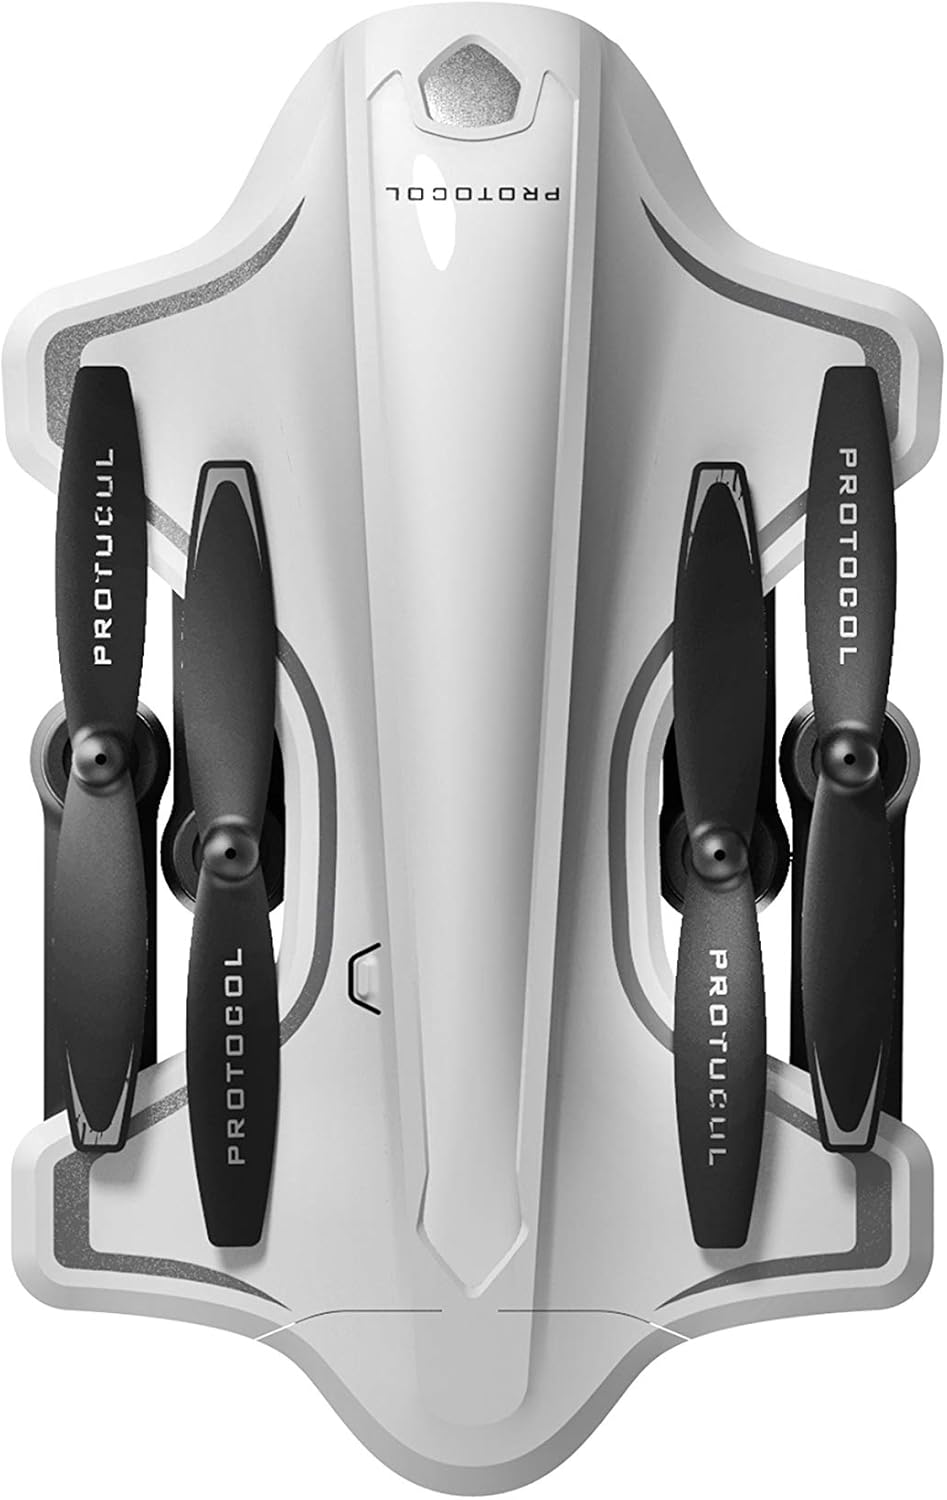
Image: The Protocol Director HD Foldable Drone in its compact, folded configuration, ready for transport.
4. Installation af dronebatteriet
- Find batterirummet på dronen.
- Insert the fully charged drone battery, ensuring it is securely seated.
- Luk batterirummets dæksel.
5. Downloading the App (Optional for Camera Features)
- Søg efter the "Protocol Director HD" app in your smartphone's app store (iOS or Android).
- Download and install the free application.
- Mount your smartphone onto the remote control's phone mount.
Betjeningsvejledning
1. Tænd og parring
- Placer dronen på en flad, plan overflade.
- Tænd dronen ved at trykke på tænd/sluk-knappen. Dronens lys vil blinke.
- Tænd for fjernbetjeningen.
- Tryk venstre joystick (gashåndtag) helt op, og derefter helt ned. Dronens lys vil lyse konstant, hvilket indikerer vellykket parring.
2. Calibrating the Gyroscope
After pairing, it is recommended to calibrate the gyroscope for stable flight:
- With the drone on a flat surface, push both joysticks down and to the right simultaneously for a few seconds.
- The drone's lights will flash rapidly and then become solid, indicating calibration is complete.
3. Grundlæggende flyvekontrol
The Protocol Director HD features auto launch, hover, and land functions due to its altitude sensor.
- Automatisk start: Press the dedicated auto launch button on the remote. The drone will ascend to a stable hovering altitude.
- Gashåndtag (venstre joystick):
- Push up: Increase altitude
- Push down: Decrease altitude
- Push left/right: Rotate drone left/right (yaw)
- Retningskontrol (højre joystick):
- Skub op: Flyv fremad
- Tryk ned: Flyv baglæns
- Skub til venstre: Flyv til venstre (strafe)
- Tryk til højre: Flyv til højre (strafe)
- Autolanding: Press the dedicated auto land button. The drone will slowly descend and land.
- Hastighedsvalg: Use the speed button on the remote to cycle through three selectable speeds (low, medium, high).
4. Camera and App Features
Connect your smartphone to the drone's Wi-Fi network (usually named "Protocol_Drone_XXXXXX") to access live streaming and advanced camera functions via the app.
- Livestreaming: View the drone's camera feed in real-time on your smartphone.
- Videooptagelse: Initiate and stop video recording (480p resolution) through the app.
- Fotooptagelse: Take still images through the app.
- Multiple Camera Angles: The app supports three different camera angles (Aerial, POV, Selfie) for varied content creation.
- Lydoptagelse: The app allows for audio recording alongside video.
- Draw Your Own Flight Path: Utilize the app's feature to draw a flight path on your screen, and the drone will follow it.
- VR Capability: The app is VR capable; VR goggles are sold separately.
Opretholdelse
- Propelinspektion: Regularly check propellers for cracks, bends, or damage. Replace any damaged propellers using the provided spare parts and screwdriver.
- Rensning: Use a soft, dry cloth to clean the drone and remote control. Avoid using liquids or harsh chemicals.
- Batteripleje:
- Overoplad ikke batterier.
- Opbevar batterier på et køligt, tørt sted.
- Remove batteries from the drone and remote control during long periods of non-use.
- Opbevaring: Fold the drone arms for compact storage in the provided travel bag when not in use. Store in a cool, dry environment.
Fejlfinding
| Problem | Mulig årsag | Løsning |
|---|---|---|
| Dronen tænder ikke. | Batteri ikke opladet eller forkert installeret. | Sørg for, at batteriet er fuldt opladet og korrekt isat. |
| Fjernbetjeningen tænder ikke. | AA batteries are dead or incorrectly installed. | Replace AA batteries, checking polarity. |
| Drone og fjernbetjening parres ikke. | Parringssekvensen er ikke fulgt korrekt. | Ensure drone is on, then remote. Push left joystick up then down completely. |
| Drone driver afsted under flyvning. | Gyroscope needs calibration; uneven surface at launch. | Land the drone, place on a flat surface, and recalibrate the gyroscope (both joysticks down and right). |
| One propeller does not spin. | Propeller damaged or motor issue. | Check for obstructions. Replace damaged propeller. If issue persists, contact support. |
| No live video feed on smartphone. | Ikke forbundet til dronens Wi-Fi; appen er ikke åben. | Ensure smartphone is connected to the drone's Wi-Fi network and the app is running. |
Specifikationer
| Mærke | Protokol |
| Modelnavn | Director HD |
| Modelnummer | 6182-7RCHA |
| Dimensioner (foldet) | Approximately 4.75 inches (length) |
| Dimensioner (Udvidet) | Approximately 9 inches (length, including blades) |
| Vægt | 0.94 kilo (940 g) |
| Kameraopløsning | 480p (videooptagelse) |
| Forbindelse | Wi-Fi (for app control and live streaming), 2.4 GHz (for remote control) |
| Stabilisering | 6-axis motion-sensitive auto stabilizers, Altitude sensor |
| Hastighedstilstande | Three selectable speeds |
| Drone-batteri | Genopladelige (2 medfølger) |
| Fjernbetjenings batteri | 4 x AA batterier (medfølger ikke) |
| Materiale | Plastic (Crash-resistant) |
| Anbefalet alder | 14 år og opefter |
Garanti og support
For warranty information, technical support, or to purchase replacement parts, please visit the official Protocol webwebstedet eller kontakt deres kundeserviceafdeling. Behold din købskvittering som købsbevis.
Webwebsted: www.protocolny.com (Eksamplinket, det faktiske link kan variere)
Kontakte: Refer to the Protocol website for contact details, including phone numbers or email support.