
Rosewill RHPA-18003
Rosewill Portable Air Conditioner
User Manual - Model RHPA-18003

Front view of the Rosewill RHPA-18003 Portable Air Conditioner, showcasinmed sit elegante hvide design og digitale display.
1. Introduktion
Thank you for choosing the Rosewill RHPA-18003 Portable Air Conditioner. This versatile 4-in-1 unit provides cooling, heating, dehumidifying, and fan functions, designed to offer comfort in spaces up to 300 square feet. Its compact design, remote control, and intelligent features like Sleep Mode and a 24-hour timer make it an efficient and convenient solution for your home or office.
Please read this manual thoroughly before operating the appliance to ensure proper use, maintenance, and safety.
2. Sikkerhedsoplysninger
- Placer altid enheden på en plan, stabil overflade.
- Ensure proper ventilation around the unit. Maintain at least 20 inches (50 cm) of clearance from walls and other objects.
- Bloker ikke luftindtag eller -udtag.
- Use only the power supply specified on the rating label.
- The unit is equipped with an LCDI (Leakage-Current Detection and Interruption) plug to reduce the risk of fire. Do not tamper with or attempt to repair this plug.
- Tag stikket ud af enheden, før du rengør eller udfører vedligeholdelse.
- Hold børn og kæledyr væk fra enheden under drift.
3. Produktkomponenter
The Rosewill RHPA-18003 comes with the following components:
- Bærbar klimaanlægsenhed
- Exhaust Heat Pipe Assembly
- Fjernbetjening
- Vinduesforseglingspladesamling
- Washer, Screw, Nut (for assembly)

Illustration of the main components included with the portable air conditioner: Exhaust Heat Pipe Assembly, Remote Control, Washer/Screw/Nut, and Window Sealing Plate Assembly.
4. Opsætning og installation
Følg disse trin for indledende opsætning:
- Placering af enheden: Place the air conditioner on a firm, level surface near a window. Ensure there is at least 20 inches (50 cm) of space around the unit for proper airflow.
- Montering af udstødningsslangen:
- Attach one end of the exhaust heat pipe assembly to the air outlet on the back of the unit.
- Extend the exhaust hose and attach the other end to the window sealing plate assembly.
- Installation af vinduessæt:
- Open the window and place the window sealing plate assembly into the window opening. Adjust the plate to fit snugly.
- Close the window securely against the plate to seal the opening.
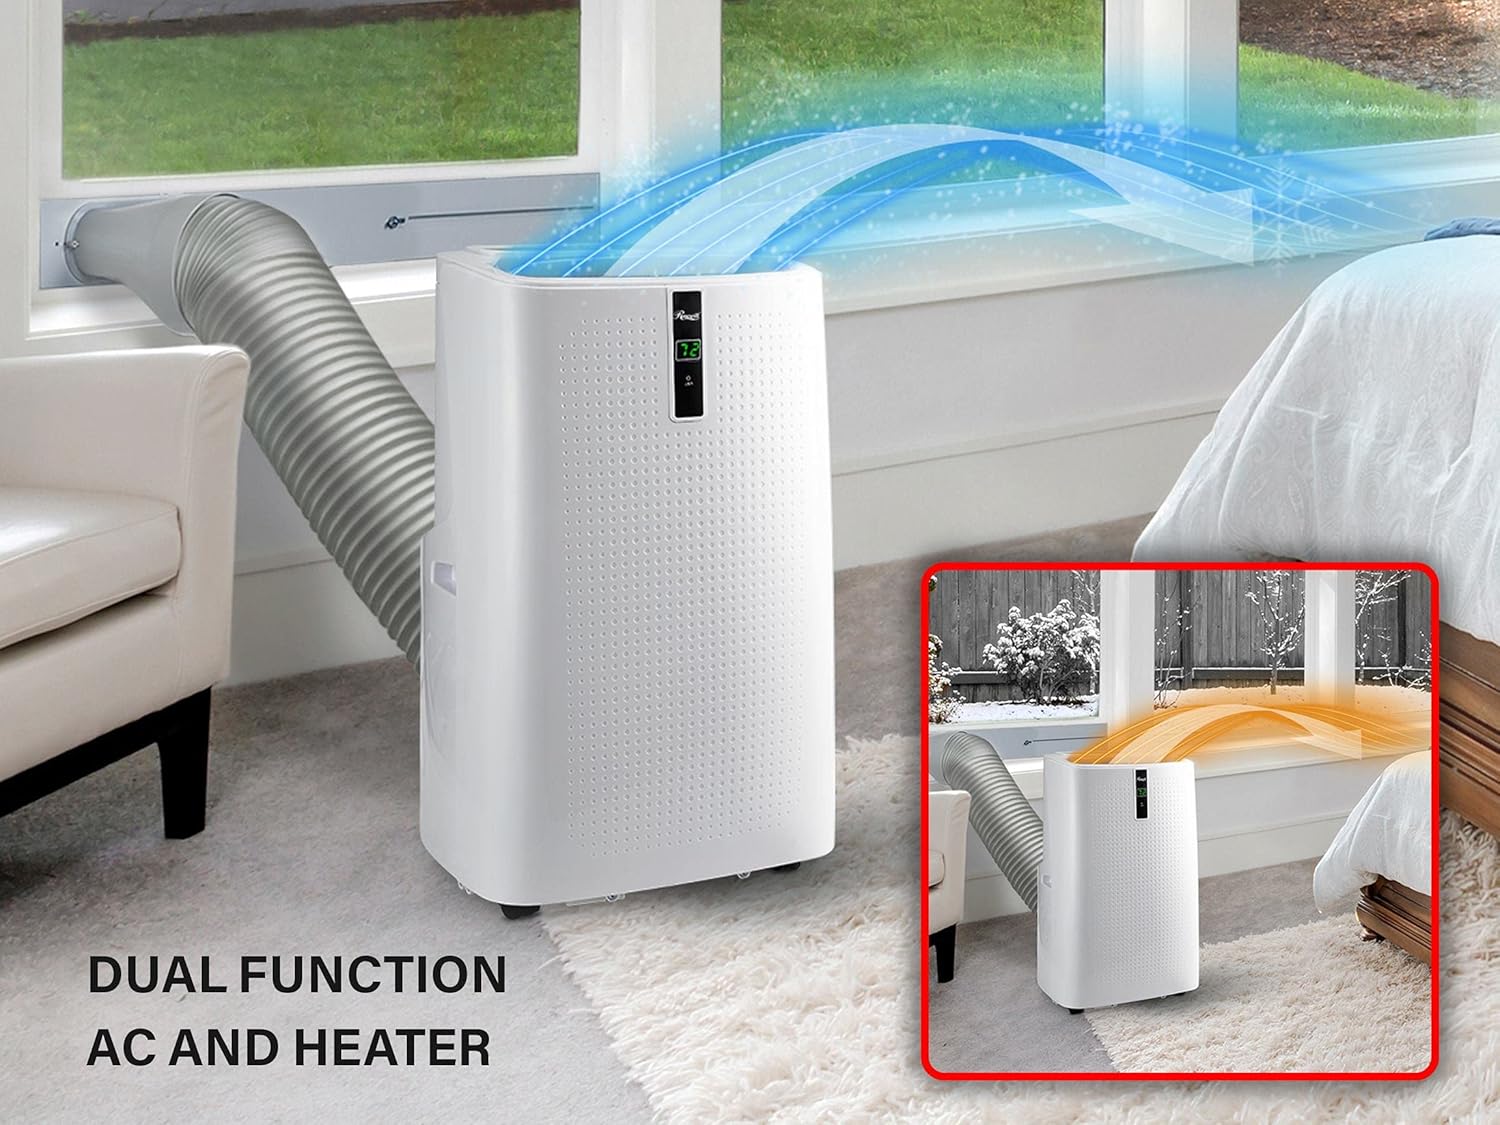
The portable air conditioner with its exhaust hose connected to a window kit, demonstrating proper setup for air ventilation.
- Strømtilslutning: Plug the LCDI power cord into a grounded electrical outlet.
5. Betjeningsvejledning
The unit can be operated using either the control panel on top of the unit or the included remote control.
Kontrolpanel overview

Detaljeret view of the control panel with buttons for Timer, Fan, Up, Display Window, Down, Mode, and Power, each numbered for easy identification.
- POWER -knap: Tryk for at tænde eller slukke enheden.
- MODE knap: Press to cycle through operating modes: Cool (AC), Fan, Dry (Dehumidifier), Heat.
- OP/NED knapper: Adjust temperature settings (in Cool/Heat mode) or timer settings.
- FAN knap: Select fan speed (Low, Medium, High) in Cool or Fan mode.
- TIMER knap: Set the auto-on or auto-off timer (up to 24 hours).
Fjernbetjening overview
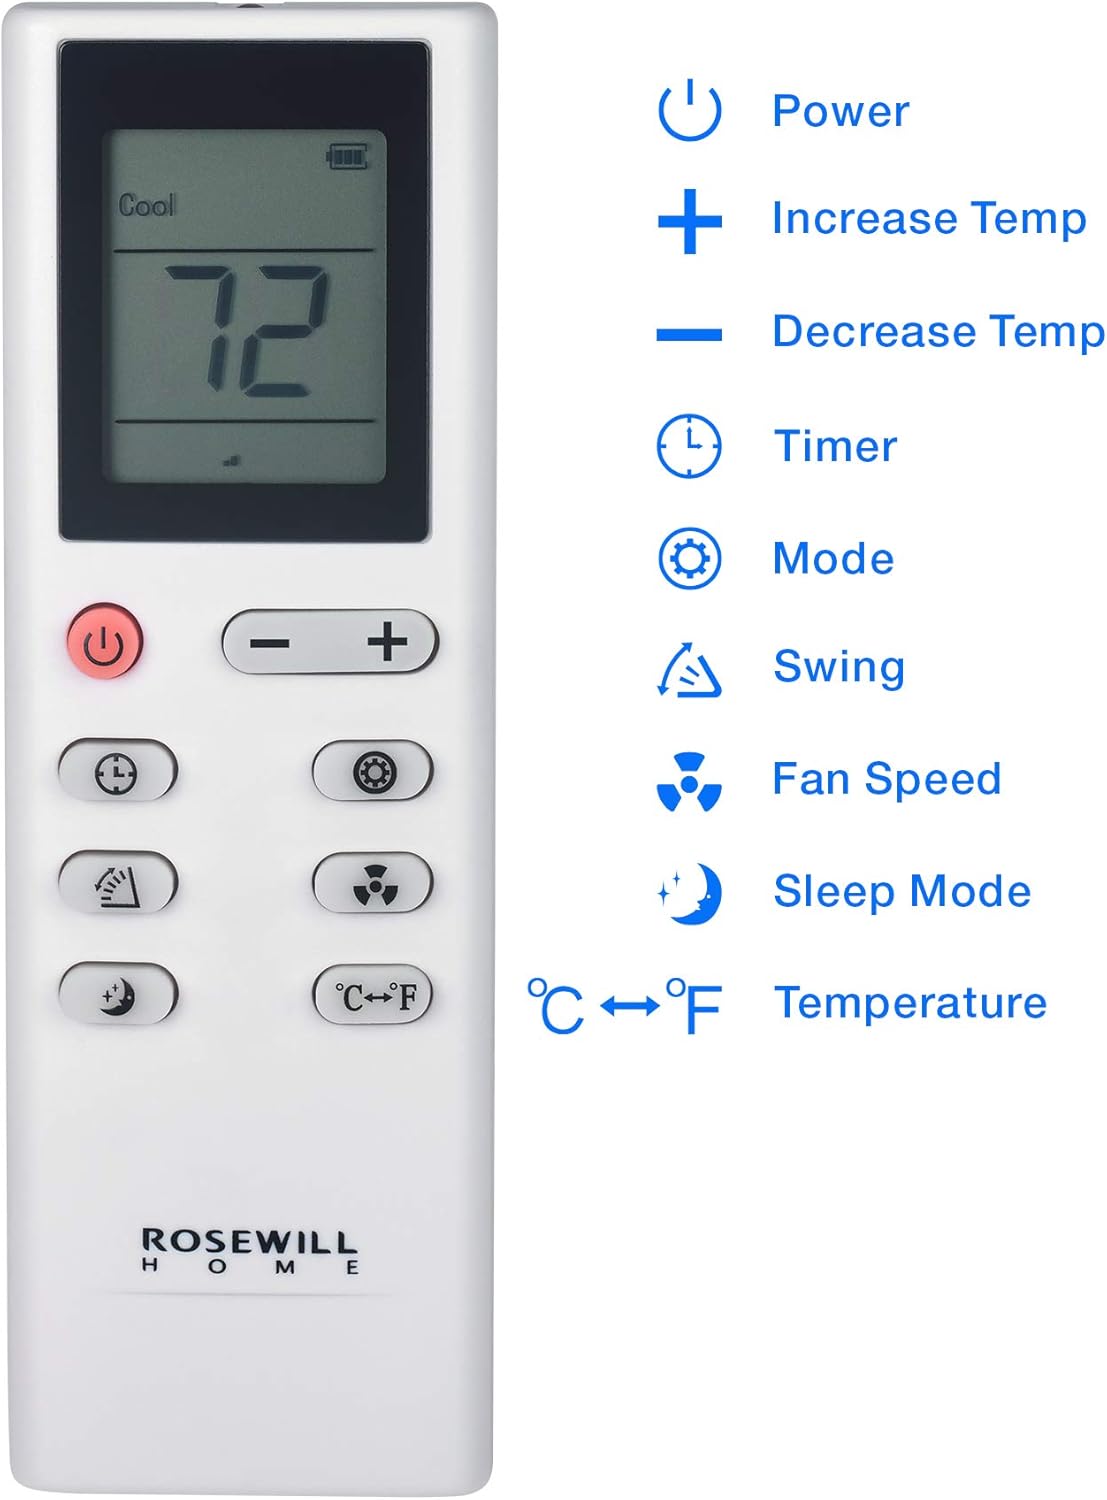
The remote control for the portable air conditioner, showing buttons for Power, Temperature Increase/Decrease, Timer, Mode, Swing, Fan Speed, Sleep Mode, and Temperature unit conversion (°C/°F).
The remote control duplicates most functions of the control panel and adds a Svinge button for automatic louver movement and a ° C / ° F button to switch temperature units.
Driftstilstande
- Cool Mode (AC): Provides cooling. Set desired temperature using UP/DOWN buttons.
- Ventilatortilstand: Circulates air without cooling or heating. Select fan speed.
- Tørretilstand (affugter): Removes moisture from the air. The fan speed is fixed to low in this mode. Ensure continuous drainage is set up if operating for extended periods.
- Varmetilstand: Provides heating. Set desired temperature using UP/DOWN buttons.
Særlige funktioner
- Sove mode: Optimizes temperature and fan speed for comfortable sleep while conserving energy.
- 3-Minute Delay Booting: To protect the compressor, the unit will not start immediately after being turned off or if the power is interrupted. There is a 3-minute delay before the compressor restarts. This is normal operation.
6. Vedligeholdelse
Regelmæssig vedligeholdelse sikrer optimal ydeevne og forlænger levetiden på din enhed.
Rengøring af luftfilteret
The unit features washable dust filters (Coated Net Filter, Activated Carbon, Pre-Filter) that trap dirt and debris. Clean the filters every two weeks or more frequently depending on usage and air quality.
- Tag enheden ud af stikkontakten.
- Locate the air filter panel on the side/back of the unit.
- Fjern filteret ved forsigtigt at trække det ud.
- Wash the filter under running water (warm, not hot) or use a vacuum cleaner to remove dust. For heavily soiled filters, a mild detergent can be used.
- Lad filteret lufttørre helt, før det sættes i enheden igen. Udsæt det ikke for direkte sollys.

Side view of the Rosewill portable air conditioner showing the removable air filter for cleaning.
Drænende vand
In Dehumidifier mode or high humidity conditions, water will accumulate in the internal reservoir. The unit has a self-evaporating system, but manual drainage may be required if the 'Full' indicator lights up.
- Sluk og tag stikket ud af enheden.
- Placer en lav gryde eller bakke under drænåbningen nederst på bagsiden af enheden.
- Fjern aftapningsproppen, så vandet kan løbe ud.
- Når den er tømt, skal du sætte aftapningsproppen ordentligt på.
Opbevaring
Hvis enheden opbevares i en længere periode:
- Tøm alt ophobet vand.
- Rengør luftfiltrene.
- Tag netledningen ud, og rul den pænt op.
- Opbevar enheden et tørt, køligt sted, væk fra direkte sollys og ekstreme temperaturer.
7. Fejlfinding
| Problem | Mulig årsag | Løsning |
|---|---|---|
| Enheden tænder ikke. | No power; LCDI plug tripped; Timer is set. | Check power outlet; Reset LCDI plug; Cancel timer setting. |
| Enheden køler/varmer ikke effektivt. | Air filter dirty; Room too large; Exhaust hose not properly installed; Doors/windows open. | Clean air filter; Ensure room size is within specifications; Check exhaust hose connection; Close all doors and windows. |
| Vandlækage. | Drain plug loose; Unit not level; Internal reservoir full. | Secure drain plug; Place unit on a level surface; Drain water from the unit. |
| Støjende drift. | Enheden står ikke på en plan overflade; Blokering i ventilatoren. | Sørg for, at enheden er i vater; Kontroller og fjern eventuelle forhindringer. |
Hvis problemet fortsætter efter at have forsøgt disse løsninger, bedes du kontakte kundesupport.
8. Specifikationer
| Feature | Specifikation |
|---|---|
| Model | RHPA-18003 |
| Funktioner | Cooling, Heating, Fan, Dehumidifying |
| Kølekraft | 12,000 BTU |
| Dækningsområde | Op til 300 kvadratfod |
| Støjniveau | 56 dB |
| Voltage | 115 volt |
| Dimensioner (H x B x D) | 34.70 cm x 18.90 cm x 15.80 cm |
| Enhedsvægt | 73.00 lbs (71.4 pounds listed in specifications) |
| Timer | 24 timer |
| Blæserhastigheder | 3 |
| Energieffektivitet | Energy Star Certified, SEER 7.00 |
9. Garanti og support
Garantioplysninger
This Rosewill RHPA-18003 Portable Air Conditioner comes with a 1 års begrænset garanti from the date of purchase. This warranty covers defects in materials and workmanship under normal use. For specific terms and conditions, please refer to the warranty card included with your product or contact Rosewill customer support.
Kundesupport
For technical assistance, troubleshooting, or warranty claims, please contact Rosewill customer support. You may also find additional resources and FAQs on the official Rosewill webwebsted.
For a digital copy of the user manual, you can refer to the PDF document available at: Rosewill RHPA-18003 User Manual PDF
Ask a question about this manual
Ask about setup, troubleshooting, compatibility, parts, safety, or missing instructions. Manuals+ will review the question and use this page’s manual context to help answer it.