
1. Introduktion
This manual provides instructions for the proper setup, operation, and maintenance of your Sonew eecoo14 WiFi USB Digital Microscope Camera. This device is designed for detailed observation and analysis, offering magnification from 50x to 1000x. It can be used for various applications, including inspecting hair follicles, skin conditions, and other microscopic details. The microscope supports connectivity via both WiFi and USB, allowing it to be used with Android, iOS, Windows, and Mac operating systems.

Image 1.1: The Sonew eecoo14 Digital Microscope Camera. This image displays the main unit of the digital microscope, highlighting its compact and ergonomic design.
2. Pakkens indhold
Bekræft, at alle nedenstående varer er til stede i din pakke:
- 1 x Sonew eecoo14 Digital Microscope Camera
- 1 x USB-kabel
- 1 x Software Installation CD
- 1 x Software Flash Disk (USB Drive)
- 1 x strømadapter (US-stik)
- 1 x Aluminum Lift Stand
- 1 x Brugermanual (dette dokument)
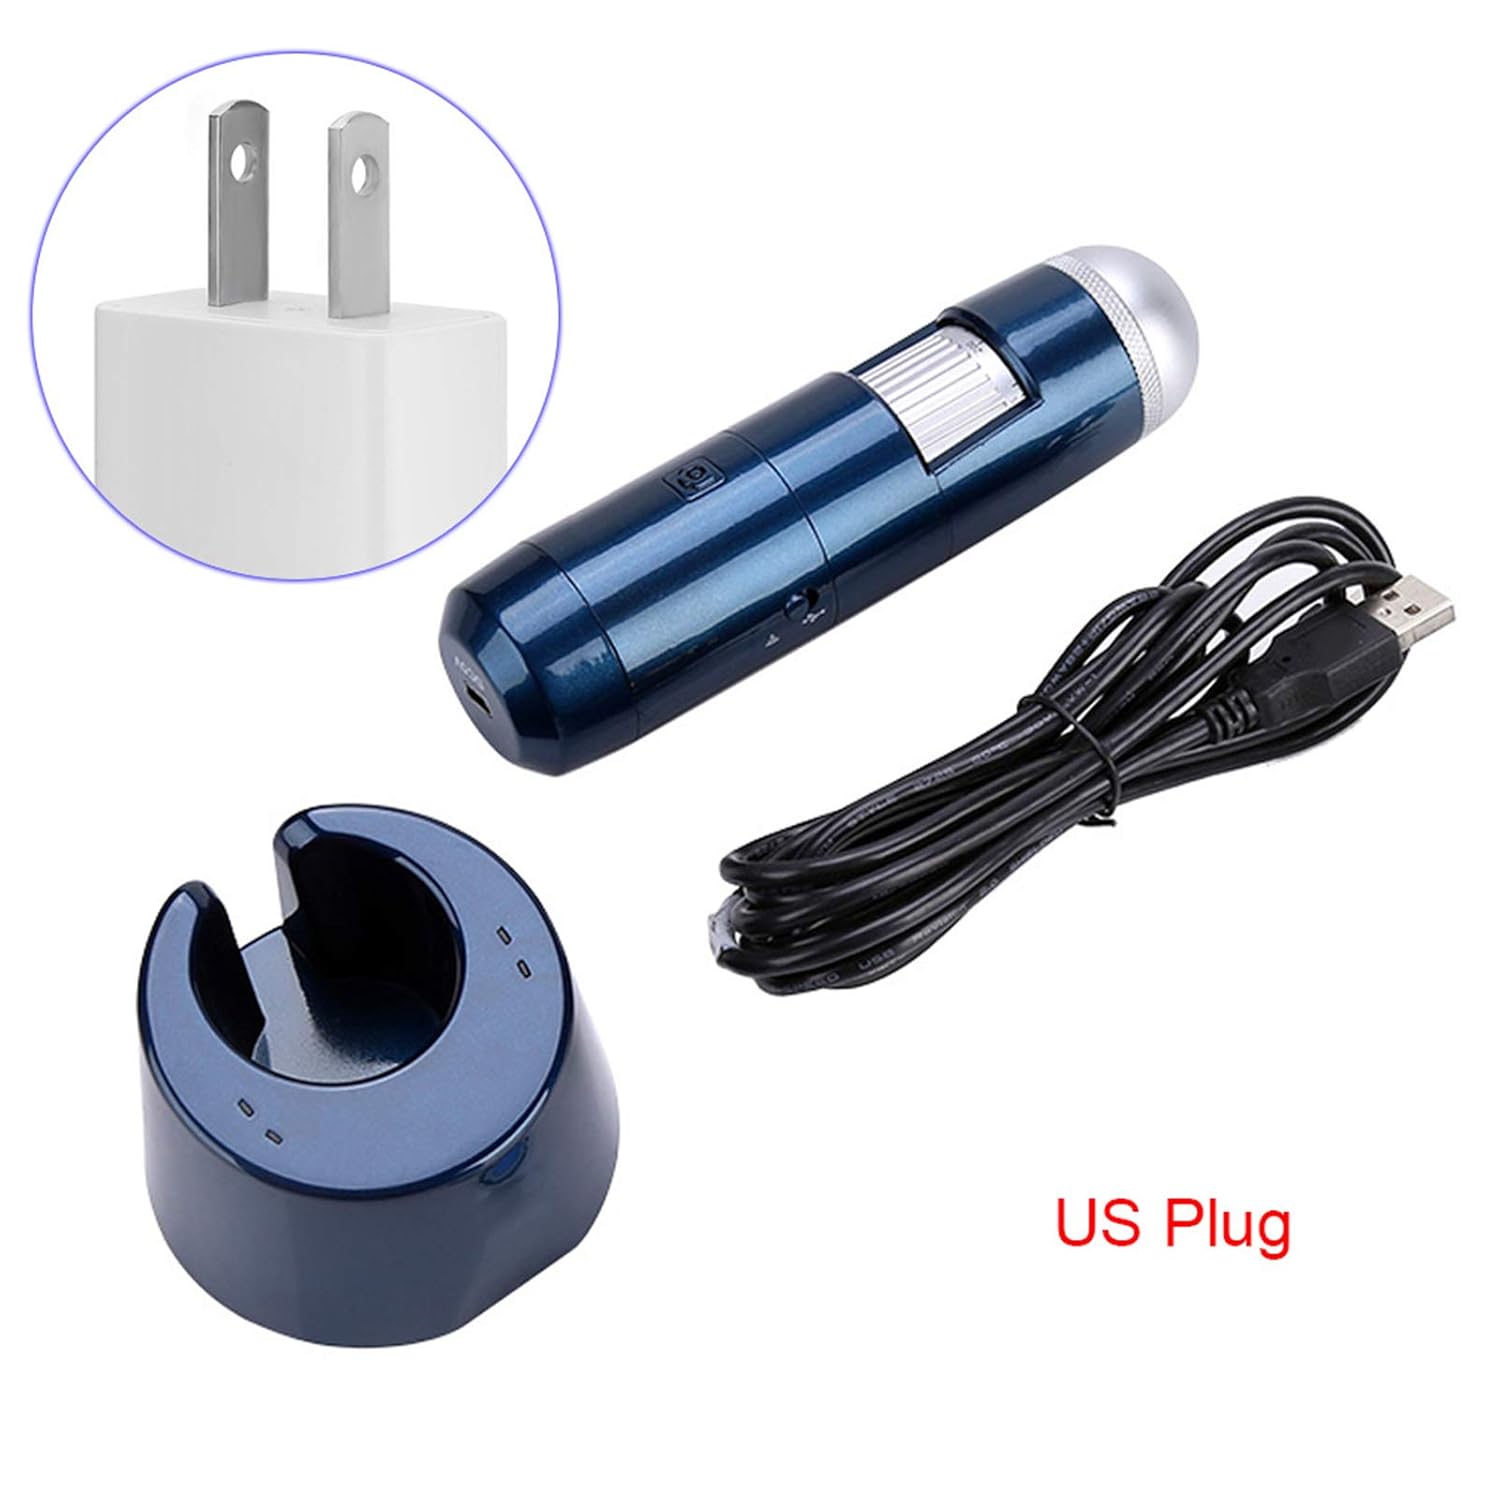
Image 2.1: Included accessories. This image shows the digital microscope, USB cable, power adapter (US plug), and the aluminum lift stand, illustrating the complete set of components.
3. Produktet er slutview
Familiarize yourself with the components of your digital microscope:
- Fokushjul: Adjusts the focus for clear images.
- Justering af forstørrelse: Allows changing the magnification level.
- LED belysning: Built-in 8-LED light source for illuminating specimens.
- Power knap: Tænder eller slukker for enheden.
- Optag knap: Takes still images or starts/stops video recording.
- USB Port (DC5V): Til opladning og kabelforbindelse til computere.
- WiFi modul: Enables wireless connection to mobile devices.

Image 3.1: Microscope features. This image provides a close-up view of the digital microscope, highlighting its various parts such as the focus wheel, power button, capture button, and USB port.
4. Opsætning
4.1 Opladning af enheden
- Connect the provided USB cable to the microscope's DC5V port.
- Sæt den anden ende af USB-kablet i strømadapteren.
- Sæt strømadapteren i en almindelig stikkontakt.
- Allow the device to charge fully before first use. The charging indicator light will change when charging is complete.
4.2 Softwareinstallation
Til view images and control the microscope, you need to install the appropriate software or application.
For Windows/Mac PC:
- Insert the Software Installation CD or the Software Flash Disk into your computer.
- Follow the on-screen instructions to install the viewing software.
- Alternatively, you may download the latest software from the manufacturer's website (refer to the included documentation for the URL).
For Android/iOS Smartphones/Tablets:
- Søg efter the recommended application (e.g., "WiFi View" or similar, check included documentation) in your device's app store (Google Play Store for Android, Apple App Store for iOS).
- Download og installer applikationen.
4.3 Connecting to a PC (USB Connection)
- Sørg for viewing software is installed on your PC.
- Connect the microscope to your PC using the provided USB cable.
- Tænd for mikroskopet ved hjælp af afbryderknappen.
- Launch the installed viewing software. The microscope feed should appear automatically.
4.4 Connecting to a Mobile Device (WiFi Connection)
- Ensure the dedicated application is installed on your mobile device.
- Tænd for mikroskopet ved hjælp af afbryderknappen.
- On your mobile device, go to WiFi settings.
- Locate and connect to the microscope's WiFi network (e.g., "WiFi_Cam_XXXX"). The default password, if any, will be in the included documentation.
- Open the installed application. The microscope feed should appear.

Image 4.1: Wireless and USB connectivity. This image illustrates the flexibility of the microscope, showing it connected wirelessly to a smartphone and via USB to a computer monitor, demonstrating its dual connection capabilities.
5. Betjeningsvejledning
5.1 Tænd/sluk
- For at tænde: Tryk på tænd/sluk-knappen, og hold den nede, indtil indikatorlampen lyser.
- For at slukke: Tryk på tænd/sluk-knappen, og hold den nede, indtil indikatorlampen slukker.
5.2 Justering af forstørrelse og fokus
- Placer mikroskopet over det objekt, du ønsker at observere.
- Rotate the magnification adjustment ring to select the desired magnification level (50x to 1000x).
- Slowly turn the focus wheel until the image on your screen is clear and sharp.
5.3 Using the LED Illumination
The microscope features 8 built-in LEDs to provide optimal lighting for your observations. The brightness can typically be adjusted via a control on the microscope body or within the viewing software/app.
5.4 Optagelse af billeder og videoer
Once the image is focused, you can capture still images or record videos:
- Using the Capture Button: Press the physical Capture button on the microscope to take a photo. Press and hold to start/stop video recording (functionality may vary by software).
- Using Software/App Controls: Mest viewing applications provide on-screen buttons for capturing images and recording videos. Refer to your software's help section for specific instructions.
5.5 Specific Applications: Scalp and Skin Analysis
The Sonew eecoo14 is particularly useful for detailed analysis of scalp and skin conditions:
- Ensure the microscope is fully charged and connected to your viewing enhed.
- Gently place the microscope lens directly onto the area of the scalp or skin you wish to examine.
- Adjust the focus and magnification to achieve a clear view of hair follicles, skin texture, or other details.
- Use the capture function to document observations for analysis or record changes over time.
- The software allows for storage and printing of analysis data, aiding in professional assessments.

Image 5.1: Scalp analysis on a monitor. This image shows the digital microscope being used to examine a person's scalp, with the magnified view displayed on a computer monitor, demonstrating its application as a skin and hair scalp detector.

Image 5.2: Hair follicle view on a smartphone. This image illustrates the microscope connected wirelessly to a smartphone, displaying a magnified view of hair follicles, highlighting its utility for detailed hair analysis.

Image 5.3: Skin texture view on a smartphone. This image shows the digital microscope connected wirelessly to a smartphone, displaying a magnified view of skin texture, demonstrating its capability for detailed skin examination.
6. Vedligeholdelse
6.1 Rengøring
- Sørg for, at enheden er slukket og frakoblet enhver strømkilde før rengøring.
- Use a soft, dry cloth to wipe the body of the microscope.
- For the lens, use a specialized lens cleaning cloth and solution to avoid scratches. Do not use abrasive cleaners or solvents.
6.2 Opbevaring
- Opbevar mikroskopet et køligt, tørt sted, væk fra direkte sollys og ekstreme temperaturer.
- Keep it in its original packaging or a protective case to prevent dust accumulation and physical damage.
- Hvis batteriet opbevares i længere perioder, skal du sørge for, at det er delvist opladet (ca. 50%) for at forlænge dets levetid.
7. Fejlfinding
If you encounter issues with your microscope, refer to the following common problems and solutions:
| Problem | Mulig årsag | Løsning |
|---|---|---|
| Intet billede på skærmen | Device not powered on; Low battery; Incorrect connection; Software not running or installed. | Ensure device is on; Charge battery; Reconnect USB/WiFi; Launch or reinstall software/app. |
| Billedet er sløret | Out of focus; Incorrect working distance. | Adjust the focus wheel; Ensure the microscope is at an appropriate distance from the object. |
| WiFi-forbindelse mislykkes | Incorrect WiFi password; Device too far from microscope; Interference. | Verify WiFi password; Move device closer; Try connecting in a different location. |
| LED'er virker ikke | LEDs turned off; Low battery. | Check LED control in software/app or on device; Charge battery. |
Hvis problemet fortsætter efter at have prøvet disse løsninger, bedes du kontakte kundesupport.
8. Specifikationer
| Feature | Specifikation |
|---|---|
| Modelnummer | eecoo14 |
| Opløsning | 640 x 840 / 1280 x 1024 |
| Forstørrelse | 50x til 1000x |
| Interface | WiFi Wireless + USB 2.0 |
| Lyskilde | 8-LED (0-30000 MLUX) |
| Strømforsyning | Built-in Lithium Battery, USB (5V DC) |
| Understøttede systemer | iOS (iPad/iPhone), Android (phone/tablet with OTG), Windows XP/Vista/7/8/10, Mac |
| Varens vægt | 491 g |
| Længde | Ca. 14.2 cm (5.6 tommer) |

Image 8.1: Microscope dimensions. This image provides a visual representation of the microscope's length, indicating it is approximately 14.2 cm.
9. Garanti og support
This product comes with a standard manufacturer's warranty. For specific warranty terms and conditions, please refer to the documentation included with your purchase or contact the retailer. For technical support, troubleshooting assistance beyond this manual, or service inquiries, please contact Sonew customer service through their official webwebstedet eller kontaktoplysningerne på din produktemballage.