
1. Introduktion
Thank you for choosing the Arzum AR2017 Panetti Bread Maker. This appliance is designed to simplify the process of baking fresh, homemade bread. With its 13 versatile programs, you can prepare a wide variety of breads, from classic white to gluten-free options. Please read this manual carefully before first use to ensure safe and optimal operation.
2. Vigtige sikkerhedsinstruktioner
- Læs alle instruktioner før brug af apparatet.
- Rør ikke ved varme overflader. Brug ovnhandsker, når du håndterer varme dele.
- For at beskytte mod elektrisk stød må ledning, stik eller apparat ikke nedsænkes i vand eller anden væske.
- Tæt opsyn er nødvendigt, når et apparat bruges af eller i nærheden af børn.
- Træk stikket ud af stikkontakten, når det ikke er i brug, og før rengøring. Lad det køle af, før du sætter dele på eller af.
- Betjen ikke noget apparat med en beskadiget ledning eller stik, eller efter at apparatet ikke fungerer korrekt eller er blevet beskadiget på nogen måde.
- Brug af tilbehør, der ikke er anbefalet af apparatets producent, kan forårsage skader.
- Må ikke bruges udendørs.
- Lad ikke ledningen hænge ud over kanten af bordet eller bordpladen eller røre ved varme overflader.
- Må ikke placeres på eller i nærheden af en varm gas- eller elektrisk brænder eller i en opvarmet ovn.
- Der skal udvises ekstrem forsigtighed ved flytning af et apparat, der indeholder varm olie eller andre varme væsker.
- For at afbryde forbindelsen skal du slukke for en hvilken som helst knap og derefter tage stikket ud af stikkontakten.
- Brug ikke apparatet til andet end tilsigtet brug.
3. Produktet er slutview
Familiarize yourself with the components of your Arzum Panetti Bread Maker.
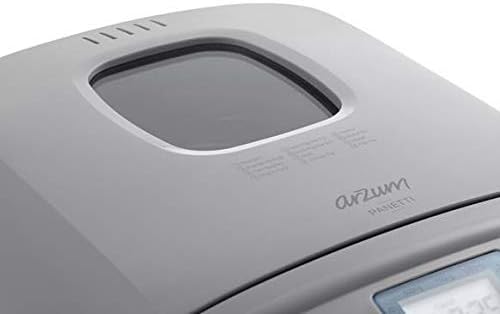
Billede: Top view of the Arzum Panetti Bread Maker, showing the lid and the transparent viewing window. This window allows you to monitor the baking process without opening the lid.

Billede: Close-up of the Arzum Panetti Bread Maker lid, displaying the numbered program labels (Standard, French Bread, Whole Wheat, Low Carb, Fast Bake, etc.) for easy reference during program selection.

Billede: The control panel and LCD screen of the Arzum Panetti Bread Maker. The screen shows "MENU" and "TIMER" with a time display, along with icons for loaf size (500g, 750g, 1000g) and crust color. Buttons for menu selection, timer, start/stop, and crust color are visible.

Billede: A hand is shown inserting the bread pan with its handle into the Arzum Panetti Bread Maker. The kneading paddle is visible at the bottom of the pan. This illustrates the process of placing the pan correctly before adding ingredients.
Komponenter:
- Hovedenhed: The body of the bread maker.
- Låg med Viewing vindue: Giver mulighed for overvågning af bageprocessen.
- Kontrolpanel: Features an LCD display and buttons for program selection, timer, crust color, and start/stop.
- Brødform: Aftagelig non-stick pande til bagning.
- Æltepaddel: Detachable paddle located inside the bread pan for mixing ingredients.
- Målekop og ske: For accurate ingredient measurement (may vary by package).
4. Opsætning og første brug
- Udpakning: Carefully unpack the bread maker and all its accessories. Remove any packaging materials.
- Rensning: Aftør ydersiden af apparatet med adamp cloth. Wash the bread pan and kneading paddle with warm, soapy water, then rinse and dry thoroughly.
- Placering: Placer brødbageren på en stabil, flad og varmebestandig overflade, væk fra direkte sollys og varmekilder. Sørg for tilstrækkelig ventilation omkring apparatet.
- Første bagecyklus (tom): Before baking bread, it is recommended to run an empty bake cycle to burn off any manufacturing residues.
- Insert the empty bread pan with the kneading paddle attached into the main unit.
- Luk låget.
- Tilslut apparatet.
- Select the "Bake" program (Program 13).
- Press the Start/Stop button. Allow it to run for about 10 minutes, then press Start/Stop again to cancel.
- Tag stikket ud af stikkontakten og lad det køle helt af.
5. Betjeningsvejledning
Grundlæggende betjeningstrin:
- Indsæt æltepaddel: Ensure the kneading paddle is securely attached to the shaft inside the bread pan.
- Tilføj ingredienser: Add ingredients to the bread pan in the order specified by your recipe (typically liquids first, then dry ingredients, with yeast last). Do not exceed the maximum capacity.
- Placer brødformen: Sæt brødformen i brødbageren, og tryk den godt ned, indtil den klikker på plads. Luk låget.
- Tilslut: Tilslut netledningen til en jordforbundet stikkontakt. Displayet viser standardprogrammet.
- Vælg program: Press the "MENU" button repeatedly to cycle through the 13 available programs until your desired program number is displayed.
- Vælg brødstørrelse: Press the "LOAF SIZE" button to choose between 500g, 750g, or 1000g, according to your recipe.
- Vælg skorpefarve: Press the "CRUST" button to select light, medium, or dark crust.
- Start med at bage: Press the "START/STOP" button to begin the baking cycle. The colon in the time display will flash, indicating operation.
- Under drift: You can monitor the process through the viewing window. Some programs may have an audible signal for adding extra ingredients (e.g., nuts, fruits).
- Slut på cyklus: Once the program is complete, the bread maker will beep. It will then automatically switch to a 1-hour "Keep Warm" function.
- Fjern brød: Press "START/STOP" to end the "Keep Warm" function. Unplug the appliance. Using oven mitts, carefully remove the bread pan by lifting its handle. Invert the pan onto a cooling rack and shake gently until the bread slides out. Remove the kneading paddle from the bread if it remains embedded.
- Køling: Lad brødet køle af på en rist i mindst 30 minutter, inden det skæres i skiver.
Forsinkelsestimerfunktion:
The delay timer allows you to set the bread maker to finish baking at a later time, up to 13 hours. This is useful for having fresh bread ready in the morning.
- Add ingredients, select program, loaf size, and crust color as usual.
- Press the "TIMER" buttons (+ or -) to set the desired delay time. The displayed time includes the baking cycle duration. For example, if the baking cycle is 3 hours and you want bread ready in 8 hours, set the timer to 8:00.
- Press "START/STOP". The timer will count down, and the bread maker will start automatically when the set time is reached.
Vigtig: Brug ikke udskudt timer til opskrifter, der indeholder meget letfordærvelige ingredienser som mælk, æg eller frisk frugt, da de kan blive fordærvede.
6. Baking Programs
The Arzum AR2017 Panetti Bread Maker offers 13 pre-set programs for various bread types and functions. Refer to the image of the lid for program numbers.
Billede: Close-up of the Arzum Panetti Bread Maker lid, displaying the numbered program labels for easy reference.
| Program nr. | Programnavn | Beskrivelse |
|---|---|---|
| 1 | Standard | Til almindeligt hvidt og blandet brød. |
| 2 | Fransk brød | For light breads made from fine flour, typically with a crispier crust. |
| 3 | Fuld hvede | For breads made with whole wheat flour, which requires a longer kneading and rising time. |
| 4 | Lav kulhydrat | Designed for recipes with reduced carbohydrate content. |
| 5 | Fast Bake 1.5 | A quicker cycle for smaller loaves or when time is limited. |
| 6 | Fast Bake 2.0 | A quicker cycle for larger loaves or when time is limited. |
| 7 | Hurtig | For very quick bread preparation. |
| 8 | European Type Dough | For preparing doughs common in European baking, such as pizza or pasta dough. |
| 9 | Dej | Prepares dough for rolls, pizza, or other baked goods that will be shaped and baked in a conventional oven. |
| 10 | Glutenfri | Specifically designed for gluten-free flours and recipes, which require different kneading and rising conditions. |
| 11 | Marmelade | Til fremstilling af hjemmelavet syltetøj og marmelade. |
| 12 | Yoghurt | Til tilberedning af hjemmelavet yoghurt. |
| 13 | Bage | A bake-only cycle for additional baking or browning. |
7. Vedligeholdelse og rengøring
Korrekt rengøring og vedligeholdelse vil forlænge levetiden på din brødbagemaskine.
- Før rengøring: Tag altid stikket ud af stikkontakten, og lad det køle helt af før rengøring.
- Brødform og æltepad:
- Remove the bread pan from the main unit.
- If the kneading paddle is stuck in the bread, use the provided hook tool (if available) to carefully remove it.
- Wash the bread pan and kneading paddle with warm, soapy water. Do not use abrasive cleaners or metal scouring pads, as these can damage the non-stick coating.
- Skyl grundigt og tør helt inden opbevaring eller næste brug.
- Vask ikke disse dele i en opvaskemaskine.
- Ydre: Tør brødbagemaskinens yderside af med en blød, tør klud.amp klæde. Brug ikke skrappe kemikalier eller slibende rengøringsmidler.
- Indre: Tør bagekammerets inderside af med enamp Fjern eventuelle krummer eller melrester.
- Låg: Rengør låget og viewing vindue med adamp klæde.
- Opbevaring: Sørg for, at alle dele er rene og tørre, før du opbevarer brødbageren et køligt og tørt sted.
8. Fejlfindingsvejledning
If you encounter issues with your bread maker, refer to the following common problems and solutions.
| Problem | Mulig årsag | Løsning |
|---|---|---|
| Brødet hæver ikke. | Expired or inactive yeast; too much or too little liquid; incorrect water temperature; too much salt or sugar. | Check yeast expiration date. Use fresh yeast. Adjust liquid amount according to recipe. Use lukewarm water (38-43°C). Ensure correct salt and sugar measurements. |
| Brødet er for tæt eller tungt. | Too much flour; not enough liquid; yeast not active; wrong program selected. | Measure flour accurately. Increase liquid slightly. Check yeast activity. Select appropriate program for the bread type. |
| Brødet kollapser under bagning. | Too much liquid; too much yeast; high humidity; too much sugar. | Reduce liquid slightly. Reduce yeast amount. Adjust recipe for high humidity. Reduce sugar. |
| Æltepaddel sidder fast i brød. | Normal forekomst. | After removing bread from pan, use the provided hook tool to carefully extract the paddle. |
| Bread pan sticks to the unit. | Food residue or crumbs under the pan. | Ensure the area under the bread pan is clean before inserting. |
| Apparatet starter ikke. | Ikke sat i stikkontakten; låget er ikke lukket ordentligt; program ikke valgt. | Check power connection. Ensure lid is fully closed. Select a program and press START/STOP. |
9. Tekniske specifikationer
- Model: AR2017
- Mærke: Arzum
- Magt: 650 watt
- Kapacitet: 500g, 750g, 1000g loaf sizes
- Programmer: 13 forudindstillede programmer
- Dimensioner (L x B x H): 31 cm x 25 cm x 30 cm (omtrent)
- Vægt: Cirka 4.92 kilogram
- Vise: LCD skærm
- Hold varm funktion: 1 hour automatic
- Forsinkelsestimer: Op til 13 timer
- Oprindelse: Kina
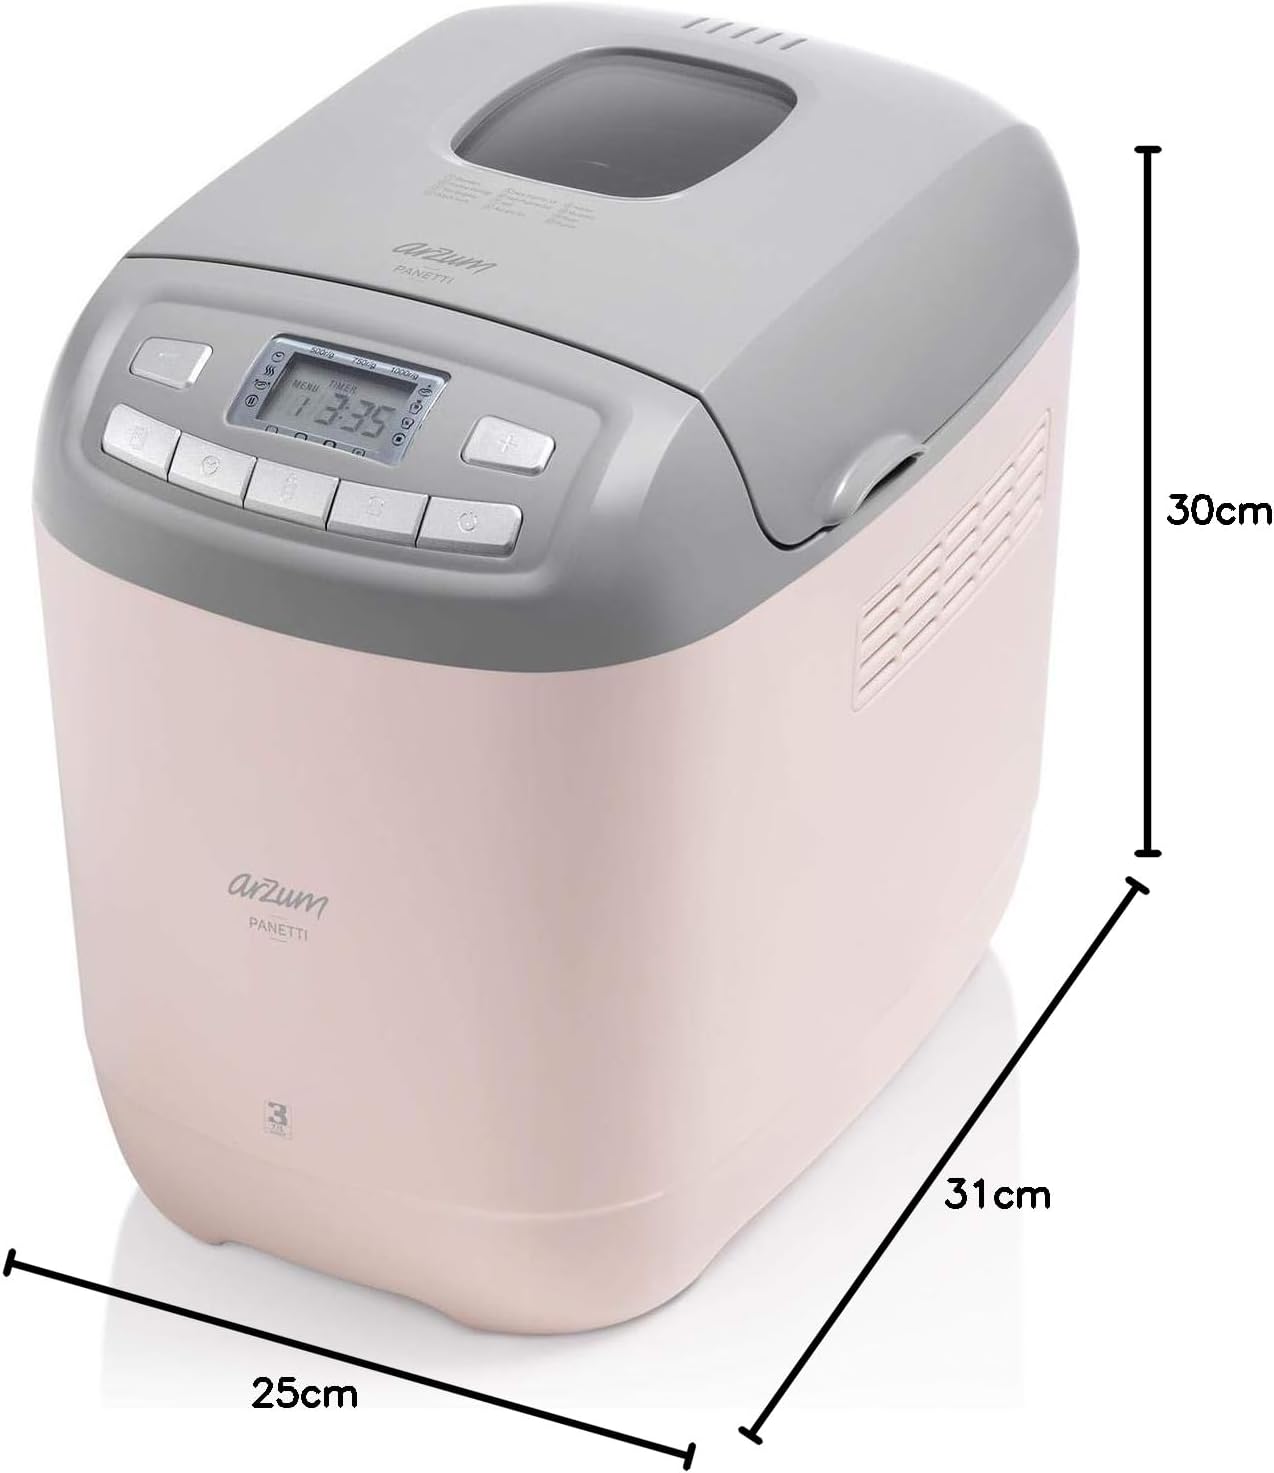
Billede: Diagram showing the dimensions of the Arzum Panetti Bread Maker: 31cm (depth), 25cm (width), and 30cm (height).
10. Garanti og support
For warranty information and customer support, please refer to the warranty card included with your product or contact Arzum customer service directly. Keep your purchase receipt as proof of purchase for warranty claims.
Fabrikant: Arzum
Kontaktoplysninger: Please visit the official Arzum website or refer to your product packaging for the most up-to-date customer service contact details in your region.