
Indledning
This manual provides detailed instructions for the proper setup, operation, and maintenance of your Naturehike Opalus Tunnel Backpacking Tent. Designed for 3 persons, this lightweight tent features a durable 20D nylon construction with a PU4000mm waterproof rating, UV 50+ sun protection, and a spacious vestibule. Please read these instructions carefully before use to ensure a safe and enjoyable campoplevelse.
The Naturehike Opalus Tunnel Tent is suitable for 4-season use, offering protection against wind, rain, and snow when both inner and outer tents are combined. For warmer weather, the inner tent can be used alone for enhanced ventilation.
Pakkens indhold
Før montering påbegyndes, skal du kontrollere, at alle komponenter er til stede:
- Tent Fly & Inner Tent
- Tent Poles (3 pieces, 7001 aluminum)
- Opbevaringspose
- Vindtov (6 stk.)
- Ground Nails/Stakes (19 pieces, 7001 aluminum)
- Footprint (Ground Mat)

Opsætningsinstruktioner
Follow these steps to properly set up your Naturehike Opalus Tunnel Tent:
- Forbered webstedet: Choose a flat, clear area for your tent. Lay out the footprint (ground mat) to protect the tent floor.
- Fold teltet ud: Lay the tent body (inner tent and rainfly attached) flat on top of the footprint.
- Saml stænger: Connect the sections of the tent poles. The Opalus tent uses 3 poles.
- Indsæt poler: Slide the assembled poles through the sleeves on the tent body. The poles are color-coded for easy matching to the corresponding sleeves.
- Sikre stænger: Insert the ends of the poles into the grommets or pin-and-ring systems at the base of the tent.
- Telt nedfældet: Secure the corners of the tent and the guylines to the ground using the provided stakes. Ensure the tent is taut to maximize stability and wind resistance.
- Adjust Vestibule: Attach the vestibule to the tent body and stake it out, ensuring it is taut and provides ample lagerplads.
- Endelige justeringer: Adjust all guylines and stakes to ensure the tent is pitched securely and evenly.

Betjeningsvejledning
Ventilation
The Naturehike Opalus Tunnel Tent is designed with excellent ventilation features to minimize condensation and ensure comfort. The rear of the rainfly can be opened to allow for increased airflow. The tent also features a double-door design, providing cross-ventilation and easy access.


Vestibule Usage
The large vestibule provides significant storage space for backpacks, camping tables, chairs, and cookware, keeping your sleeping area clear and organized. It also offers a sheltered area for cooking in adverse weather conditions.

Interne funktioner
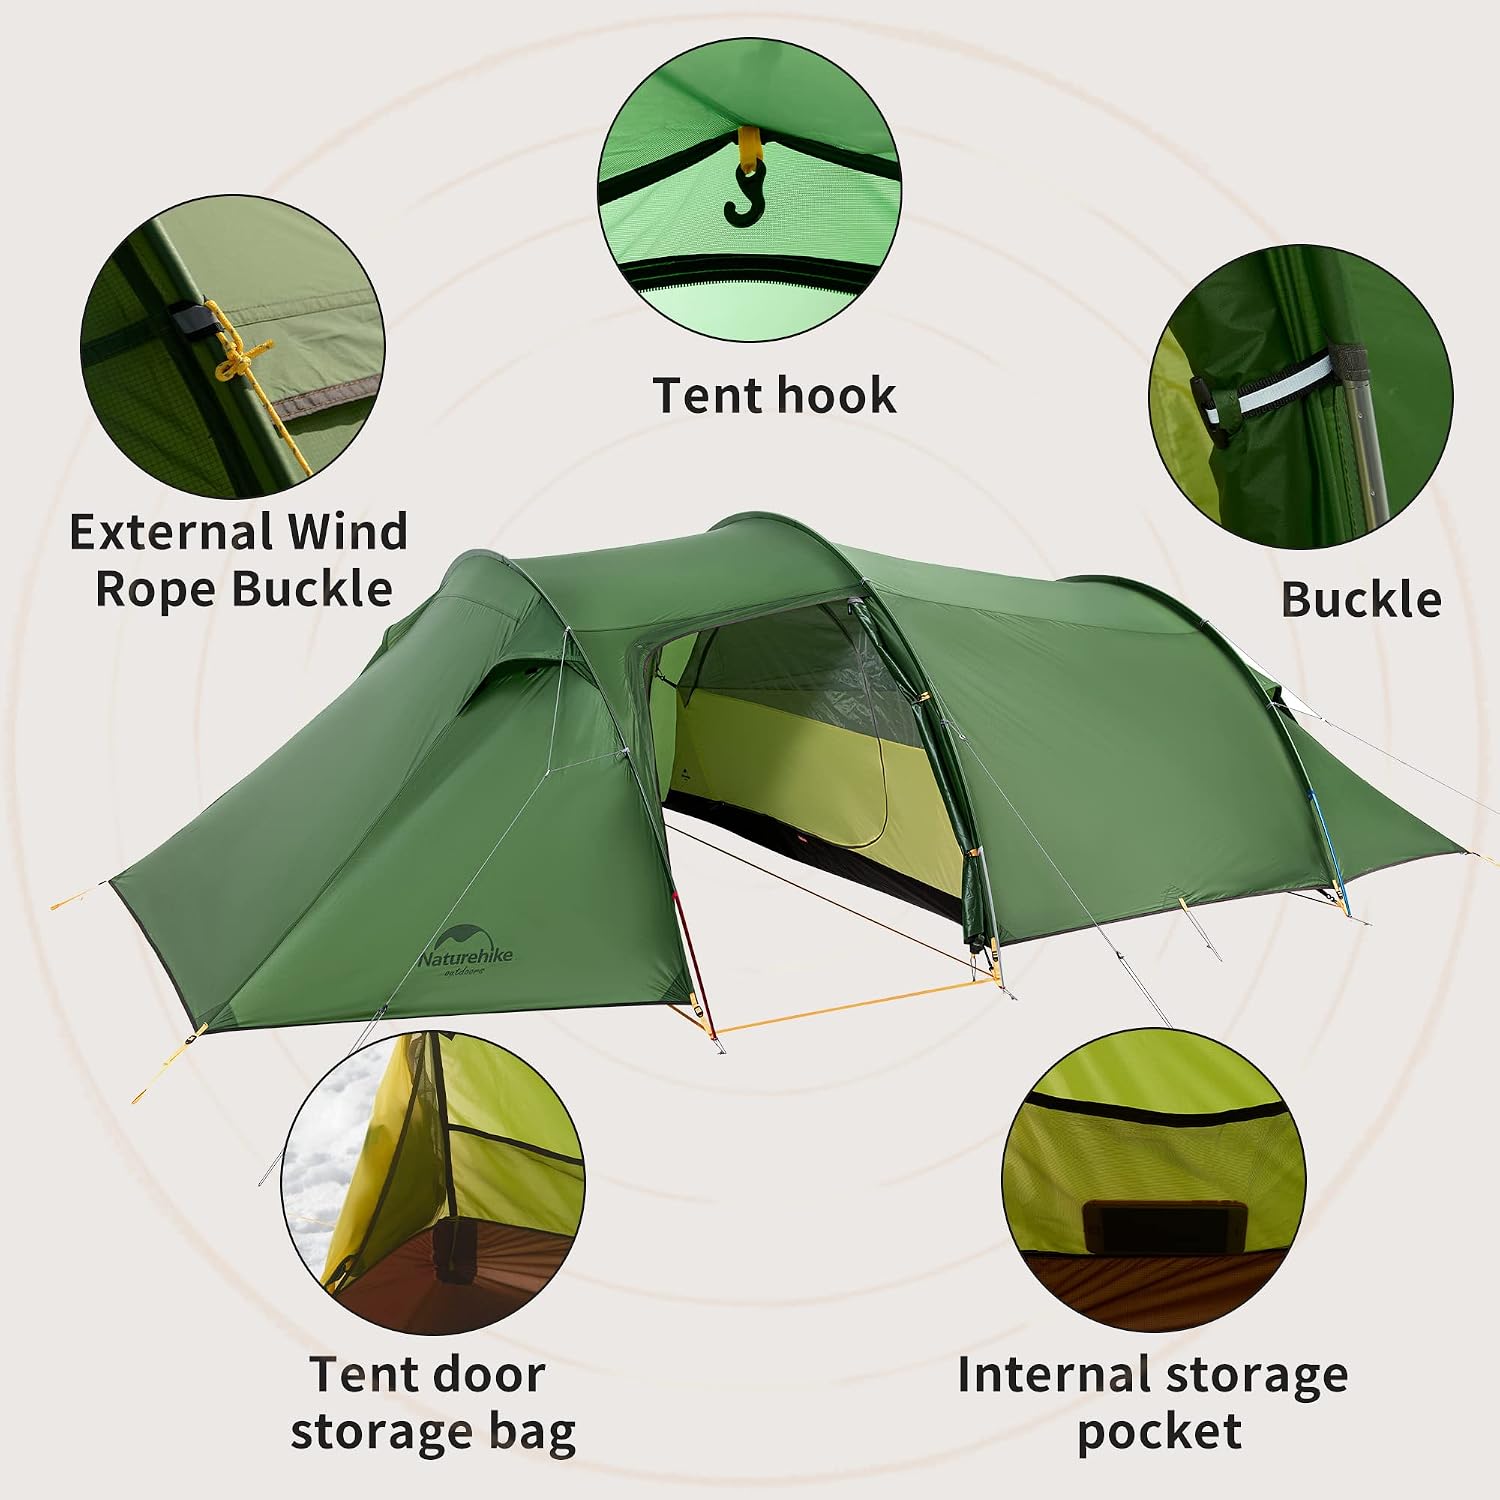
The tent includes internal storage pockets for small items and a tent hook for hanging a lantern or other lightweight accessories.
Opretholdelse
Rensning
To clean your tent, hand wash with mild soap and water. Do not use harsh detergents or machine wash, as this can damage the waterproof coating and fabric. Rinse thoroughly and allow to air dry completely before packing away.
Opbevaring
Ensure the tent is completely dry before packing to prevent mildew and odors. Store in a cool, dry place away from direct sunlight. Avoid compressing the tent for extended periods, as this can affect the loft of the fabric and its waterproof properties.
Vandtætning
The tent features a PU4000mm waterproof layer and silicone-coated nylon. Over time, the waterproof coating may degrade. You may reapply a suitable water repellent spray or seam sealer to maintain optimal waterproofing, especially on seams.

Fejlfinding
- Kondensation: If condensation occurs, ensure proper ventilation by opening the rear rainfly vent and utilizing the double doors. Choose a well-drained campwebsted.
- Tent Not Taut: Re-adjust stakes and guylines. Ensure poles are fully seated in their grommets. Tunnel tents require proper tensioning for stability.
- Vandlækage: Check for any tears or punctures in the fabric. Ensure all zippers are fully closed. Consider reapplying seam sealer to critical seams if leaks persist after extended use.
- Difficulty with Pole Insertion: Ensure poles are fully assembled and aligned. Do not force poles; gently guide them through the sleeves.
Specifikationer
| Feature | Detalje |
|---|---|
| Modelnummer | NH20ZP001 |
| Belægning | 3 person |
| Årstider | 4 sæsoner |
| Tent Design | Tunnel |
| Inner Tent Dimensions | 93 (L) x 75 (B) x 43 (H) tommer |
| Outer Layer Dimensions (with vestibule) | 165 (L) x 83 (B) x 43 (H) tommer |
| Pakket størrelse | 23.5 (L) x 7 (B) x 7 (H) tommer |
| Vægt | 6.5 lbs (including tent and all accessories) |
| Regnfluemateriale | 20D Rip-stop Nylon with Silicone Coating |
| Vandafvisende teknologi | PU4000mm |
| UV beskyttelse | UV 50+ |
| Inderteltmateriale | 20D Nylon Mesh |
| Teltstænger | 7001 Aluminum (3 poles) |
| Antal døre | 2 |
| Number of Vestibules | 1 |
| Antal indsatser | 19 |
| Antal barduner | 6 |

Garantioplysninger
Naturehike provides a 30-day money-back guarantee for any reason and a 12-month warranty for quality-related issues. For warranty claims or questions, please contact customer support.
Kundesupport
For further assistance, product inquiries, or support, please contact Naturehike customer service. Refer to your purchase documentation for specific contact details or visit the official Naturehike webwebsted.
Manufacturer Contact Information: Dallas, TX 75241, US