
1. Produktet er slutview
The Seitron TFF01M is a programmable thermostat designed for precise temperature control in fan-coil units. It features a backlit graphic LCD display and touch controls for intuitive operation. This wall-mounted device allows for advanced weekly and hourly programming, ensuring efficient and personalized climate management. It operates on battery power for settings retention and requires a 230 Volt wired connection for full functionality.

Figur 1: Forside view of the Seitron TFF01M thermostat.
2. Opsætning og installation
2.1 Sikkerhedsforanstaltninger
- Ensure power is disconnected before beginning installation to prevent electrical shock.
- Installationen skal udføres af en kvalificeret tekniker.
- Følg alle lokale elektriske regler og regler.
2.2 Montering af termostaten
The TFF01M thermostat is designed for wall mounting. Choose a location away from direct sunlight, drafts, and heat sources for accurate temperature sensing. The optimal height is typically 1.5 meters (5 feet) from the floor.
- Carefully separate the front cover from the back plate of the thermostat.
- Position the back plate on the wall and mark the drilling points.
- Bor huller og isæt vægankre om nødvendigt.
- Secure the back plate to the wall using appropriate screws.
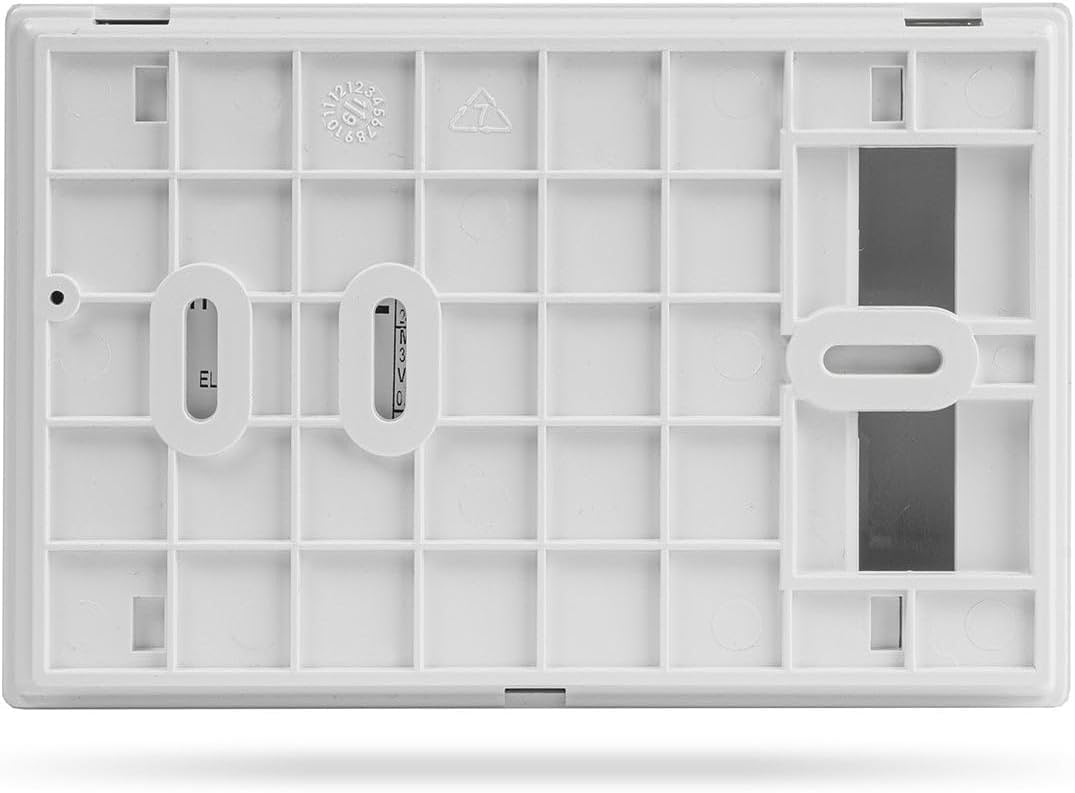
Figur 2: Bagside view of the thermostat's back plate for wall mounting.
2.3 Elektriske forbindelser
Connect the thermostat to the fan-coil unit wiring according to the diagram below. The thermostat requires a 230 Volt wired connection. Ensure all connections are secure.

Figure 3: Electrical wiring diagram for the TFF01M thermostat.
- L, N: Main power supply (230V).
- 3, 4: External input for economy/comfort mode or remote sensor.
- 5-8: Fan speed control outputs (V1, V2, V3 for different speeds).
- 9-12: Valve control outputs (VCA, VCC for heating valve; VFA, VFC for cooling valve).
- 13-16: Auxiliary inputs/outputs (e.g., for window contact, occupancy sensor).
- RS: Remote sensor connection.
2.4 Batteriinstallation
The thermostat is battery-powered for its internal clock and settings retention. Insert the required batteries (typically AA or AAA, refer to the battery compartment for specifics) into the designated slot on the back of the front cover, observing polarity.
2.5 Slutsamling
Once wiring and battery installation are complete, carefully reattach the front cover to the back plate, ensuring it clicks securely into place. Restore power to the fan-coil unit.
3. Betjeningsvejledning
3.1 Display og betjeningselementer
The thermostat features a backlit graphic LCD display that shows current temperature, operating mode, fan speed, and programming status. Touch-sensitive buttons on the right side of the unit allow for interaction.
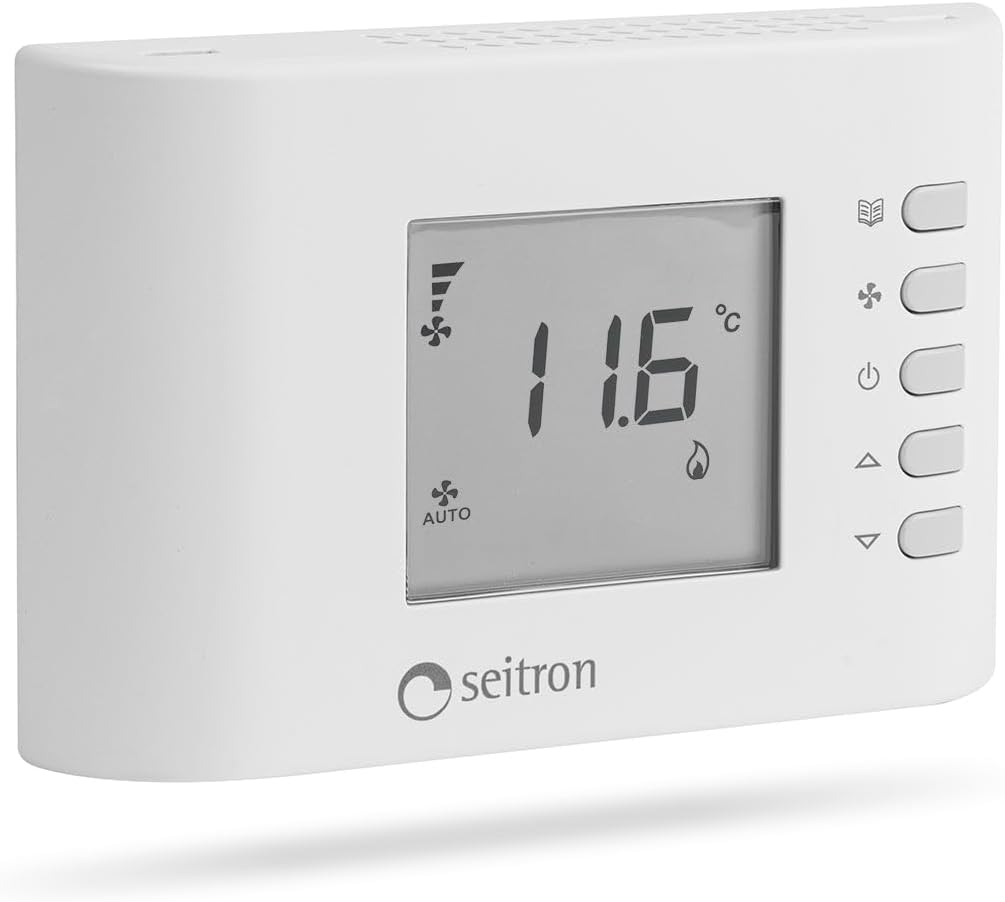
Figure 4: Display and control interface.
- Book Icon: Accesses programming menu.
- Fan -ikon: Justerer ventilatorhastigheden (Auto, Lav, Mellem, Høj).
- Power knap: Tænder/slukker enheden.
- Pil op/ned: Adjusts temperature setpoint or navigates menu options.
3.2 Grundlæggende betjening
- Tænd/sluk: Tryk på Magt knappen til at tænde eller slukke for termostaten.
- Justering af temperatur: Brug Up og Ned arrow buttons to set your desired temperature. The display will show the new setpoint temporarily.
- Ændring af blæserhastighed: Tryk på Ventilator knappen gentagne gange for at gennemgå de tilgængelige ventilatorhastigheder (f.eks. Auto, Lav, Mellem, Høj).
- Valg af tilstand: The thermostat typically operates in heating or cooling mode based on the system's configuration and setpoint. Refer to the programming section for advanced mode selection if available.
3.3 Avanceret programmering
The TFF01M allows for advanced weekly and hourly programming to optimize comfort and energy efficiency.
- Adgang til programmenu: Tryk på Bog icon button to enter the programming menu.
- Indstilling af tid og dag: Navigate using the arrow buttons to set the current time and day of the week. Confirm selections.
- Creating Schedules: For each day, you can typically set multiple time periods (e.g., Morning, Day, Evening, Night) with different desired temperatures. Use the arrow buttons to adjust times and temperatures for each period.
- Gemmeprogrammer: Følg anvisningerne på skærmen for at gemme din programmerede tidsplan.
Detailed instructions for specific programming options can be found in the full product manual available on the Seitron webwebsted.
4. Vedligeholdelse
4.1 Rengøring
To maintain optimal performance and appearance, clean the thermostat's exterior periodically. Use a soft, damp cloth. Avoid abrasive cleaners or solvents, as these can damage the display or casing.
4.2 Udskiftning af batteri
When the battery low indicator appears on the display, replace the batteries promptly. Open the front cover, remove the old batteries, and insert new ones of the correct type and polarity. Dispose of old batteries responsibly.
5. Fejlfinding
| Problem | Mulig årsag | Løsning |
|---|---|---|
| Skærmen er tom eller svag. | Low or dead batteries. No power to the unit. | Replace batteries. Check main power supply to the fan-coil unit and thermostat wiring. |
| Thermostat not controlling temperature. | Incorrect mode selected. Setpoint not met. Wiring issue. | Verify the operating mode (heating/cooling). Adjust setpoint. Check wiring connections as per diagram. |
| Ventilator kører ikke. | Fan speed set to 'Off' or 'Auto' when no demand. Wiring issue. | Check fan speed setting. Ensure there is a demand for heating/cooling. Inspect fan wiring. |
| Programming not saving or working. | Incorrect programming steps. Low batteries. | Review programming instructions carefully. Replace batteries. |
Hvis problemet fortsætter efter at have forsøgt disse løsninger, skal du kontakte kundesupport eller en kvalificeret tekniker.
6. Tekniske specifikationer
| Mærke | SEITRON |
| Modelnummer | TFF01M (80310251) |
| Kontroltype | Manual Control, Programmable |
| Specifik produktanvendelse | Fan-coil units |
| Forbindelsesteknologi | Kablet |
| Strømkilde | Battery powered (for settings retention), Wired (for operation) |
| Voltage | 230 volt |
| Display Type | LCD, baggrundsbelyst |
| Kontrolmetode | Røre |
| Monteringstype | Vægmontering |
| Varens vægt | 2.2 pund (ca. 1 kg) |
7. Garantioplysninger
Seitron products are typically covered by a manufacturer's warranty against defects in materials and workmanship. The specific terms and duration of the warranty may vary by region and product. Please refer to the warranty card included with your product or visit the official Seitron webwebstedet for detaljerede garantioplysninger og registreringsprocedurer.
8. Kundesupport
For technical assistance, troubleshooting beyond this manual, or inquiries regarding your Seitron TFF01M thermostat, please contact Seitron customer support. You can find contact information, including phone numbers and email addresses, on the official Seitron website. Have your product model number (TFF01M) and purchase details ready when contacting support.


