
Indledning
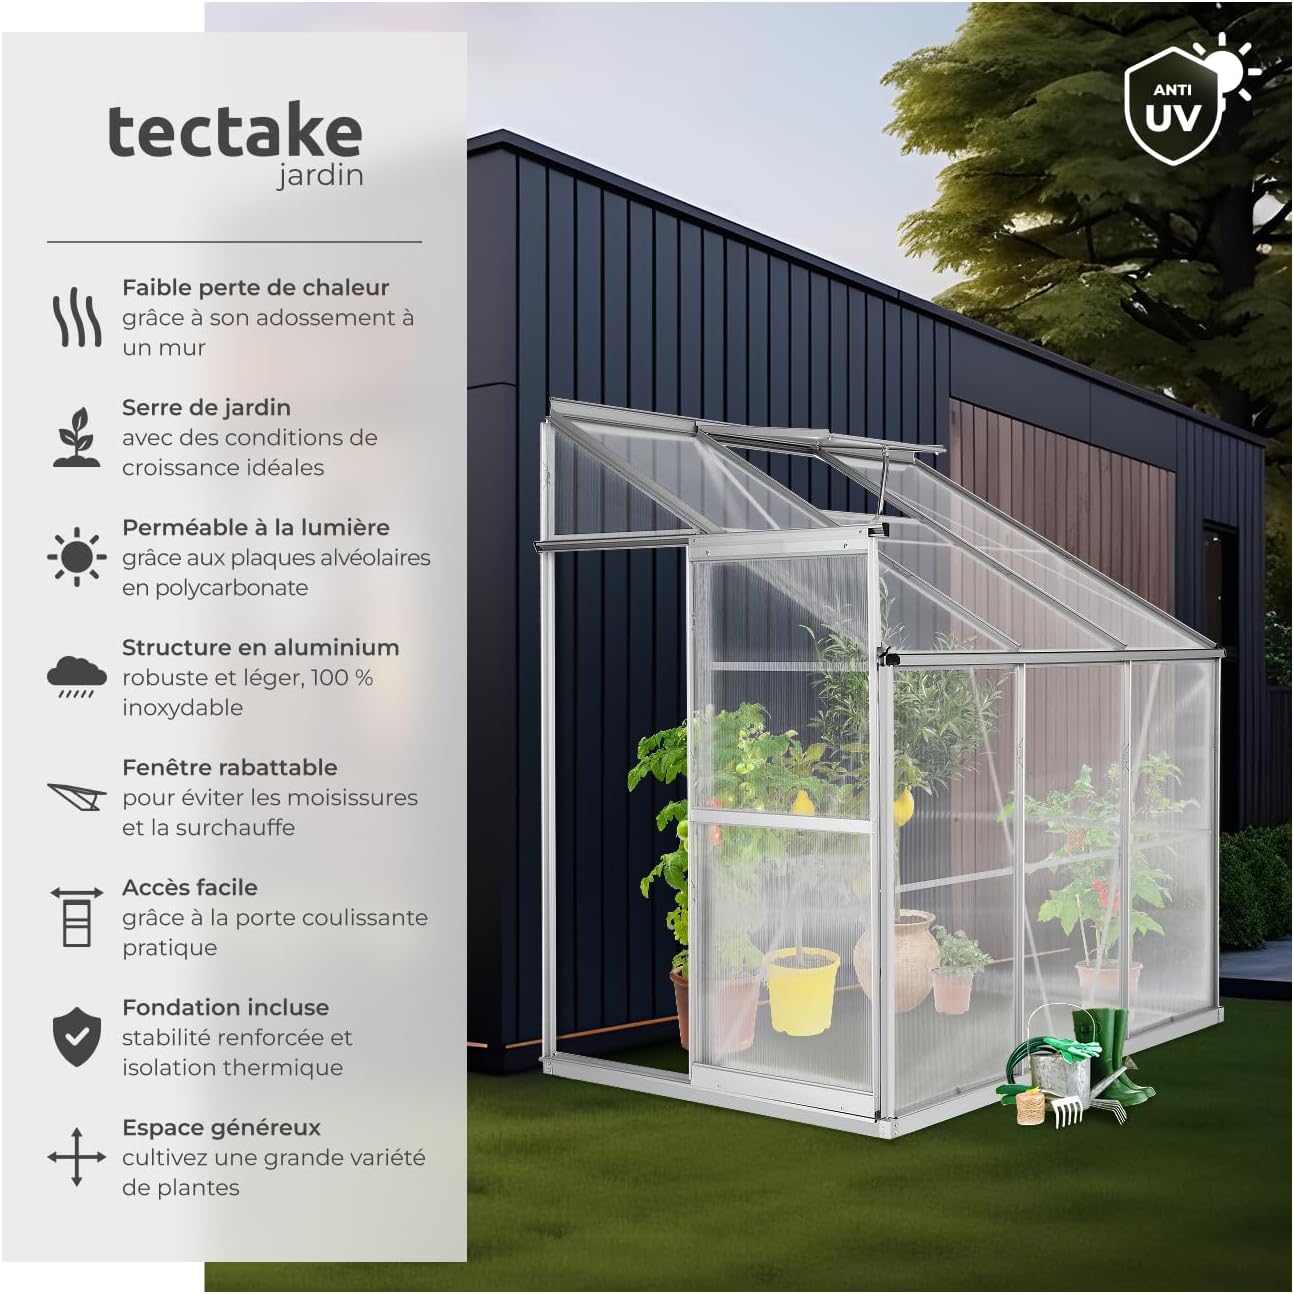
This manual provides detailed instructions for the assembly, operation, and maintenance of your tectake Greenhouse. Designed with an anodized aluminum frame and durable polycarbonate panels, this greenhouse offers an optimal environment for cultivating plants, protecting them from adverse weather conditions, and extending your growing season. The integrated foundation ensures stability and ease of installation.

Sikkerhedsoplysninger
Læs venligst alle instruktioner omhyggeligt inden montering og brug. Manglende overholdelse af disse instruktioner kan resultere i personskade eller beskadigelse af produktet.
- Brug beskyttelsesudstyr: Always wear appropriate safety gloves and eye protection during assembly to prevent cuts and scrapes.
- To-personers samling: Assembly requires at least two adults due to the size and weight of components.
- Secure Foundation: Ensure the greenhouse foundation is level and securely anchored to the ground to prevent tipping, especially in windy conditions.
- Vejrforholdsregler: In areas prone to strong winds or heavy snow, additional anchoring or reinforcement may be necessary. Clear snow accumulation from the roof promptly.
- Skarpe kanter: Be aware of potentially sharp edges on aluminum profiles and polycarbonate panels during handling.
- Børn og kæledyr: Keep children and pets away from the assembly area. Do not allow them to play inside the greenhouse unsupervised.
Pakkens indhold
Før montering påbegyndes, skal du kontrollere, at alle dele er til stede og ubeskadigede. Se den medfølgende delliste i din emballage for specifik komponentidentifikation.
- Aluminiumsramme profiles (various lengths and shapes)
- Polycarbonate panels (for walls and roof)
- Integrated galvanized steel foundation frame
- Sliding door components
- Roof window components
- Fasteners (screws, bolts, nuts, clips, washers)
- Rubber seals or gaskets
- Samlingsvejledning (denne manual)
Opsætning og montering
Assembly of this greenhouse requires patience and careful attention to the provided diagrams. It is highly recommended to have at least two people for the assembly process.
1. Forberedelse af stedet
- Choose a level, well-drained site for your greenhouse. Ensure it is positioned against a sturdy wall or structure as intended for optimal heat retention.
- Ryd området for alt affald, sten eller vegetation.
- Ensure adequate space around the greenhouse for assembly and future access.
2. Fundamentssamling
- Assemble the galvanized steel foundation frame according to the diagrams in your instruction booklet.
- Ensure all corners are square and connections are tight.
- Position the assembled foundation on your prepared site and level it using a spirit level.
- Securely anchor the foundation to the ground using appropriate stakes or concrete anchors (not always included, check your package).
3. Rammesamling
- Begin by attaching the base profiles to the foundation.
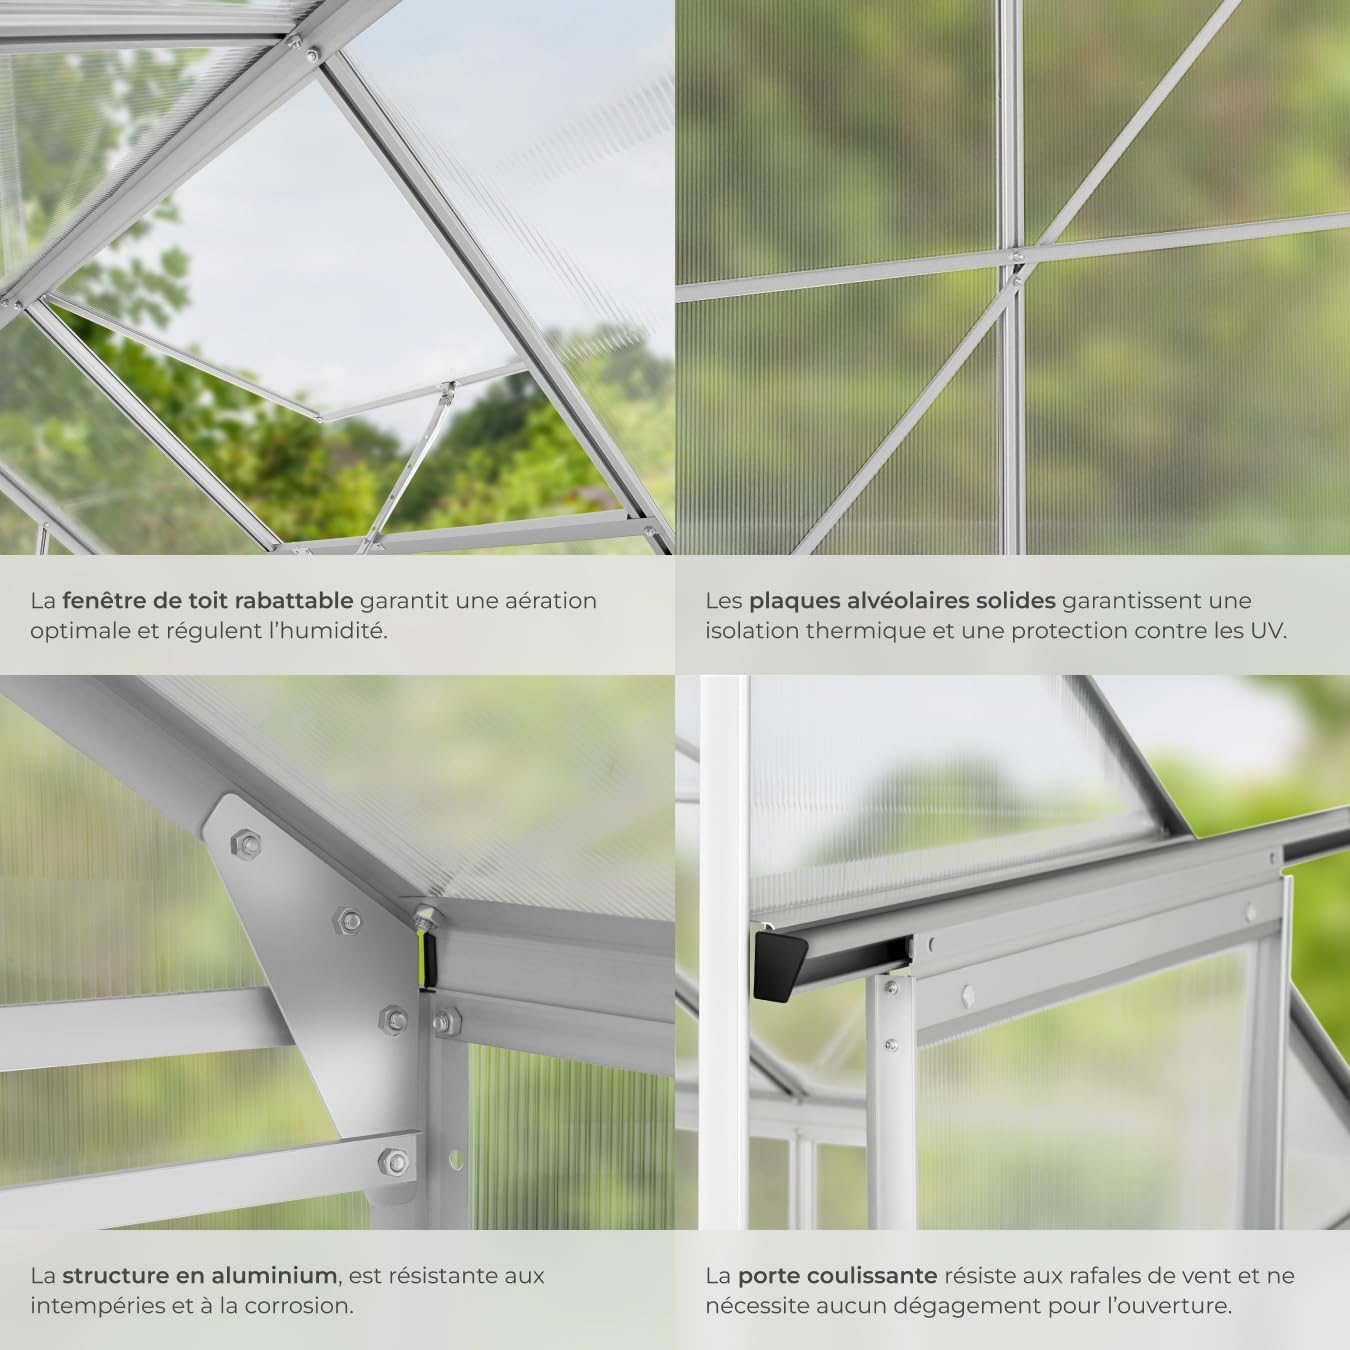
- Assemble the vertical and horizontal aluminum profiles to form the main structure of the greenhouse. Pay close attention to the orientation of each profile som angivet i diagrammerne.
- Gradually build up the side walls and roof structure, securing each connection with the provided fasteners. Do not overtighten until the entire frame is loosely assembled.

4. Panel installation
- Carefully slide the polycarbonate panels into the designated channels of the aluminum frame. Ensure the UV-protected side of the panels faces outwards (usually indicated by a label).
- Use the provided clips or rubber seals to secure the panels in place. Ensure a snug fit to prevent panels from dislodging in wind.
5. Door and Roof Window Installation
- Assemble the sliding door according to the instructions and install it into its track. Ensure it slides smoothly.
- Assemble and install the roof window. Test its opening and closing mechanism.
6. Endelig tilspænding
- Once all components are in place and the structure is square, gradually tighten all fasteners. Avoid overtightening, which can warp the frame.
Betjeningsvejledning
Proper operation of your greenhouse will ensure optimal growing conditions for your plants.
- Ventilation: Use the hinged roof window to regulate temperature and humidity inside the greenhouse. Open it on warm days to allow hot air to escape and prevent overheating. Close it during cold weather or at night to retain heat.
- Adgang: The sliding door provides easy access to the interior. Ensure the track is kept clear of debris for smooth operation.
- Temperaturovervågning: Consider installing a thermometer inside the greenhouse to monitor temperatures and adjust ventilation as needed.

Opretholdelse
Regular maintenance will prolong the life of your greenhouse and ensure its continued performance.
- Rengøring af paneler: Clean polycarbonate panels periodically with mild soap and water using a soft cloth or sponge. Avoid abrasive cleaners or brushes that could scratch the surface. Rinse thoroughly.
- Rammeinspektion: Annually inspect the aluminum frame for any signs of corrosion, loose fasteners, or damage. Tighten any loose bolts or screws.
- Panelsikkerhed: Check that all polycarbonate panels are securely held by their clips or seals. Re-secure any loose panels immediately to prevent them from dislodging in wind.
- Door and Window Tracks: Keep the sliding door and roof window tracks clean and free of dirt or debris to ensure smooth operation. Lubricate if necessary with a silicone-based spray.
- Vinter forberedelse: In regions with heavy snowfall, consider reinforcing the roof structure or regularly clearing snow to prevent excessive weight accumulation.

Fejlfinding
Her er løsninger på almindelige problemer, du kan støde på:
- Panels Detaching in Wind:
Årsag: Insufficiently secured panels or extreme wind conditions.
Løsning: Ensure all panel clips are correctly installed and tight. For added security, consider applying a bead of silicone sealant along the panel edges or using additional clips (not included) if available. Verify the foundation is firmly anchored. - Structural Instability/Wobbling:
Årsag: Uneven foundation, loose fasteners, or inadequate anchoring.
Løsning: Re-check that the foundation is perfectly level and securely anchored to the ground. Inspect all frame connections and tighten any loose bolts or screws. - Vanskeligheder under montering:
Årsag: Complex instructions, misinterpretation of diagrams, or incorrect part orientation.
Løsning: Take your time. Carefully review each step and diagram before proceeding. Ensure parts are oriented correctly. If stuck, disassemble the last few steps and re-evaluate. Having a second person assist can significantly ease the process. - Døren glider ikke jævnt:
Årsag: Debris in the track, warped frame, or misaligned door.
Løsning: Clean the door track thoroughly. Check if the frame is square and level. Adjust door rollers or guides if necessary.
Specifikationer
Detailed technical specifications for the tectake Greenhouse (Model 402469-6).
| Overordnede mål (L x B x H) | 192 cm x 128 cm x 202 cm |
| Foundation Dimensions (L x W x H) | 190 cm x 127 cm x 12 cm |
| Wall Height (under gutter) | 126 cm |
| Dørmål (B x H) | 60 cm x 156 cm |
| Base Surface Area | Cirka 2.39 m² |
| Bind | Cirka 4.09 m³ |
| Vægt | Cirka 21.9 kg |
| Rammemateriale | Anodiseret aluminium |
| Panelmateriale | 4 mm thick Polycarbonate (PC) |
| Foundation Material | Galvaniseret stål |
| Dør stil | Skydedør |
| Montering påkrævet | Ja |

Garantioplysninger
This product is covered by the manufacturer's standard warranty against defects in materials and workmanship. Please refer to your purchase documentation or contact tectake customer support for specific warranty terms and conditions.
A 30-day return policy is typically offered for this product. For details on returns and legal guarantees, please consult the retailer's policy at the time of purchase.
Kundesupport
If you have any questions, require assistance with assembly, or need to report a missing or damaged part, please contact tectake customer support.
You can often find support information and contact details on the official tectake webhjemmeside eller gennem den forhandler, hvor du købte produktet.
For more information about tectake products, you may visit the tectake Brand Store.