1. Produktet er slutview
This manual provides instructions for the Kato N-Gauge Series E235 Yamanote Line Add-on B 3-Car Set, model number 10-1470. This set is designed to expand your existing Series E235 Yamanote Line train collection, featuring precise reproductions of the AU 737 cooler, pantograph, and other roof equipment. The delicate yellow-green gradation of the line color on the front and door sections is accurately replicated. The set includes printed "0913 G" and "Yamanote Line" displays, along with replacement front displays for "Shinagawa · Tokyo direction" and "Ikebukuro · Ueno direction." Wheelchair marks, stroller marks, and emergency door cock notations are also printed. The coupler system utilizes a body mount compact coupler, and the set is DCC friendly.

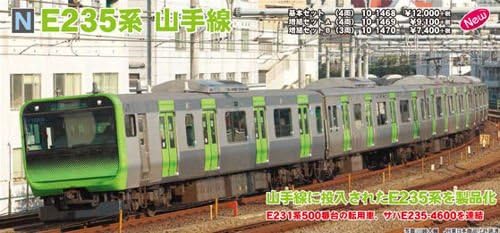
Image 1: The Kato N-Gauge Series E235 Yamanote Line Add-on B 3-Car Set, illustrating the complete train on model tracks.
2. Pakkens indhold
The Kato N-Gauge Series E235 Yamanote Line Add-on B 3-Car Set (Model 10-1470) includes:
- Three (3) N-Gauge Series E235 Yamanote Line passenger cars.
- Replacement front display parts (Shinagawa · Tokyo direction, Ikebukuro · Ueno direction).
- Various small parts for assembly or detailing.
Billede 2: En detaljeret view of a single car from the Kato N-Gauge Series E235 Yamanote Line set, showcasing dens indviklede design.
3. Opsætning og montering
- Udpakning: Carefully remove all components from the packaging. Inspect each car for any visible damage.
- Connecting Cars: This add-on set is designed to be connected to a base set of the Kato N-Gauge Series E235 Yamanote Line. Align the body mount compact couplers between the cars and gently push them together until they click into place. Ensure a secure connection for smooth operation.
- Installing Front Displays: If desired, replace the pre-installed front display with one of the provided directional displays. Carefully remove the existing display and insert the new one into the designated slot on the front car.
- Placement on Tracks: Place the assembled train cars onto clean N-Gauge tracks. Ensure all wheels are properly seated on the rails.

Billede 3: Side profile of the Kato N-Gauge Series E235 Yamanote Line cars, illustrating the compact coupler system.
4. Betjeningsvejledning
Once the add-on cars are securely connected to your base set and placed on the tracks, you can operate your train using a compatible N-Gauge power pack and controller. This set is DCC friendly, meaning it can be easily integrated into a Digital Command Control (DCC) system by installing a DCC decoder (sold separately) into the appropriate car(s).
- Strømtilslutning: Ensure your power pack is correctly connected to the track.
- Hastighedskontrol: Use the controller to adjust the train's speed. Start slowly to ensure smooth operation.
- Retningskontrol: Use the direction switch on your controller to change the train's direction.
- DCC-drift: If using DCC, refer to your DCC system's manual for programming and operating instructions after installing a decoder.
5. Vedligeholdelse og pleje
Proper maintenance ensures the longevity and smooth operation of your model train set.
- Rensning: Regularly wipe the train cars with a soft, dry cloth to remove dust. Avoid using harsh chemicals or abrasive materials. For detailed cleaning, a slightly damp klud kan bruges, efterfulgt af øjeblikkelig tørring.
- Wheel and Track Cleaning: Keep wheels and tracks clean to ensure good electrical contact and smooth running. Use a specialized track cleaner and wheel cleaning fluid as recommended by model train enthusiasts.
- Opbevaring: When not in use, store the train cars in their original packaging or a protective case to prevent dust accumulation and damage. Store in a cool, dry place away from direct sunlight.
- Smøring: Periodically lubricate moving parts (e.g., axles, gears) with specialized model train lubricant, following general N-Gauge maintenance guidelines. This set is an add-on, so primary lubrication would apply to the powered locomotive.
6. Fejlfinding
If you encounter issues with your add-on car set, consider the following common troubleshooting steps:
- Cars Derail:
- Ensure tracks are clean and properly joined.
- Check that all wheels are correctly seated on the rails.
- Verify that couplers are securely connected and not causing binding.
- Inspect for any bent axles or damaged wheels.
- Poor Electrical Contact (if applicable to lighted cars):
- Clean the wheels and track thoroughly.
- Ensure all electrical pickups are making good contact with the wheels.
- Difficulty Coupling:
- Ensure couplers are aligned correctly.
- Gently push until a click is heard, indicating a secure connection. Avoid excessive force.
7. Specifikationer
| Feature | Detalje |
|---|---|
| Mærke | Kato |
| Modelnummer | 10-1470 |
| Produkttype | N-Gauge Model Train Add-on Set (3-Car) |
| Serie | E235 Yamanote Line |
| Skala | N-Gauge |
| Materiale | Plast |
| Farve | Green (Yamanote Line livery) |
| DCC Compatibility | DCC Friendly (decoder sold separately) |
| Inkluderede komponenter | 3 train cars, various parts |
| Varedimensioner (D x B x H) | 1.34"D x 9.53"W x 7.56"H (Packaging/Overall dimensions, individual car dimensions not specified) |
8. Garanti og support
For information regarding product warranty, repairs, or technical support, please contact Kato directly. As a Japanese company, Kato provides comprehensive after-sales service and parts availability for their models. Refer to the official Kato website or contact their customer service for detailed assistance.
Note: This product is an add-on set. Ensure compatibility with your existing Kato N-Gauge Series E235 Yamanote Line base set.