
1. Introduktion
This manual provides comprehensive instructions for the installation, operation, and maintenance of your GeoVision GV-EFD4700-2F 4MP H.265 3.8MM IP Camera. This device is designed for advanced surveillance applications, offering high-resolution video capture and efficient H.265 compression for optimal storage and bandwidth usage. Please read this manual thoroughly before using the product to ensure proper setup and functionality.
2. Sikkerhedsoplysninger
- Sørg for, at strømforsyningen voltage matches the camera's requirements to prevent damage.
- Do not expose the camera to extreme temperatures, humidity, or direct water contact.
- Avoid placing the camera in areas with strong electromagnetic interference.
- Handle the camera with care. Do not drop or subject it to strong impacts.
- Brug kun tilbehør specificeret af producenten.
- Installation should be performed by qualified personnel if you are unsure about the process.
3. Pakkens indhold
Bekræft at alle varer er til stede i pakken:
- GeoVision GV-EFD4700-2F IP Camera Unit
- Monteringssæt (skruer, vægankre)
- Hurtig startvejledning
- Software CD (or download link)
- Power Adapter (may be sold separately depending on region)
4. Produktet er slutview
The GeoVision GV-EFD4700-2F is a compact dome-style IP camera designed for discreet surveillance. Key components include:
- Linse: 3.8 mm fast linse til et bredt felt view.
- IR lysdioder: Infrared illuminators for night vision capabilities.
- Mikrofon: For audio monitoring (if equipped).
- Netværksport: RJ-45 Ethernet port for wired network connection and Power over Ethernet (PoE) if supported.
- Strømindgang: DC power jack for external power adapter.
- Nulstil knap: Bruges til at gendanne fabriksindstillingerne.
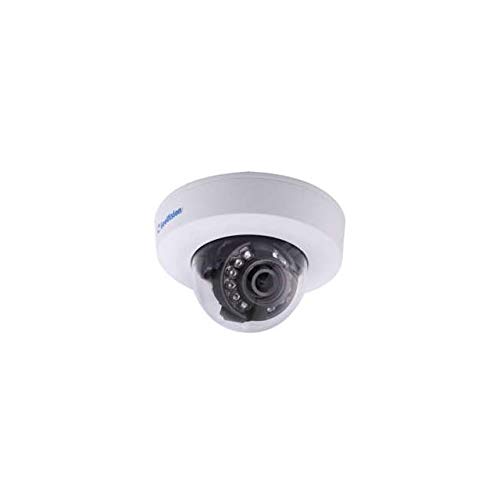
Figure 1: GeoVision GV-EFD4700-2F IP Camera. This image shows the compact dome design of the camera, typically featuring a lens, IR illuminators, and a durable casing suitable for various mounting environments.
5. Opsætning
5.1 Fysisk installation
- Vælg en placering: Vælg et passende sted til overvågning, idet du tager højde for kameraets synsfelt view and power/network access. This camera supports both ceiling mount and wall mount installations.
- Montering:
- Use the provided mounting template (if available) to mark drill holes on the ceiling or wall.
- Bor huller og isæt vægankre om nødvendigt.
- Fastgør kameraets monteringsbase til overfladen med skruerne.
- Attach the camera body to the mounting base and adjust its angle for optimal coverage.
5.2 Strøm- og netværksforbindelse
- Magt: Connect the power adapter to the camera's power input and then to a power outlet. If using Power over Ethernet (PoE), connect an Ethernet cable from a PoE-enabled switch or injector to the camera's network port.
- Network (Wi-Fi): This camera supports Wi-Fi connectivity. After powering on, the camera will broadcast a temporary Wi-Fi signal or can be configured via a wired connection first. Refer to the Quick Start Guide for initial Wi-Fi setup steps, which typically involve using a mobile app or web interface to connect to your local Wi-Fi network.
- Netværk (kablet): Connect an Ethernet cable from your router or network switch to the camera's network port.
5.3 Indledende konfiguration
- Software installation: Install the GeoVision surveillance software (e.g., GV-NVR, GV-VMS) on your computer or download the GeoVision mobile app from your device's app store.
- Enhedsopdagelse: Use the software or app to discover the camera on your network. The camera will typically obtain an IP address automatically via DHCP.
- Adgangskodeopsætning: For security, change the default password immediately upon first access. Create a strong, unique password.
- Grundlæggende indstillinger: Configure essential settings such as date/time, video resolution, and recording schedules.
6. Betjening
6.1 Live View
Access the live video feed through the GeoVision software or mobile app. You can view multiple cameras simultaneously and switch between different views.
6.2 Optagelse
- Kontinuerlig optagelse: Records video constantly.
- Optagelse af bevægelsesdetektering: Optager kun, når der registreres bevægelse i kameraets synsfelt view. Configure motion detection zones and sensitivity in the camera settings.
- Planlagt optagelse: Optagelser på bestemte tidspunkter af dagen eller ugen.
6.3 Afspilning
Use the playback function in the software or app to review optaget footage. You can search by date, time, or event (e.g., motion detection).
6.4 Fjernadgang
Configure port forwarding on your router or use GeoVision's cloud services (if available) to access your camera remotely from outside your local network.
7. Vedligeholdelse
- Rensning: Gently wipe the camera lens and casinmed en blød, tør klud. Brug ikke skrappe kemikalier eller slibende rengøringsmidler.
- Firmwareopdateringer: Regularly check the GeoVision website for firmware updates. Keeping your camera's firmware up-to-date ensures optimal performance, security, and access to new features.
- Kabelinspektion: Periodically inspect power and network cables for any signs of wear or damage.
- Lagerstyring: Monitor your recording storage. Ensure there is sufficient space or that old footage is being overwritten according to your settings.
8. Fejlfinding
| Problem | Mulig årsag | Løsning |
|---|---|---|
| Ingen strømindikator | Power adapter not connected; power outlet faulty; camera fault. | Check power connections; try a different outlet; contact support. |
| Cannot connect to camera (wired) | Ethernet cable faulty; network settings incorrect; camera not powered on. | Check cable; verify network settings (DHCP/static IP); ensure camera is powered. |
| Cannot connect to camera (Wi-Fi) | Incorrect Wi-Fi password; camera out of range; Wi-Fi interference. | Re-enter Wi-Fi password; move camera closer to router; reduce interference. |
| Dårlig billedkvalitet | Snavset objektiv; dårlige lysforhold; forkerte opløsningsindstillinger. | Clean lens; ensure adequate lighting; adjust resolution settings. |
| Glemt adgangskode | Glemt eller mistet adgangskode. | Use the reset button to restore factory defaults (note: this will erase all settings). |
9. Specifikationer
| Feature | Detalje |
|---|---|
| Mærke | GeoVision |
| Model | GV-EFD4700-2F |
| Videooptagelsesopløsning | 4 MP |
| Effektiv stillopløsning | 4 MP |
| Forbindelsesprotokol | Wi-Fi |
| Monteringstype | Loftmontering, Vægmontering |
| Videooptagelsesformat | MP4 |
| Fabrikant | GeoVision |
10. Garantioplysninger
GeoVision products typically come with a limited warranty. For detailed information regarding the warranty period, terms, and conditions for your GV-EFD4700-2F IP Camera, please refer to the warranty card included with your product or visit the official GeoVision webwebsted. Gem din købsbevis til garantikrav.
11. Support
If you encounter any issues that cannot be resolved using the troubleshooting guide, or if you require further assistance, please contact GeoVision technical support. You can find contact information, FAQs, and additional resources on the official GeoVision webwebsted:
Webwebsted: www.geovision.com.tw
Please have your product model number (GV-EFD4700-2F) and serial number ready when contacting support.