
1. Introduktion
Thank you for choosing the VonHaus Dual Monitor Stand. This manual provides detailed instructions for the safe and efficient assembly, operation, and maintenance of your new monitor stand. Please read all instructions carefully before use and retain this manual for future reference.
This free-standing desk mount is designed to hold two monitors, allowing for ergonomic positioning to enhance comfort and productivity. It features swivel, tilt, and rotation adjustments to customize your viewoplevelse.
2. Sikkerhedsoplysninger
WARNING: Failure to read, understand, and follow all instructions can result in serious personal injury, property damage, or voiding of your warranty.
- Overskrid ikke den maksimale vægtkapacitet på 10 kg (22 lbs) pr. arm.
- This stand is designed for monitors between 13 and 32 inches.
- Ensure the desk surface is stable and capable of supporting the combined weight of the stand and two monitors.
- Always ensure all screws and bolts are securely tightened before use. Periodically check for tightness.
- Hold børn og kæledyr væk fra samleområdet. Små dele kan være en kvælningsfare.
- Use only the provided hardware. If any parts are missing or damaged, contact VonHaus customer support.
3. Pakkens indhold
Please verify that all components are present before beginning assembly. If any parts are missing or damaged, do not proceed with assembly and contact customer support.
- Bundplade
- Støttepol
- Monitorarme (2)
- VESA-plader (2)
- Kabelhåndteringsklip
- Hardware-sæt (skruer, skiver, unbrakonøgler)
- Instruktionsmanual
4. Opsætningsvejledning
Follow these steps carefully to assemble your VonHaus Dual Monitor Stand.
4.1 Attach the Support Pole to the Base
- Place the base plate on a stable, flat surface.
- Align the support pole with the hole in the center of the base plate.
- Secure the pole to the base using the provided screws and Allen key from underneath the base. Ensure it is firmly tightened.

Figure 1: Base assembly with dimensions. The base measures approximately 330mm wide and 271mm deep, featuring non-slip foot pads for stability.
4.2 Install the Monitor Arms
- Slide the monitor arms onto the support pole at your desired height.
- Use the provided Allen key to tighten the set screw on the arm collar to secure it in place.

Figure 2: Full dimensions and articulation points of the stand. The stand allows for 45° tilt, 180° swivel, and 360° rotation for each monitor.
4.3 Fastgør VESA-plader til skærme
- Placer forsigtigt din skærm med forsiden nedad på en blød, ren overflade.
- Identify the VESA mounting holes on the back of your monitor (75x75mm or 100x100mm pattern).
- Attach a VESA plate to each monitor using the appropriate screws and washers from the hardware kit. Do not overtighten.
4.4 Montering af skærme på arme
- With assistance if needed, carefully slide the VESA plate attached to your monitor onto the mounting head of the monitor arm.
- Ensure the monitor is securely seated. Tighten any locking screws on the VESA mounting head to prevent accidental dislodgement.
- Repeat for the second monitor.

Figure 3: Monitors mounted on the stand, demonstrating compatibility with 17-32 inch monitors and VESA 75x75mm or 100x100mm patterns. Each arm supports up to 10kg (22 lbs).
5. Betjeningsvejledning
Once your monitors are securely mounted, you can adjust them for optimal viewkomfort.
5.1 Justering af skærmposition
- Højdejustering: Loosen the set screw on the arm collar, slide the arm up or down the pole to the desired height, and re-tighten the set screw.
- Justering af hældning: The monitor can be tilted ±45 degrees (up or down) by gently pushing or pulling the top or bottom edge of the monitor.
- Drejejustering: The monitor arms can swivel ±180 degrees (left or right) at the pole and at the arm joints.
- Rotationsjustering: The VESA plate allows for 360-degree rotation, enabling you to switch between landscape and portrait orientations.
Adjustments are designed to be simple and generally do not require tools for tilt, swivel, or rotation once the initial setup is complete.
5.2 Kabelstyring
Utilize the integrated cable management clips along the monitor arms and the support pole to route your monitor cables neatly. This helps maintain a tidy workspace and prevents cable clutter.
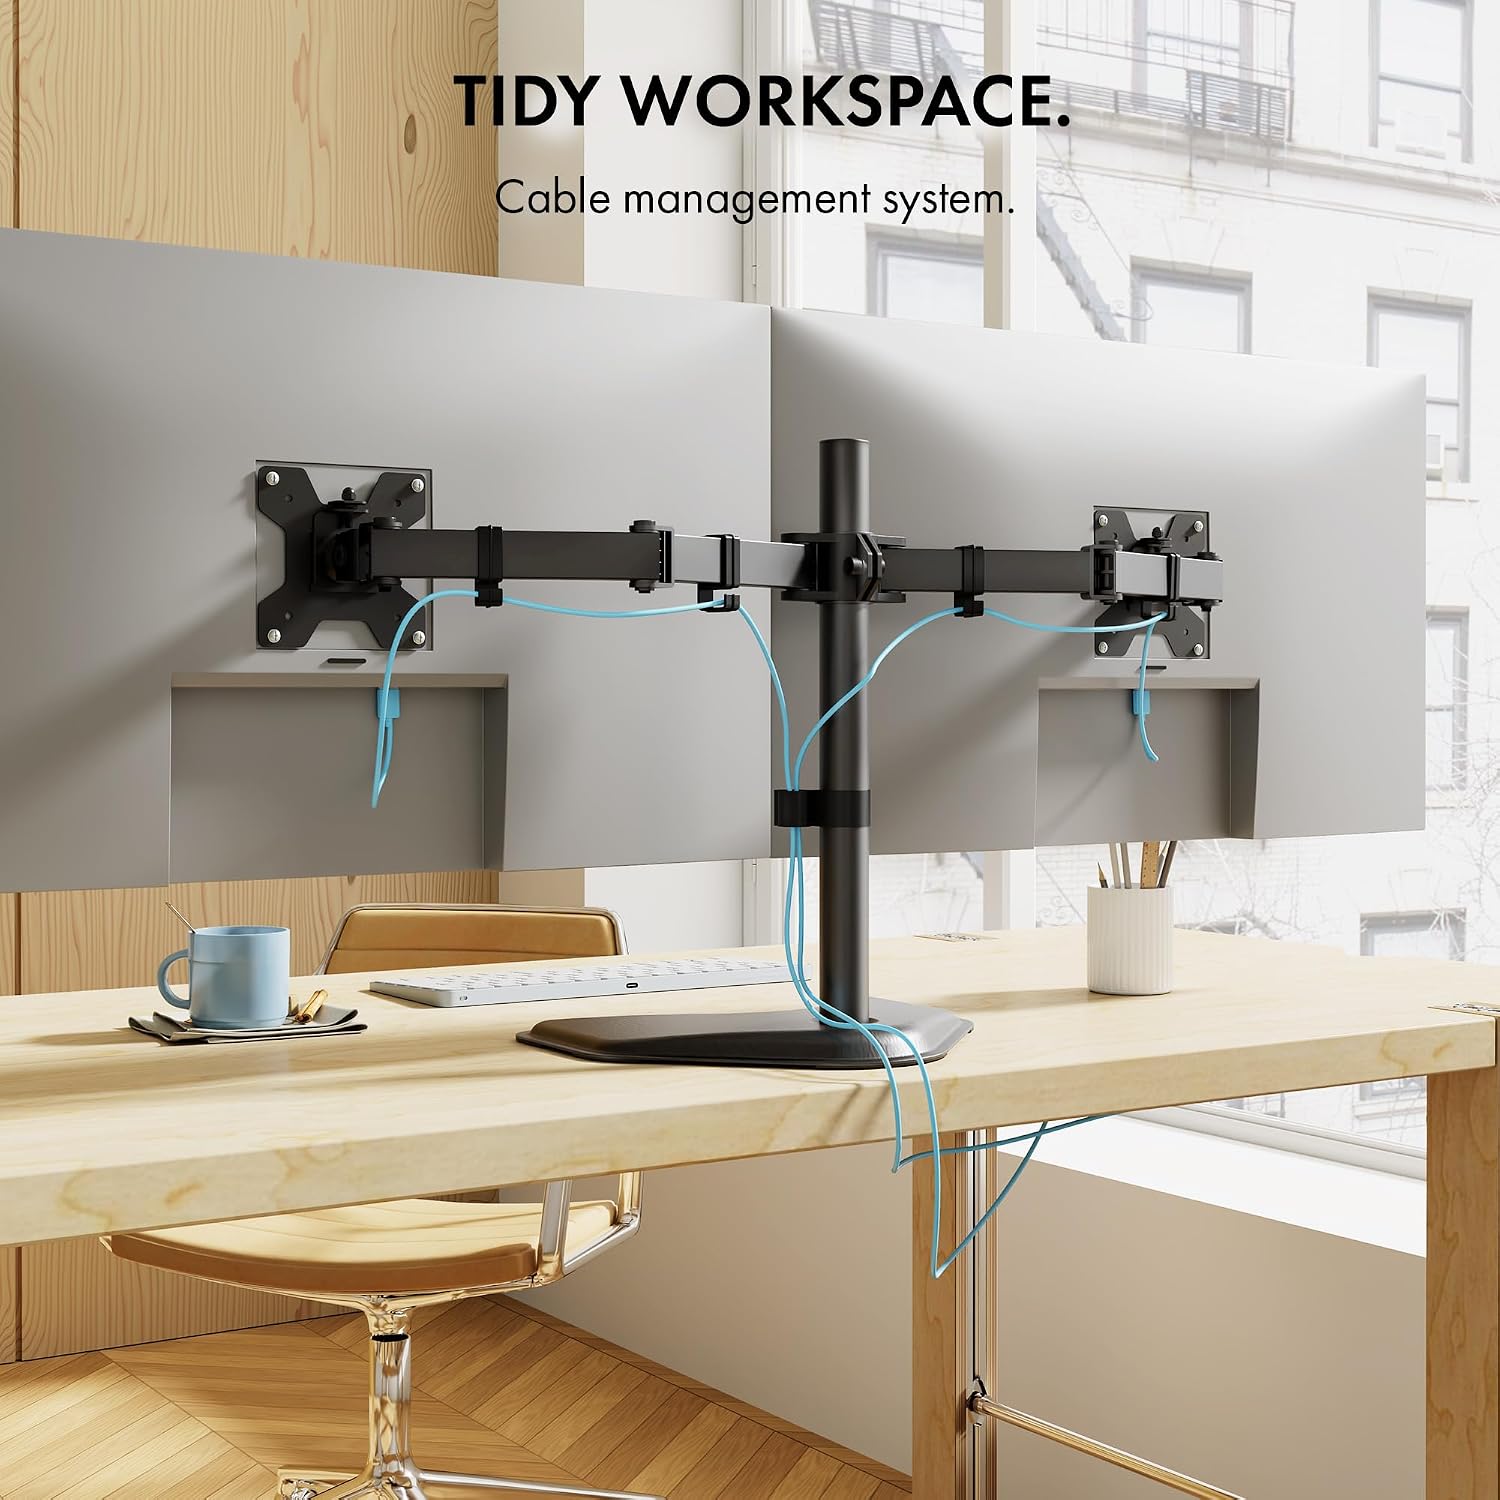
Figur 4: Eksample of cable management in use, keeping the workspace organized.
6. Vedligeholdelse
- Rensning: Tør stativet af med en blød kludamp klud. Undgå slibende rengøringsmidler eller opløsningsmidler.
- Periodiske kontroller: Regularly check all screws and bolts to ensure they remain tight. Loose connections can lead to instability or sagging.
- Smøring: Der kræves ingen smøring af de bevægelige dele.
7. Fejlfinding
- Monitors are sagging or not holding position:
Ensure all adjustment bolts, especially those on the VESA mounting plate and arm joints, are securely tightened. For heavier monitors, it may be necessary to tighten these bolts firmly to prevent downward tilt.
- Stativet føles ustabilt:
Verify that the support pole is firmly attached to the base. Ensure the stand is placed on a flat, stable surface and that the combined weight of the monitors does not exceed the stand's capacity.
- Difficulty attaching pole to base:
Ensure proper alignment of the pole with the base. If resistance is met, check for any obstructions or misthreading. Do not force components together.
8. Specifikationer
| Feature | Specifikation |
|---|---|
| Modelnummer | B075SC9H1N |
| Monteringstype | Tabletop Mount, Free Standing |
| Bevægelsestype | Roter, Drej, Tilt |
| Mærke | VonHaus |
| Materiale | Legeret stål, aluminium |
| Kompatible enheder | Skærm, fjernsyn |
| Maksimal hældningsvinkel | 45 grader |
| Maximum Supported Screen Size | 32 tommer |
| Minimum Supported Screen Size | 13 tommer |
| Weight Capacity Per Arm | 10 kg (22 lbs) |
| VESA-kompatibilitet | 75x75mm, 100x100mm |
| Basismål (ca.) | Width: 15.35" (390mm), Depth: 11.02" (280mm) |
| Overall Height (approx.) | 18.3" (465 mm) |
Bemærk: Specifikationerne kan ændres uden varsel.
9. Garanti og support
For warranty information or technical support, please refer to the warranty card included with your product or visit the official VonHaus website. You may also contact VonHaus customer service directly for assistance with product inquiries, missing parts, or troubleshooting.
Kontaktoplysninger: Please refer to your purchase documentation or the VonHaus official webhjemmeside for de mest opdaterede kontaktoplysninger.