Indledning
The ASUS Prime Z270-A motherboard is designed to support 7th generation Intel Core processors, offering a robust platform for PC enthusiasts. It integrates advanced customization and tuning capabilities, making it suitable for various system builds. This manual provides essential information for the proper setup, operation, maintenance, and troubleshooting of your motherboard.
Nøglefunktioner:
- 5-vejs optimering: Features auto-tuning and FanXpert 4 for tailored overclocking profiles and dynamic system cooling.
- Forbedret forbindelse: Includes integrated Dual M.2 slots, Intel Optane Memory compatibility, USB 3.1 Type-A/Type-C connections, and Intel Thunderbolt 3 support for maximum transfer speeds.
- SafeSlot Technology: Dual patent-pending Safe Slots with metal framing provide increased support and rigidity for heavy graphics cards.
- AURA Sync RGB-belysning: Offers a wide spectrum of colors and synchronization effects across compatible AURA Sync enabled products.
- 3D-Printing Mounts: On-board mounts allow for unique design customization.
Pakkens indhold
Bekræft at alle dele er til stede i din bundkortpakke:
- Brugermanual
- Serielle ATA 6.0Gb/s kabler (3)
- SLI HB BRO (2-VEJS-M)
- ASUS Q-Shield
- Q-connector
- M.2 skruepakke
- CPU Installation Tool
Opsætning og installation
This section guides you through the physical installation of components onto your motherboard.
1. Bundkort overview
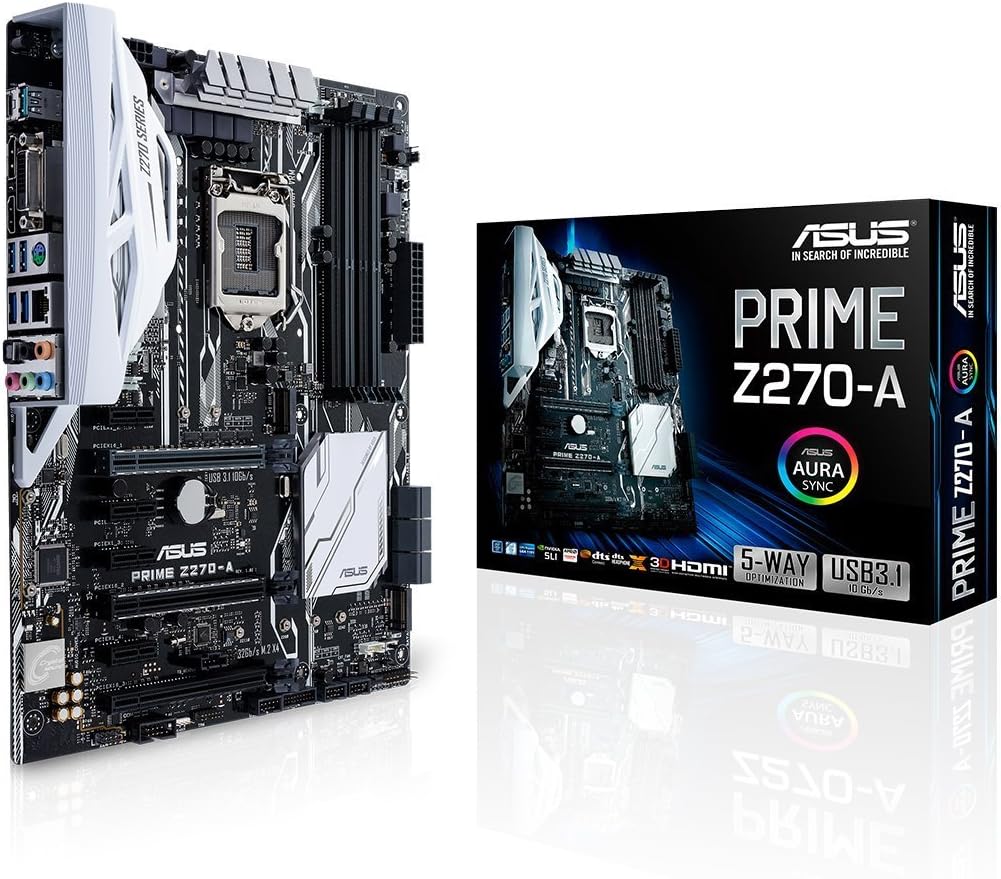
This image displays a full view of the ASUS Prime Z270-A motherboard, highlighting its layout and various component slots.
2. CPU-installation
The motherboard features an LGA 1151 socket for 7th Generation Intel Core processors. Carefully align the CPU with the socket, ensuring the gold triangle on the CPU matches the triangle on the socket. Lower the retention arm to secure the CPU.
3. RAM-installation
Install DDR4 memory modules into the four available DIMM slots. For optimal performance, refer to the user manual for recommended dual-channel configurations. Ensure the modules are firmly seated until the clips on both ends lock into place.
4. Installation af lagerenhed
The motherboard supports both traditional SATA drives and high-speed M.2 SSDs.

This image shows the dual M.2 slots on the motherboard, which allow for high-speed NVMe SSDs and can be configured in RAID for enhanced performance.
Utilize the dual M.2 slots for PCIe RAID configurations to achieve superior data transfer speeds. Connect SATA drives to the available SATA 6.0Gb/s ports.
5. Installation af grafikkort
Insert your graphics card(s) into the PCIe x16 slots. The two primary PCIe x16 slots feature ASUS SafeSlot technology, providing reinforced support for heavier graphics cards.

This image highlights the ASUS SafeSlot technology on the PCIe x16 slots, which provides enhanced retention and shearing resistance for graphics cards.
6. Strømforbindelser
Tilslut 24-bens ATX-strømstikket og 8-bens CPU-strømstikket fra din strømforsyning til de tilsvarende porte på bundkortet.
7. Rear Panel Connectivity
Connect your peripherals to the rear I/O ports.
This image illustrates the rear I/O panel of the ASUS Prime Z270-A motherboard, detailing the various ports including USB 3.1 Type-A and Type-C, DVI, DisplayPort 1.2, HDMI 1.4B, 4x USB 3.0, Gigabit LAN, PS/2, and 8-Channel HD Audio jacks.
- USB-porte: Two USB 3.1 ports (one Type-A, one Type-C) and four USB 3.0 ports.
- Videooutput: DisplayPort 1.2, HDMI 1.4B, and DVI for display connections.
- Netværk: Gigabit LAN port for wired internet connection.
- Lyd: 8-Channel HD Audio jacks.
- Ældre: PS/2 port for older keyboards or mice.
Betjeningsvejledning
This section covers basic operation and customization features of your motherboard.
1. BIOS/UEFI-adgang
For at få adgang til BIOS/UEFI-opsætningsværktøjet skal du tænde computeren og trykke gentagne gange på DEL nøgle eller F2 key during the Power-On Self-Test (POST). This allows you to configure system settings, boot order, and advanced features.
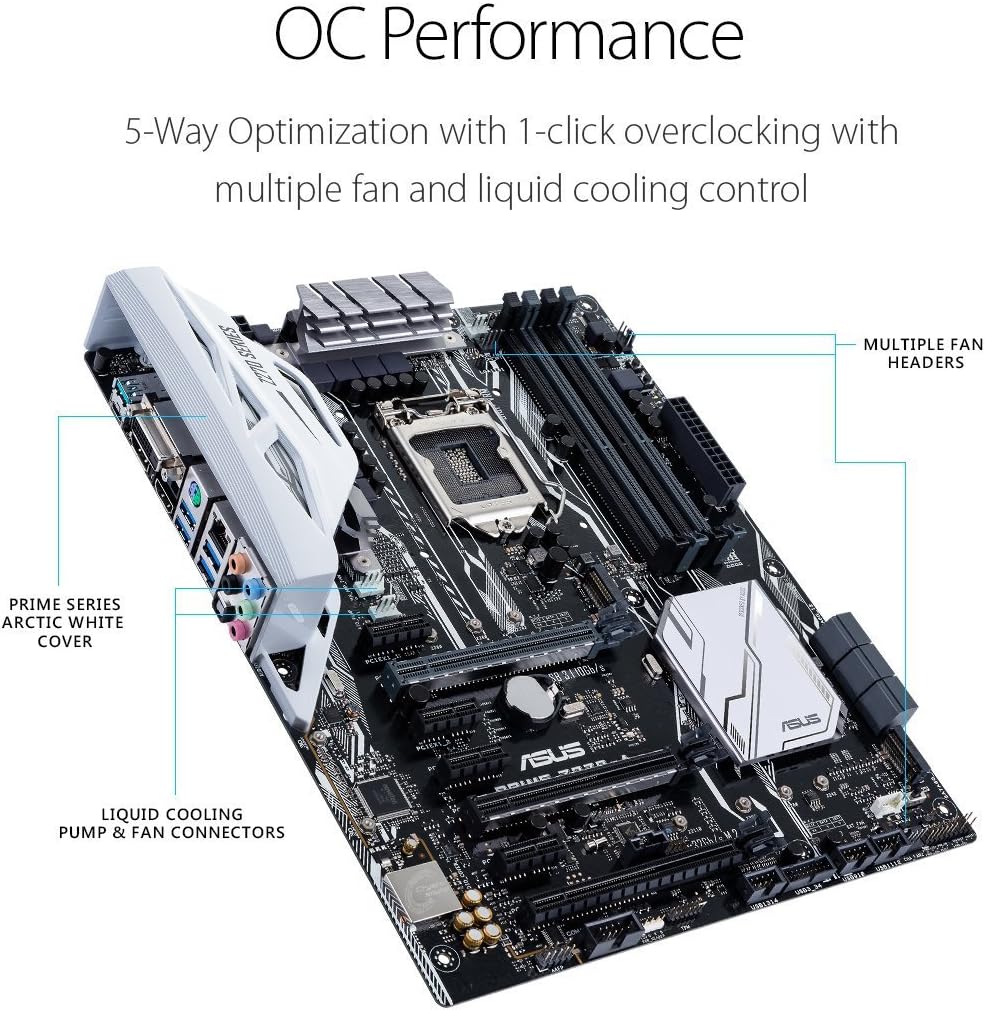
2. 5-Way Optimization
Utilize the ASUS 5-Way Optimization feature for intelligent auto-tuning of your system. This function automatically tailors overclocking profiles to your specific build, optimizing CPU performance, fan speeds, and power delivery for efficiency and stability.

This image highlights the OC Performance capabilities of the ASUS Prime Z270-A, featuring 5-Way Optimization with 1-click overclocking and control over multiple fan and liquid cooling connectors.
3. AURA Sync RGB Lighting
Customize the aesthetic of your build using AURA Sync RGB lighting. The motherboard includes an RGB LED header (+12V G R B) for connecting LED strips, which can be controlled via the AURA Sync software to synchronize lighting effects across compatible components.

This image shows the RGB_HEADER on the motherboard, allowing connection of LED strips for customizable lighting effects via AURA Sync software.
4. Officielt produkt overståetview Video
Denne video giver en detaljeret oversigtview of the ASUS Prime Z270-A motherboard, showcasing its features, connectivity options, and design. It offers visual guidance on various aspects of the product.
Opretholdelse
Korrekt vedligeholdelse sikrer dit bundkorts levetid og optimale ydeevne.
1. BIOS- og driveropdateringer
Tjek ASUS-support regelmæssigt website for the latest BIOS updates and device drivers. Updating these components can improve system stability, performance, and compatibility with new hardware or software.
2. Fysisk rengøring
Periodically clean dust from the motherboard and other internal components using compressed air. Ensure the system is powered off and unplugged before cleaning. Dust accumulation can lead to overheating and reduced performance.
Fejlfinding
Dette afsnit omhandler almindelige problemer, du kan støde på.
1. No Power/No POST
- Kontroller, at alle strømkabler (24-bens ATX, 8-bens CPU) er tilsluttet korrekt.
- Ensure the CPU and RAM are correctly seated. Try booting with only one RAM stick.
- Check for any diagnostic LEDs or POST codes on the motherboard, if available, and consult the user manual for their meaning.
2. Problemer med skærm
- Confirm the graphics card is properly installed in its PCIe slot and any necessary power connectors are attached.
- Ensure the monitor cable is connected to the graphics card (or motherboard if using integrated graphics) and not loose.
- Test med et andet skærmkabel eller en anden skærm, hvis det er muligt.
3. Problemer med USB-forbindelse
- Try connecting USB devices to different ports.
- Ensure USB drivers are up to date.
- For high-bandwidth devices, avoid using multiple such devices on adjacent ports if experiencing issues.
Specifikationer
| Mærke | ASUS |
| Modelnavn | PREMIUM Z270-A |
| CPU socket | LGA 1151 |
| Kompatible processorer | 7. generation af Intel Core |
| Chipsættype | Intel Z270 |
| RAM-hukommelsesteknologi | DDR4 |
| Hukommelses urhastighed | 2133 MHz (up to 3866 MHz OC) |
| Ram Memory Maximum Size | 64 GB |
| Hukommelsespladser til rådighed | 4 |
| Grafikkort interface | PCI Express |
| Total PCIe Ports | 2 (PCIe x16) |
| Total SATA Ports | 6 |
| M.2 Slots | 2 |
| USB 3.1 porte | 2 (1x Type-A, 1x Type-C) |
| USB 3.0 porte | 4 (Bagside I/O) |
| USB 2.0 porte | 6 (Internal headers) |
| Total Number of HDMI Ports | 1 |
| DisplayPort | 1 |
| DVI port | 1 |
| Antal Ethernet-porte | 1 |
| Lyd | 8-Channel HD Audio |
| Platform | Windows 10 |
| Varens vægt | 1.1 kilo |
Garantioplysninger
The ASUS Prime Z270-A Motherboard comes with a 3 års garanti. For detailed terms and conditions, please refer to the warranty card included in your product package or visit the official ASUS support webwebsted.
Støtte
For further assistance, technical support, or driver downloads, please visit the official ASUS support webwebsted:
You can also find FAQs and troubleshooting guides specific to your motherboard model on the support page.