
1. Introduktion
This manual provides detailed instructions for the safe and effective operation of your Profile 191000001 Digital Multimeter. This device is designed for measuring DC/AC voltage, DC current, resistance, diode forward voltage drop, and transistor hFE. Please read this manual thoroughly before use and retain it for future reference.
2. Sikkerhedsoplysninger
WARNING: Failure to follow these safety instructions can result in electric shock, fire, or personal injury.
- Sørg altid for, at multimeteret er i god stand før brug. Undersøg testledningerne for skader.
- Påfør ikke mere end den nominelle voltage (600V DC/AC) between the terminals or between any terminal and ground.
- Vær yderst forsigtig, når du arbejder med voltagover 30V AC RMS, 42V peak eller 60V DC. Disse voluminertages udgør en stødfare.
- Frakobl altid testledningerne fra kredsløbet, før du skifter funktioner.
- Forsøg ikke at måle strøm på et kredsløb med vol.tage over 600V.
- Sørg for, at den korrekte funktion og det korrekte område er valgt til målingen.
- Udskift batterierne, når indikatoren for lavt batteri vises, for at sikre nøjagtige aflæsninger.
- Do not operate the multimeter in explosive atmospheres or in the presence of flammable gases or dust.
3. Pakkens indhold
Bekræft, at alle nedenstående varer er til stede i din pakke:
- Profile 191000001 Digitalt multimeter
- One pair of Test Leads (Red and Black)
- Transistor hFE Test Adapter
- 2 x 1.5V AAA Batteries (may be pre-installed)
- Brugermanual

Figure 1: The Profile 191000001 Digital Multimeter, including the main unit, red and black test leads, and the hFE transistor test adapter.
4. Opsætning
4.1. Batteriinstallation
The multimeter requires two 1.5V AAA batteries for operation. These are typically included and may be pre-installed. If not, or if replacement is needed:
- Sørg for, at multimeteret er slukket.
- Find batteridækslet på bagsiden af enheden.
- Brug en skruetrækker til at fjerne skruen, der fastgør dækslet.
- Insert the two AAA batteries, observing the correct polarity (+ and - markings).
- Sæt batterirummets dæksel på igen og fastgør det med skruen.
4.2. Tilslutning af testledninger
The test leads are essential for making measurements. Connect them as follows:
- Sæt den sorte testledning i 'COM'-stikket (Common).
- For de fleste volumenertage, resistance, and diode measurements, insert the red test lead into the 'VΩmA' jack.
- For current measurements up to 10A, insert the red test lead into the '10A' jack.
5. Betjeningsvejledning
The multimeter features a rotary switch to select the desired measurement function and range. The display will show the measurement value.
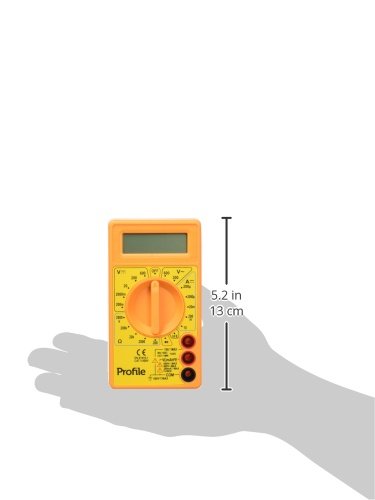
Figure 2: The Profile 191000001 Digital Multimeter with an overlay indicating its approximate dimensions (13 cm height).
5.1. Måling af DC-volumentage (V---)
- Connect the red test lead to the 'VΩmA' jack and the black test lead to the 'COM' jack.
- Indstil drejekontakten til den ønskede DC-volumentage range (e.g., 20V, 200V, 600V). If the voltagHvis e er ukendt, skal du starte med det højeste område og sænke det efter behov.
- Tilslut testledningerne parallelt på tværs af den komponent eller det kredsløb, der skal måles.
- Læs bindtage -værdi på displayet.
5.2. Måling af AC Voltage (V~)
- Connect the red test lead to the 'VΩmA' jack and the black test lead to the 'COM' jack.
- Indstil drejekontakten til den ønskede AC-volumentage-område (f.eks. 200V, 600V).
- Connect the test leads in parallel across the AC source or component.
- Læs bindtage -værdi på displayet.
5.3. Measuring DC Current (A---)
CAUTION: To avoid damage to the multimeter or the circuit, never connect the multimeter in parallel when measuring current. Always connect it in series.
- For currents up to 200mA, connect the red test lead to the 'VΩmA' jack. For currents up to 10A, connect the red test lead to the '10A' jack. The black test lead always connects to 'COM'.
- Indstil drejekontakten til det ønskede DC-strømområde (f.eks. 200 µA, 2 mA, 20 mA, 200 mA, 10 A).
- Åbn kredsløbet, hvor strømmen skal måles, og tilslut multimeteret i serie.
- Aflæs den aktuelle værdi på displayet.
5.4. Måling af modstand (Ω)
- Connect the red test lead to the 'VΩmA' jack and the black test lead to the 'COM' jack.
- Set the rotary switch to the desired Resistance range (e.g., 200Ω, 2kΩ, 20kΩ, 200kΩ, 2MΩ).
- Sørg for, at kredsløbet eller komponenten er spændingsløs, før du måler modstanden.
- Tilslut testledningerne på tværs af komponenten.
- Læs modstandsværdien på displayet.
5.5. Diodetest
- Connect the red test lead to the 'VΩmA' jack and the black test lead to the 'COM' jack.
- Set the rotary switch to the diode symbol (→|).
- Connect the red lead to the anode and the black lead to the cathode of the diode. The display will show the forward voltage drop.
- Reverse the leads. The display should show 'OL' (Overload) for a good diode.
5.6. Transistor hFE test
- Set the rotary switch to the 'hFE' position.
- Insert the transistor hFE test adapter into the designated sockets on the multimeter.
- Identify if the transistor is NPN or PNP and its Emitter (E), Base (B), Collector (C) terminals.
- Insert the transistor leads into the corresponding holes on the hFE adapter.
- Aflæs hFE-værdien (DC-strømforstærkning) på displayet.
6. Vedligeholdelse
6.1. Udskiftning af batteri
When the low battery indicator appears on the display, replace the batteries promptly to ensure accurate measurements. Refer to Section 4.1 for battery installation instructions.
6.2. Rensning
For at rengøre multimeteret skal du tørre huset af med enamp klud og et mildt rengøringsmiddel. Brug ikke slibemidler eller opløsningsmidler. Sørg for, at enheden er helt tør, før den tages i brug.
6.3. Opbevaring
If the multimeter is not used for an extended period, remove the batteries to prevent leakage and store the device in a cool, dry place away from direct sunlight.
7. Fejlfinding
- Ingen visning eller svag visning: Check battery charge and ensure they are correctly installed. Replace batteries if necessary.
- 'OL' (Overload) on display: Den målte værdi overstiger det valgte område. Skift til et højere område.
- Forkerte aflæsninger: Ensure test leads are properly connected, the correct function and range are selected, and the batteries are not low. Verify the circuit is de-energized for resistance measurements.
- Ingen aflæsning for nuværende: Ensure the multimeter is connected in series with the circuit and the correct current jack (VΩmA or 10A) is used for the red lead.
8. Specifikationer
| Feature | Specifikation |
|---|---|
| Modelnummer | 191000001 |
| Max DC/AC Voltage | 600V |
| Max DC Current | 10A |
| Modstandsmåling | Ja |
| Diode måling | Ja |
| Transistor hFE-måling | Ja |
| Strømkilde | 2 x 1.5V AAA batterier |
| Produktmål (L x B x H) | 13.5 x 3 x 18.9 cm (5.3 x 1.2 x 7.4 tommer) |
| Produktets vægt | 0.22 kg (0.48 lbs) |
| Fabrikant | Eltra N.V. |
9. Garanti og support
9.1. Garanti
This Profile 191000001 Digital Multimeter comes with a 2-year warranty from the date of purchase, covering manufacturing defects. This warranty does not cover damage caused by misuse, unauthorized modification, accident, or normal wear and tear.
9.2. Kundesupport
For technical assistance, warranty claims, or further inquiries, please contact your retailer or the manufacturer's customer support channels. Please have your product model number and proof of purchase ready when contacting support.