Indledning
This manual provides comprehensive instructions for the setup, operation, and maintenance of your GPX Digital AM/FM Clock Radio, model C224B. Please read this manual thoroughly before using the device to ensure proper functionality and to maximize your user experience. Keep this manual for future reference.
Produkt overview
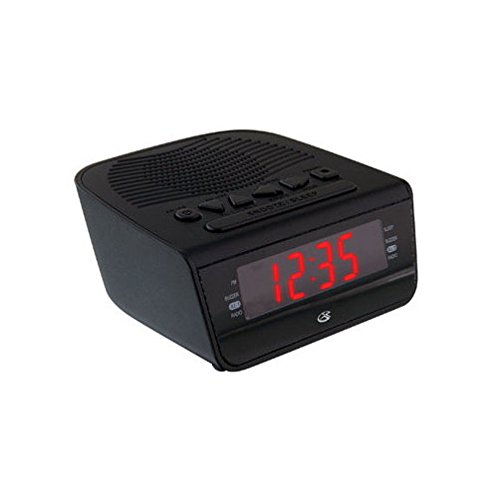
Figur 1: Front view of the GPX Digital AM/FM Clock Radio. This image shows the compact black unit with its digital display and control buttons.
The GPX Digital AM/FM Clock Radio (C224B) is designed for reliable timekeeping and audio entertainment. Key features include a clear multi-display clock, AM/FM radio tuner, dual alarm functionality, and a battery backup option to ensure continuous operation during power interruptions. Its compact and modern design makes it suitable for various indoor settings.
Opsætning
1. Udpakning
Carefully remove the clock radio from its packaging. Ensure all components are present: the clock radio unit and the power adapter.
2. Strømtilslutning
- Plug the power adapter into the DC input jack located on the back of the clock radio.
- Plug the other end of the power adapter into a standard wall outlet (AC 120V, 60Hz).
- The display will illuminate, indicating the unit is receiving power.
3. Installation af batteribackup (valgfrit)
Til nødstrøm under udgangentages, install batteries (not included).
- Find batterirummet i bunden af enheden.
- Åbn batterirummets dæksel.
- Insert the required batteries (e.g., 2 x AAA, check unit for specific type) according to the polarity markings (+ and -).
- Luk batterirummets dæksel forsvarligt.
Note: Batteries are for backup only and will not power the display or radio functions continuously. They preserve time and alarm settings during a power interruption.
Betjeningsvejledning
1. Indstilling af tid
- Tryk og hold på TIDSINDSTILLING knappen, indtil displayet blinker.
- Brug TIME og MINUT knapper for at justere tiden.
- Trykke TIDSINDSTILLING igen for at bekræfte og afslutte tidsindstillingstilstanden.
2. Indstilling af alarmer (Alarm 1 og Alarm 2)
This unit features dual alarms, allowing you to set two independent wake-up times.
- Tryk og hold på ALARM 1 SÆT (eller ALARM 2 SÆT) button until the alarm time flashes.
- Brug TIME og MINUT knapperne til at justere det ønskede alarmtidspunkt.
- Trykke ALARM 1 SÆT (eller ALARM 2 SÆT) again to confirm the time.
- Immediately after confirming the time, use the ALARMtilstand button to select the alarm source: SUMMER or RADIO.
- The alarm icon (e.g., AL1 or AL2) will appear on the display, indicating the alarm is active.
To turn off an alarm, press the corresponding ALARM 1 TIL/FRA (eller ALARM 2 TIL/FRA) button. The alarm icon will disappear.
3. AM/FM-radiobetjening
- Tryk på RADIO TIL/FRA knappen for at tænde for radioen.
- Tryk på BAND knappen for at skifte mellem AM- og FM-båndene.
- Brug TUNE + or TUNE - knapperne til manuelt at stille ind på en ønsket station.
- To automatically scan for the next available station, press and hold TUNE + or TUNE - i et par sekunder.
- Juster lydstyrken ved hjælp af LYDSTYRKE + or VOLUME - knapper.
- Tryk på for at slukke for radioen RADIO TIL/FRA knappen igen.
4. Snooze-funktion
Når en alarm lyder, skal du trykke på SLUM knappen for midlertidigt at afbryde alarmen i cirka 9 minutter. Alarmen lyder igen efter snooze-perioden.
5. Dvalefunktion
The sleep function allows the radio to play for a set duration before automatically turning off.
- Mens radioen spiller, skal du trykke på SOVE knappen gentagne gange for at gennemgå de tilgængelige sovetider (f.eks. 90, 60, 30, 15 minutter, FRA).
- Radioen slukker automatisk efter det valgte tidspunkt.
Opretholdelse
1. Rensning
To clean the unit, wipe the exterior with a soft, slightly damp cloth. Do not use abrasive cleaners or solvents, as these may damage the finish. Ensure the unit is unplugged before cleaning.
2. Udskiftning af batteri
If the battery backup function is not working, or if the unit loses time during a power outage, the backup batteries may need replacement. Follow the "Battery Backup Installation" steps in the Setup section to replace them.
Fejlfinding
| Problem | Mulig årsag | Løsning |
|---|---|---|
| Enheden tænder ikke. | Strømadapteren er ikke tilsluttet, eller der er en defekt stikkontakt. | Sørg for, at strømadapteren er korrekt tilsluttet enheden og en fungerende stikkontakt. Prøv en anden stikkontakt. |
| Alarmen lyder ikke. | Alarm ikke indstillet, alarmlydstyrken er for lav, eller alarmen er slået fra. | Verify alarm time and source (buzzer/radio) are set correctly. Ensure alarm is activated (icon visible). Increase radio volume if alarm source is radio. |
| Dårlig radiomodtagelse. | Svagt signal eller interferens. | Adjust the position of the unit or the antenna (if external). Move away from other electronic devices that may cause interference. |
| Tid/indstillinger mistet efter strømafbrydelsetage. | Backup-batterierne er døde eller ikke installeret. | Install fresh backup batteries or replace existing ones. |
Specifikationer
- Model: C224B
- Strømkilde: AC 120V, 60Hz (main); Battery Powered (backup)
- Skærmtype: LED digitalt display
- Radiobånd: AM/FM
- Dimensioner (ca.): 5.12 cm B x 5.12 cm H
- Vægt (ca.): 3 pund
- Farve: Sort
- Materiale: Plast
Garanti og support
For warranty information or technical support, please refer to the warranty card included with your product or visit the official GPX website. Do not attempt to repair this unit yourself, as this may void your warranty.
GPX Official Webwebsted: www.gpx.com