1. Introduktion
This manual provides essential information for the proper installation, operation, and maintenance of your DS18 SLC-MD12 12-inch car subwoofer. Please read these instructions carefully before use to ensure optimal performance and longevity of your product.
The DS18 SLC-MD12 is a 12-inch subwoofer designed for car audio systems, featuring a black steel basket, a polypropylene cone, and a 4-layer voice coil. It is engineered to deliver quality bass response for car audio enthusiasts.
2. Produktfunktioner
- Størrelse: 12 tommer diameter
- Strømhåndtering: 250W RMS, 500W Max
- Impedans: 4 Ohm (Single Voice Coil - SVC)
- Stemmespole: ACCAW 4-layer, 2-inch (50.8mm) diameter
- Magnet: Ferrite, 42 oz weight
- Keglemateriale: Poly Injection (Polypropylene)
- Ramme: Black Steel Basket
- Affjedring: Non-fatiguing rubber surround for durability

Billede: Forside view of the DS18 SLC-MD12 subwoofer, highlighting its 12-inch size, 4 Ohm impedance, and frequency response. Note: While the image indicates 1000W Max Power, the product specifications state 500W Max Power.
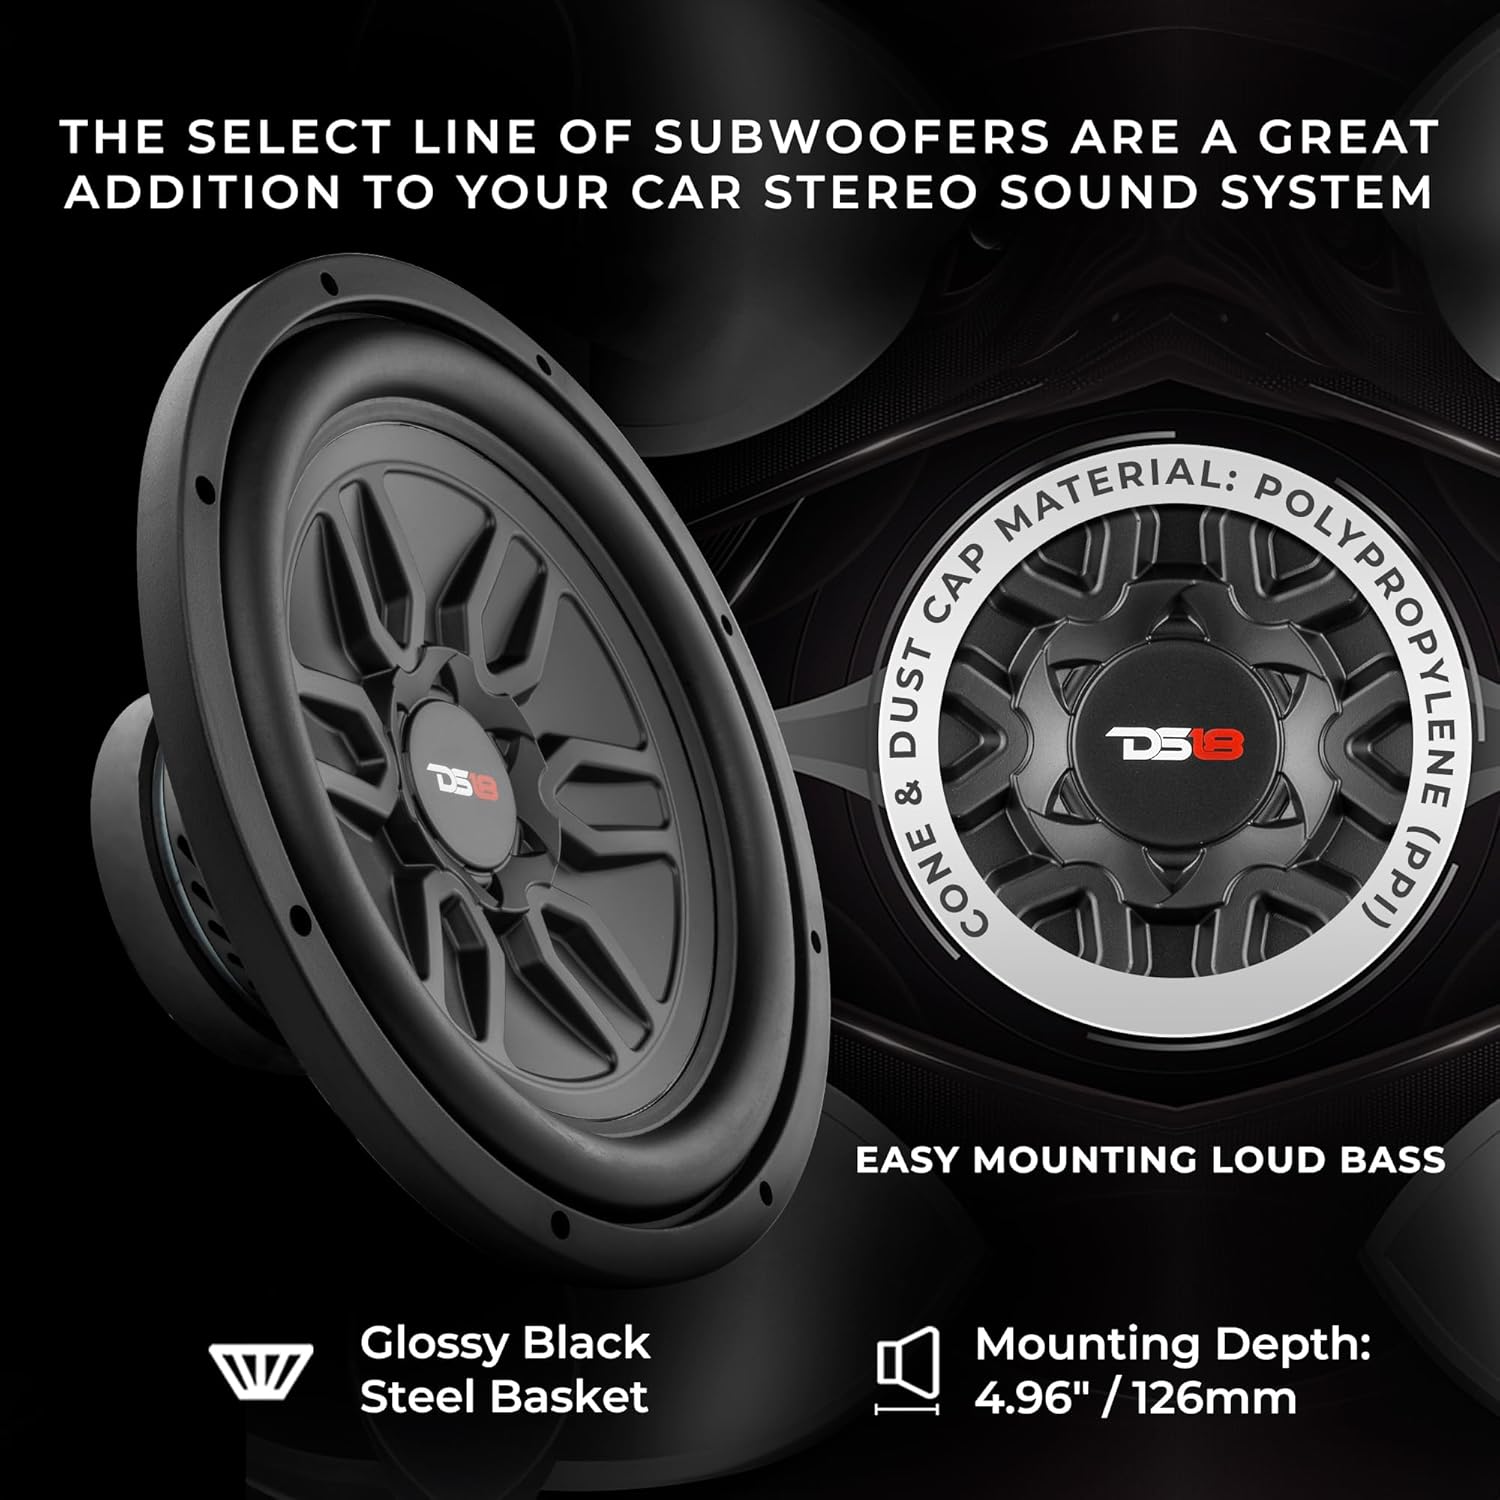
Billede: Vinklet view of the DS18 SLC-MD12 subwoofer, showing the polypropylene cone and dust cap. The image also indicates a mounting depth of 4.96 inches (126mm) and a glossy black steel basket.
3. Opsætning og installation
3.1. Indbrudsprocedure
Before operating your new subwoofer under harsh conditions, it is crucial to perform a 'break-in' process. This ensures the subwoofer's components settle and perform as designed, preventing premature failure and optimizing performance.
- Install the subwoofer into its enclosure.
- Tilslut subwooferen til din amplifier with appropriate wiring.
- Play music at a moderate volume for approximately 10-20 hours. Avoid excessive bass or high volumes during this period.
- Gradually increase the volume and bass levels after the break-in period.
Over-driving the woofer before it has been properly broken-in can lead to premature failure and poor sound quality.
3.2. Overvejelser om montering
Ensure the mounting location provides adequate space and structural integrity for the subwoofer. Refer to the specifications for precise dimensions.
- Udskæringsdiameter: 10.9 tommer
- Samlet diameter: 12.4 tommer
- Monteringsdybde: 5.5 tommer

Billede: Side view of the DS18 SLC-MD12 subwoofer, illustrating the magnet structure and the area where the voice coil is housed. This view helps in understanding the required mounting depth.

Billede: Bagside view of the DS18 SLC-MD12 subwoofer, displaying the speaker terminals for wiring connections.
4. Betjeningsvejledning
Once installed and broken-in, your DS18 SLC-MD12 subwoofer is ready for operation. Ensure your amplifier settings are correctly configured for a 4 Ohm load and that the power output does not exceed the subwoofer's RMS rating of 250W to prevent damage.
4.1. Recommended Enclosure Volumes
For optimal performance, consider the following enclosure volumes:
- Optimum Sealed Enclosure: 1.3 cubic feet / 36.8 Liters
- Optimum Ported Enclosure: 1.55 cubic feet / 43.9 Liters
Video: An official product video demonstrating the DS18 MD12 Car Subwoofer. This video provides a visual overview of the subwoofer's features and design, aiding in understanding its physical characteristics and potential applications.
5. Vedligeholdelse
The DS18 SLC-MD12 subwoofer requires minimal maintenance. To ensure its longevity and performance:
- Hold subwooferen ren og fri for støv og snavs. Brug en blød, tør klud til rengøring.
- Undgå at udsætte subwooferen for ekstreme temperaturer eller fugt.
- Kontroller regelmæssigt ledningsforbindelserne for tæthed og korrosion.
- Ensure the enclosure remains sealed and free from air leaks.
6. Fejlfinding
If you experience issues with your DS18 SLC-MD12 subwoofer, consider the following common troubleshooting steps:
- Ingen lyd:
- Check all power and audio connections to ensure they are secure and correctly wired.
- Bekræft, at ampkøleren er tændt og fungerer korrekt.
- Inspect the subwoofer's voice coil for any visible damage (though this usually requires removal).
- Forvrænget lyd:
- Reduce the volume level on your head unit and amplivligere.
- Check amplifier gain settings; ensure they are not set too high.
- Verify that the subwoofer is not over-driven beyond its power handling capabilities.
- Inspect the cone and surround for any physical damage.
- Svag bas:
- Ensure the subwoofer is wired in phase with other speakers.
- Check the enclosure for any air leaks or damage.
- Adjust bass boost and crossover settings on your amplifier eller hovedenhed.
If problems persist after performing these checks, consult a professional car audio technician or contact DS18 customer support.
7. Specifikationer
| Parameter | Værdi |
|---|---|
| Størrelse | 12 tommer |
| Udskæringsdiameter | 10.9 tommer |
| Samlet diameter | 12.4 tommer |
| Monteringsdybde | 5.5 tommer |
| Nominel impedans | 4 Ohm |
| Power Handling (RMS) | 250W |
| Power Handling (MAX) | 500W |
| Stemmespole diameter | 2 tommer (50.8 mm) |
| Magnetvægt | 42 oz |
| Optimum Sealed Enclosure | 1.3 cubic feet / 36.8 Liters |
| Optimum Ported Enclosure | 1.55 cubic feet / 43.9 Liters |
| Forskydning | 0.07 kubikfod |
| Fs (Resonansfrekvens) | 29.6 Hz |
| Re (DC-modstand) | 3.2 Ohm |
| Qes (Elektrisk Q-faktor) | 0.783 |
| Qms (Mekanisk Q-faktor) | 5.367 |
| Qts (Total Q-faktor) | 0.684 |
| Vas (ækvivalent volumen) | 48.52 liter |
| Xmax (lineær udflugt) | 13.8 mm |
8. Garanti og support
For garantioplysninger og teknisk support henvises til den officielle DS18 website or contact your authorized DS18 dealer. Keep your purchase receipt as proof of purchase for any warranty claims.
DS18 Officiel Webwebsted: www.ds18.com