1. Produktet er slutview
Vim'entag CP1 is a wireless IP video monitoring surveillance security camera designed for remote home or business monitoring. It features high-definition video, pan/tilt functionality, two-way audio, and night vision capabilities.
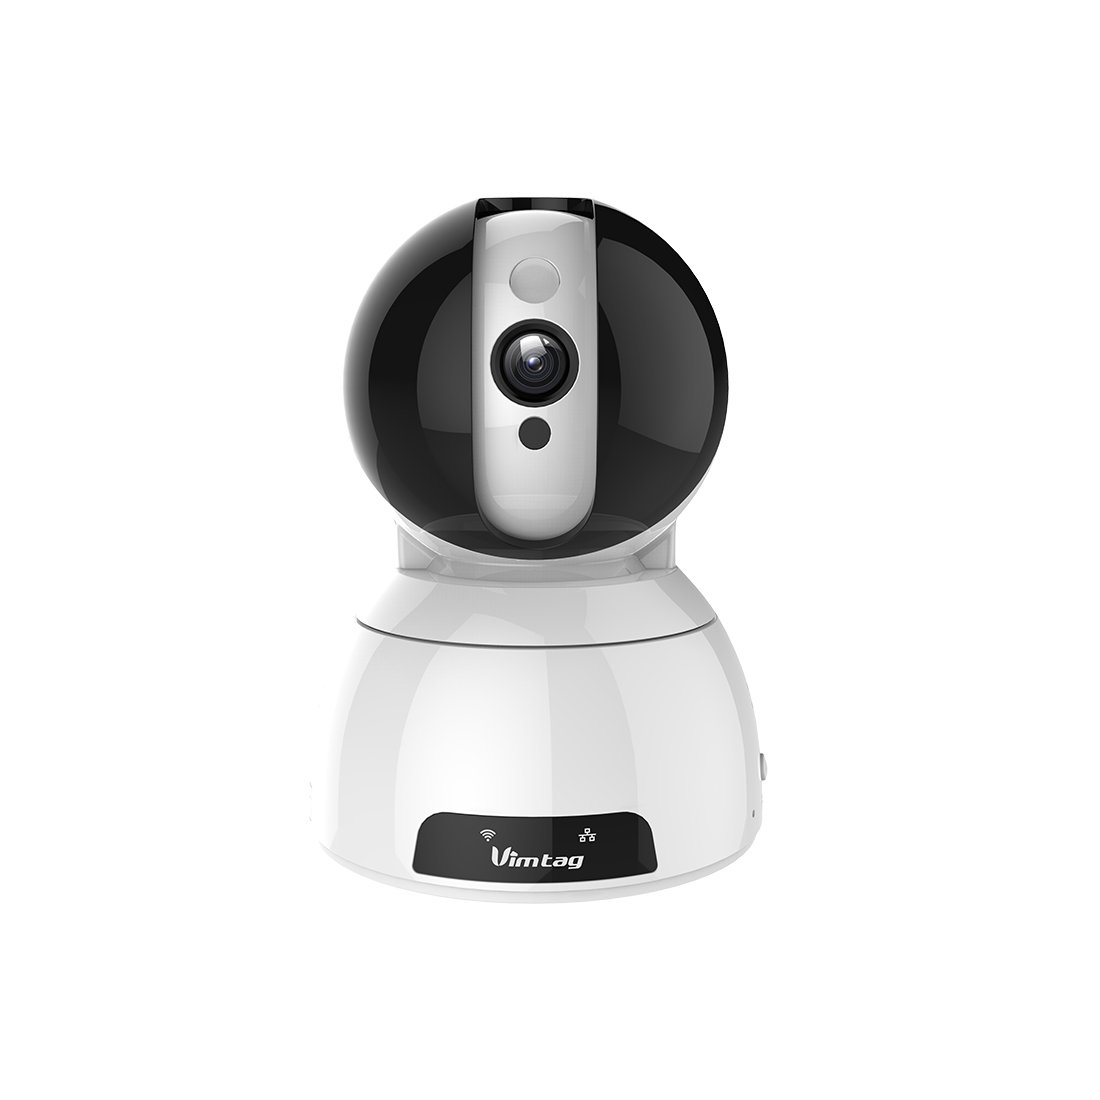
Figure 1: Vimtag CP1 Camera Front View
Nøglefunktioner:
- HD-videokvalitet: 1280 x 720p at 25 frames per second for clear monitoring.
- Panorerings- og vippefunktion: 350-degree horizontal rotation and 100-degree vertical tilt to cover a wide area.
- Tovejs lyd: Indbygget mikrofon og højttaler til kommunikation.
- Nattesyn: Infrarøde LED'er giver klar synlighed på op til 10 meter under dårlige lysforhold.
- Bevægelsesdetektion: Alerts with snapshots and video clips upon detecting movement.
- Lokal og Cloud Storage: Supports Micro SD cards up to 64GB and optional cloud storage.
- Nem opsætning: Quick Wi-Fi setup via the Vimtag mobilapplikation.

Figure 2: Vimtag CP1 Key Features
2. Opsætningsvejledning
2.1 Pakkens indhold
Før du starter, skal du sørge for, at alle dele er til stede i pakken:
- 1 x Vimtag CP1 Camera
- 1 x Camera Rack
- 1 x strømkabel
- 1 x Ethernet-kabel
- 1 x Brugermanual (dette dokument)
2.2 Indledende opsætningstrin
- Tænd: Connect the power cable to the camera and plug it into a power outlet. The camera will initiate its startup sequence.
- Download appen: Download the free Vimtag app fra din smartphones appbutik (iOS App Store eller Google Play Store).
- Kontoregistrering: Åbn Vimtag app and register for a new account or log in if you already have one.
- Tilføj kamera: Follow the in-app instructions to add your new CP1 camera. This typically involves scanning a QR code on the camera or entering its device ID.
- Wi-Fi-konfiguration: Configure the camera to connect to your Wi-Fi network using the app. Ensure your Wi-Fi network is 2.4GHz, as 5GHz networks may not be supported.
- Montering (valgfrit): Use the included camera rack to mount the camera on a wall or ceiling if desired.
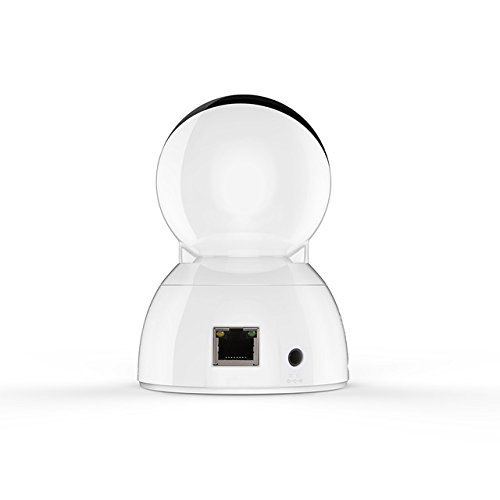
Figure 3: Vimtag CP1 Back View med havne
For detailed visual guidance, refer to the video tutorials available on the official Vimtag støtte webwebsted.
3. Betjeningsvejledning
3.1 Live View og panorering/tilt-kontrol
Once the camera is connected, open the Vimtag app to access the live video feed. Use the on-screen controls to pan the camera horizontally (350 degrees) and tilt it vertically (100 degrees) to adjust the viewvinkel.

Figure 5: Pan and Tilt Control via App
3.2 Tovejslyd
The camera supports two-way audio. Tap the microphone icon in the app to speak through the camera's speaker, and listen to audio from the camera's built-in microphone.
3.3 Nattesyn
The CP1 camera automatically switches to night vision mode in low-light conditions, providing clear black and white video up to 10 meters using its infrared LEDs.
3.4 Bevægelsesdetektion og advarsler
Configure motion detection settings within the Vimtag app. You can set sensitivity levels and define specific areas for detection. When motion is detected, the camera can send instant notifications to your smartphone, including snapshots or short video clips.
3.5 Videooptagelse og -lagring
Kameraet understøtter to primære lagringsmetoder:
- Micro SD-kort: Insert a Micro SD card (up to 64GB, not included) into the camera's designated slot for local recording. Recordings can be accessed and managed through the app.
- Cloud Storage: Optional cloud storage services are available through Vimtag for remote backup and access to recorded footage.
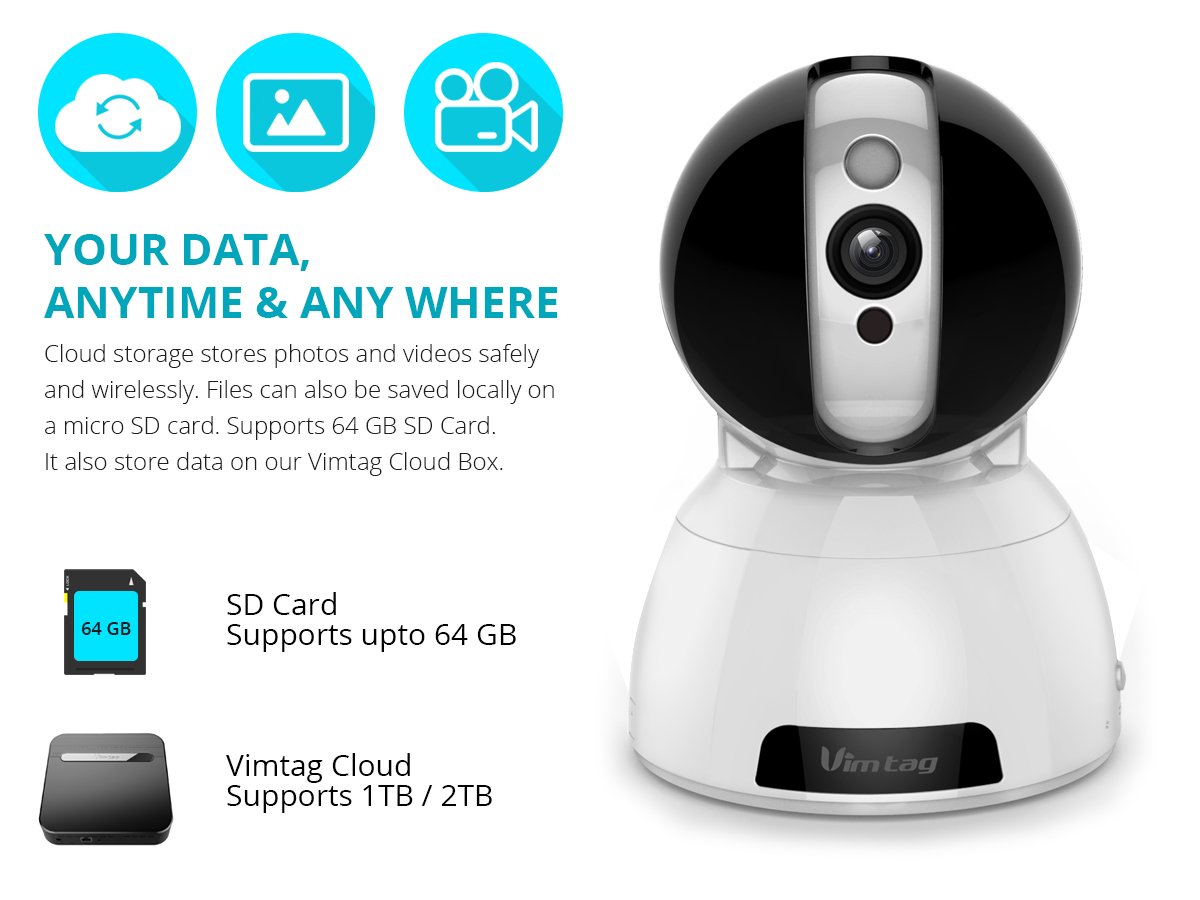
Figure 6: Storage Options for Vimtag CP1
4. Vedligeholdelse
4.1 Rengøring
To maintain optimal performance, periodically clean the camera's lens and exterior. Use a soft, dry cloth. Avoid abrasive cleaners or solvents that could damage the camera's finish or lens coating.
4.2 firmwareopdateringer
Vimtag may release firmware updates to improve camera performance, add features, or enhance security. Check the Vimtag app regularly for available updates and follow the in-app instructions to install them. Ensure the camera remains powered during the update process.
4.3 Miljøhensyn
Vim'entag CP1 camera is designed for indoor use. Avoid exposing it to extreme temperatures, direct sunlight, high humidity, or water, as it is not water-resistant.
5. Fejlfinding
This section addresses common issues you might encounter with your Vimtag CP1 kamera.
5.1 Kameraet opretter ikke forbindelse til Wi-Fi
- Tjek Wi-Fi-bånd: Sørg for, at dit Wi-Fi-netværk er 2.4 GHz. Kameraet understøtter muligvis ikke 5 GHz-netværk.
- Signalstyrke: Placer kameraet tættere på din Wi-Fi-router for at sikre et stærkt signal.
- Korrekt adgangskode: Dobbelttjek, at du indtaster den korrekte Wi-Fi-adgangskode i appen.
- Nulstil kamera: Locate the reset button on the camera (often a small pinhole) and press it for 5-10 seconds until the camera resets. Then, attempt the setup process again.
- Routerindstillinger: Verify that your router's firewall or security settings are not blocking the camera's connection.
5.2 Dårlig videokvalitet
- Netværks båndbredde: Ensure your internet connection has sufficient upload speed for streaming HD video.
- App-indstillinger: Check the video quality settings within the Vimtag app; you might be able to adjust it.
- Linserens: Rengør kameralinsen med en blød, tør klud.
5.3 Problemer med tovejslyd
- Lydstyrkeniveauer: Check the volume settings on your smartphone and within the Vimtag app.
- Mikrofon-/højttalerblokering: Sørg for, at kameraets mikrofon og højttaler ikke er blokeret.
- Netværksforsinkelse: High network latency can affect audio quality and introduce delays.
5.4 Bevægelsesdetektion virker ikke
- Aktivér funktion: Verify that motion detection is enabled in the Vimtag app-indstillinger.
- Følsomhed: Juster bevægelsesdetektionens følsomhed. Hvis den er for lav, kan den overse hændelser.
- Registreringszoner: Ensure the areas you want to monitor are correctly configured as detection zones.
6. Tekniske specifikationer
| Modelnavn | Vimtag CP1 |
| Varemodelnummer | 6970167642228 |
| Videooptagelsesopløsning | 720p (1280 x 720 pixels) |
| Billedhastighed | 25 billeder i sekundet |
| Pan/tilt rækkevidde | 350 degrees (Pan) x 100 degrees (Tilt) |
| Digital Zoom | 4x |
| Nattesynsafstand | Op til 10 meter (infrarød) |
| Opbevaringsmuligheder | Micro SD (op til 64 GB), Cloud-lagring |
| Forbindelse | Wireless (Wi-Fi IEEE802.12b/g/n) |
| Strømkilde | AC Power Adapter (7 Watts) |
| Dimensioner (L x B x H) | 40 x 30 x 40 millimeter |
| Varens vægt | 450 gram |
| Indendørs/Udendørs brug | Indendørs |
| Vandmodstandsniveau | Ikke vandafvisende |
| Kontrolmetode | App (Android, iOS), Voice |
7. Garanti og support
7.1 Produktgaranti
Vim'entag CP1 camera comes with a 6 måneders erstatningsgarantiDenne garanti dækker fabrikationsfejl og funktionsfejl ved normal brug. Gem venligst din købsbevis til garantikrav.
7.2 Kundesupport
For any queries, technical assistance, or warranty claims, please contact Vimtag customer support. Support is available via telephone, chat, Skype, and email. Refer to the official Vimtag webhjemmeside for de seneste kontaktoplysninger.
Step-by-step setup instructions and video tutorials are also available on the Vimtag support portal to assist you with installation and operation.