
Indledning
This manual provides detailed instructions for the installation, operation, and maintenance of your Vantec NexStar TX Dual Bay USB 3.0 Hard Drive Dock. This device is designed to provide a convenient solution for accessing 2.5-inch and 3.5-inch SATA HDDs and SSDs via a SuperSpeed USB 3.0 connection.

Image: The Vantec NexStar TX Dual Bay USB 3.0 Hard Drive Dock, showing its sleek black design and dual drive bays.
Opsætning
Pakkens indhold
- Vantec NexStar TX Dual Bay USB 3.0 Hard Drive Dock
- USB 3.0-kabel
- Strømadapter
- Brugervejledning (dette dokument)
Systemkrav
- Tilgængelig USB 3.0- eller USB 2.0-port
- Windows 7 eller nyere
- Mac OS X 10.6 eller nyere
Hardware installation
- Tilslut strøm: Connect the provided power adapter to the dock's power input and then to a wall outlet.
- Tilslut USB: Connect one end of the USB 3.0 cable to the dock's USB 3.0 port and the other end to an available USB 3.0 port on your computer.
- Indsæt harddiske:
- Gently slide your 2.5-inch or 3.5-inch SATA HDD/SSD into an available drive bay until it is securely seated. The dock supports two drives simultaneously.
- Ensure the drive's SATA connector aligns with the dock's connector.

Image: The Vantec NexStar TX dock highlighting its SuperSpeed USB 3.0, Dual Bay, Plug & Play, and EZ Swap Design features.
Operation
Tænd/sluk
- After connecting the power and USB cables, press the power button on the dock to turn it on. The power LED will illuminate.
- To turn off the dock, press the power button again. Always safely eject drives from your operating system before powering off.
Drive Recognition and Data Transfer
- Once powered on, your operating system should automatically detect the inserted drives. New drives may require initialization and formatting before use.
- You can now access the drives like any other external storage device. Drag and drop fileeller brug din foretrukne backup-software.
- The dock supports SuperSpeed USB 3.0 for fast data transfer rates.
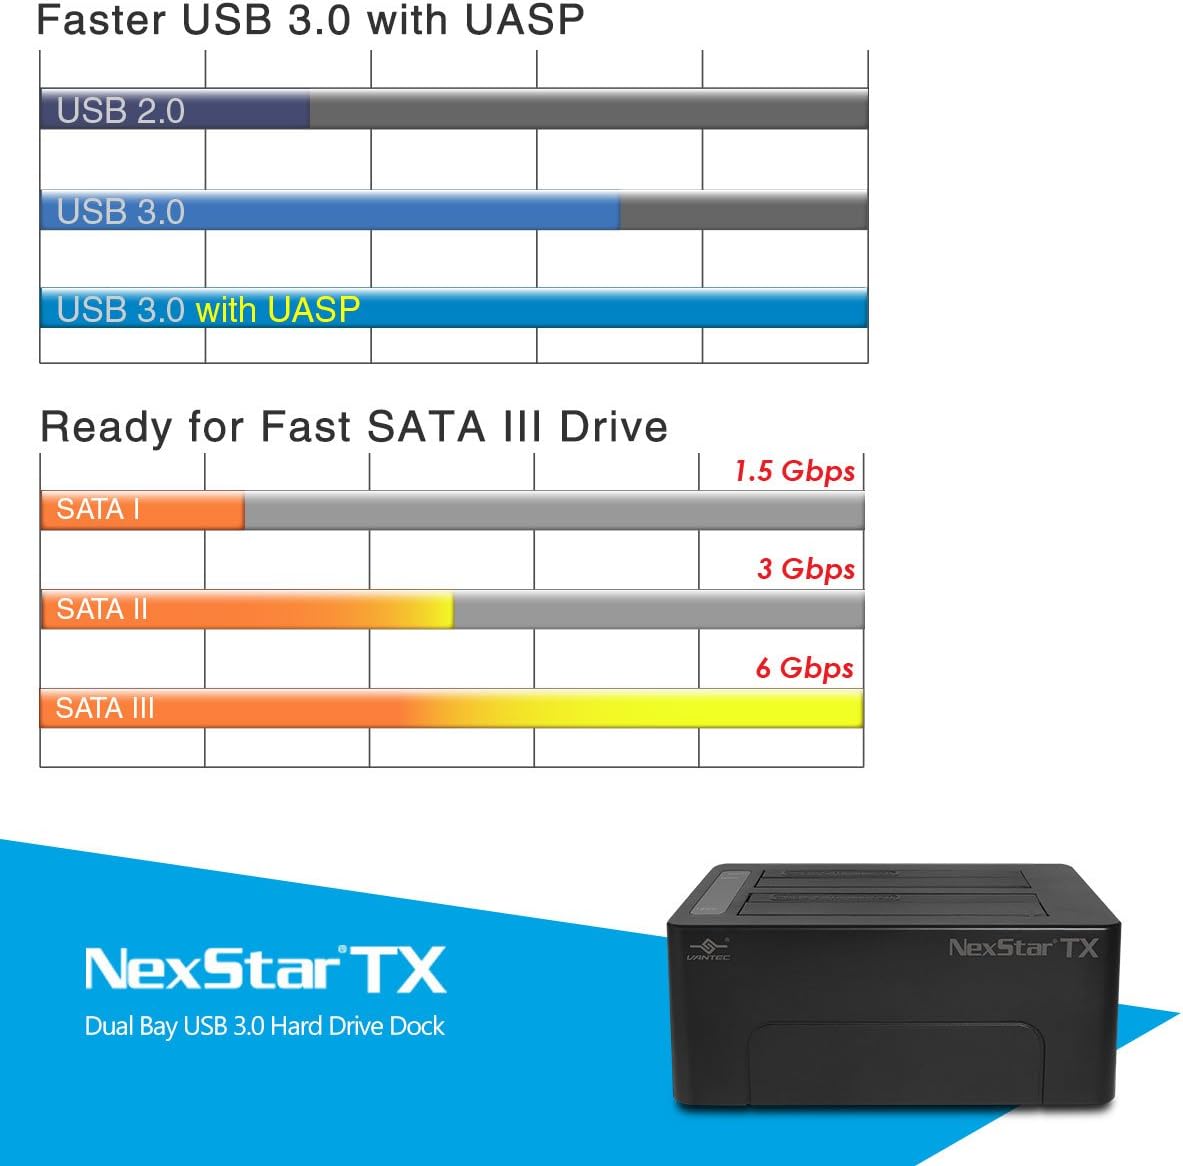
Image: A chart illustrating the speed advantages of USB 3.0 with UASP and SATA III (6 Gbps) compared to older standards.
Hot-Swapping Drives
The NexStar TX dock supports hot-swapping. To safely remove a drive while the dock is powered on:
- Safely eject the drive from your operating system (e.g., "Safely Remove Hardware" in Windows, "Eject" in macOS).
- Once the OS confirms it's safe, gently pull the drive out of the bay.
- You can then insert another drive.

Image: Illustration showing compatibility with various 2.5-inch SSD/HDD and 3.5-inch HDD sizes, supporting up to 16TB total capacity.
Opretholdelse
Rensning
- Ensure the dock is powered off and disconnected from all cables before cleaning.
- Use a soft, dry, lint-free cloth to wipe the exterior of the dock.
- Brug ikke flydende rengøringsmidler, aerosoler eller opløsningsmidler, da de kan beskadige overfladen eller de indvendige komponenter.
Safe Handling and Storage
- Avoid dropping or subjecting the dock to strong impacts.
- Opbevar docken et køligt, tørt sted væk fra direkte sollys og ekstreme temperaturer.
- Keep the dock away from liquids and excessive dust.
Fejlfinding
Drev ikke fundet
- Tjek strøm: Ensure the dock is powered on and the power adapter is securely connected.
- Tjek USB-forbindelse: Verify the USB cable is firmly connected to both the dock and your computer. Try a different USB port or cable.
- Re-insert Drive: Remove and re-insert the hard drive(s) to ensure they are properly seated in the bays.
- Drevsundhed: Test the hard drive in another enclosure or directly connected to a computer (if possible) to rule out drive failure.
- Diskhåndtering (Windows) / Diskværktøj (macOS): Check if the drive appears in your operating system's disk management tools. New drives may need to be initialized and formatted.
Langsomme dataoverførselshastigheder
- USB 3.0-port: Ensure the dock is connected to a USB 3.0 port on your computer. Connecting to a USB 2.0 port will result in USB 2.0 speeds.
- USB 3.0-kabel: Use the provided USB 3.0 cable or another certified USB 3.0 cable.
- Kørehastighed: The actual transfer speed is limited by the slowest component, which is often the hard drive itself. Older HDDs will be slower than modern SSDs.
- Systembelastning: High CPU usage or other background processes can affect transfer speeds.
Docken tænder ikke
- Strømadapter: Ensure the power adapter is correctly connected to both the dock and a working wall outlet.
- Power knap: Tryk hårdt på tænd/sluk-knappen.
- Testudtag: Try plugging the power adapter into a different electrical outlet.
Specifikationer
| Modelnummer | NST-D428S3-BK |
| Mærke | Vantec |
| Hardware-interface | USB 3.0 |
| Kompatible drev | 2.5" / 3.5" SATA I/II/III HDD/SSD |
| Antal Drive Bays | 2 |
| Produktmål (L x B x H) | 6" x 4.3" x 2.4" (15.24 cm x 10.92 cm x 6.1 cm) |
| Varens vægt | 1.3 pund (0.59 kg) |
| Strømindgang | AC Adapter (36W) |
| Operativsystemsupport | Windows 7 og nyere, Mac OS X 10.6 og nyere |
Garanti & Support
Garantioplysninger
Vantec products typically come with a limited warranty. Please refer to the warranty card included with your product or visit the official Vantec website for specific warranty terms and conditions applicable to the NexStar TX Dual Bay USB 3.0 Hard Drive Dock.
Teknisk support
If you encounter any issues not covered in this manual or require further assistance, please contact Vantec Technical Support:
- Webwebsted: Visit the Vantec USA webwebsted for supportressourcer, ofte stillede spørgsmål og kontaktoplysninger.
- E-mail/Telefon: Refer to the Vantec website for the most current email and phone support options.
When contacting support, please have your product model number (NST-D428S3-BK) and a detailed description of your issue ready.