
1. Introduktion
This manual provides detailed instructions for the safe installation, operation, and maintenance of your Progress Lighting Lucky Collection 4-Light Vanity, model P2182-15DI. Please read all instructions carefully before beginning installation and retain this manual for future reference.

Figur 1: Forside view of the Progress Lighting Lucky Collection 4-Light Vanity (Model P2182-15DI).
2. Vigtige sikkerhedsoplysninger
ADVARSEL: Risiko for elektrisk stød. Afbryd strømmen til sikringsboksen eller afbryderen før installation eller service. Kontakt en kvalificeret elektriker, hvis du er usikker på installationsprocessen.
- Læs alle instruktioner omhyggeligt før installation.
- Al ledningsføring skal være i overensstemmelse med nationale og lokale el-forskrifter.
- Sørg for, at monteringsfladen kan bære armaturets vægt.
- Tilslut ikke denne armatur til et ujordet elektrisk system.
- Brug kun den specificerede pæretype og wattage.
- Forsøg ikke at ændre armaturet på nogen måde.
- Hold brandfarlige materialer væk fra lysarmaturet, når det er i brug.
3. Pakkens indhold
Carefully unpack the fixture and check that all parts are present. If any parts are missing or damaged, do not attempt to assemble or install the fixture. Contact customer service for assistance.
- Vanity Light Fixture (1)
- Glass Shades (4)
- Mounting Hardware Kit (includes mounting strap, outlet box screws, wire nuts)
- Installationsvejledning (denne vejledning)
Note: Bulbs are not included and must be purchased separately.
4. Opsætning og installation
4.1 Nødvendigt værktøj (medfølger ikke)
- Phillips hovedskruetrækker
- Flad skruetrækker
- Trådstrippere
- Elektrisk tape
- Sikkerhedsbriller
- Stige
4.2 Forinstallation
- Sluk for strømmen: Locate the circuit breaker or fuse box and turn off the power to the electrical outlet box where the fixture will be installed.
- Forbered monteringsfladen: Ensure the electrical outlet box is securely mounted and capable of supporting the fixture's weight.
- Pakker ud: Fjern forsigtigt alt indhold fra kartonen.
4.3 Montering af armaturet
- Attach the mounting strap to the outlet box using the provided outlet box screws. Ensure the strap is oriented correctly for the fixture.
- Pull the electrical wires from the outlet box through the center hole of the mounting strap.

Figur 2: Eksample of the vanity light fixture installed above a mirror.
4.4 Ledningsforbindelser
Follow these steps to make the electrical connections. If you are unfamiliar with electrical wiring, consult a qualified electrician.
- Tilslut grøn or bart kobber jordledningen fra armaturet til grøn or bart kobber ground wire from the outlet box using a wire nut. If the outlet box does not have a ground wire, attach the fixture's ground wire to the green grounding screw on the mounting strap.
- Tilslut hvid ledningen fra armaturet til hvid (neutral) wire from the outlet box using a wire nut.
- Tilslut sort ledningen fra armaturet til sort (hot) wire from the outlet box using a wire nut.
- Stik forsigtigt alle ledninger ind i stikdåsen.
4.5 Securing the Fixture and Installing Shades/Bulbs
- Align the fixture's backplate with the mounting strap and secure it with the provided screws.
- Carefully place each glass shade over the socket and secure it with the retaining ring (if applicable).
- Screw the recommended bulbs (E26 base, max 100W incandescent or equivalent LED) into the sockets. Do not overtighten.
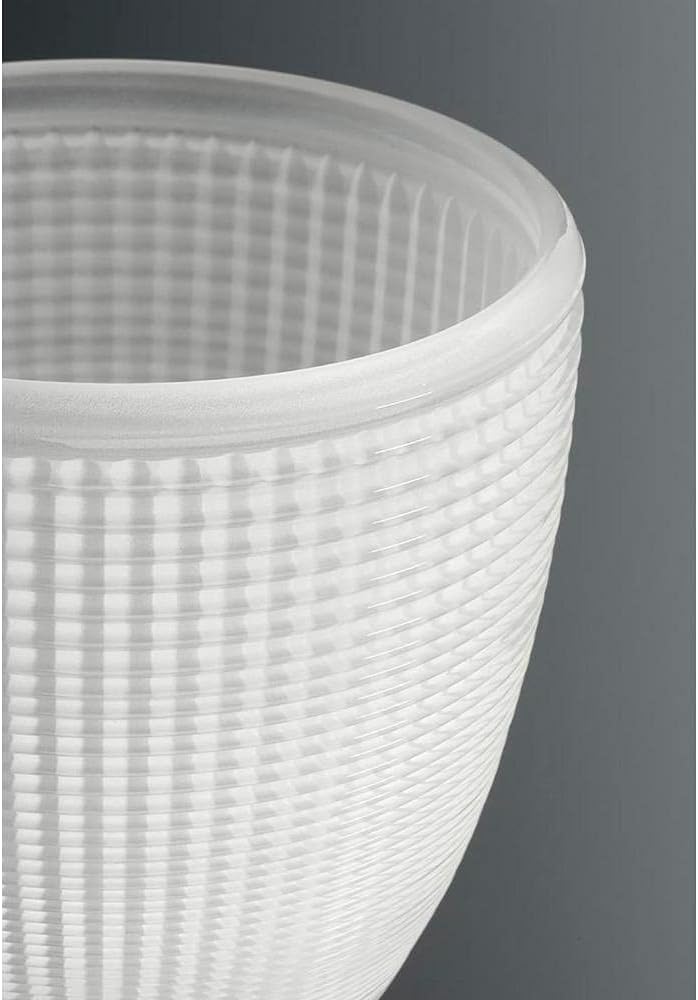
Figure 3: Detail of the textured glass shade.
- Gendan strømmen til afbryderen eller sikringsboksen.
- Test armaturet for at sikre korrekt drift.
5. Betjeningsvejledning
The Progress Lighting Lucky Collection 4-Light Vanity is operated by a standard wall switch connected to the electrical circuit. Ensure the wall switch is in the "ON" position for the fixture to receive power.
- Tænd/sluk: Brug vægkontakten til at tænde eller slukke lysarmaturet.
- Pære type: This fixture is designed for E26 base bulbs, with a maximum wattage of 100 watts per socket for incandescent bulbs. For energy efficiency, consider using equivalent LED bulbs.
- Kontrolmetode: The product specifications mention "Remote" as a control method. If your installation includes a compatible remote control system (purchased separately), refer to its specific instructions for operation. Otherwise, control is via a standard wall switch.
6. Vedligeholdelse
6.1 Rengøring
- ADVARSEL: Afbryd altid strømmen før rengøring.
- For at rengøre armaturet skal du tørre det af med en blød kludamp klæde.
- Brug ikke slibende rengøringsmidler, opløsningsmidler eller polermidler, da de kan beskadige finishen.
- For glass shades, remove them carefully and wash with mild soap and water, then rinse and dry thoroughly before reattaching.
6.2 Udskiftning af pære
- ADVARSEL: Allow bulbs to cool completely before replacing.
- Sluk for strømmen til armaturet ved afbryderen.
- Skru forsigtigt den gamle pære ud af fatningen.
- Screw in a new E26 base bulb, ensuring it does not exceed 100 watts for incandescent bulbs.
- Gendan strømmen og test armaturet.
7. Fejlfinding
| Problem | Mulig årsag | Løsning |
|---|---|---|
| Armaturet lyser ikke |
|
|
| Flimrende lys |
|
|
| Armatur brummer |
|
|
8. Specifikationer
| Feature | Detalje |
|---|---|
| Modelnummer | P2182-15DI |
| Mærke | Fremskridtsbelysning |
| Armaturtype | Vanity Light |
| Materiale | Glass, Metal (Polished Finish) |
| Farve | Silver (Fixture), Clear (Shades) |
| Antal lys | 4 |
| Pære base | E26 (medium) |
| Max Wattage pr. pære | 100 watt (glødepære) |
| Voltage | 120 volt |
| Indendørs/Udendørs brug | Indendørs |
| Værelsestype | Badeværelse |
| Kontrolmetode | Remote (if compatible system installed), Wall Switch |
| Påkrævet samling | Minor assembly required (shades, bulbs, mounting) |
9. Garanti og support
Progress Lighting products are manufactured to high standards and are backed by a limited warranty. For specific warranty details, please refer to the warranty card included with your purchase or visit the official Progress Lighting website. For technical support or replacement parts, please contact Progress Lighting customer service.
Kontaktoplysninger: Please refer to the packaging or the official Progress Lighting webhjemmeside for de mest aktuelle kontaktoplysninger til kundeservice.


