
1. Introduktion
The GeoVision GV-VS2400 is a compact and powerful 4-channel H.264 Video Server designed for converting analog video signals into high-resolution digital images. This device supports TVI 1080p/720p and analog 960H/D1 real-time video inputs, making it an integral part of a comprehensive IP surveillance solution when integrated with GV-System (GV-DVR/NVR) or GV-VMS.
Key features include support for over 50 PTZ camera models, local video recording to USB storage, and a Tampering Alarm system to enhance security. The GV-VS2400 is suitable for various surveillance applications requiring reliable video digitization and management.
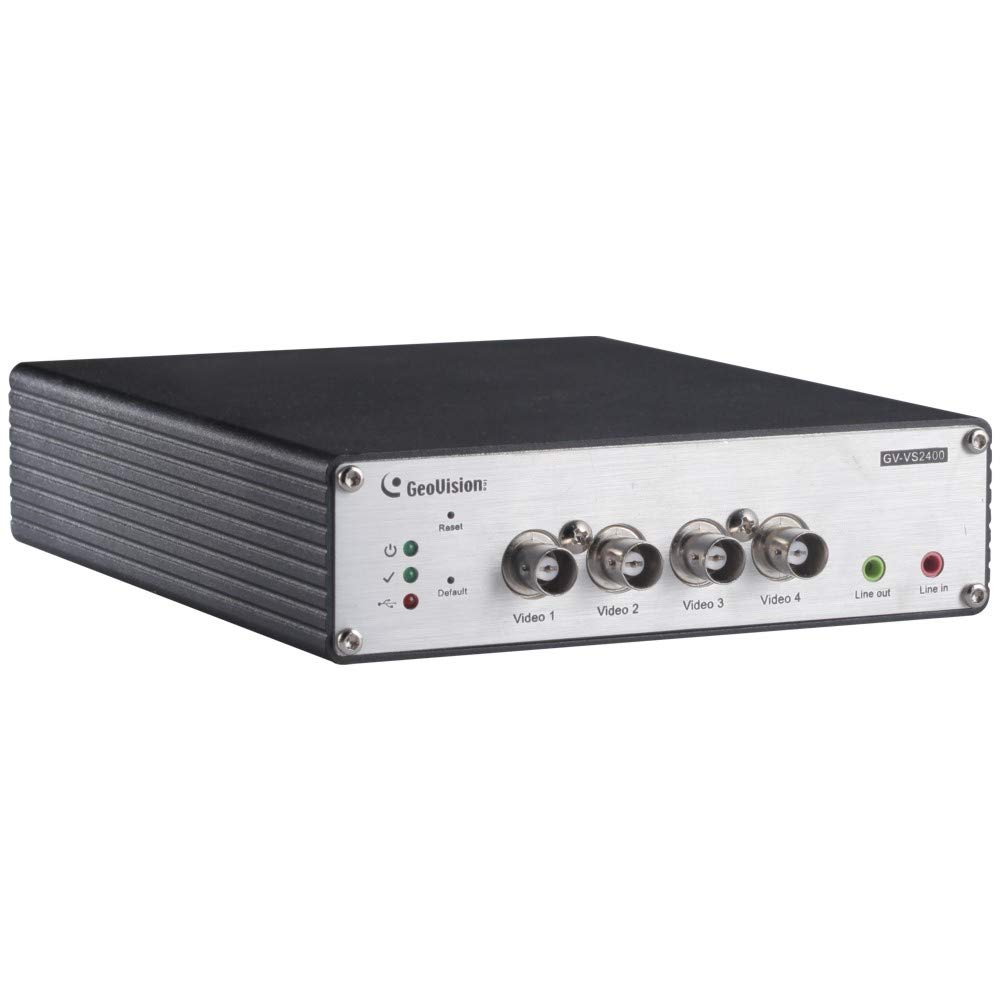
Figur 1: Forside view of the GeoVision GV-VS2400 Video Server, showing its compact design and ports.
2. Opsætning
2.1 Pakkens indhold
Før installationen påbegyndes, skal du kontrollere, at alle dele er til stede i pakken:
- GV-VS2400 Video Server Unit
- Strømadapter (12V DC)
- Hurtig startvejledning
- Software CD (GV-System/GV-VMS)
- Monteringssæt (hvis relevant)
2.2 Hardwareinstallation
- Tilslut kameraer: Connect up to four TVI 1080p/720p or analog 960H/D1 cameras to the video input ports on the GV-VS2400. Ensure secure connections.
- Netværks forbindelse: Connect the GV-VS2400 to your network using an Ethernet cable. Alternatively, configure Wi-Fi or 3G/4G connectivity as required.
- USB Storage (Optional): For local recording, connect a compatible USB HDD to the USB port on the GV-VS2400.
- Strømtilslutning: Connect the 12V DC power adapter to the GV-VS2400 and then plug it into a power outlet. The device will power on automatically.
Figur 2: Bagside view of the GV-VS2400, illustrating video input, network, and power connections.
2.3 Indledende konfiguration
After hardware installation, access the device's web grænseflade til indledende konfiguration:
- Opdag enhed: Use the GeoVision IP Device Utility software (available on the provided CD or GeoVision website) to discover the GV-VS2400 on your network.
- Adgang Web Interface: Åbn a web browser and enter the IP address of the GV-VS2400. Log in using the default credentials (refer to the Quick Start Guide for details).
- Netværksindstillinger: Configure network settings, including IP address, subnet mask, and gateway, to match your network environment.
- Video Indstillinger: Adjust video input settings for each connected camera, including resolution, frame rate, and compression (H.264).
- PTZ kontrol: If using PTZ cameras, configure the appropriate PTZ protocol and settings.
- Lagerkonfiguration: Format and configure the connected USB HDD for video recording.
3. Operating the GV-VS2400
3.1 Live View og optagelse
The GV-VS2400 can be monitored and managed through its web interface or integrated with GeoVision's GV-System/GV-VMS software.
- Levende View: Access the live video streams from connected cameras through the web interface or client software.
- Manuel optagelse: Initiate manual recording of video streams to the configured USB storage or network storage.
- Planlagt optagelse: Opsæt optagelsesplaner baseret på tid eller begivenheder (f.eks. bevægelsesdetektion).
3.2 Tampalarm
Den Tampering Alarm feature detects attempts to obstruct or disable cameras.
- Aktiver TampDetektion af ering: I den web interface, navigate to the camera settings and enable the Tampering Alarm for desired channels.
- Konfigurér handlinger: Specify actions to be taken when a tampering event is detected, such as sending notifications, triggering recording, or activating an alarm output.
3.3 Mobile Access
The GV-VS2400 supports remote access via mobile devices using GeoVision's mobile applications.
- Download app: Download the appropriate GeoVision mobile app from your device's app store.
- Tilføj enhed: Add the GV-VS2400 to the app using its IP address or QR code.
- View Live Feeds: Access live video feeds and manage basic settings remotely.
4. Vedligeholdelse
4.1 firmwareopdateringer
Tjek regelmæssigt for og installer firmwareopdateringer for at sikre optimal ydeevne og sikkerhed.
- Visit the official GeoVision webwebsted for de seneste firmwareversioner.
- Follow the provided instructions for firmware update procedures.
4.2 Systembackup og -gendannelse
It is recommended to regularly back up your system configurations.
- Brug web interface to export configuration files.
- Store backup files in a secure location.
4.3 Rengøring
Keep the device clean to prevent dust accumulation and ensure proper ventilation.
- Brug en blød, tør klud til at rengøre ydersiden af enheden.
- Brug ikke flydende rengøringsmidler eller slibende materialer.
5. Fejlfinding
| Problem | Mulig årsag | Løsning |
|---|---|---|
| Intet videosignal |
|
|
| Kan ikke få adgang web interface |
|
|
| Optagelse virker ikke |
|
|
6. Specifikationer
| Feature | Beskrivelse |
|---|---|
| Model | GV-VS2400 |
| Video input | 4-channel TVI 1080p / 720p, Analog 960H / D1 |
| Videokomprimering | H.264 |
| Max opløsning | Up to 2 Megapixels (digitized) |
| Forbindelse | Ethernet, Wi-Fi, USB, UMTS / 3G / 3.5G / 4G |
| Opbevaring | USB HDD (for local recording) |
| PTZ support | Supports over 50 PTZ models |
| Strømindgang | 12V DC |
| Særlige funktioner | Tampering Alarm, Automatic switch between WiFi and 3G, Multi-language web interface (29 languages) |
7. Garanti og support
7.1 Produktgaranti
GeoVision products typically come with a limited warranty. Please refer to the warranty card included with your product or visit the official GeoVision website for detailed warranty terms and conditions specific to the GV-VS2400. Keep your proof of purchase for warranty claims.
7.2 Teknisk support
For technical assistance, product inquiries, or troubleshooting beyond this manual, please contact GeoVision technical support:
- Webwebsted: Visit the official GeoVision webwebsted for supportressourcer, ofte stillede spørgsmål og driverdownloads.
- Kontaktoplysninger: Refer to the GeoVision website for regional contact numbers and email addresses for technical support.
- Online ressourcer: Explore GeoVision's online knowledge base and forums for community support and additional information.