1. Introduktion
This manual provides essential information for the safe and efficient operation, installation, and maintenance of your Daitsu ADDH10 Digital Dehumidifier. Please read these instructions thoroughly before using the appliance and retain them for future reference.
The Daitsu ADDH10 is designed to reduce humidity levels in indoor environments, helping to prevent mold, mildew, and other moisture-related issues. It features a digital display and automatic functions for user convenience.
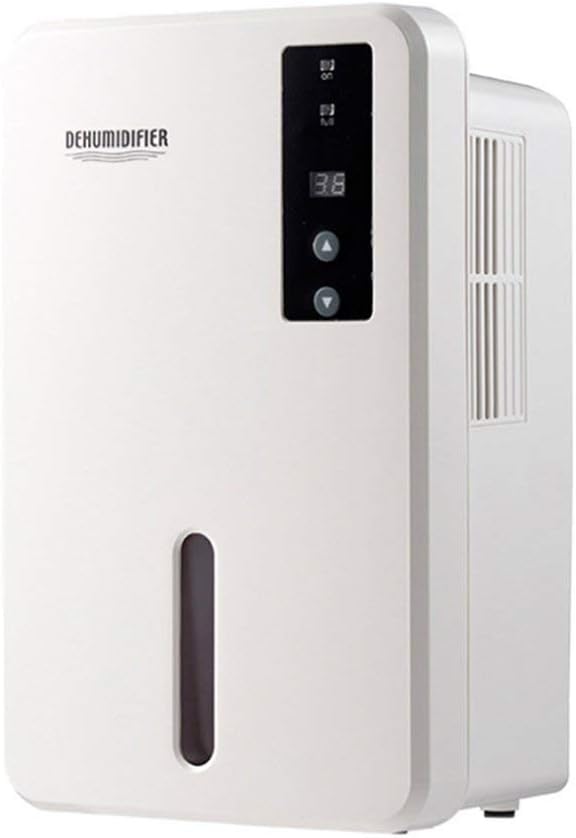
Billede 1.1: Forside view of the Daitsu ADDH10 Digital Dehumidifier, showing the control panel and water tank window.
2. Sikkerhedsoplysninger
Følg altid grundlæggende sikkerhedsforanstaltninger, når du bruger elektriske apparater, for at mindske risikoen for brand, elektrisk stød og personskade.
- Læs alle instruktioner, før du bruger affugteren.
- Sørg for, at strømforsyningen matcher voltage angivet på mærkatet.
- Brug ikke affugteren med en beskadiget ledning eller stik.
- Hold apparatet væk fra varmekilder, direkte sollys og brandfarlige materialer.
- Do not block the air inlet or outlet. Ensure adequate air circulation around the unit.
- Placer altid affugteren på en stabil, plan overflade.
- Tag stikket ud af enheden før rengøring, vedligeholdelse eller når den ikke er i brug i længere perioder.
- Dette apparat er ikke beregnet til brug af personer (inklusive børn) med nedsatte fysiske, sensoriske eller mentale evner, eller mangel på erfaring og viden, medmindre de har fået opsyn eller instruktion i brugen af apparatet af en person, der er ansvarlig for deres sikkerhed.

Image 2.1: Illustration of the dehumidifier's double security protection, including automatic shut-off when the water tank is full and over-temperature protection (auto-stop if heat sink exceeds 80°C).
3. Produktkomponenter og funktioner
Gør dig bekendt med hoveddelene i din affugter:
- Kontrolpanel: Digitalt display og knapper til betjening.
- Luftindtag: Hvor fugtig luft suges ind i enheden.
- Luftudtag: Hvor tør luft udstødes.
- Vandtank: Collects condensed water. Features a transparent window to monitor water level.
- Water Tank Handle/Lid: For easy removal and emptying.

Image 3.1: Diagram showing the key components: Air outlet, Control panel, Air inlet, and the 1.5L water tank capacity.
The dehumidifier has a 1.5-liter water tank capacity and features automatic shut-off when the tank is full, indicated by a float sensor. It also includes over-temperature protection.
4. Opsætning og installation
4.1 Udpakning
- Tag forsigtigt affugteren ud af emballagen.
- Fjern alle emballagematerialer, tape og beskyttelsesfilm.
- Inspect the unit for any signs of damage. If damaged, do not operate and contact your retailer.
4.2 Placering
- Placer affugteren på en fast, plan overflade, der kan bære dens vægt, når vandtanken er fuld.
- Ensure there is at least 20 cm (8 inches) of space around the air inlet and outlet for proper air circulation.
- Avoid placing the unit near walls, furniture, or curtains that could obstruct airflow.
- Do not place the unit in direct sunlight or near heat-generating appliances.
- For optimal performance, operate the dehumidifier in an enclosed area. Close all doors and windows in the room.
4.3 Strømtilslutning
- Ensure your hands are dry before plugging in the unit.
- Sæt netledningen i en korrekt jordet stikkontakt.
5. Betjeningsvejledning
5.1 Kontrolpanel overview
The control panel features a digital display and control buttons:
- Digital skærm: Shows current humidity level or settings.
- Power knap: Tænder eller slukker for enheden.
- Op/Ned knapper: Adjust desired humidity level or other settings.

Image 5.1: Various angles of the dehumidifier, highlighting the digital control panel with up/down buttons and the transparent water tank.
5.2 Grundlæggende betjening
- Tænd: Press the Power button to turn on the dehumidifier. The digital display will light up, showing the current room humidity.
- Indstil ønsket luftfugtighed: Use the Up and Down buttons to set your desired humidity level. The unit will operate until the room humidity reaches the set level, then cycle on and off to maintain it.
- Sluk: Press the Power button again to turn off the dehumidifier.
5.3 Tømning af vandtanken
When the water tank is full, the dehumidifier will automatically stop operating, and an indicator light (if available) may illuminate. The unit will not resume operation until the tank is emptied and reinserted correctly.
- Træk forsigtigt vandtanken ud fra enhedens forside.
- Bær forsigtigt tanken til en vask eller et afløb.
- Remove the tank lid (if applicable) and pour out the collected water.
- Replace the lid securely and slide the empty water tank back into the dehumidifier until it clicks into place.
- The unit will resume operation automatically if the power is on and the desired humidity level has not been reached.

Image 5.2: The transparent water tank, designed for easy removal and emptying.
6. Vedligeholdelse
Regelmæssig vedligeholdelse sikrer optimal ydeevne og forlænger levetiden for din affugter. Tag altid stikket ud af enheden, før du udfører nogen form for vedligeholdelse.
6.1 Rengøring af vandtanken
- Clean the water tank regularly (e.g., every few weeks) to prevent mold and bacteria growth.
- Fjern vandtanken som beskrevet i afsnit 5.3.
- Wash the tank with mild detergent and warm water. Rinse thoroughly.
- Tør tanken helt, før du sætter den tilbage i enheden.
6.2 Rengøring af ydersiden
- Tør ydersiden af affugteren af med en blød, damp klæde.
- Brug ikke slibende rengøringsmidler, opløsningsmidler eller stærke kemikalier, da disse kan beskadige overfladen.
- Sørg for, at der ikke trænger vand ind i de indvendige komponenter.
6.3 Opbevaring
- Hvis affugteren opbevares i en længere periode, skal du sørge for, at vandtanken er tom og ren.
- Rengør ydersiden af enheden.
- Opbevar enheden i oprejst position på et køligt, tørt sted, væk fra direkte sollys og ekstreme temperaturer.
7. Fejlfinding
Før du kontakter kundesupport, bedes du læse følgende fejlfindingsvejledning for almindelige problemer:
| Problem | Mulig årsag | Løsning |
|---|---|---|
| Affugteren tænder ikke. | Ingen strømforsyning. Netledningen er ikke sat ordentligt i. |
Tjek om stikkontakten virker. Sørg for, at netledningen er korrekt tilsluttet enheden og stikkontakten. |
| Enheden kører, men opsamler ikke vand. | Rummets luftfugtighed er allerede lav. Temperaturen er for lav. Luftstrømmen er blokeret. |
Check the current humidity level on the display. If it's below your set point, the unit will not collect water. Affugtere er mindre effektive i meget kolde miljøer. Sørg for, at luftindtag og -udløb ikke er blokeret. |
| Unit stops operating and indicator light is on. | Vandbeholderen er fuld. Vandtanken er ikke korrekt isat. |
Tøm vandbeholderen. Reinsert the water tank correctly until it clicks into place. |
| Usædvanlig støj under drift. | Enheden står ikke på en plan overflade. Problem med intern komponent. |
Sørg for, at enheden er placeret på en stabil, plan overflade. Hvis støjen fortsætter, skal du stoppe med at bruge den og kontakte kundesupport. |
8. Specifikationer
| Feature | Specifikation |
|---|---|
| Mærke | Daitsu |
| Modelnummer | ADDH10 (Technical Model: bb_S0403263) |
| Farve | Hvid |
| Varens vægt | 10 kilo |
| Produktmål (ca.) | 286 mm (højde) x 180 mm (bredde) x 134 mm (dybde) |
| Vandtankkapacitet | 1.5 liter |
| Driftstilstand | Automatisk |
| Inkluderede komponenter | Affugter |

Image 8.1: Diagram illustrating the dimensions of the dehumidifier: 286mm height, 180mm width, and 134mm depth.
9. Garanti og support
For warranty information, please refer to the documentation included with your product packaging or visit the official Daitsu webGarantibetingelserne kan variere afhængigt af region og forhandler.
If you encounter issues not covered in the troubleshooting section or require further assistance, please contact your retailer or the manufacturer's customer support. Have your model number (ADDH10) and purchase details ready when contacting support.