
1. Introduktion
This manual provides detailed instructions for the installation, operation, and maintenance of your Planet Audio PNV9650 in-dash navigation touchscreen DVD receiver. Please read this manual thoroughly before using the product to ensure proper operation and to prevent damage.
The PNV9650 is a versatile car entertainment system featuring a 6.5-inch touchscreen, built-in navigation, Bluetooth connectivity for hands-free calling and audio streaming, DVD/CD playback, USB/SD media support, and AM/FM radio.
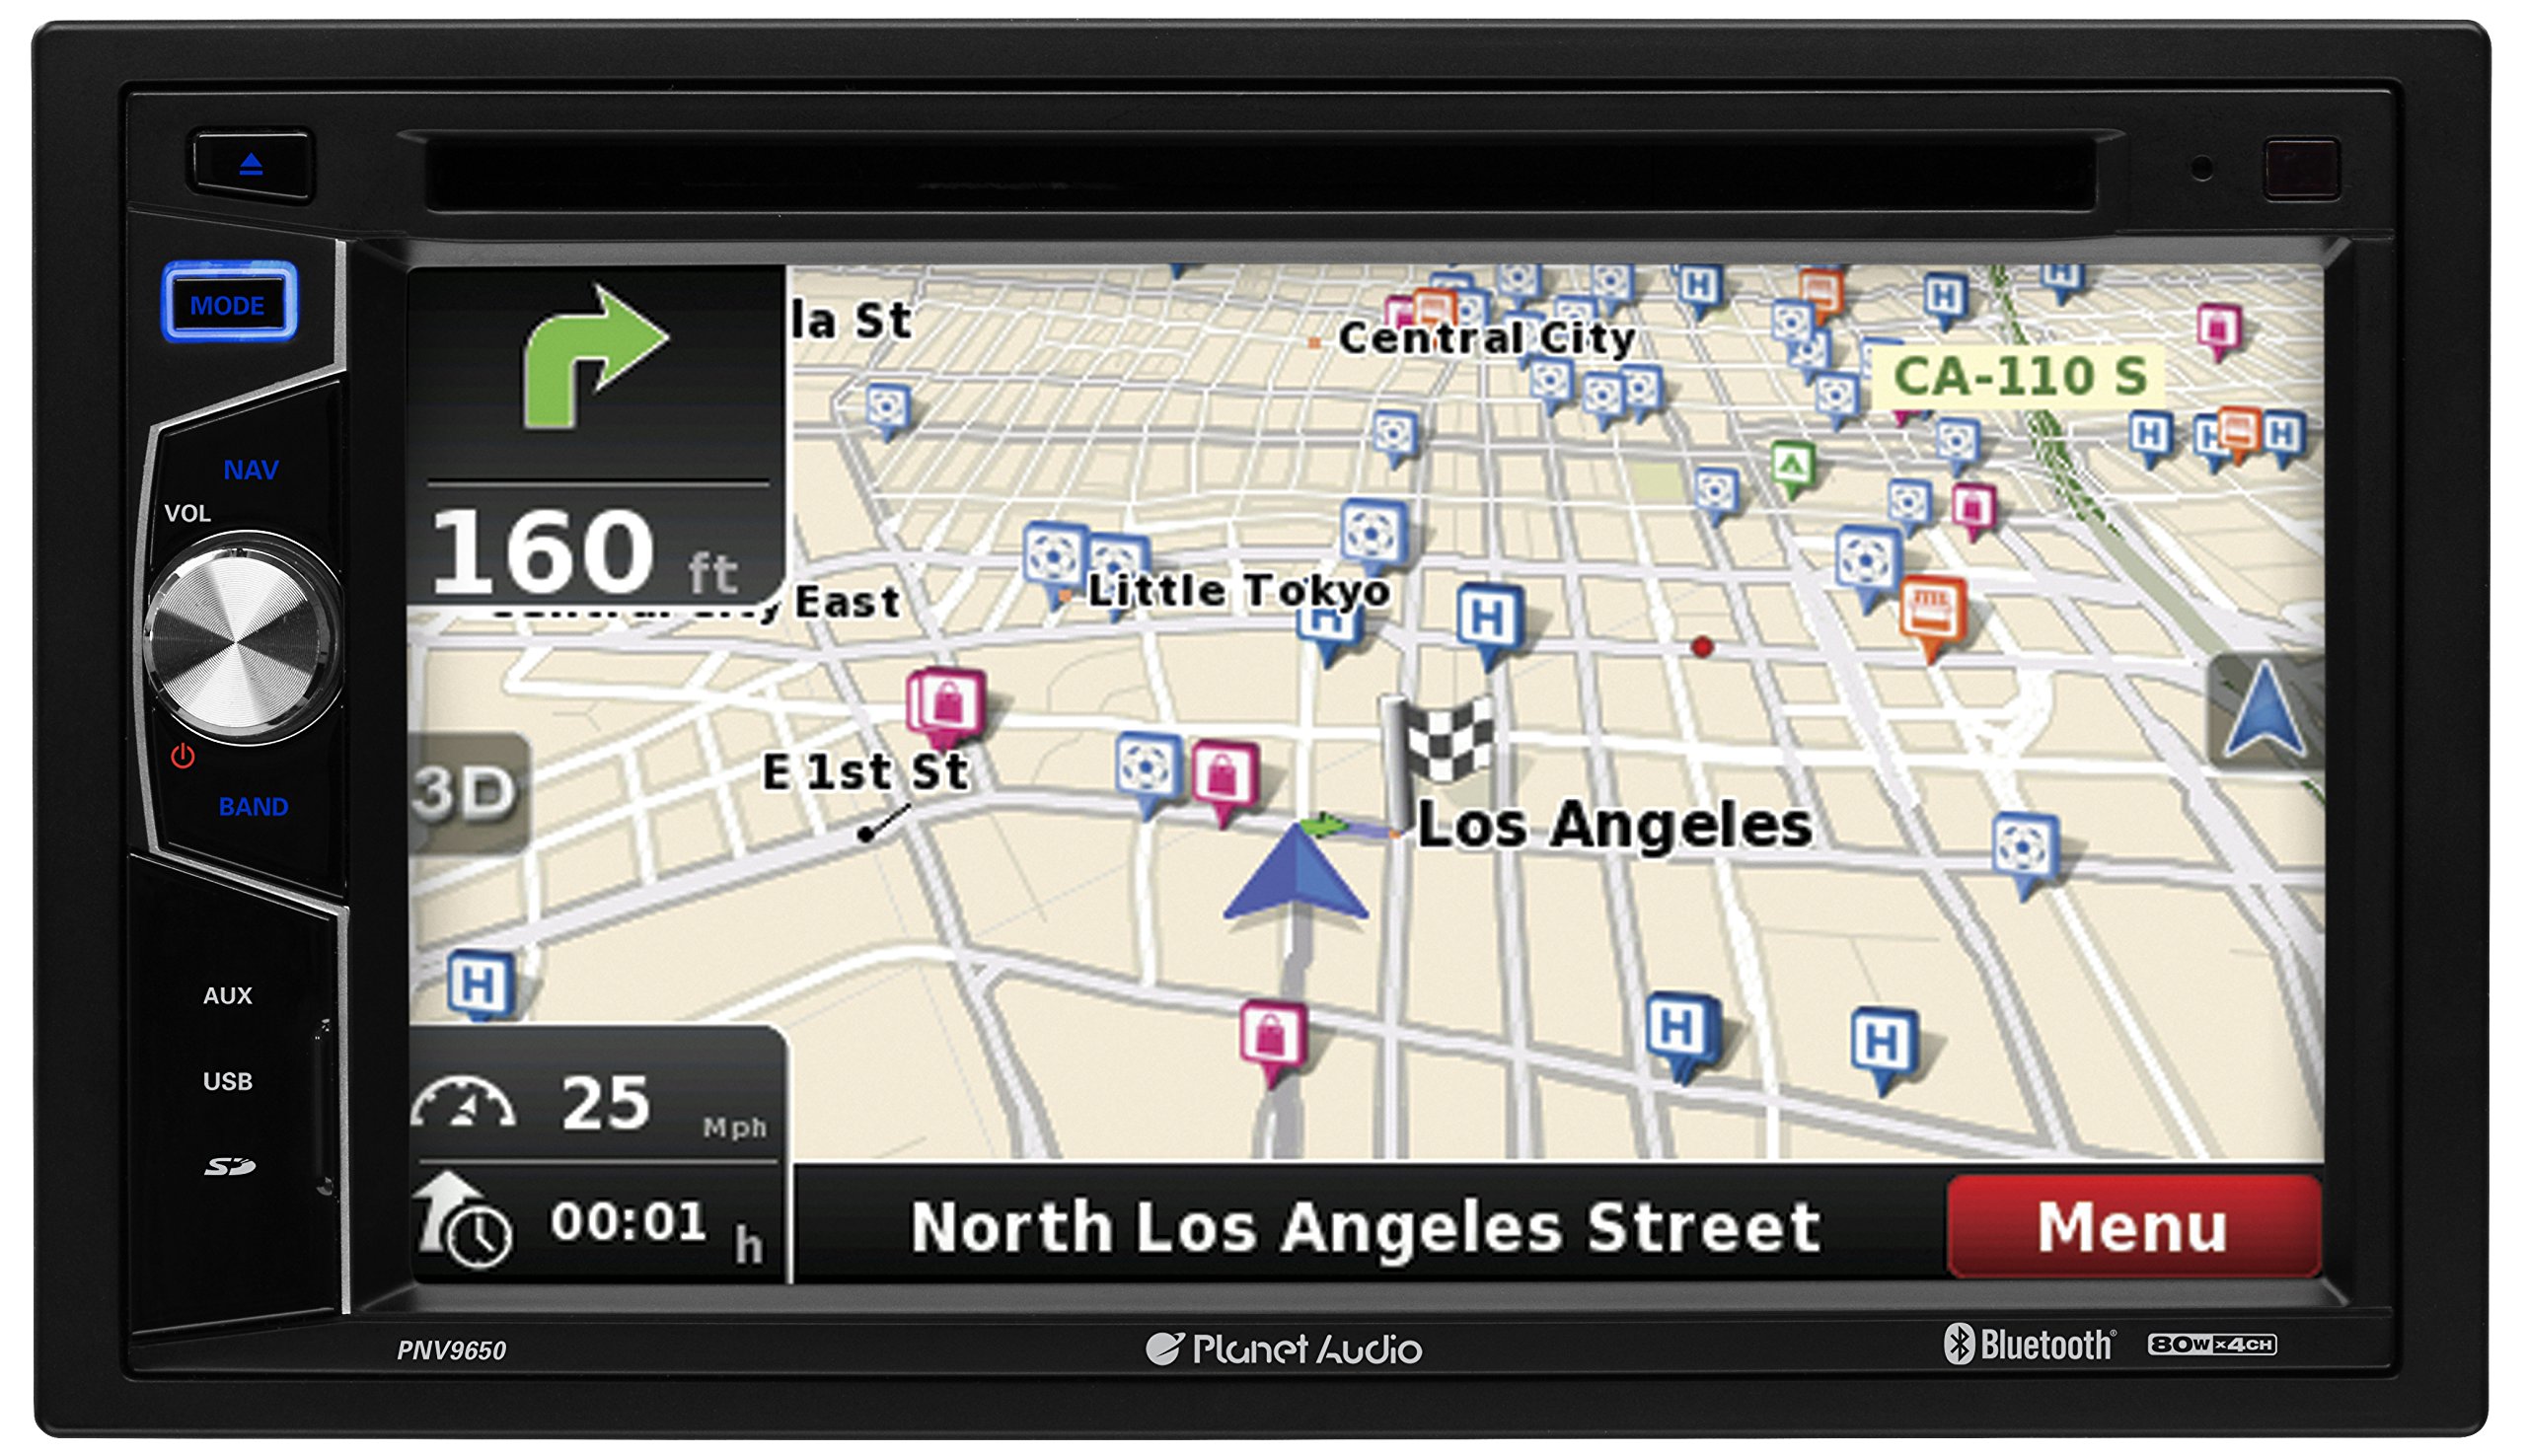
Figure 1.1: Planet Audio PNV9650 Main Unit
Dette billede viser forsiden view of the Planet Audio PNV9650 in-dash receiver, showcasing its 6.5-inch touchscreen display, control knobs, and media slots. The screen shows a navigation map interface.
2. Opsætning og installation
2.1 Udpakning og indhold
Carefully unpack the unit and verify that all items are present. The package should include:
- PNV9650 Main Unit
- Ledningsnet
- GPS antenne
- Fjernbetjening
- Monteringshardware
- Brugervejledning (dette dokument)

Figur 2.1: Medfølgende tilbehør
This image shows the various components included with the PNV9650 unit, such as the GPS antenna, wiring harness, mounting brackets, screws, and a stylus.
2.2 Retningslinjer for installation
The PNV9650 is a double-DIN unit designed for in-dash installation. Professional installation is highly recommended to ensure correct wiring and functionality. Incorrect installation can lead to damage to the unit or vehicle electrical system.
- Sørg for, at køretøjets batteri er frakoblet, før installationen påbegyndes.
- Mount the unit securely in the dashboard opening.
- Connect all wiring according to the wiring diagram provided in this section.
- Sørg for korrekt jordforbindelse til køretøjets chassis.
2.3 Ledningsdiagram
Refer to the following image for the wiring connections. Each wire is labeled for its specific function.

Figure 2.2: Rear Panel Wiring
This image displays the rear panel of the PNV9650 unit, showing the various input and output ports, including the main wiring harness connector, RCA audio/video jacks, and the GPS antenna input. Each wire in the harness is color-coded and labeled for specific functions like power, ground, speaker outputs, and accessory connections.
Nøgleforbindelser:
- Strøm (Gul): Constant 12V+
- Tilbehør (rød): Switched 12V+ (Ignition)
- Jord (sort): Connect to vehicle chassis
- Højttalerkabler: Connect to corresponding vehicle speakers (e.g., White/White-Black for Front Left, Gray/Gray-Black for Front Right, Green/Green-Black for Rear Left, Purple/Purple-Black for Rear Right).
- Indgang for bagkamera: Connect to a compatible rear-view kamera.
- GPS-antenne: Tilslut den medfølgende GPS-antenne, og monter den på et sted med en fri view af himlen.
- Ratbetjening (SWC): Connect to a compatible steering wheel control interface (sold separately).
2.4 Indledende tænding
After installation, reconnect the vehicle battery. Press the power button on the unit or remote control to turn on the device. Follow any on-screen prompts for initial setup, such as language selection or time zone settings.
3. Betjeningsvejledning
3.1 Grundlæggende kontroller
The PNV9650 can be controlled via the touchscreen, front panel buttons, or the included wireless remote control.

Figur 3.1: Trådløs fjernbetjening
This image displays the wireless remote control for the PNV9650 unit. It features buttons for power, mute, volume control, mode selection, navigation, audio settings, track/chapter skipping, and a numeric keypad for direct input.
- Power knap: Tryk for at tænde/slukke enheden.
- Volume Knob/Buttons: Juster lydudgangsniveauet.
- Mode knap: Cycle through available sources (Radio, DVD, USB, SD, Bluetooth, AUX, Navigation).
- Menu-knap: Adgang til hovedmenuen eller indstillingerne.
- EQ knap: Få adgang til equalizer-indstillinger.
3.2 Bluetooth-betjening
The PNV9650 supports Bluetooth for hands-free calling and audio streaming.
- Parring:
- Go to the Bluetooth menu on the PNV9650.
- Aktiver Bluetooth på din mobilenhed, og søg efter tilgængelige enheder.
- Select "PNV9650" from the list. Enter the PIN (usually "0000") if prompted.
- Once paired, the unit will display a confirmation.
- Håndfri opkald:
- Use the touchscreen or remote to dial numbers, answer, or end calls.
- Your phonebook may sync automatically after pairing.
- Lydstreaming (A2DP):
- Vælg Bluetooth-lyd som kilde.
- Play music from your paired device. You can control playback (play/pause, skip tracks) from the PNV9650.
3.3 Navigationssystem
The PNV9650 features built-in navigation with map coverage of all 50 states and pre-loaded points of interest.

Figur 3.2: Navigationsgrænseflade
This image shows the PNV9650's display screen featuring its integrated navigation system. A detailed map is visible, indicating current location, route, and points of interest. Speed and estimated time of arrival are also displayed.
- Adgang til navigation: Press the NAV button on the front panel or select Navigation from the main menu.
- Indtastning af destinationer: Use the touchscreen keyboard to input addresses, search for points of interest, or select from recent destinations.
- Rutevejledning: The system provides turn-by-turn voice prompts (Text-to-Speech) and visual guidance.
- Kortopdateringer: Map data may require periodic updates. Refer to the manufacturer's website for information on obtaining map updates.
3.4 DVD/CD-afspilning
Insert a DVD or CD into the disc slot. The unit will automatically switch to DVD/CD mode and begin playback. Use the on-screen controls or remote for playback functions (play, pause, skip, stop).
3.5 USB/SD Media Playback
Insert a USB drive into the USB port or an SD card into the SD card slot. The unit supports MP3 and WMA audio files. Select USB or SD as the source to browse and play media files.
3.6 AM/FM-radio
Select Radio as the source. Use the touchscreen or tuning buttons to scan for stations. You can save your favorite stations as presets for quick access.
4. Vedligeholdelse
4.1 Rengøring af enheden
- Brug en blød, tør klud til at rengøre enhedens yderside.
- For the touchscreen, use a soft, lint-free cloth slightly damprengøres med vand eller en skærmrengøringsopløsning. Brug ikke slibende rengøringsmidler eller opløsningsmidler.
- Undgå at sprøjte væsker direkte på enheden.
4.2 Generel pleje
- Hold enheden fri for støv og snavs.
- Undgå at udsætte enheden for ekstreme temperaturer eller direkte sollys i længere perioder.
- Sørg for korrekt ventilation omkring enheden for at forhindre overophedning.
5. Fejlfinding
If you encounter problems with your PNV9650, refer to the following common issues and solutions before contacting support.
| Problem | Mulig årsag | Løsning |
|---|---|---|
| Enheden tænder ikke. | Ingen strøm, sprunget sikring, forkert ledningsføring. | Check power connections (Yellow, Red, Black wires). Verify vehicle fuse and unit's inline fuse. Ensure proper grounding. |
| Ingen lyd eller forvrænget lyd. | Incorrect speaker wiring, volume too low, mute activated, EQ settings. | Check all speaker wire connections. Increase volume. Deactivate mute. Adjust EQ settings. |
| Bluetooth not connecting or dropping. | Device out of range, pairing issue, interference. | Ensure device is within range. Delete previous pairing and re-pair. Restart both devices. |
| Navigationen virker ikke eller er unøjagtig. | GPS-antenne ikke tilsluttet, dårligt satellitsignal, forældede kort. | Ensure GPS antenna is securely connected and mounted with a clear view of the sky. Check for map updates. |
| DVD/CD not playing. | Disc dirty or damaged, incorrect disc format, disc inserted incorrectly. | Clean the disc. Ensure disc is inserted correctly. Verify disc format is supported. |
| Fjernbetjening virker ikke. | Dead battery, obstruction, incorrect angle. | Replace remote battery. Ensure no obstruction between remote and unit. Point remote directly at the unit's IR sensor. |
6. Specifikationer
The following are key technical specifications for the Planet Audio PNV9650:
- Chassis størrelse: Dobbelt-DIN
- Skærmtype: TFT-berøringsskærm
- Maks. Udgangseffekt: 80 watt x 4 kanaler
- Preamp Voltage: 1 volt
- Medieafspilning: DVD, CD, USB, SD, MP3, WMA, AM/FM
- Bluetooth: Hands-Free Calling, Audio Streaming (A2DP)
- Navigation: Built-in with map coverage of all 50 states, Pre-Loaded Points of Interest, Text-to-Speech
- Indgange: USB/Video, USB Charging, SD, AUX, Rear Camera, Steering Wheel Control Interface (Interface Sold Separately)
- Udgange: Video, Front, Rear & Subwoofer Preamp Udgange
- Tuner: RDS Tuner, Switchable US & Europe Frequencies
- Equalizer: Balance/Fader/Bass/Treble and Preset built-in EQ
- Varens vægt: Cirka 1 pund
- Produktdimensioner: Approximately 1 x 1 x 1 inches (Note: Actual dimensions for double-DIN unit will vary, this is a general reference)
7. Garantioplysninger
The Planet Audio PNV9650 comes with a 3 Year Platinum Online Dealer Warranty. Please retain your proof of purchase for warranty claims. For specific terms and conditions, refer to the warranty card included with your product or visit the Planet Audio official webwebsted.
8. Support
For further assistance, technical support, or service inquiries regarding your Planet Audio PNV9650, please contact Planet Audio customer support. Contact information can typically be found on the official Planet Audio webwebstedet eller i den dokumentation, der følger med dit produkt.
When contacting support, please have your product model number (PNV9650) and proof of purchase readily available.