
1. Introduktion
This manual provides detailed instructions for installing, configuring, and maintaining your GIGABYTE GA-B150M-D3H Micro ATX motherboard. The GA-B150M-D3H is designed to support 6th Generation Intel Core Processors and features Dual Channel DDR4 memory, PCIe Gen3 x4 M.2 connector, SATA Express, and 8-channel HD audio with Audio Noise Guard.
Please read this manual thoroughly before beginning installation to ensure proper setup and operation.
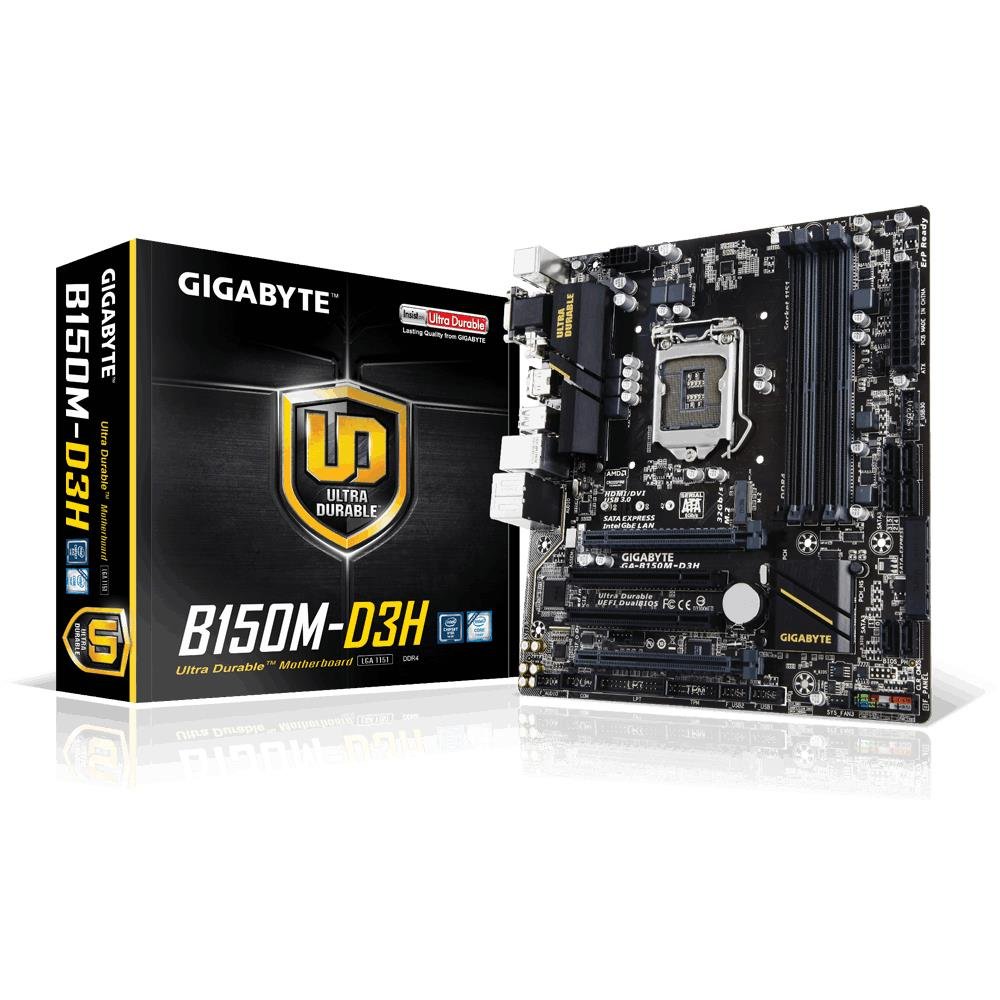
Image 1.1: GIGABYTE GA-B150M-D3H Micro ATX Motherboard. This image displays the overall layout of the motherboard, highlighting its compact Micro ATX form factor and various component slots.
2. Sikkerhedsoplysninger
Overhold følgende sikkerhedsforanstaltninger for at forhindre skader på bundkortet og personskade:
- Tag altid netledningen ud af stikkontakten, før du rører ved nogen af komponenterne.
- Bær en antistatisk håndledsrem, eller rør ofte ved en jordforbundet metalgenstand for at aflade statisk elektricitet.
- Hold bundkortet i kanterne for at undgå at berøre følsomme komponenter.
- Hold bundkortet væk fra fugt og ekstreme temperaturer.
- Sørg for tilstrækkelig ventilation i computerkabinettet for at forhindre overophedning.
3. Pakkens indhold
Bekræft at alle dele er til stede i din bundkortpakke:
- GIGABYTE GA-B150M-D3H Motherboard
- Brugermanual
- I / O-skjold
- SATA kabler
- Driver-cd/dvd
Note: Contents may vary slightly depending on region or revision.
4. Bundkortlayout
Familiarize yourself with the various components and connectors on the GA-B150M-D3H motherboard.
Image 4.1: GIGABYTE GA-B150M-D3H Motherboard Layout. This image provides a visual reference for the location of key components such as the CPU socket, DIMM slots, PCIe slots, SATA ports, and M.2 connector.
Nøglekomponenter:
- LGA 1151 CPU Socket: For 6th Generation Intel Core Processors.
- DDR4 DIMM Slots (4): Supports Dual Channel DDR4 memory up to 2133 MHz.
- PCIe-slots: Includes PCIe Gen3 x16 for graphics cards and PCIe x1 slots for expansion.
- M.2 Connector: Supports PCIe NVMe & SATA SSDs with up to 32Gb/s data transfer.
- SATA Express Connector: For up to 16Gb/s data transfer.
- SATA 6Gb/s porte: For connecting traditional SATA storage devices.
- 24-bens ATX-strømstik: Hovedstrømindgang.
- 8-Pin ATX 12V Power Connector: CPU power input.
- Frontpanelets overskrifter: For power button, reset button, LED indicators, and USB ports.
- Lydstik: 8-channel HD Audio with high quality capacitors and Audio Noise Guard.
5. Opsætning og installation
Følg disse trin for korrekt installation af dit bundkort og komponenter.
5.1. Installation af CPU'en
- Locate the LGA 1151 CPU socket.
- Åbn CPU-sokkelhåndtaget, og løft belastningspladen.
- Juster forsigtigt CPU'en med soklen, og sørg for, at den gyldne trekant på CPU'en matcher trekanten på soklen. Tving ikke CPU'en ind i soklen.
- Sænk lastpladen, og fastgør den med håndtaget.
5.2. Installation af CPU-køleren
Refer to your CPU cooler's instruction manual for specific installation steps. Ensure thermal paste is applied correctly between the CPU and cooler base.
5.3. Installation af hukommelse (RAM)
- Åbn klipsene i begge ender af DDR4 DIMM-pladserne.
- Juster hukommelsesmodulet med stikket, og sørg for, at hakket på modulet passer til nøglen i stikket.
- Tryk godt ned i begge ender af hukommelsesmodulet, indtil klipsene klikker på plads.
- For dual-channel performance, install memory modules in matching colored slots (e.g., DIMM1 and DIMM2).
5.4. Installing Expansion Cards
- Remove the metal bracket from the desired PCIe slot on your computer case.
- Align the expansion card with the PCIe slot and press down firmly until it is seated correctly.
- Fastgør kortet til computerkabinettet med en skrue.
5.5. Connecting Storage Devices
- SATA-enheder: Connect one end of the SATA data cable to a SATA 6Gb/s port on the motherboard and the other end to your hard drive or SSD. Connect the SATA power cable from your power supply to the device.
- M.2 SSD: Insert the M.2 SSD into the M.2 slot at an angle, then gently push it down and secure it with the provided screw.
- SATA Express: If using a SATA Express device, connect it to the designated SATA Express connector.
5.6. Tilslutning af frontpanelstik
Connect the cables from your computer case's front panel (power button, reset button, HDD LED, power LED, front USB, front audio) to the corresponding headers on the motherboard. Refer to the motherboard layout diagram for exact locations and pin assignments.
5.7. Tilslutning af strømforsyning
- Connect the 24-pin ATX main power connector from your power supply to the 24-pin power socket on the motherboard.
- Connect the 8-pin ATX 12V CPU power connector to the 8-pin socket near the CPU.
- Sørg for, at alle strømforbindelser er sikre.
6. Betjeningsvejledning
6.1. Første opstart
After assembling all components, connect your monitor, keyboard, and mouse. Power on the system. The system should display the GIGABYTE splash screen and then enter the BIOS/UEFI setup or attempt to boot from a connected storage device.
6.2. BIOS/UEFI-opsætning
For at åbne BIOS/UEFI-opsætningen skal du trykke på DEL key repeatedly during the boot process when the GIGABYTE logo appears. Here you can configure system settings, boot order, and monitor hardware status. The GA-B150M-D3H features GIGABYTE UEFI Dual BIOS for enhanced reliability.
6.3. Driver installation
After installing your operating system, install the necessary drivers for the motherboard components. These can be found on the included driver CD/DVD or downloaded from the official GIGABYTE website. Key drivers include chipset, audio (Realtek ALC892 codec), LAN, and any integrated graphics drivers.
6.4. Installation af operativsystem
Insert your operating system installation media (USB drive or DVD) and configure the boot order in the BIOS/UEFI to boot from it. Follow the on-screen instructions to install your preferred operating system (e.g., Windows 8.1, Windows 10).
7. Vedligeholdelse
7.1. Rensning
Rengør regelmæssigt computerens inderside for at forhindre støvophobning, som kan føre til overophedning. Brug trykluft til at fjerne støv fra ventilatorer, køleplader og bundkortkomponenter. Sørg for, at systemet er slukket og frakoblet, før du rengør det.
7.2. BIOS-opdateringer
GIGABYTE periodically releases BIOS updates to improve system stability, compatibility, and performance. Visit the official GIGABYTE website for your motherboard model (GA-B150M-D3H) to check for the latest BIOS version and follow the provided instructions for updating. Exercise caution during BIOS updates, as an interruption can render the motherboard inoperable.
8. Fejlfinding
Dette afsnit omhandler almindelige problemer, du kan støde på.
8.1. Ingen strøm / Systemet tænder ikke
- Kontroller, om strømforsyningen er tilsluttet korrekt til bundkortet (24-bens og 8-bens stik).
- Sørg for, at strømforsyningsafbryderen er i ON-positionen.
- Kontroller, at kablet til tænd/sluk-knappen på frontpanelet er korrekt tilsluttet bundkortets header.
- Test strømforsyningen med et andet system eller en strømforsyningstester.
8.2. Ingen skærmoutput
- Ensure the monitor is connected to the correct graphics output (either integrated graphics on the motherboard or a dedicated graphics card).
- Sæt grafikkortet og hukommelsesmodulerne i igen.
- Prøv at starte op med kun ét hukommelsesmodul installeret.
- Kontroller, om skærmen er tændt og indstillet til den korrekte inputkilde.
8.3. Systemustabilitet / Nedbrud
- Kontrollér CPU- og GPU-temperaturerne for at sikre, at de er inden for sikre driftsgrænser.
- Kontroller, at alle drivere er installeret og opdaterede.
- Kør hukommelsesdiagnosticeringsværktøjer for at kontrollere for defekt RAM.
- Ensure the power supply provides sufficient and stable power to all components.
9. Specifikationer
Detailed technical specifications for the GIGABYTE GA-B150M-D3H motherboard:
| Feature | Specifikation |
|---|---|
| Modelnavn | GA-B150M-D3H |
| Formfaktor | Micro ATX (24.4 cm x 22.5 cm) |
| CPU socket | LGA 1151 |
| Kompatible processorer | 6. generations Intel Core-processorer |
| Chipsæt | Intel B150 Express Chipset |
| Hukommelsesteknologi | DDR4 |
| Hukommelsessokler | 4 x DDR4 DIMM sockets (Dual Channel) |
| Maksimal hukommelseskapacitet | 16 GB |
| Hukommelses urhastighed | 2133 MHz |
| PCIe Slots | 1 x PCI Express x16, 1 x Total PCIe Ports |
| Lagringsgrænseflader | PCIe Gen3 x4 M.2, SATA Express, SATA 6Gb/s |
| Audio Codec | Realtek ALC892 codec, 8-channel HD Audio |
| USB-porte | Total 8 USB Ports (including USB 2.0) |
| Hovedstrømstik | 24-Pin ATX |
| CPU strømstik | 8-Pin ATX 12V |
| Unikke funktioner | GIGABYTE UEFI Dual BIOS, Audio Noise Guard with LED Trace Path Lighting, App Center (Easy Tune, Cloud Station) |
10. Garanti og support
For warranty information, please refer to the warranty card included in your product package or visit the official GIGABYTE webGarantibetingelserne kan variere fra region til region.
For technical support, driver downloads, BIOS updates, and further product information, please visit the GIGABYTE official support webwebsted:
https://www.gigabyte.com/Support
When contacting support, please have your motherboard model (GA-B150M-D3H) and serial number ready.