
Dorman 905-539
Dorman 905-539 Rear Lower Rearward Differential Mount Instruction Manual
Model: 905-539
Indledning
The Dorman 905-539 Rear Lower Rearward Differential Mount is a precision-engineered component designed to provide a reliable replacement for the original equipment differential mount in select Honda vehicles. This manual provides essential information for the proper installation, maintenance, and troubleshooting of this product.
This part is compatible with the following vehicles:
- Honda CR-V: 2002, 2003, 2004, 2005, 2006, 2007, 2008, 2009, 2010, 2011
- Honda Element: 2003, 2004, 2005, 2006, 2007, 2008, 2009, 2010, 2011
Always verify fitment for your specific vehicle trim using appropriate tools or resources before installation.

Figure 1: Dorman 905-539 Rear Lower Rearward Differential Mount, showing its overall structure and mounting points.
Sikkerhedsoplysninger
Always prioritize safety when working on vehicles. Improper installation or handling can lead to serious injury or damage to the vehicle.
- Brug passende personlige værnemidler (PPE), herunder sikkerhedsbriller og handsker.
- Sørg for, at køretøjet er sikkert understøttet på donkrafte eller en lift, før du påbegynder arbejdet. Stol aldrig udelukkende på en donkraft.
- Disconnect the vehicle's battery before performing electrical work, if applicable (not directly relevant for this part, but good general practice).
- Se køretøjsproducentens servicehåndbog for specifikke momentspecifikationer og procedurer.
- Hold arbejdsområdet rent og godt oplyst.
- Forslag 65 Advarsel: Dette produkt kan indeholde kemikalier, som staten Californien kender til at forårsage kræft og fosterskader eller anden reproduktionsskade.
Produkt overview
The Dorman 905-539 differential mount is designed to secure the rear differential to the vehicle's chassis, absorbing vibrations and ensuring proper alignment of drivetrain components. It is constructed from durable materials to withstand the stresses of vehicle operation.
Nøglefunktioner:
- Direkte udskiftning: Engineered to fit and perform like the original equipment.
- Pålidelig pasform: Præcisionskonstrueret til at matche design og dimensioner af originale komponenter.
- Holdbar konstruktion: Fremstillet efter strenge standarder ved hjælp af robuste og sikre materialer for lang levetid.
- Grundigt testet: Undergoes thorough quality control measures to ensure performance and durability.
Installationsvejledning
Installation of the differential mount requires mechanical aptitude and appropriate tools. If you are unsure about any step, consult a qualified automotive technician.
Nødvendige værktøjer og materialer:
- Topnøglesæt
- Momentnøgle
- Køretøjslift eller donkrafte
- Penetrerende olie (valgfrit)
- Stålbørste (valgfrit)
Procedure:
- Klargør køretøjet: Safely lift and support the vehicle on a level surface. Ensure the rear differential is accessible.
- Locate the Old Mount: Identify the existing rear lower rearward differential mount. It will typically be bolted to the differential housing and the vehicle's subframe.
- Support the Differential: Use a transmission jack or suitable support to slightly relieve pressure on the differential mount. This will prevent the differential from dropping once the old mount is removed.
- Fjern gammel montering: Carefully unbolt the old differential mount from both the differential and the subframe. Note the orientation of the old mount for correct installation of the new part.

Figur 2: Nederst view of the Dorman 905-539 Differential Mount, highlighting the lower mounting points.
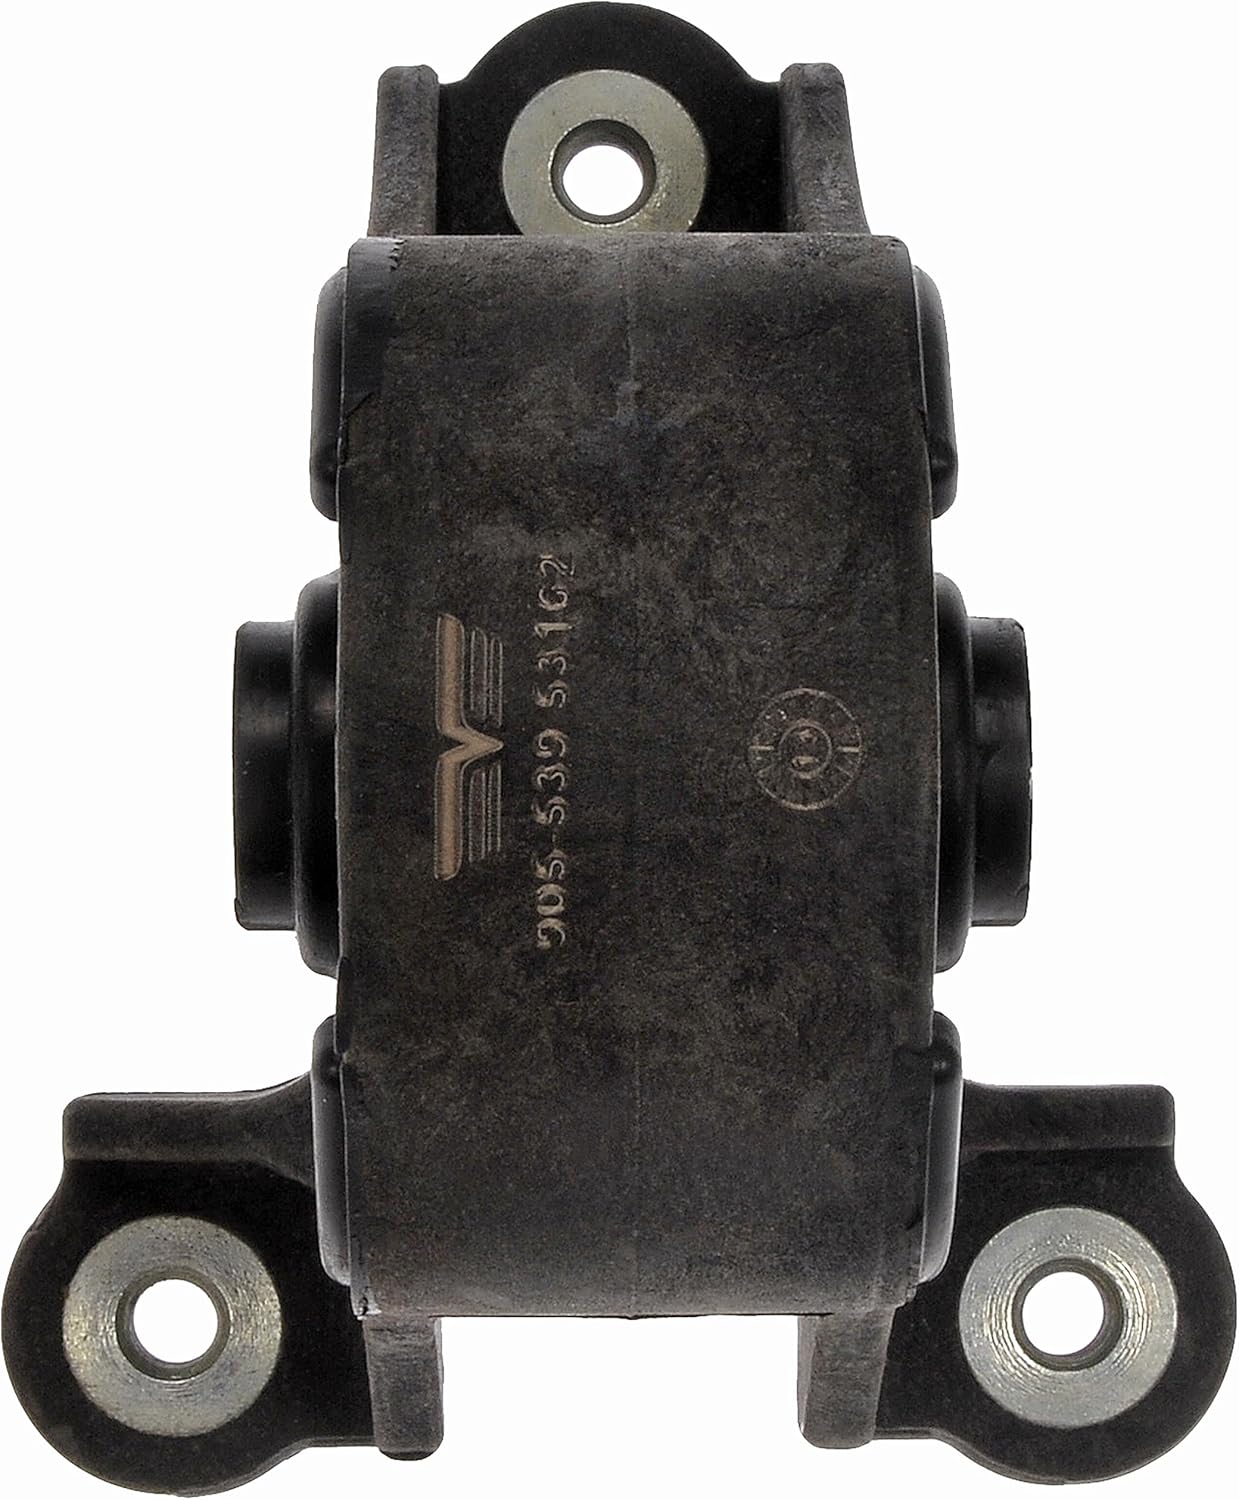
Figur 3: Øverst view of the Dorman 905-539 Differential Mount, showing the upper mounting points and overall design.
- Rengør monteringsflader: Inspect and clean any rust or debris from the mounting surfaces on both the differential and the subframe.
- Installer ny montering: Position the new Dorman 905-539 differential mount in place. Align the bolt holes and hand-tighten the bolts.
- Momentbolte: Refer to your vehicle's service manual for the correct torque specifications for the differential mount bolts. Tighten all bolts to the specified torque. Do not overtighten.
- Endelig kontrol: Double-check all connections to ensure they are secure. Remove the differential support and safely lower the vehicle.
Driftsmæssige overvejelser
Once installed, the differential mount functions passively to support the differential and dampen vibrations. There are no operational controls for this component.
After installation, it is recommended to drive the vehicle for a short period and listen for any unusual noises or vibrations. A properly installed differential mount should contribute to a smoother and quieter drivetrain operation.
Opretholdelse
The Dorman 905-539 differential mount is designed for long-term durability. Regular inspection is recommended as part of routine vehicle maintenance.
- Visuel inspektion: Periodically inspect the differential mount for signs of wear, cracking, tearing of the rubber, or corrosion on the metal components.
- Tjek for løshed: Ensure all mounting bolts remain tight. If any looseness is detected, re-torque to vehicle manufacturer specifications.
- Address Fluid Leaks: If you notice any fluid leaks from the differential itself, address them promptly, as leaking fluids can degrade rubber components over time.
Fejlfinding
If you experience issues after installing the differential mount, consider the following common problems and solutions:
| Symptom | Mulig årsag | Løsning |
|---|---|---|
| New knocking or clunking noise from the rear. |
|
|
| Vibration felt through the vehicle. |
|
|
If troubleshooting steps do not resolve the issue, it is recommended to consult a certified mechanic.
Specifikationer
| Attribut | Detalje |
|---|---|
| Mærke | Dorman |
| Modelnummer | 905-539 |
| Monteringstype | Bageste beslag |
| Varens vægt | 0.77 pund (ca. 12.3 ounces) |
| Produktmål (L x B x H) | 5.8 x 5.6 x 4.3 tommer |
| OEM varenumre | 1042079; EM5871; 50721S5C013 |
| Udvendig finish | Maskinbearbejdet |
| Oprindelsesland | Indien |
Garanti og support
For information regarding product warranty, returns, or technical support, please refer to the official Dorman website or contact Dorman customer service directly. Keep your purchase receipt as proof of purchase.
Dorman Contact Information:
- Webwebsted: www.dormanproducts.com
- Der henvises til website for current contact numbers and support options.
Ask a question about this manual
Ask about setup, troubleshooting, compatibility, parts, safety, or missing instructions. Manuals+ will review the question and use this page’s manual context to help answer it.