Indledning
This manual provides essential information for the safe and efficient operation, maintenance, and troubleshooting of your STAYER MIG 200 MULTI Welding Machine. Please read this manual thoroughly before using the equipment.
The STAYER MIG 200 MULTI is a versatile electronic welding machine designed for MIG-MAG (flux-cored wire), TIG, and MMA (coated electrode) welding processes. It features robust construction and advanced functionalities to ensure high performance and reliability.
Sikkerhedsinstruktioner
Always prioritize safety when operating welding equipment. Failure to follow safety guidelines can result in serious injury or damage to the equipment.
- Ensure proper ventilation in the work area to avoid inhaling welding fumes.
- Wear appropriate personal protective equipment (PPE), including a welding helmet with suitable shade, flame-resistant clothing, welding gloves, and safety shoes.
- Beskyt tilskuere mod lysbuer og gnister. Brug svejseskærme om nødvendigt.
- Afbryd strømmen, før du udfører vedligeholdelse eller udskifter tilbehør.
- Brug ikke maskinen i damp eller våde forhold.
- Sørg for, at maskinen er korrekt jordet.
- Hold brændbare materialer væk fra svejseområdet.
- Se lokale sikkerhedsforskrifter og standarder.
Produkt overview
The STAYER MIG 200 MULTI is an Inverter Industrial MIG/MAG welding machine capable of 200A output. It supports multiple welding processes and is designed for professional use.

Figure 1: STAYER MIG 200 MULTI Welding Machine. This image shows the overall view of the welding machine, highlighting its compact design with four swivel wheels and an ergonomic carrying handle.
Nøglefunktioner
- Multi-process capability: MIG-MAG (flux-cored wire), TIG, and MMA (coated electrode).
- Robust construction exceeding European specifications (2011/65/EU, 2014/35/EU, 2014/30/EU, EN/IEC 60974).
- Professional spool holder with capacity for large spools (up to 15 kg).
- Precise wire feed mechanism with a powerful 60W motor, supporting 0.8mm / 1.0mm wire.
- Easy adjustment with classic analog controls for precise current, voltage, and wire speed.
- Quick and easy polarity reversal for flux-cored wire welding.
- MMA mode includes Hot Start, Arc Force, and Anti Stick functions for optimized arc ignition, stability, and preventing electrode sticking.
- Lightweight and compact design with 4 swivel wheels and an ergonomic carrying handle for portability.
- Equipped for safe use with stabilized generators, AVR, and inverters.
Opsætning
Udpakning og inspektion
Carefully unpack the welding machine and all accessories. Inspect for any signs of damage during transit. Report any damage to your supplier immediately.
Connecting the Welding Machine
- Strømtilslutning: Connect the machine to a suitable 220V power supply. Ensure the power outlet is properly grounded and can handle the machine's power requirements. The machine is designed for safe use with stabilized generators, AVR, and inverters.
- Jord Clamp Forbindelse: Fastgør jorden clamp cable to the workpiece. Ensure a clean, secure connection for optimal welding performance and safety.
- Tilslutning af svejsebrænder/elektrodeholder:
- MIG/MAG-svejsning: Connect the MIG torch to the appropriate connector on the machine.
- MMA-svejsning: Tilslut elektrodeholderen til den positive (+) terminal og jordklemmen.amp to the negative (-) terminal for most electrodes. Refer to electrode manufacturer specifications.
- TIG svejsning: Connect the TIG torch (if included or purchased separately) to the appropriate connector.
- Gas Connection (for MIG/MAG with shielding gas): If using shielding gas, connect the gas hose from the regulator on your gas cylinder to the gas inlet on the welding machine.
- Wire Spool Installation (for MIG/MAG): Open the wire spool compartment. Install a wire spool (up to 15 kg) of 0.8mm or 1.0mm wire. Thread the wire through the feed mechanism.
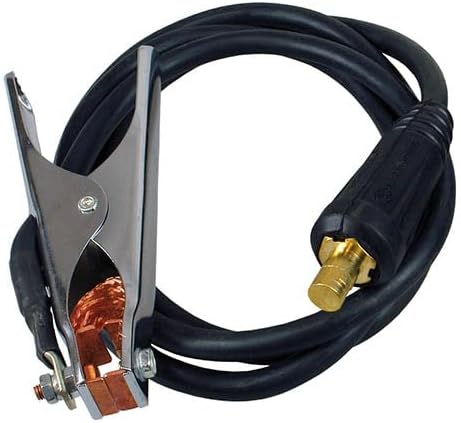
Figure 2: Ground Clamp. This image displays the ground clamp and its cable, essential for establishing a proper electrical circuit during welding.

Figure 3: MIG Welding Torch. This image shows the MIG welding torch, which includes the cable and connector for wire feeding and gas delivery.
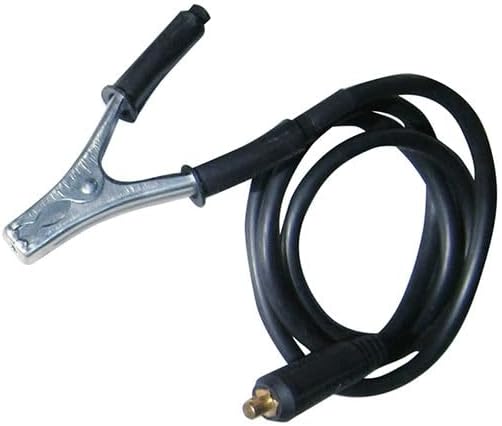
Figure 4: Electrode Holder. This image displays the electrode holder used for MMA (Stick) welding, designed to securely grip coated electrodes.

Figure 5: STAYER MIG 200 MULTI with Accessories. This image shows the welding machine connected with its torch and ground clamp, ready for operation.
Betjeningsvejledning
Kontrolpanel overview
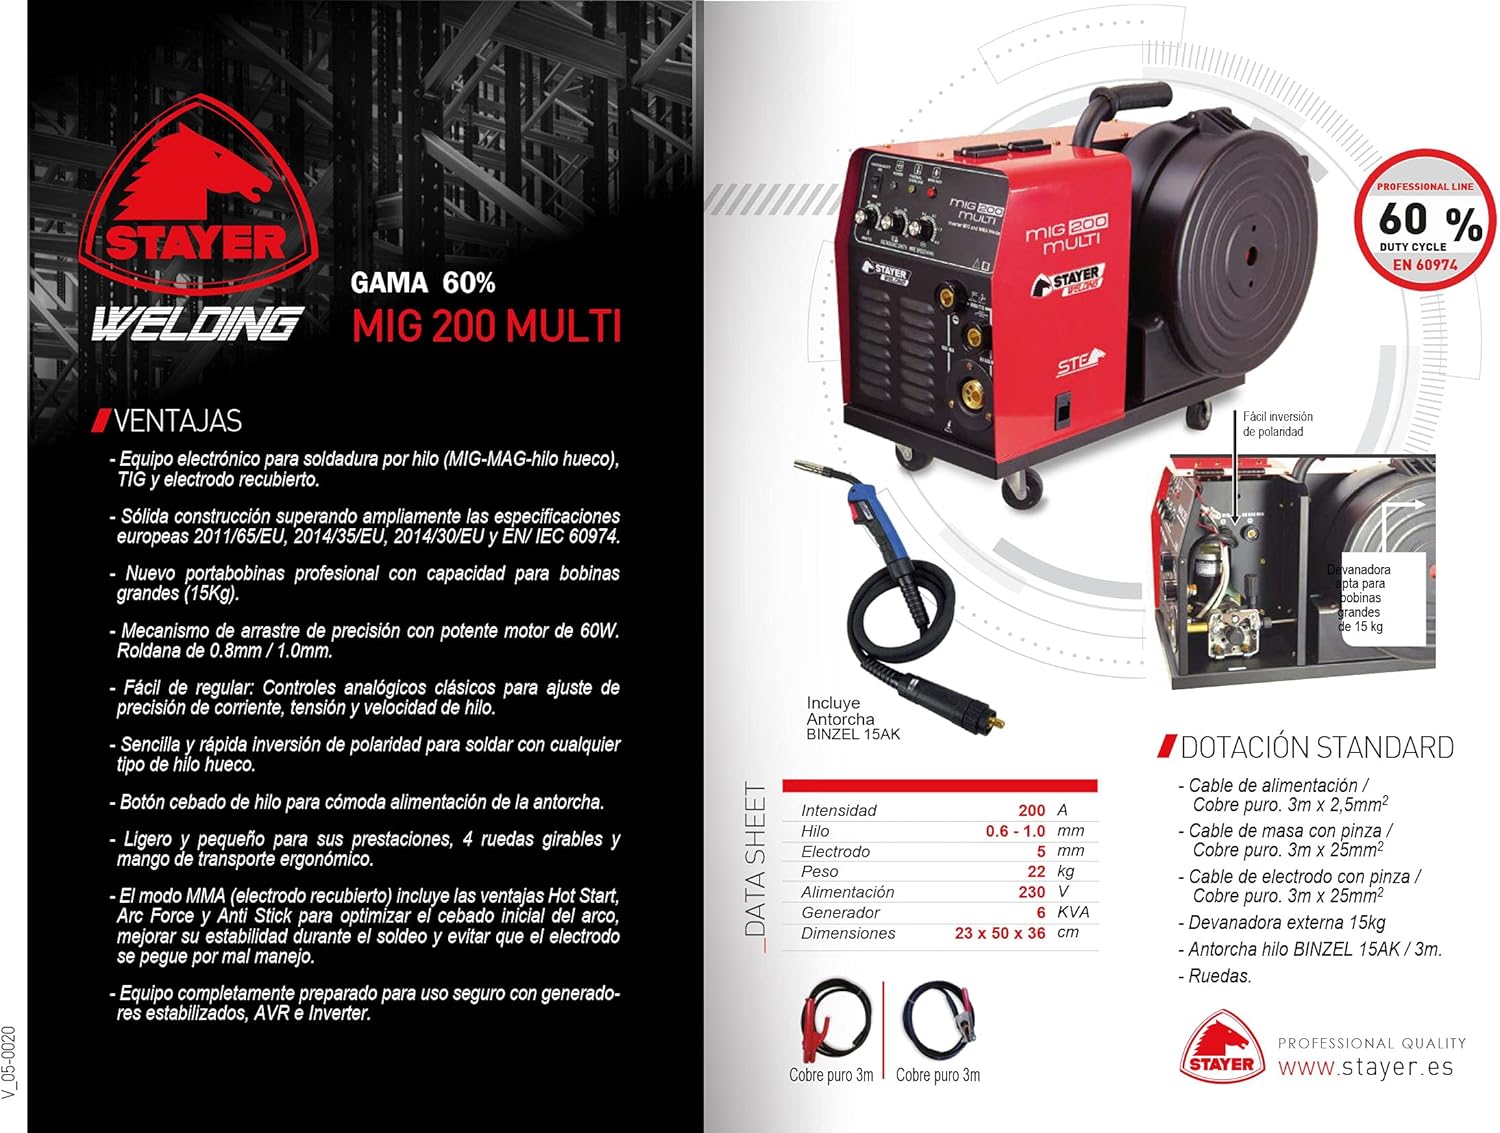
Figure 6: Control Panel. This image provides a close-up view of the welding machine's control panel, showing the analog dials for current, voltage, and wire speed adjustments.
The machine features classic analog controls for precise adjustment of welding parameters.
Welding Process Selection
Select the desired welding process (MIG/MAG, TIG, or MMA) using the mode selector switch on the control panel.
Parameterjustering
- Nuværende (Ampalder): Adjust the current knob to set the welding amperage according to the material thickness and welding wire/electrode size.
- Voltage (MIG/MAG): For MIG/MAG welding, adjust the voltage knob to control the arc length and bead profile.
- Wire Speed (MIG/MAG): Adjust the wire speed knob to match the current and voltage settings. The machine features a precise wire feed mechanism with a powerful 60W motor.
- Polarity Reversal (for Flux-Cored Wire): For welding with flux-cored wire without gas, reverse the polarity as indicated on the machine or in the quick-start guide. This is an easy and quick process.
Starting Welding
Once all connections are secure and parameters are set, put on your PPE. Position the torch/electrode and initiate the arc. The MMA mode includes Hot Start, Arc Force, and Anti Stick features to optimize arc ignition, enhance stability during welding, and prevent the electrode from sticking due to improper use.
Opretholdelse
Regelmæssig vedligeholdelse sikrer din svejsemaskines levetid og optimale ydeevne.
- Rensning: Periodically clean the machine's exterior and ventilation openings to prevent dust and debris buildup, which can hinder cooling. Use compressed air for internal cleaning if necessary, ensuring the machine is unplugged.
- Trådfremføringsmekanisme: Inspect and clean the wire feed rollers regularly. Ensure they are free from debris and that the wire guides are not worn.
- Brænder-/elektrodeholder: Check the welding torch and electrode holder for wear and tear. Replace consumables (contact tips, nozzles, diffusers) as needed.
- Kabler: Inspect all welding cables (power, ground, torch) for cuts, abrasions, or loose connections. Replace damaged cables immediately.
- Opbevaring: Opbevar maskinen et tørt og rent sted, når den ikke er i brug.
Fejlfinding
| Problem | Mulig årsag | Løsning |
|---|---|---|
| Ingen strøm | Strømkabel frakoblet, afbryder udløst, maskine slukket | Check power connections, reset breaker, turn on machine |
| Ingen bue | Poor ground connection, incorrect settings, worn consumables, faulty torch/electrode holder | Ensure clean ground connection, adjust settings, replace consumables, inspect torch/holder |
| Irregular wire feed (MIG/MAG) | Clogged liner, incorrect roller tension, worn contact tip, wrong wire size | Clean liner, adjust roller tension, replace contact tip, use correct wire |
| Overophedning | Overskridelse af driftscyklus, blokeret ventilation, høj omgivelsestemperatur | Lad maskinen køle af, sørg for ventilation, og brug den i et køligere miljø. |
Specifikationer
| Feature | Detalje |
|---|---|
| Model | MIG 200 MULTI |
| Mærke | Stayer |
| Varenummer | 1.739 |
| Svejseprocesser | MIG-MAG (flux-cored wire), TIG, MMA (coated electrode) |
| Input bindtage | 220V |
| Maks. Udgangsstrøm | 200A |
| Trådspolekapacitet | Op til 15 kg |
| Tråddiameter | 0.8 mm / 1.0 mm |
| Trådfremføringsmotor | 60W |
| Dimensioner (pakke) | 67 x 67 x 52.6 cm |
| Vægt | 22 kilo |
| Overholdelse | 2011/65/EU, 2014/35/EU, 2014/30/EU, EN/IEC 60974 |
Garanti og support
For warranty information, please refer to the documentation provided with your purchase or contact your authorized Stayer dealer.
For technical support, spare parts, or service, please contact Stayer customer service or your local distributor.
You can find more information on the official Stayer webwebsted: www.stayer.es