
UHPPOTE UT0111-101A
UHPPOTE Proximity RFID Card Reader (Model UT0111-101A) Instruction Manual
Model: UT0111-101A | Brand: UHPPOTE
1. Introduktion
This manual provides detailed instructions for the installation, wiring, operation, and maintenance of the UHPPOTE Proximity RFID Card Reader, Model UT0111-101A. This device is designed for use in access control systems and requires connection to a compatible Wiegand protocol access controller.
Please read this manual thoroughly before installation and operation to ensure correct usage and optimal performance.
2. Produktet er slutview og funktioner
The UHPPOTE Proximity RFID Card Reader is a robust device designed for secure access control. It integrates seamlessly with Wiegand protocol access controllers to manage entry and exit points.

Figur 2.1: Forside view of the RFID Card Reader, showing its sleek black design and card icon.
Nøglefunktioner:
- Wiegand Protocol Compatibility: Supports Wiegand 26-bit or Wiegand 34-bit output formats, ensuring broad compatibility with various access control panels, fingerprint devices, or master controllers.
- Lavt strømforbrug: Designed for efficiency with an ultra-low standby current of less than 50mA.
- Stabil ydeevne: Utilizes a high-performance MCU (Microcontroller Unit) for reliable and consistent operation.
- Holdbart design: Features an IP66 waterproof rating, providing good performance in various environmental conditions, including low temperatures.
- Alsidig anvendelse: Suitable for a wide range of environments such as factories, residential quarters, offices, and mechanical/electrical control equipment.
- Important Note on Card Compatibility: This Wiegand reader is not compatible with certain encrypted cards, including but not limited to HID, Indala, Cobra, APCiK, Paradox, Radio, and Honeywell.

Figure 2.2: The RFID reader is rated IP66 waterproof, indicating its suitability for outdoor and harsh environments, and good performance in low temperatures.
3. Specifikationer
| Specifikation | Detalje |
|---|---|
| Modelnummer | UT0111-101A |
| Mærke | UHPPOTE |
| Driftsfrekvens | 125KHz |
| Outputformat | Wiegand 26-bit / Wiegand 34-bit |
| Strømforsyning | 13 volt DC |
| Standby-strøm | Mindre end 50mA |
| Materiale | Plast |
| Farve | Sort |
| Produktdimensioner | 3.54 x 1.77 x 0.75 tommer (90 x 45 x 19 mm) |
| Varens vægt | 4.8 ounces (136 gram) |
| Vandtæt vurdering | IP66 |
| Fabrikant | UHPPOTE |
| UPC/GTIN | 701385687854 |

Figure 3.1: Dimensions of the UHPPOTE Proximity RFID Card Reader.
4. Sikkerhedsoplysninger
- Ensure all power is disconnected before performing any installation or wiring.
- This device is designed for low voltage DC operation. Do not connect to AC power directly.
- Installation should be performed by qualified personnel to prevent electrical hazards and ensure proper functionality.
- Avoid exposing the device to extreme physical shock or corrosive substances.
- Verify all wiring connections are secure and correct before applying power. Incorrect wiring can damage the device or connected equipment.
5. Opsætning og installation
The RFID card reader is typically mounted near an entry point, such as a door frame. Ensure the mounting surface is stable and allows for proper cable routing.
Monteringstrin:
- Choose a suitable location for the reader, typically at eye level next to the door.
- Use the provided mounting template (if available) or the back plate of the reader to mark the drilling points on the wall or door frame.
- Bor pilothuller til monteringsskruerne.
- Route the wiring from the access controller to the reader's mounting location.
- Secure the reader's back plate to the wall using screws.
- Connect the wiring as detailed in the "Wiring Diagram" section.
- Attach the reader unit to its back plate, ensuring it is securely fastened.
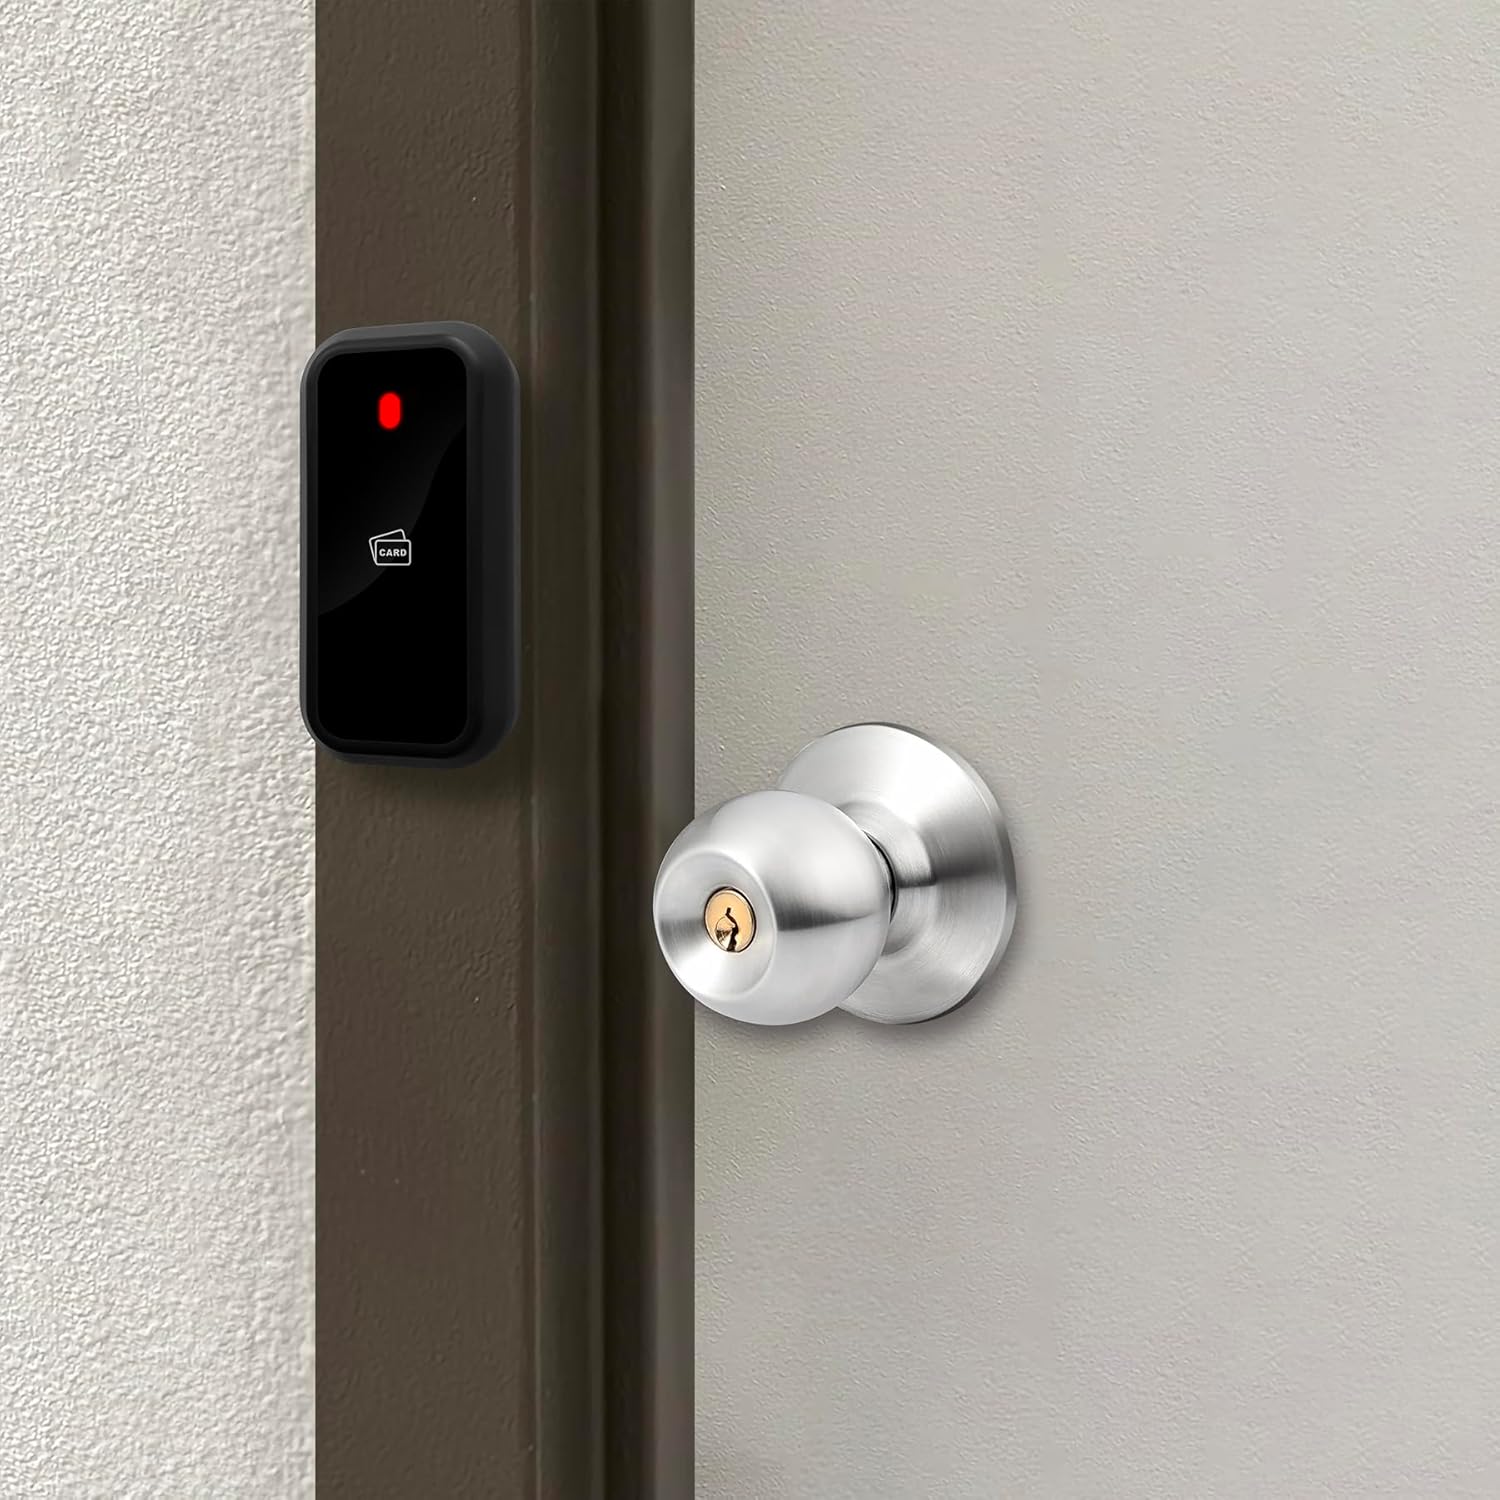
Figur 5.1: Eksample installation of the RFID reader on a door frame.

Figure 5.2: Mounting diagram for the RFID reader.
6. Ledningsdiagram
The UHPPOTE Proximity RFID Card Reader must be connected to an access control panel or master controller via Wiegand protocol. Below are the general wiring connections. Always refer to your access controller's manual for specific wiring requirements.

Figur 6.1: Tilbage view of the RFID reader with wiring harness.

Figure 6.2: Wiring labels on the back cover of the reader. Connections are: Red (+12V), Black (GND), White (D1), Green (D0), Blue (LED), Yellow (BEEP), Gray (WG34).
Generelle ledningsforbindelser:
- Rød ledning: +12V DC strømindgang
- Sort ledning: Jord (GND)
- Hvid ledning: Wiegand Data 1 (D1)
- Grøn ledning: Wiegand Data 0 (D0)
- Blå ledning: LED Control (Connect to LED input on controller)
- Gul ledning: BEEP Control (Connect to BEEP input on controller)
- Grå ledning: Wiegand 34-bit selection (Connect to GND for Wiegand 34-bit, leave open for Wiegand 26-bit)

Figure 6.3: Typical access control system setup with PC, access controller, and RFID reader.
Video: Wiring of Wiegand Access Control System
Video 6.1: This video demonstrates the wiring process for a Wiegand access control system, including connections for the power supply, card reader, electric lock, and exit button. It provides a visual guide for connecting the UHPPOTE RFID reader to a compatible access control panel.
7. Betjeningsvejledning
Once properly installed and wired to an access control system, the UHPPOTE RFID Card Reader operates by reading compatible proximity cards or key fobs.
Grundlæggende betjening:
- Tænd: Ensure the access control system and reader are powered on. The reader's LED indicator may show a standby status (e.g., red or green, depending on system configuration).
- Present Card: Hold a compatible 125KHz RFID card or key fob within close proximity (typically 2-10 cm) of the reader.
- Access Granted/Denied:
- If the card is recognized and authorized by the access controller, the reader will typically emit a short beep and the LED indicator may change color (e.g., from red to green) to signal access granted. The connected lock will then unlock.
- If the card is not recognized or unauthorized, the reader may emit a different sound or the LED may remain in its standby state, indicating access denied.
- Udgang: For exiting, an exit button (if installed) or another reader on the inside will be used to unlock the door.

Figure 7.1: Demonstrating how to present an RFID key fob to the reader for access.
8. Vedligeholdelse
The UHPPOTE RFID Card Reader is designed for minimal maintenance. Regular cleaning and inspection can help ensure its longevity and reliable operation.
- Rensning: Wipe the reader's surface with a soft, damp cloth. Avoid using abrasive cleaners, solvents, or excessive moisture, which can damage the device.
- Inspektion: Periodically check the wiring connections for any signs of wear, corrosion, or loose contacts. Ensure the reader is securely mounted.
- Miljøbeskyttelse: Although IP66 rated, prolonged exposure to direct sunlight or extreme weather conditions may affect the lifespan of the device.

Figure 8.1: The reader's IP66 rating ensures protection against water splashes, but proper care is still recommended.
9. Fejlfinding
If you encounter issues with your RFID card reader, refer to the following troubleshooting steps:
| Problem | Mulig årsag | Løsning |
|---|---|---|
| Reader does not power on (no LED, no sound). | Ingen strømforsyning, forkert ledningsføring, defekt strømforsyning. | Check +12V and GND connections. Ensure power supply is active and providing correct voltage. Verify wiring against the diagram. |
| Reader does not respond to cards (no beep, no LED change). | Incompatible card type, card not enrolled in access controller, faulty reader, incorrect Wiegand wiring (D0/D1). | Ensure cards are 125KHz and not encrypted (e.g., HID, Indala). Verify cards are correctly enrolled in the access control system. Check D0 and D1 wiring to the controller. |
| Access granted but door does not unlock. | Faulty lock, incorrect lock wiring, access controller relay issue. | Check wiring between the access controller and the electric lock. Test the lock independently if possible. Consult the access controller manual. |
| Reader LED stays green too long after card scan (as per some user feedback). | Firmware behavior, specific access controller configuration. | This might be a characteristic of the reader's firmware. Check if your access controller allows for LED timing adjustments. |
If problems persist after following these steps, contact UHPPOTE customer support or a qualified technician.
10. Garanti og support
UHPPOTE products are manufactured to high quality standards. For warranty information, technical support, or service inquiries, please refer to the warranty card included with your product or visit the official UHPPOTE webwebsted.
Kontaktoplysninger:
- Mærke: UHPPOTE
- Webwebsted: Besøg UHPPOTE-butikken på Amazon (for generel produktinformation)
- For direct technical support, please refer to the contact details provided in your product packaging or on the manufacturer's official webwebsted.
Ask a question about this manual
Ask about setup, troubleshooting, compatibility, parts, safety, or missing instructions. Manuals+ will review the question and use this page’s manual context to help answer it.